

I haven’t been working on my Moonglow quilt for a while, so a few weeks ago, I pulled it out again. I’ve always loved this quilt design and thought that when I bought the kit, I’d be obsessed with it until it was all pieced. Not so. It’s been a very fits-and-starts project. I tried to figure out why. (The picture at right is of someone else’s completed quilt.)
I first posted about it in April of this year, although I’ve had the kit for at least a year. Here’s that first post, with the alternating blocks and the first three stars done. In my May post, with the next two stars, I admitted to not loving the process, even though I’d switched to paper piecing.
I figured out that I’m not having fun because I’m disappointed in my results. My blocks aren’t completely flat (they ripple) and the points don’t match as neatly as I’d like. There are a bunch of reasons for this, even though I’m a fairly accurate seamstress. You can paper-piece some parts of each block, but never yet has it been possible to piece the entire block on paper.

Many of the blocks have set-in corners, like this one. So, the corner quadrants are paper-pieced, but then have to be set into the central star.
Many (many) seams are on the bias of the fabric, so they stretch.
There are many slightly angled seams, and it’s tricky to pivot at the right point. Under the sewing machine foot, it’s hard to see the point.
So, I used some techniques from dressmaking to minimize the effect of these things. When I have paper piecing, for example, I’m leaving the paper on each piece until it’s sewn in on every side. That helps to stabilize the seams on the bias. I’m also pinning the beginning and the end of each of those seams, then using more pins in the middle, to make sure it doesn’t shift while being sewn.
When setting in a corner, I sew the seam that comes to the corner only as far as the seam allowance and backtack it. That means I can move the seam allowances more readily when insetting the other piece. I’m also sewing out from the point, doing the inset in two seams (instead of sewing in to the corner, pivoting, then sewing out). Lots and lots of pins on these insets, too.

When there’s a slightly angled seam, I poke a pin through the paper at the pivot point, leaving a hole. That’s visible when I’m sewing so I know exactly where to pivot. I’m also clipping the paper at those points, which makes it easier to re-align the seams (when the needle is down in the turning point) to continue sewing.
(You can also see in this image how much fabric is wasted in the trims. I’ve been saving these pieces as they’re big enough to cut the corner squares in the sashing.)
And of course, pressing, pressing, pressing. I was pressing a lot before but now I’m doing it even more.
I’ve done three more stars and am much happier with the results. I also enjoyed sewing them more. They’re still not perfect, but they’re better. These three blocks allowed me to complete the second column and the fourth column of the quilt. Here they are:


They all look much better once pieced into the quilt. I have five more blocks to make – the four corners and the middle star. There are two blocks designed for the corners and you make each one twice. The centre star is kind of the big finish, the most complicated block of all.
All my borders are cut and the alternating squares pieced, and many of the fabrics won’t be used again. There’s a lot of fabric left over, which means I’ll be able to redo any of the blocks that really irk me. (And there will still be a lot of fabric left! The cuts in this kit are really generous.) I’m getting close!
In the meantime, I’ve been seduced by another beauty: look at this!
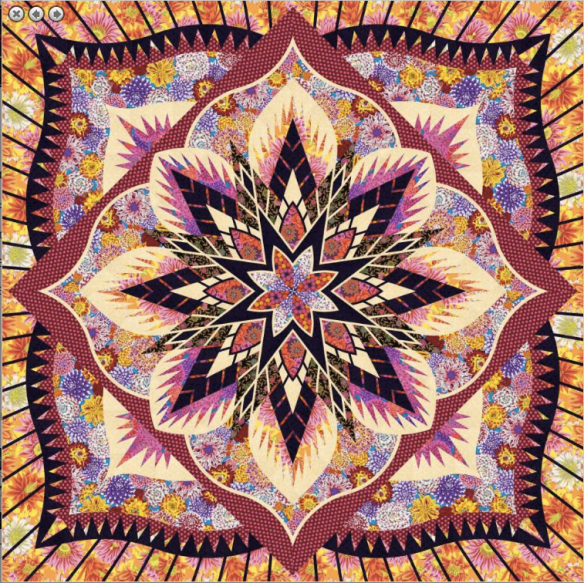
This is called Crimson Poppy and was designed by Judy Niemeyer (the designer of Jumping Jax Flash, which I’ve made) and sold at Quiltworx. Here’s a link to buy the pattern for the central medallion – it ends with the red polkadot square. The central block is on point in this version. You can also buy a kit for this larger version, with the four corner extensions and all the fabric required at Quiltster, right here.
On this page, there are a number of colour options and corner additions displayed, also as kits including fabric. You can also (be still my heart) join Quiltster and change out the fabrics online, customizing your own version, then buy your own kit from them. Hello, timesink – but what fun!

Pingback: Finishing the Moonglow Quilt | Alive & Knitting
Pingback: The Moonglow Quilt is Done! | Alive & Knitting