About Deborah Cooke

I write romance novels, including medieval romances as Claire Delacroix, and contemporary and paranormal romances as Deborah Cooke. I also am an avid knitter and sewist.

On My Needles

The girls aren’t the only ones claiming my time – their things are just finished more quickly! Here’s what’s on my needles for me right now.

This is my second No. 9 sweater, knit as a pullover this time with a different yarn and weight. (These are all Ravelry links.) The Berroco Blackstone Tweed Chunky was an impulsive buy, once upon a time, because I loved the colour so much. (It’s called Salt Water.) I *thought* I had a bunch of patterns specifically for the yarn and figured I was golden – nope, the patterns are for the other weight of Berroco Blackstone Tweed, which is an aran. This one is bulky. So, this pretty yarn sat in the stash, waiting for its moment.

This winter, the moment arrived. Sweater No. 9 calls for a bulky yarn, but not one like this. The pattern uses two yarns held together, a silk mohair and a fingering yarn. The result is just not as bulky as this bulky weight yarn. Gauge is on a 7mm needle, with 14 stitches and 10 rows to 10 cm. Gauge is of course highly personal – the needle size is less important than the stitch count, which ensures the result is the right size. On 6.5mm needles, my swatch was 12.5 stitches to 10cm and I liked the feel of the fabric. I knew the finished bust size I wanted so figured out how many stitches that would require in this gauge. I then followed the directions and stitch counts for the size that ended up with that many stitches in the bust.

For my first No. 9 sweater, in contrast, I was getting 16 stitches to 10cm on 5mm needles with the Kidsilk Haze Trio. I did the same calculation, then followed the directions and stitch counts for the size on the pattern that resulted in the right number of stitches across the bust. That resulted in a sweater that fit me perfectly in that yarn.

The big different between my chosen yarn and the specified combinations, even though the weight is close, is in the rolldown collar. This robust yarn just doesn’t fold over well. It’s really thick, so I’ll probably wear the collar up under my chin.

No. 9 sweater in progress, knit in Berroco Blackstone Tweed Chunky by Deborah Cooke

I’m stalled at the sleeves because I’m positive I must have a 40cm 6.5mm circular needle. I just can’t find it. (I mean, really, I have buckets of needles. How can I be missing one?) If I’d been near a knitting store, I probably would have just bought one by now, even if it meant ending up with two. Instead, since we don’t have a LYS anymore, I have to make a pilgrimage to a store and that hasn’t happened yet. It’s okay. This yarn is used to waiting.

I do like how the ribbing is more defined in this wool. I changed the stitch counts on the collar and hem to make them line up again, and continued the ribbing from the raglans down the sides, and I like both of those elements too. 🙂

Meanwhile…I bought a kit. I’ve knit the back so far and am really liking it. The pattern is Churchmouse Yarns’ Quintessential Cardigan and jewel-necked cardigans are one kind of sweater I wear over and over again. (I may even wear out the Kidsilk Haze Stripe Hebrides or the Lunenberg in Koigu KPPPM.) The yarn is Jody Long Alba, unknown to me before I indulged in this kit. It is kind of an amazing thing to knit with a yarn that isn’t discontinued yet. This colourway is Moss.

Here’s the product detail page at Knitting Fever – it comes in a lot of colours!

That makes sense as Alba is quite similar in feel to Rowan Felted Tweed, which also comes in a lot of colours. The composition is the same, too. Both yarns are 50% merino wool, 25% alpaca and 25% rayon/viscose. Alba isn’t as soft as Felted Tweed, though, which might be a good thing in some ways. It’s hard to sew seams with Felted Tweed because it breaks all the time, but Alba would be fine. Hmm. I wonder why. Is it the “felting”, however that’s done, or is the Alba made of fibre with a longer staple? I don’t know. The put-up is much larger: Alba comes in 100g balls of 350m while Felted Tweed comes in 50g balls of 175m.

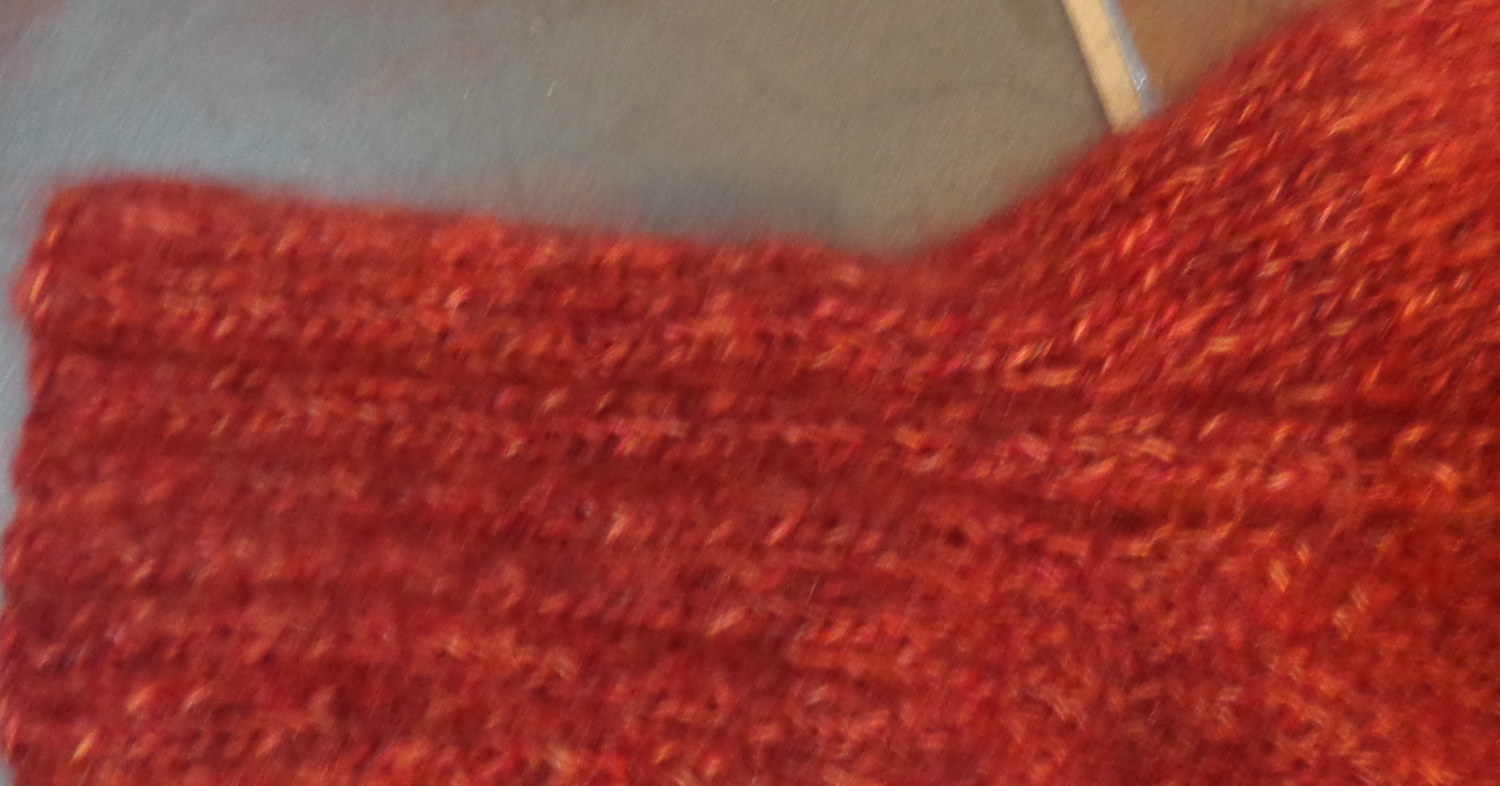
Here’s the back of the new sweater.

modified back of Quintessential cardigan designed by Churchmouse Yarns, knit by Deborah Cooke in Jody Long Abla in moss colourway

I love all the flicky colour bits of the tweed!

We were talking a few weeks ago about cropped sweaters and I discovered in the knitting of this one that it was intended to be cropped. (Feh.) I first knit a 12″ side seam as specified in the pattern, thinking that would result in a high hip length which I like, but the armscye is shorter on this pattern and the sweater hem ended up just below my waist. I ripped it back and added two inches into the length before binding off stitches for the armholes.

I actually bought two of these kits, the other in a heathered plum called Kilt, and may knit that one another inch longer than this. I’ll see whether I run out of yarn on this one first.

I did knit a sweater in Felted Tweed a few years ago and here it is again. I did like the feel of it while I was knitting and this pattern was a bit addictive. This sweater has some miles on it, if not a lot of wear. My mom admired it and I gave it to her, then she didn’t wear it (she didn’t like the pink) and she gave it back to me. I don’t wear these colours so much now that my hair is grey, so it’s waiting on a day in the sun.

Bute by Lisa Richardson knit in Rowan Colourspun and Felted Tweed by Deborah Cooke

The pattern is Bute by Lisa Richardson, which was shown in two colourways by Rowan. That’s the link to the version I knit on Ravelry, and here’s the link to the blue variation. The blue version is shown as a man’s sweater, but actually the pattern is unisex. Hmm. Yes, it had suede elbow patches, which I left off. I also recall that I had to take in the shoulders for a better fit. The mister liked the blue one, so I stashed all the yarns. There’s another project I should get on the needles to free that yarn from the stash. So much string, so little time!

Trench Setting for Silkstone Barbie

I’ve been sewing for the B girls again and trying some different pattern companies. The vintage patterns are great for vintage B, but the Silkstone girls are skinnier – and the articulated Silkstone girls are even skinnier. (I’m starting to think of them as social media girls – they photograph really well and look great in clothes but in real life, they’re really thin.) But I wanted to try some patterns drafted specifically for the thinner dolls.

Trench Setting pattern for Silkstone Barbie by Hankie Chic patterns

First up was Trench Setting from Hankie Chic patterns on Etsy. (This designer is not the same person who wrote the Hankie Couture books that I blogged about before.) This pattern for a coat and dress is designed for 11.5″ dolls. As has become my habit, I shop based on the doll used to model the garment – that’s an original Silkstone B, so I know it will fit that body. It’ll probably be a little loose on the articulated Silkstone and will be too small around (esp the dress) for vintage B. The sleeves of the coat might be too long for her, too.

For some reason, I cut two coats of an orange shot linen. I gave them different linings and buttons – plus an inside pocket—as a social media girl, Silkstone B needs somewhere to put her phone.

Trench Setting coat designed by Hankie Chic for Silkstone Barbie, sewn in orange shot linen by Deborah Cooke

The one on the left is lined with Liberty Tana Lawn, and the one on the right with a cotton check that’s been in the stash forever. It was a strange little remnant but I liked it with the orange linen, even though I had to piece the back. (See that little seam across the shoulders?)

The Tana Lawn one has bronze dome buttons while the orange plaid version has shiny gold buttons.

Trench Setting coat designed by Hankie Chic for Silkstone Barbie, sewn in orange shot linen by Deborah Cooke

The straps seemed a little out of proportion to me, so I halved the width of them for the sleeves and for the half belt at the back. The coat appears to be designed to be worn open, although I put snaps on one with the check lining to close the fronts. (The problem then is that when it’s open, you can see the metal snaps. Always a conundrum for the girls!)

Here’s B in both. (The pic is a little fuzzy so it’s small here. I really need to get my lighting sorted for doll pictures. The issue here is that there’s not enough of it.)

Trench Setting coat designed by Hankie Chic for Silkstone Barbie, coat sewn in orange shot linen and dress in Liberty Tana Lawn by Deborah Cooke

I sewed the coats almost entirely by machine and added some top-stitching, because that’s just how I roll.

I think the orange linen is a bit too thick of a fabric choice, so it looks more bulky than would be ideal. The linen also gives her a bit of a rumpled Columbo look – but Silkstone B prefers to look polished and sleek. I might make her another one. We’ll see. (I have another coat pattern to try first, a more fitted one that she might prefer.)

The doll modeling the combo here is Silkstone Barbie Dusk to Dawn.

The dress is a complete gem. Here’s my first one, made in Liberty Tana Lawn to match the lining on one of the coats. (I wish I had more of that yellow check, but I had to piece it to get the coat lining.) It’s lined with white cotton voile.

Trench Setting designed by Hankie Chic for Silkstone Barbie, coat sewn in Liberty Tana Lawn by Deborah Cooke

I love this one!

Again, I sewed it almost completely by machine – I hand-stitched the center back seam in the skirt lining and that was it. I also buried the back ends of the shoulder straps. The pattern instructs you to sew them inside the finished bodice back, but I wasn’t so fussed on that plan. I remembered this trick from a vintage pattern – I left a gap in the seam of each upper back, where the fabric is sewn to the lining. I put the dress on the doll to fit, slid the strap ends into the gap and pinned them in place. Then I caught them in the seam when I top-stitched the edges.

You can see that the left one could have been tucked in a teensy bit more on the edge closest to the center back.

Trench Setting designed by Hankie Chic for Silkstone Barbie, coat sewn in Liberty Tana Lawn by Deborah Cooke

The belt is a piece of 1/8″ gross-grain ribbon – in the most absolutely perfect colour! – with a teeny tiny buckle included as a gift in one of my orders from I Sew for Doll. She always tucks in a teeny ziplock with a sample of something. This one had four of these buckles. It’s a brilliant marketing strategy because I now know what size of buckle is perfect for this kind of belt for B and will order more in more colours. (Mr. Math likes the teensy ziplocks the buttons come in and has suggested I pack lunches for the girls, with teeny sandwiches in the teeny ziplocks. Maybe some teeny carrot and celery sticks. The problem with jokes like this is that they make me go “hmmmm” and think about modelling clay…)

I’ve cut out two more of the dress, one in a teal crepe-backed satin, and one in a navy cotton with a teeny tiny leaf print. Quilting cotton would be too heavy for this dress design, so I’m rummaging through my various cotton lawns and silks, too. I’ll be on the hunt for more Liberty Tana Lawn prints, too.

Then – because I am that person – I decided that B needed a little clothing rack. While the girls have their cases with clothing racks, B’s are getting full. I made this rack from foamboard with a dowel for the clothing bar.

clothing rack in 1/6 scale for doll clothes, modelled by Silkstone Barbie and made by Deborah Cooke

It worked out pretty well, so I plan to make another in basa wood, maybe even with wheels…

A new Suit & Hat for Grace

I told you about my new addition to the collection of dolls, Amazing Grace #3. (That link takes you to the Dreamcastle Dolls site detail page for her. All of the Grace dolls are on this page of the reference site. They are 16.5″ Tonner dolls with the RTB-101 body.)

Since Grace is half an inch taller than the Tyler and Sydney dolls, she needs her own clothes. Her proportions are different, too – her feet are a lot bigger! – so the other girls will be able to wear some of Grace’s clothes but not the other way around. I finished a raincoat, for example, in black pleather and it just looks too short on Grace. (Sydney loves it, though!)

Around the same time that Grace arrived, I noticed a new doll being released by Integrity Toys. This is a 12″ Fashion Royalty doll, which I don’t want, but I love her outfit. I decided to use it as inspiration for Grace’s first clothes of her own.

This is Evelyn Weaverton Traveling in Style:

Evelyn Weaverton Traveling in Style from Integrity Toys Fashion Royalty

How great is this 1950’s ensemble?

Designs by Jude Equestrian pattern, sized for Grace

I started with the jacket and used the riding jacket from Designs by Jude’s Equestrian pattern, which is sized for Grace.

I cut this of an olive green crepe, with the pocket flaps and collar cut of black velveteen. Mine is lined in rayon Bemberg. I fiddled around with the construction to sew more of it on the machine, and also sewed down the pocket flaps invisibly to keep them in place. It’s a nice little jacket and fits Tyler, too.

Noteworthy Style by Designs by Jude, sized for Grace

I wanted a straight skirt on my first variation, so used the dress from Designs by Jude’s Noteworthy Style, again, sized for Grace.

I split the dress into two pieces at the waist, adding a seam allowance on each half. I cut the top of a silk print and the bottom of the dark green so it looked like a blouse and skirt. I also added long sleeves with a cuff, but ending up taking them off as they didn’t fit well under the jacket. Lots of ripping and handstitching on this one! The dress is lined and it has an invisible zipper at the center back.

Here’s Grace in her new suit:

Grace Fitzpatrick doll in Equestrian Jacket by Designs by Jude, sewn by Deborah Cooke

I’m not so fussed about dress, so no detail pix of it. It’s fine, but I did a lot of ripping (thanks to those sleeves) and that adversely influenced my joy in both the process and the result.

Another variable is the zipper down the center back of the dress. I couldn’t find a doll zipper long enough – the high collar makes that seam longer – so I used a 7″ invisible skirt zipper. The tab feels huge and out of scale, plus there’s a lot of bulk at the back of the neck with the zipper tab and the turndown velvet collar of the jacket. I also wish the skirt was maybe 1/4″ longer to hide her knee joints. (Sadly, I have no stockings for Grace as yet. She didn’t come with any, and I haven’t found a place to order them. They need to be longer than Tyler’s.)

The buttons are lovely little gold roses which I ordered from I Sew For Doll.

Instead of the turban in the inspiration photo, I made her a little hat.

Felt hat made for Grace Fitzpatrick by Deborah Cooke

You might remember that I bought the pattern for sunhats from DBDolls last year to go with their sundresses. For this one, I played around with making the hat from felt – the pattern uses linen. This is just polyester felt but I could do it again in wool felt. I played with the depth of the crown and of the brim, as well as cutting the top as an oval instead of a circle. My big new trick is adding that pleat at the top – I turned down 3/8″ on the top edge of the piece that goes around the doll head, then hand-stitched the oval crown to it, slightly below the stitching line. That gives a nicer definition to the top of the hat, IMO. The embroidery stitch on the outer edge of the brim was an experiment and a technique I’ll use again. The feather is from a pack of zillions of different coloured craft feathers that I got for a couple of bucks at Michaels – and there’s another rose button on the band.

The hat might be my favorite part of the outfit. 🙂

She reminds me of the ladies in Munich heading out in their loden suits. I probably shouldn’t have used that shade of green. I do have a black belt I need to finish and am still scheming for the swing coat. I’m going to tray another jacket in a small wool check, probably with a pleated skirt. I’ll show you that when it’s done, maybe with a coat, too.

New Socks for the Mister

I’ve been stuck with my current knitting project. I can’t find the right needle for the sleeves of my current No. 9 sweater. It defies belief that I don’t have a 40cm 6.5mm needle, in all my stash of knitting needles, so I’m hunting through everything. Dollars to donuts, as soon as I decide I must not have one and buy one, I’ll find the one lurking in my projects. This is, after all, how one gathers a needle stash.

I actually made a spreadsheet a few years ago, inventorying all of my knitting needles for exactly this reason. At the time, I listed the project where the needles could be found, if they were being used. The spreadsheet is out of date, sadly, but it does not show that I have a needle in this size. Maybe I don’t. I’ll keep looking to be sure.

In the meantime, there was movie night and nothing to knit. I cast on a pair of socks for the mister, and now they’re done. (But I still haven’t found the needle.)

men's socks knit in Online Supersocke New Wave by Deborah Cooke

This yarn has been well aged in the stash: it’s Online Supersocke (6-fach) New Wave – Color, a sock yarn from Germany. That’s the Ravelry link for the yarn since it’s discontinued. The yarn was actually made in Italy. This colourway is 1091.

And yes, I really like that I was able to make them match. 🙂

This is a nice yarn, squishy but with a firm twist. I think it will wear well and the mister really likes the colours. It comes in big balls and I bought a few of them when they were on sale, once upon a time, since the colours appealed to him. Thanks to Ravelry, I know I don’t have any more of this specific yarn in the stash, but I should have one more big balls of Online Supersocke. Time for it to be knitted up!

Meanwhile, I’ll keep looking for that elusive 40cm circular needle…

A Knitted Purse

Here’s another project that’s been waiting on me for a while and was finished up this week. I wanted to post it yesterday, but the handsewing at the end took a bit longer than anticipated.

One Stick Two Stick Sushi Wallet instructions

It started with a kit called Sushi Wallet. Here’s a Ravelry link for the pattern. The kit was from One Stick Two Stick and was packaged in a cute way, like a tray of sushi with six little balls of wool. I’ve chucked the packaging from mine, but here’s one that sold on Etsy. The kit includes the yarn, the pattern and a matching zipper.

On the right is the instruction folder, which shows the sushi wallet you’re supposed to make at the top. The second wallet is a variation, with just one sushi on the side and stripes on the back.

I found the kit for a buck in the discount section at Len’s Mills and they were all in the blue-green colourway called Caribbean Seas, possibly because it doesn’t make sense for sushi to be those colours (even though the combination was pretty). The yarn is a bamboo wool mix and there were four colours included: 64g of the medium blue, 18g of the light blue, 13g of the dark green and 11g of the light green. I weighed them all because I planned to do something different than follow the instructions. There was enough yarn to make two wallets, but I didn’t want two wallets.

I made a bigger purse instead, by casting on more stitches and knitting more rows. I also added a wedge at each side and a base so it wouldn’t be flat. (The original design is flat, a rectangle folded in half.) I also knit a strip to be a handle. Then I knit petals and leaves from the other colours. Here are all the pieces.

Purse pieces knit by Deborah Cooke for modified sushi wallet

I felted everything in the washing machine. I put the pieces in laundry bags to make sure none of them were lost in the washing machine – this set from Ikea is really useful. Once that was done, I sewed everything in place. I added some embroidery and ended up with this:

Felted Purse with embroidery by Deborah Cooke

I still didn’t love it, so I added some beads:

Felted Purse with beads by Deborah Cooke

I lined the bag with a cute scrap of batik cotton in matchy colours – just using the purse as a pattern and adding a small seam allowance. I also added a little pocket inside, because I always add little pockets inside purses. They’re so useful. You can see it on the right – it’s the perfect size for a hotel room key, credit card, or folded $20 bill.

batik lining for felted purse by Deborah Cooke

Here’s the assembled lining, ready to go into the purse:

assembled batik lining for felted purse by Deborah Cooke

I hadn’t planned on those two tabs at the top, but they came in handy when attaching the handles.

With the zipper inserted and the handle added, the finished purse looks like this:

Felted Purse by Deborah Cooke, finished - side A

And the flip side:

Felted Purse by Deborah Cooke, finished - side B

Overall, I’m pretty happy with this. The shape is a little bit wonky, but that tends to happen with felted knits. I certainly like it better than I would have liked a blue sushi wallet. 🙂

And this reminds me that somewhere in my stash of unfinished projects, I have the Elegant Edibles kit from Knitpicks, which is now discontinued. I think I knit the kiwi purse and I know I knit the orange one, and they must both waiting to be lined. I was going to knit the bunch of grapes, but I have a feeling that yarn joined the stash instead. I’ll have to have a look.

Finishing the Moonglow Quilt

I last posted about my Moonglow quilt in November 2020, so this project has been in limbo for a while. I started to post about this quilt in April 2020, and had been working on the piecing for about a year before that, so we’re at five years on this project.

It’s also been two years since I did any machine quilting myself. My goal this spring was to get some things done that have been languishing in my sewing room and this quilt top certainly made the list.

Moonglow Quilt by Jinny Beyer

Here’s that official image of the quilt again, just to remind you. 🙂

When I pulled the Moonglow out this time, I had five blocks left to piece – the four corners and the middle block, which are the most complicated ones. After that, there’s the assembly with the sashing and the final quilting. This one is going to a long arm quilter to be finished up – my plan in March was to keep at it until it was ready to go to the quilter. I did pretty well with that goal!

The idea behind the quilt is that it should take a year to piece. There’s a block assigned to each month, then in month twelve, you piece the intermittent blocks and assemble the quilt. Of course, I didn’t follow the sequence – I did the courthouse steps blocks that go in between the stars when I was tired of paper piecing, so they were done already.

There are two different designs for the corner blocks and you make two of each. I’d already cut out the pieces for the pair that are top right and bottom left, so finished them up first. These are month nine’s project.

Moonglow quilt kit by Jinny Beyer pieced by Deborah Cooke

It’s a dingy day today, so I had to take the pix inside, which means they’re a bit underexposed.

Then, top left and bottom right:

Moonglow quilt kit by Jinny Beyer pieced by Deborah Cooke

And finally, the central medallion – I need to hand-sew the central octagon, so it’s pinned in place here.

Moonglow quilt kit by Jinny Beyer pieced by Deborah Cooke

Next up, the assembly. I’m not going to repiece any of the blocks (I had thought I might, and there’s enough fabric leftover for that) but I am going to restitch one of those central octagons to make a neater job. I’m also going to change the borders on the star blocks so that the seam allowances all press outward. I did that on the central medallion and it makes for a flatter finish. Then I’ll put it all together and take it to the long-arm quilting place.

I’ve never had a quilt quilted at the long-arm place, so I’ll take the dragon quilt to be finished first. This one will make the trip second.

I am pleased with this top and am sure I’ll like the final quilt. It’s a beautiful design and the colour selection is magical. I wish there had been more explanation of why each hue was chosen for each place – I assembled the quilt, but I still don’t understand what makes it work so well.

I did learn in the piecing of this one to step back when I was getting tired instead of pressing on. That’s probably why I wasn’t enjoying it so much at first – I was product-oriented instead of process-oriented. When I slowed down and just sewed for as long as I found it satisfying, the process was much more enjoyable. So, there’s a lesson learned.

I’m also done with kits. Both this one and the dragon quilt top were kits including both the fabric and the pattern. While I like them, I don’t feel the same sense of satisfaction as with the quilts I’ve either designed myself, or the quilt patterns for which I’ve chosen my own fabrics. It certainly could be argued that the designers do a better job of selecting the perfect fabric for each section, but I prefer when my quilts are unique – even if they’re less than optimal!

This one, for example, was also paper pieced, and there are sections that I’d make another colour if I did it again, but I like it better than either of these kits. It’s one of a kind. 🙂

Jumping Jax Flash quilt pieced by Deborah Cooke

The pattern is Jumping Jax Flash by Judy Niemeyer. I pieced it probably twenty years ago. (Maybe thirty. Ha!) It’ll be heading to the long-arm quilter too, but it’ll be third and last to head there.

McCalls 8532 Instant Wardrobe

McCalls 8532 Barbie Instant Wardrobe

This is an older sewing pattern for dolls that I found on Etsy as a digital download. Once upon a time, my grandmother made pantsuits with palazzo pants for my dolls and I wondered whether this might have been the pattern she used.

After downloading it, though, I realized there was a very neat feature about the designs – the suit and the coat are made of felt, so there are no edges to finish. In scale, it’s as if they’re made of boiled wool. Hmm.

One thing that is good about this download is that there’s a tape measure on each page of the PDF. This should make it easier to ensure that the pattern pieces are printed to scale. More about that in a minute.

Here’s my first attempt at the suit. The jacket is great as is (and very clever, too) but the skirt is meh, IMO. It’s just a tube with a paperbag waist and the same kind of belt-and-slits finish as the jacket. The result is quite bulky around her waist. I’m not showing you the paperbag waist because, well, meh. We can do better. 🙂

McCalls 8532 for Barbie sewn by Deborah Cooke

I’m a little concerned about how well the felt belt will wear. (There’s another one on the skirt.) With a lot of play, I could see it just shredding apart. I may make a fake leather belt next time.

The hat was enormous, probably to go over those early 60’s bubble cuts, so I cut it way down for the version on the right.

McCalls 8532 for Barbie sewn by Deborah Cooke

It’s still a bucket hat, so not the most flattering option possible. I like the felt, though, and it’s got me thinking about tweaking it to a more vintage style.

The dress had a lined skirt but an unlined bodice. I chose to do it the other way around since lining the bodice makes it easier to finish the neck and sleeve edges in this scale. I also modified the back to have an overlap in my usual way. I like it in this Kaffe Fasset cotton print.

McCalls 8532 for Barbie sewn by Deborah Cooke

There’s a triangular kerchief to match the dress that irked me a bit. I made two and hemmed hemmed them in two different ways – one with the edges turned under twice, as per the pattern, and one with fusible interfacing on the edges, then turned under once and zigzagged – but I don’t like either particularly. Maybe it needs a snap – there’s not much fabric to tie it in place. Hmm.

The knit top that is supposed to be sewn into the skirt came out so big that it fit Tyler instead of Barbie. Again, the construction is interesting so I’ll modify it a bit to make a t-shirt pattern for both Tyler and Barbie. I printed the pattern page so that the included tape measure is exactly right, but this makes me wonder whether the tape measure image was added later than the scan of the pattern piece – and is actually wrong. Hmm.

I still have to sew up the pantsuit, which I cut of a woven rayon jungle print, just for fun.

This pattern also made me aware of a lack in my doll accessories – I don’t have any white go-go boots for B. I have tall white boots for her, but am now on the hunt for those mid-calf ones. They’d look great with that dress.

Like most doll patterns, this one needs a few tweaks to bring me joy, but there are details I like about it as it is. I really like the felt for a jacket that resembles boiled wool, so I cut out another one. Inspired by a Simplicity pattern for women, I all add darts to the waist of the jacket to give it some shaping. I’m also going to modify the paperbag waist on the skirt – there’s too much bulk with it under the jacket as is. I’ll show you that and the pantsuit when they’re done. I’ll probably make the coat, too, and another hat. It really is an instant wardrobe!

Modified No. 9 Sweater Finished

I finished that cardigan from the No. 9 sweater patterns that we talked about last week. Since it was a much better day, I took an outside pic of it.

No. 9 sweater from My Favourite Things knit with modifications in Kidsilk Haze Trio by Deborah Cooke

The colour is pretty true in this picture. I really like this sweater: it’s light, warm and red! I’m swatching with another yarn (we can gasp in unison at that bit of news) to try the pullover version next.

Here’s a better shot of the buttons that don’t quite match.

No. 9 sweater from My Favourite Things knit with modifications in Kidsilk Haze Trio by Deborah Cooke

They’re a little more pink than russet, but I like those two gold lines in them a lot. They’re staying. 🙂

I’m also embarked on a long-overdue sort of my fabric stash, which will continue to my yarn stash. It’s time to get organized, and time for some things to find new (more appreciative) homes.

I’ve noticed that the fabrics headed out the door fall into three groups: the first group is the biggest. My colouring was Autumn before I let my hair turn grey, so I had a lot of Autumn-favouring fabrics in my stash. I still like the russets and burgundies, the olive and some of the brown. The gold, taupe and beige, though, just don’t work for me anymore. I also used to wear white shirts a lot, and they don’t work for me anymore either —they’ve been culled from my clothing stash and are leaving my fabric stash, too. (There are compensations. Now I can wear black.)

The second group of fabrics are graphic prints. I like bold prints on the bolt and often admire them in the store. Some have come home with me over the years. I tend not to like them as much once they’re garments, or I like them but don’t wear them. They’re leaving, too.

Finally, there’s a shade of pink. Maybe it’s a pink that is supposed to work for Autumn colouring. (?) We used to call it dusty rose – it’s a mucky pink, not a clear clean one. Now it looks like Pepto-bismol to me, so out it goes.

It is very interesting to see how things pull together after my measuring, sorting and stacking. There’s a new cohesiveness in my stash, which I like — it makes me want to display it, not pack it away LOL — and which is also inspiring. I can see how things coordinate and work together, which gets me planning. It’s proving to be a useful exercise, though a time-consuming one. I expect I’ll be sewing more in the near future and not just for the girls. That makes me happy. 🙂

The Incredible Custom-Fit Raglan

As promised, here’s a post about a sweater knit a while ago. First, let’s talk about the pattern. I used The Incredible Custom-Fit Raglan. I think it appeared in Threads magazine once upon a time and you can find it online now. It’s less of a pattern than a formula, so it can be used for any size of person and any yarn. Here it is on Ravelry with links to the Wayback Machine. It looks like you can download it from Rav, too.

I used this formula a couple of times to make sweaters for Mr. Math, including the Elrond Sweater. That’s the link to my Ravelry project page, and here’s my blog post. Below is the sweater. Ha. I knit it in 2009 and he still loves it. 🙂

The Elrond Sweater, knit in Kauni Effektgarn by Deborah Cooke

The sweater I wanted to write about today, though, is this one, which was knit so long ago that it doesn’t even have a Ravelry project page.

The Incredible Custom-Fit Raglan knit in A Pound of Mohair by Deborah Cooke

My No. 9 sweater reminded me of it, so I dug it out. This sweater was knit from a huge ball of yarn that I bought at Lewiscraft, probably in the 1970’s. It was called A Pound of Mohair or something similar. (How fun. I found an article on Knitty about Lewiscraft upon its demise in 2006.) As you can see, it was gradient-dyed.

This is not the mohair of KSH but the older variant, which is more prickly and thicker, blended with a bit of synthetic. Hayfield 80 (80% mohair, 10% nylon 10% acrylic) which is an aran weight is more similar to this one. (That’s a Ravelry link.) The scary thing is that I have another 1 lb. cone of similar mohair in graduated tones in my stash, which I bought in NYC, but that’s another story.

So, this cardigan was knit maybe 40 years ago. I was so proud of myself for getting the gradient on the sleeves to match! That was only possible because I used a contrasting yarn for the ribbing, although I don’t remember what it was. It doesn’t have any detail on the ribbing increases – like the one for the mister, the increases are just made on either side of two stitches that define the raglan line. It would be easy to increase the stitch count there and do a little cable, or the P2K2P2 of the No. 9 sweater.

The other cool thing about this sweater are the buttons. They’re clear with bugle beads inside. They’re very sparkly and special – I bought them from a little button shop on Queen Street West in Toronto, which was gone the last time I went looking for it. It was one of those places with all the boxes of buttons, and you bought buttons individually. (Yes, I have a button stash. Don’t you?)

clear buttons

I used similar gold buttons that have metallic threads inside, bought at the same time, on my felted Stripey Noro messenger bag. (That link goes to the pattern page at Ravelry. This design of mine is a free pattern download.)

Stripey Noro Messenger Bag by Deborah Cooke knit by Deborah Cooke

This button place reminded me of excursions with my mom when I was a kid – she would make the trek from suburbia on public transit to Dressmakers’ Supply on Avenue Road for notions like buttons. I thought it was an amazing place – all those boxes of buttons, sorted by colour! I also thought it was about six million miles north of Bloor St., but really it was maybe three blocks. We always walked that bit. Dressmakers’ Supply moved down to Queen St. West at some point and has since closed down.

There is another button store on Queen St. West now called Trillium Button – or maybe it’s the same place but on the other side of the street now – which I’ll have to check out the next time I’m downtown. Ha! I found a blog post from 2012 about the button store and it IS the same store, but moved west and to the north side of the street. Definitely worth a trip. (Here’s that blog post, which has some pix.)

And hmm. Now I’m wondering what to do with all that mohair in the stash…

The No. 9 Sweater

Last year, I knit a lot for the girls as there’s something satisfying about finishing up a project quickly. It was time for a human-sized knit! This sweater for me really took a while, as I knitted it twice. Will I ever learn to knit a gauge swatch? Probably not. I just don’t like doing it and if the price is having to knit something twice, well, I don’t mind so very much. Usually, I realize what I’ve done sooner than I did this time. Often, I find other things I want to change in the sweater, anyway. That happened this time, too.

So, let’s take a look. The pattern is Sweater No. 9 by My Favourite Things. Here’s a Ravelry link and here’s the link to the pattern on the designer’s website. It’s a top-down sweater with some ribbing detail on the raglan lines, with two suggested lengths. Here’s one of the designer’s official pix:

No. 9 sweater by My Favorite Things

I used some Rowan Kidsilk Haze Trio from my stash, in Loganberry. This yarn is wonderful and squishy as well as very light. It’s discontinued now, but you could replicate it easily by knitting with three strands of KSH (or similar) held together. The colourways have three different harmonious colours each – this one has a red, a burgundy and a more orangey-red hue.

Here’s a pic of the yarn, knitted up in green and in the ball in the red, as well as my Felix cardigan knit of a KSH-ish yarn held with a fingering weight merino. That gives a similar effect to the KSH trio but is a little bit heavier:

Felix cardigan knit by Deborah Cooke with two shades of Kidsilk Haze Trio

I had bought this yarn in two colourways, as you see above, and knit a sweater of the green colourway, called Fern, a while back. I used a Rowan pattern called Paige but turned it into a cardigan. Here’s my Ravelry project page and here’s my blog post. I don’t wear that one much, because the drop shoulders and the length make it seem like a droopy blanket. It is very light and warm, though. Here’s that sweater:

Paige by Lisa Richardson, with modifications knit in Kidsilk Haze Trio by Deborah Cooke

And here’s the new red cardigan – with one sleeve still on the needles. The pictures are less than ideal as it’s snowing and grey today. There’s not a lot of light, even with all the lights on in the kitchen.

No. 9 sweater from My Favourite Things knit with modifications in Kidsilk Haze Trio by Deborah Cooke

I’ll finish it up this week – this yarn knits up quickly! – and when there’s a sunny day, I’ll take a pic of it outside.

The benefit of knitting something twice is that I can see what things I don’t love and change them out in my version. For example, I really dislike when ribbing doesn’t line up with the pattern in the body of the sweater. If you’re knitting a K2 P1 rib for the collar, as here, and there’s a K2 in the raglan rib, they should align IMO so that the K2 in the ribbing just continues on down into the sweater. That isn’t going to work in this case, since there’s only a P1 on either side of the K2 and the raglan lines are P2 K2 P2. So I changed the counts in my collar, plotting out the placement of the raglan lines from the outset and working P2 K2 P2 in the collar to line up with that. You can see the knit ridge in this photo, that continues up the collar.

No. 9 sweater from My Favourite Things knit with modifications in Kidsilk Haze Trio by Deborah Cooke

My second change was also a result of that test knit. I tried on the sweater and oooooo, that yarn was itchy itchy on my throat. I know I can’t wear KSH against my skin but I had a moment of (unmerited) optimism. So, when I ripped it back, I split the front of the sweater, turning it into a cardigan with two moss stitch bands down the front. I wasn’t sure of my ultimate row count so I winged it with the buttonholes, but it worked out fairly well.

My third change was a result of comments on Ravelry. The fronts and the backs of a sweater should not be the same and interchangeable, since the neck should be lower in the front. I added four short rows between the back raglan increases before starting those raglan increases – I could see the P2 K2 P2 place in the ribbing – to make the back a little higher at the neck. It was an easy change.

Change number four was an inadvertent one. I finished the yoke and wasn’t sure what to do with the ribbing lines from the raglan once the body was joined in the round. Just stopping them looked silly to me, so I picked up an extra stitch to have another K stitch in the middle of the 4 purls, and carried them down the virtual side seam of the sweater. To my delight, everything matched up at the hem for the K2 P1 ribbing at the waist, just as I’d set it in the collar.

No. 9 sweater from My Favourite Things knit with modifications in Kidsilk Haze Trio by Deborah Cooke

There are two suggested lengths in the pattern for the sweater and mine is in between. I tried it on, because there were a couple of Ravelry comments about the hem being in an unfortunate location and I wanted to be sure. I generally don’t like cropped sweaters as they seem too short for me, and as a shorter person, I often need to shorten a “regular” length sweater so I don’t look overwhelmed. 12.5 – 13″ from underarm to hem is good for me. That’s 32 – 33cm. This one is 22 cm from underarm to the top of the ribbing and the waist ribbing is 10 cm. It’s perfect for me.

No. 9 sweater from My Favourite Things knit with modifications in Kidsilk Haze Trio by Deborah Cooke

The buttons aren’t a perfect match – a bit more burgundy than russet – but I like the bit of gold in them and they came from my stash, which is even better. (That is a fuzzy pic!) The funny thing about them is that the shafts aren’t all drilled at the same angle. I’m a little OCD about things lining up and buttons being at the same angle, so I may take these off and re-sew them so that the little gold swoosh has the same orientation on all of them. Right now, all the buttons are sewn on with the hole in the shaft at the same angle.

I really like this sweater. I like it so much that I’m thinking of ripping back the Ferny Paige and knitting a green version of this sweater of that yarn instead. I also have a sweater quantity of a tweedy yarn in the same weight, so will try the pullover with that first.

It also reminds me of a mohair sweater I knit a looooooong time ago, and I’ll tell you about that tomorrow.