

Time for an update on my sewing for Barbie. You might remember that I was planning to make the Soirée ballgown from this Japanese pattern book, Stylebook of Dolls Dress by Kate Mitsubachi, but I got distracted by the Double Breasted Suit instead. That started a little adventure that led me down a rabbit hole.
First, the suit pattern. Here’s the image from the book at right. It’s very cute.
The patterns in this book are written in Japanese, but there are illustrations for the assembly. You can see in the pattern layout below that the dark grey fabric is the main fabric – that’s the skirt, placed on the fold, the jacket cut twice, the sleeve cut twice, and the bias panel to line the skirt which only needs to be cut once – the stripe is the lining and the light grey fabric is the white used for the hat.

For this one, they’d forgotten to include the collar on the layout for the main fabric, but that was easily remedied.
I was less happy that the jacket is supposed to be unlined. I made one version as instructed, but didn’t finish it. I then cut another suit with a lining.
It was a bit tricky to line the skirt, given the construction order. In the end, I changed it. I cut a skirt lining the same as the main fabric piece, sewed the hem, the center back seam (which I made narrower, to allow more overlap for the snap) and then the pleats. I lined the top of the skirt with the bias piece, then hand-sewed that piece over the lower part of the skirt.
For the jacket, I needed a lining pattern piece. I traced the main jacket pattern and laid the back neck facing over it, tracing it. I then folded back the pattern on the front foldline and traced the self-facing of the fronts. Then I had to mark the seam line, and add a seam allowance on the other side before cutting the lining pieces. I also decided to cut the back collar facing in the main fabric, just as you would do with a bigger jacket, instead of in lining as instructed.
This also changed the construction order. I sewed the darts in both lining and jacket, then the center back seam in the fabric. I sewed only part of the CB seam in the lining, so I’d have a way to turn the jacket. I inset the sleeves in both lining and jacket (I basted these by hand first), then sewed the sleeve hems. Finally, I sewed all around the outsides and turned the jacket. When it was pressed and seamed, I added snaps to the jacket front and skirt back. The pattern suggests seed beads as mock buttons, but I had teensy Barbie buttons in black, so I sewed ten of them up the front.
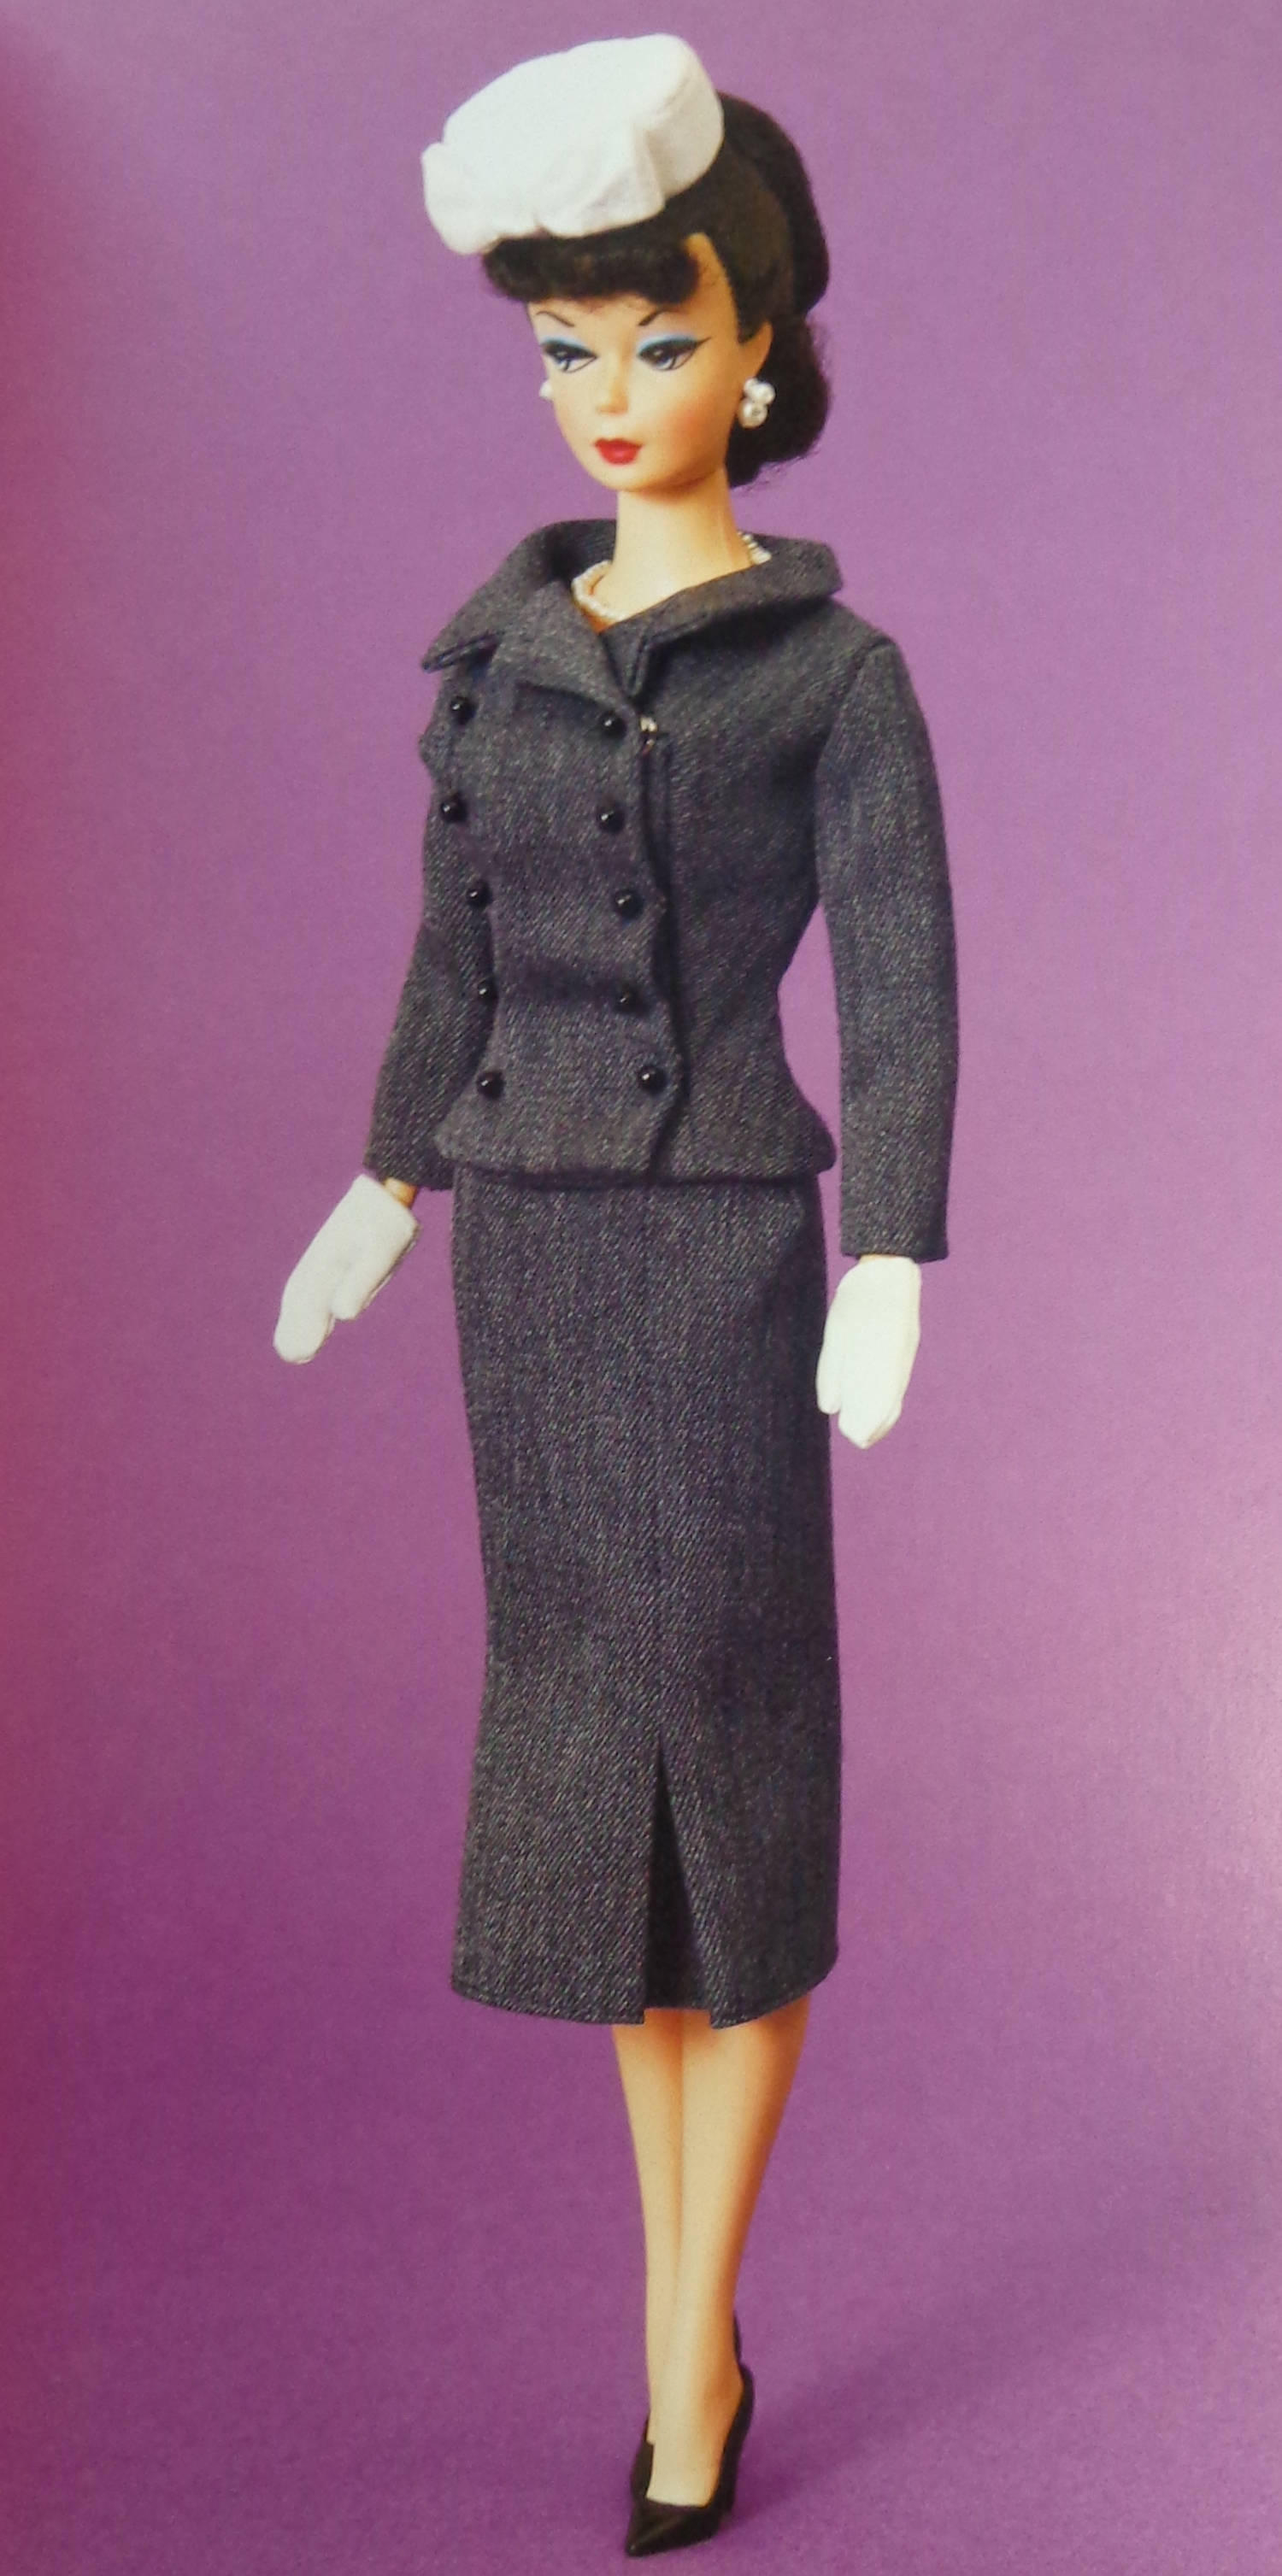
So, here we are with the finished suit:

It’s important to press as you go with Barbie’s clothes as the garment keeps getting smaller and it becomes harder to get to the seam allowances. I made myself a little helper, not unlike a pressing ham, but rolling some cotton flannel into a tight tube, a little more than an inch across. I can get that into the waistband of any garment to press it. Sleeves require a skinnier tube, so I rolled more flannel around a dowel. These two funny little rolls are now part of my Barbie dressmaking toolkit.
What leads me astray with Barbie outfits are the accessories, because Barbie doesn’t just throw something on. She pulls it all together. It took me a while to finish the hat for this outfit, not because it was hard but because it was tiny and had to be handsewn. My pillbox hat doesn’t have quite as crisp of an edge, so I’ll have to figure out how to fix that next time. It’s possible I tugged the thread a bit and gathered it slightly.
I became a big fan of Avery mailing labels while making this outfit. They’re a really useful way to temporarily mark the finished size of any element – you cut a template out of the mailing label and stick it on the fabric. I did that with the crown of the hat, which allowed me to sew the band in place with more accuracy.
For the accent on this hat, after much deliberation, I went with a contrast bow like the one suggested in the pattern. There’s more inspiration on this website, though. (Actually, the whole site is pretty amazing as a fashion reference.)
Can this suit be worn without a string of pearls? I thought not. I used the tiniest jelly elastic I could find (it was at Fabricland and is .5mm wide) along with some seed “pearls” from the bridal department at Len’s Mills. I played around with different lengths and also pendants. This one has a black bead rose. I’d love to have a string of pearls that was shorter, but there are limits to how much the jelly will stretch to go over her head. (And clasps are another rabbit hole. I did find this teeny one.) The jelly has a square knot at the back, which has been reinforced with a dab of glue. There will be more on necklaces in next week’s post. They’re like potato chips – it’s hard to have just one.
Of course, she needs a purse. There’s a clutch bag on the McCalls 7550 pattern which reminds me of the classic dimpled gold clutch from days of yore. (I still have one.) It’s really easy to make and just requires a bead as a clasp. I made this one out of a red faux-leather which is very thin. I ordered a piece of it from I Sew For Doll and am using it sparingly. The clasp is a black bead in this case.
Finally, she needed gloves – which are actually mittens even though we always call them gloves. (Why do we do that??) I’m getting better at making these, although they’re still not perfect. Again, the mailing labels help. I traced the finished glove dimensions on a label, and cut it out as a template. I then hemmed a square of the fabric for the gloves so the wrist edge was finished, folded it, stuck the label on the fold and sewed around it. I trimmed it to the glove shape after sewing, not before. They’re tricky to turn as they’re so small, but a little crochet hook helps. These are made from a stretch knit with a shiny coating that looks like patent leather. It’s a very thin fabric. I got it at Fabricland in several colours, including metallics, specifically for gloves. Next time, I’ll try a second row of stitching parallel to the first. It might keep her from poking her finger out between the thumb and fingers of the mitten.
Barbie is modelling this suit on the construction site for my new diorama of a shop. I’ll talk more about that process another day.

What do you think of outfit #1 in my Kate & Me challenge? (The problem with sewing for Barbie and having multiple dolls is that now they all want a new suit.)

Wow! I can’t even imagine the precision needed for this. It looks great.
It was fussy sewing, for sure, but oh so satisfying!
Pingback: McCalls 3701 for Tyler & Friends | Alive & Knitting
Pingback: Coco – A Chanel Suit for the Girls | Alive & Knitting
Pingback: Danielle Two-Piece Dress | Alive & Knitting