About ten years ago, I designed a cozy for our French press coffee pot called Java Ninja. It’s a free download from Ravelry. The original Ninja looked like this:
I knit this one in two colours of Patons Classic Wool Tweed. It’s knit top-down, then I added to contrasting I-cord at the top and the flap to go under the handle for the buttons.
Over the years, coffee dribbled, the wool soaked it up, the wool felted when washed and we broke that French press. Our current one is a bit taller. Mr. Math also was not a fan of the buttons – since he makes the coffee, his opinion rules.
I made a new coffee cozy recently. I called it Rogue Ninja because I simplified the pattern. There’s only one colour of yarn, there’s no flap or buttons and no contrasting I-cord at the top. I also used a heavier yarn and knit it more tightly. Red Heart Gemstone is an acrylic yarn with a slow gradation. It won’t felt. It’s also a bulky weight instead of a worsted, so I knit it on bigger needles and increased the top to fewer stitches all around.
Here’s the result:
This used 55 grams which is just over a quarter of a ball. I’m quite pleased with how it came out. It’s very sturdy and will actually stand up by itself, which makes it look like a medieval knight’s tent.
Sometimes you need a quick project. I’ve been pushing dragon alphabets around the floor and needed some close-to-instant gratification. My go-to in these situations is making for Barbie and friends. Modern Day Goddess is a fantastic little pattern for a slip-on sleeveless dress for 11.5″ fashion dolls – and it’s free! (That’s a Ravelry link.) It requires a bit of sock yarn and is knit in the round from the top-down. There are just two ends to sew in and it’s ready to wear.
I knit the first in leftover sock yarn with a slow gradation and a tweedy flick. I followed the directions as written, then noticed that the pictures all showed Barbies with the Model Muse body sculpt. I have one (rescued from the thrift store) so here she is in her first dress. (She was naked at the thrift store and has since been washed and had her hair redone.)
This dress is the same front and back, which makes it easier to pull on right. It fits like a dream and was really a quick project.
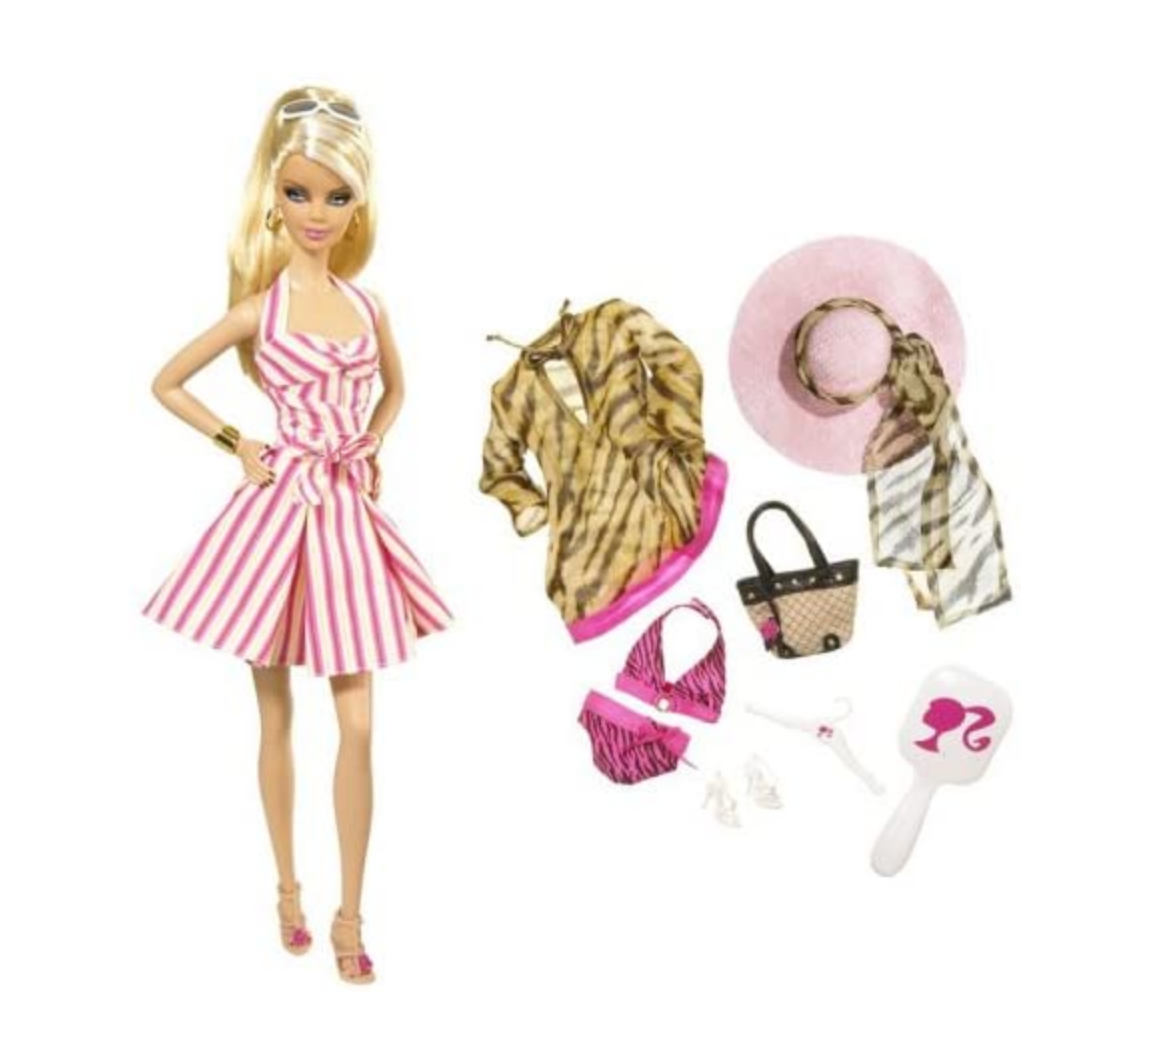
This Ms. B. is Top Model Resort Barbie from 2007, and originally looked like the image below:
Hmm. I need to steam down her bangs. But that hat! I see a listing for her on ebay NIB for $299US today, so I’ll stick with my thrift store girl and find a different hat.
The pink purse is a new acquisition – it seems to be hers now – which AstroJen sent me. It’s from a 5-Surprise Mini Fashion by Zuru. (That’s an Indigo listing. Amazon.ca doesn’t stock them. This company makes a lot of different miniature bundles, so check the fine print and make sure you’re getting the fashion bags if you want the purses.) Each one contains a mini purse and four other things (one might be a sticker. Hmm.) Jen sent me her duplicates, which was sweet. The purses are just the right size for the girls and are quite well made. (I succumbed and ordered a few myself now that I’ve seen them.) There’s a third one in kind of a silvery purple, but the Monster High girls made off with that one. (They made a quick getaway on the Vespa.)
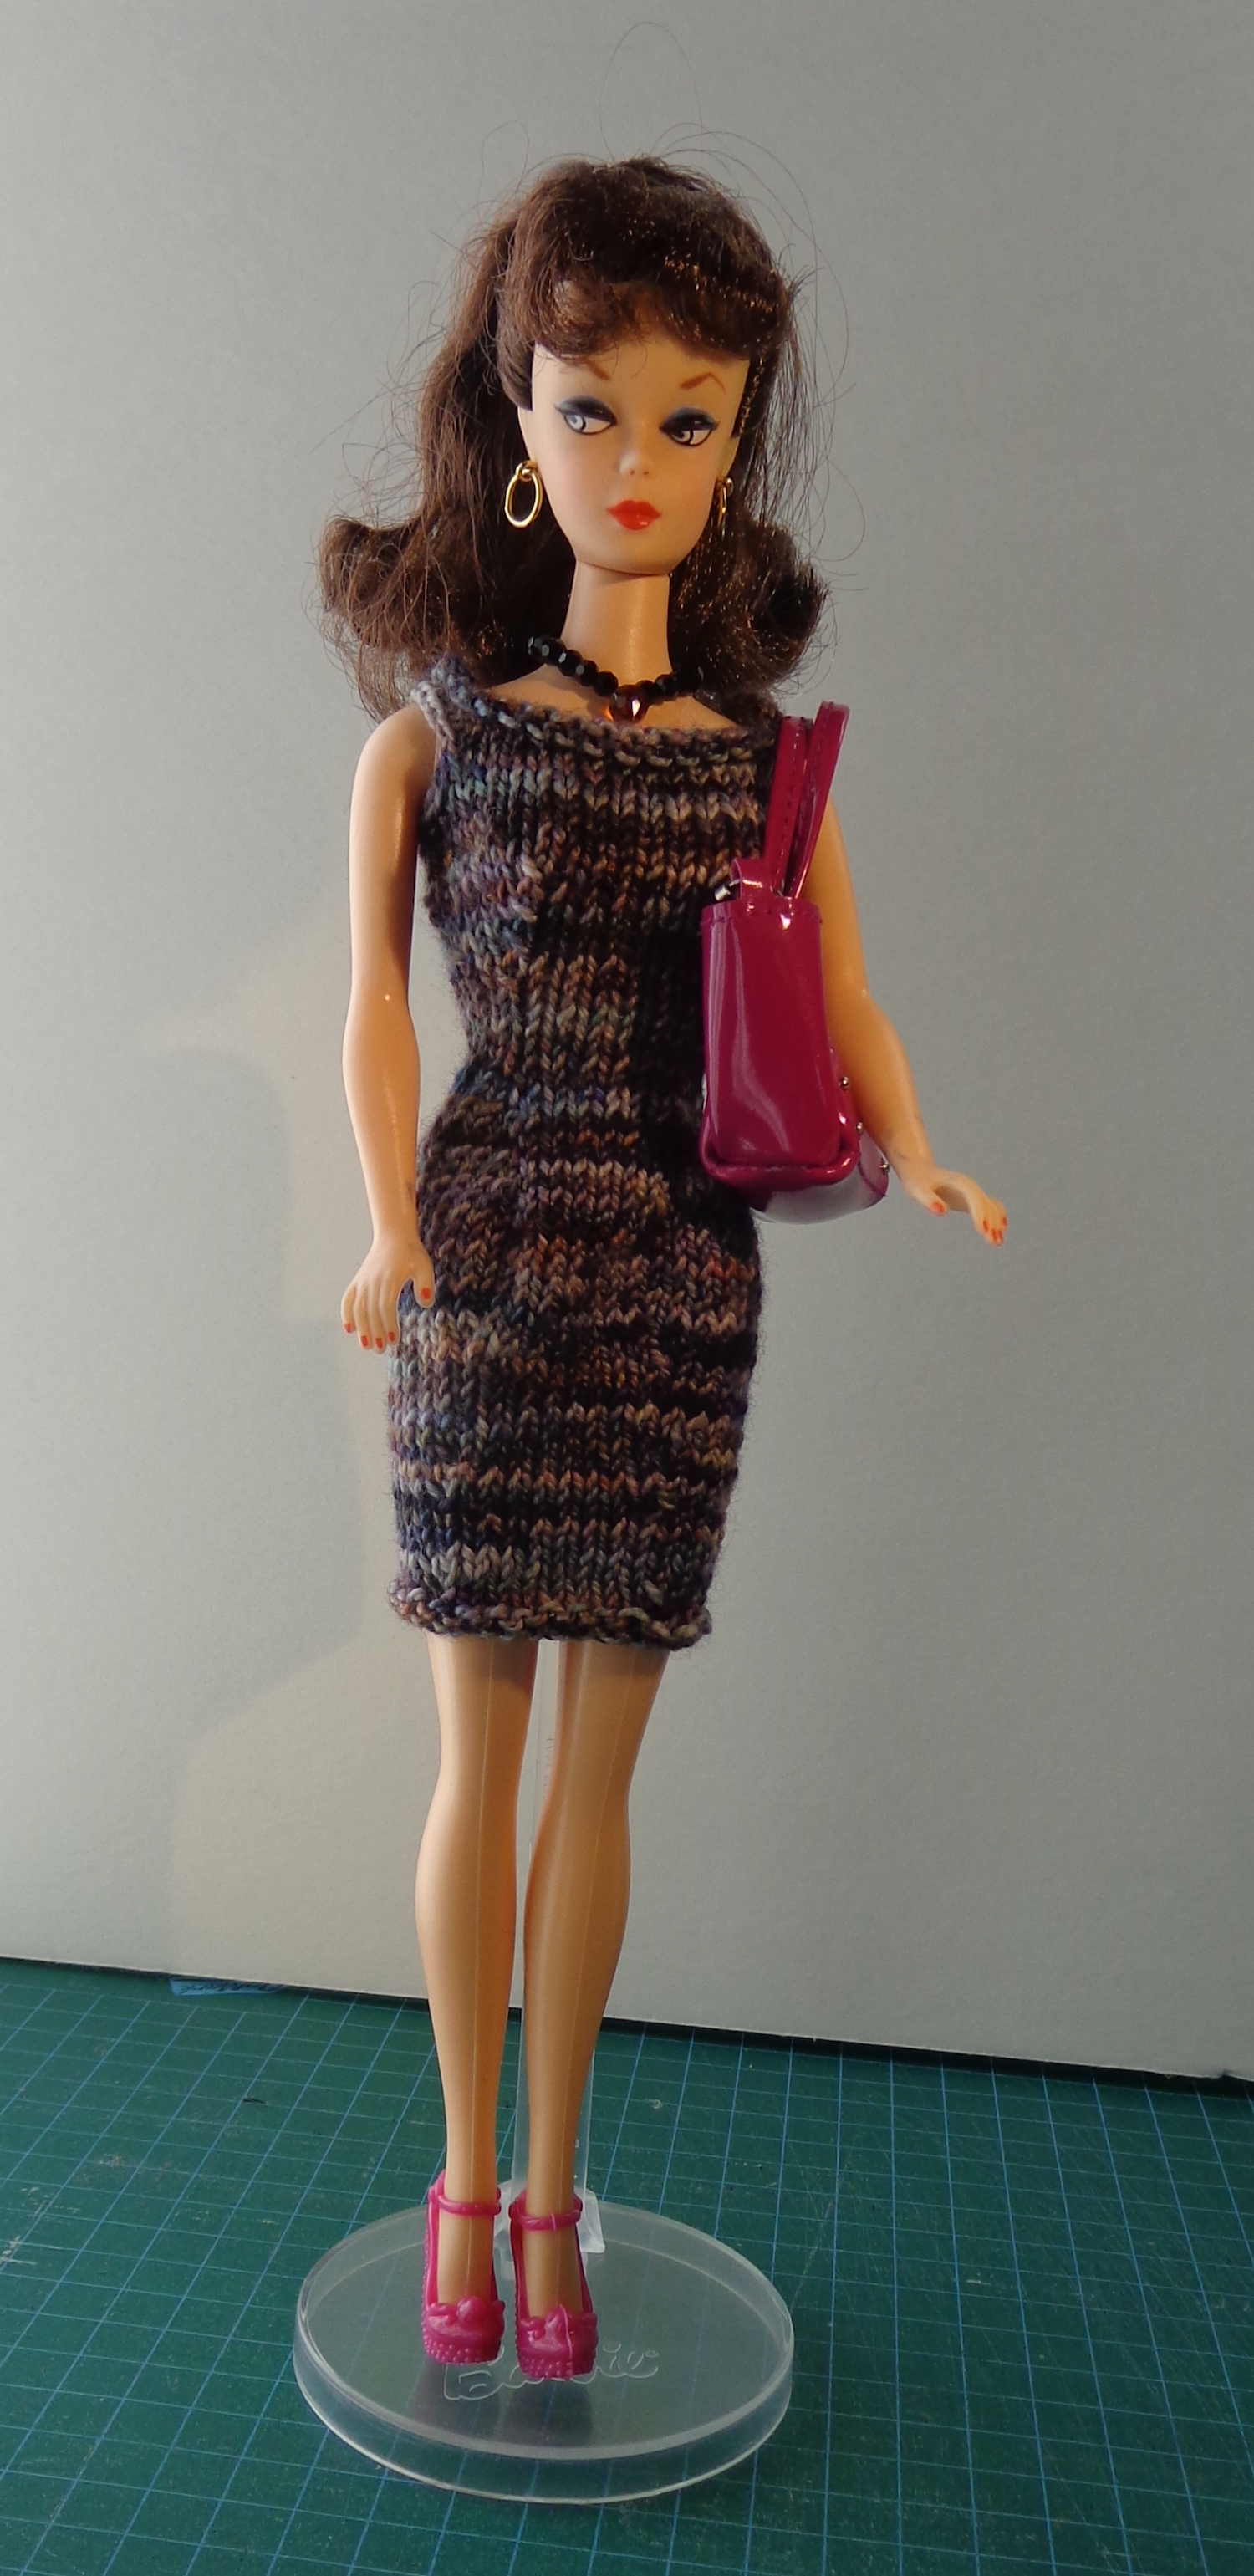
My only concern with the dress was that vintage B isn’t the same size front and back. The blue one stretched tight over the front and the armholes gapes. I made some modifications on my second version to give her a little more fabric over the girls. This one is knit in Koigu KPPPM. Ms. B. is also rocking a purse from those surprise packs.
You wouldn’t know it from her expression but she’s happy about the better fit.
What did I change?
• In the original pattern, the top decreases are at the sides. I moved the decreases to be below the bust, like darts, because there are more of them. The pattern has this nice 6-st panel running down the front and back of the skirt, so I lined up the bodice decreases with that.
• I cast on 4 more stitches.
• I also knit 2 more rows before splitting for the sleeves. That makes the neckline a bit wider and less like straps.
• I cast off fewer stitches for the sleeves. The armhole gaped on vintage B, probably because the fabric was stretching across the front.
• I positioned the sleeves so there would be more stitches on the front than the back. (That’s where my extra 4 stitches went, in front.)
• I added 2 rows to the bodice length. From that point on, I knit following the original instructions.
I really like how both versions came out. I still need to block them both, and that will uncurl the necklines a little bit.
This process inevitably gave me More Ideas, so I’ll have another variation to share later. I also found paper boxes in the stores again (yay!) so will be creating two more carriers, one for the Barbies and one for the Monster High and EverAfter High girls. We need more closet space!
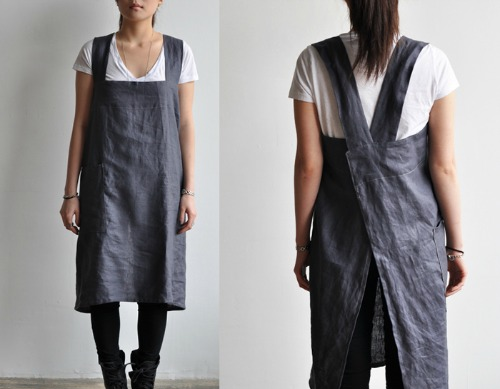
Everyone’s linen apron journey seems to start in the same place, with this image:
It’s a picture from Pinterest of a Japanese-inspired linen apron, once for sale but no longer available. It looks so simple! It looks so easy to make.
But, um, no.
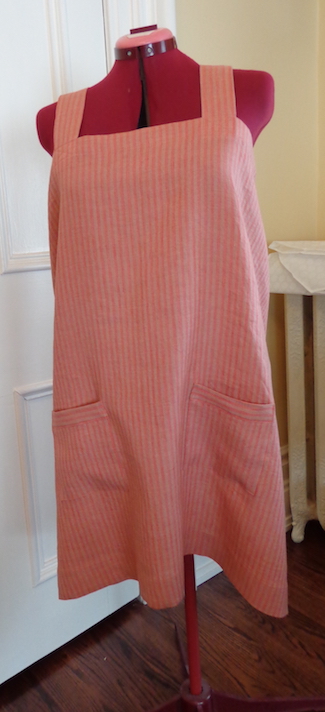
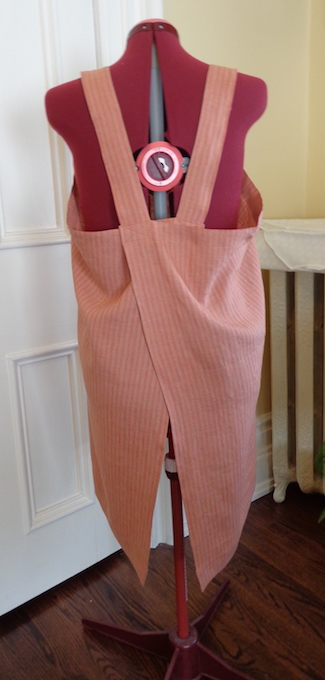
In my quest to make one of these aprons, I found this post on the Daily Sew blog, with videos. This is an excellent resource and you should definitely check it out. I followed this plan for my first apron. I used a piece of linen I’d bought as a remnant. It was one of those online purchases that left me feeling meh – the colour was called Watermelon, but really, the watermelon is striped with oatmeal and the overall effect is Puce. (Although that wouldn’t have sold as well.)
The plan was to cut my piece 120cm (20cm wider than my bust) and 90cm long, because I like really deep hems on linen. (Like old tablecloths.) At each end, I did a narrow hem, at the top, I turned down 1″ twice, and at the hem I turned up 2″ twice. The straps are 55cm long but I cut them wide (almost 8″) so that there are four layers of cloth in each strap. (Fold both long ends to the center, then fold the strap in half and topstitch.) I added a contrast cuff on the top of the pockets because I thought after cutting them that they could be bigger. I learned this tricky and tidy pocket construction making my Butterick 5537 bathrobe.
I loved working with the linen.
(Oops, Nellie looks a little drunk in the first picture!)
In the end, though, this is not a flattering garment – and it looks better on Nellie than it does on me, because our measurements have diverged of late. There’s a LOT of extra fabric around the bust which makes it feel frumpy. I’m a pear, so I don’t need extra fabric there or pooling around my waist. Hmm.
Then I recalled a conversation with my friend Terri the tailor. When I first was intrigued by this design, she was skeptical. She said something to the effect that square pieces of fabric on grain don’t drape well on curved bodies. *BING* I decided to try another version with the body of the apron cut on the bias.
I LOVE this version.
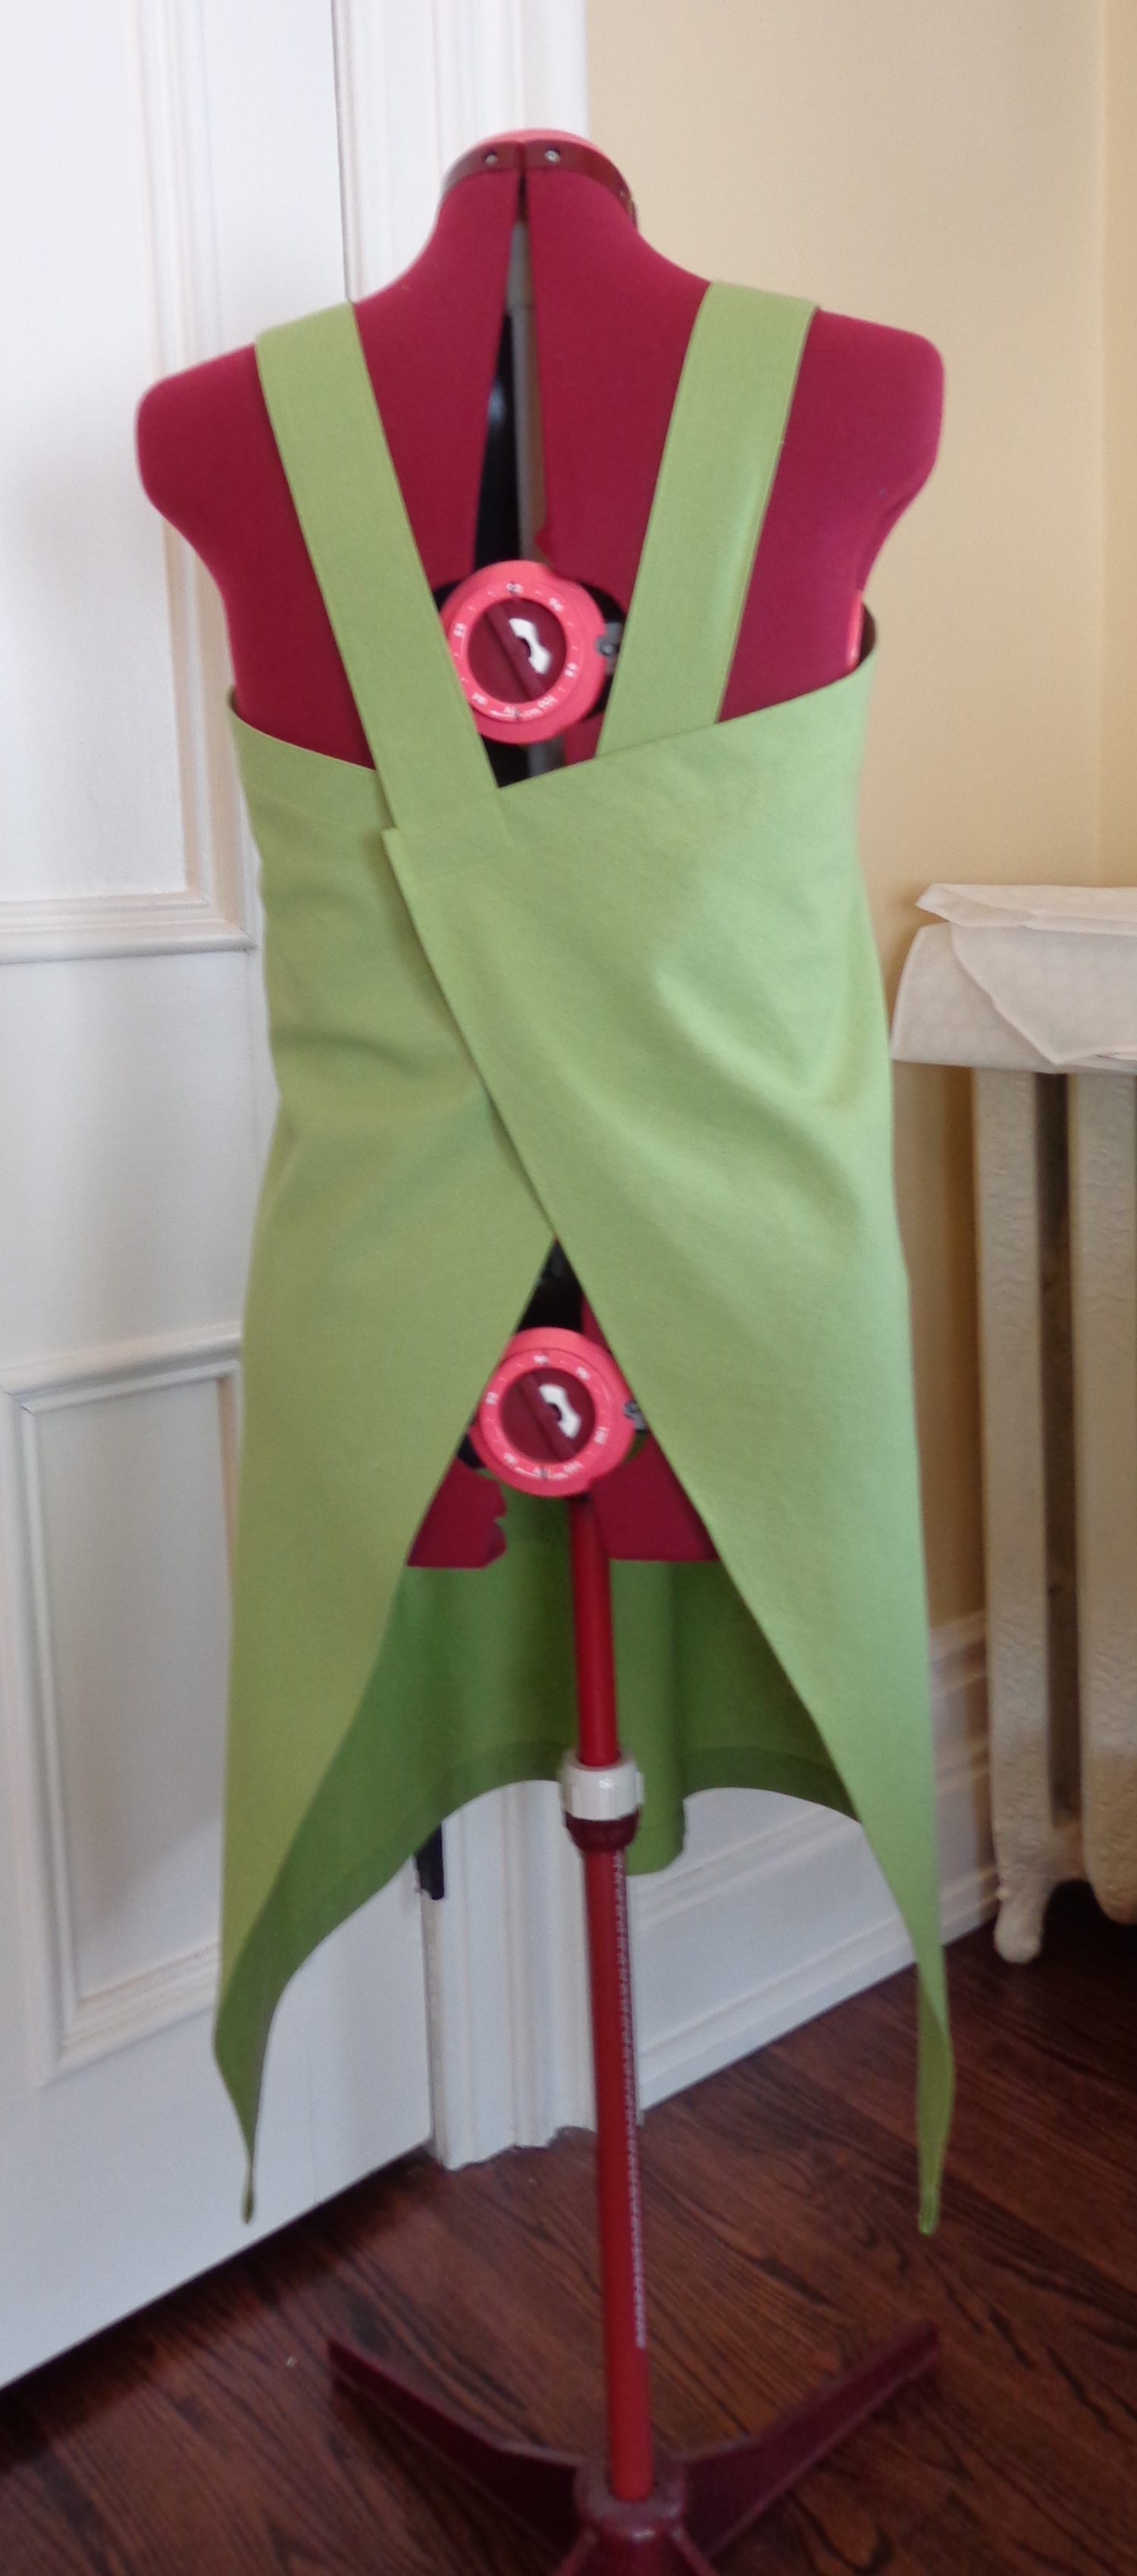
Version #2 is cut from a linen and cotton blend (55/45) that was on sale for $4/m at Fabricland because it’s from a previous season. I liked the colour and it’s perfect for this experiment. Because it’s 135cm wide, I couldn’t get the entire 120cm by 90cm on the bias in one piece. I cut for the length of 85cm (sacrificing my fat hem, boo) but only ended up with a width of 105cm. I cut another 20cm by 85cm panel on the bias, and decided to put it down the center front to make a vertical line. I cut the straps and pockets on the straight of grain.
Here’s my second finished apron:
Those two seams down the front are felled and actually they make a nice line for the inside edge of the straps and the pockets. These straps are a little closer together than on the first version, which also improves the fit. I didn’t have a green thread in exactly the same colour so I used one that was a bit more lime, and I like how that looks, too.
You can see that it hangs in a more flattering way on Nelie than the other one. It also looks better on me. (Bonus!)
But wait. Why is it smaller in the back than the first one?
I did some measuring and realized I made a mistake with the first apron. I pulled a thread to get the straight crosswise grain and cut a piece the right length but the entire width of the cloth. That’s 135cm. I forgot to trim that edge. (Now I remember that I was going to use that strip for the straps, but it wasn’t wide enough, so I cut them out of the rest of the fabric and forgot to trim the piece down.
That’s why there’s so much fabric in the first one – it’s a bigger piece of fabric. (Duh.) But, the bias cut version does hang a lot better.
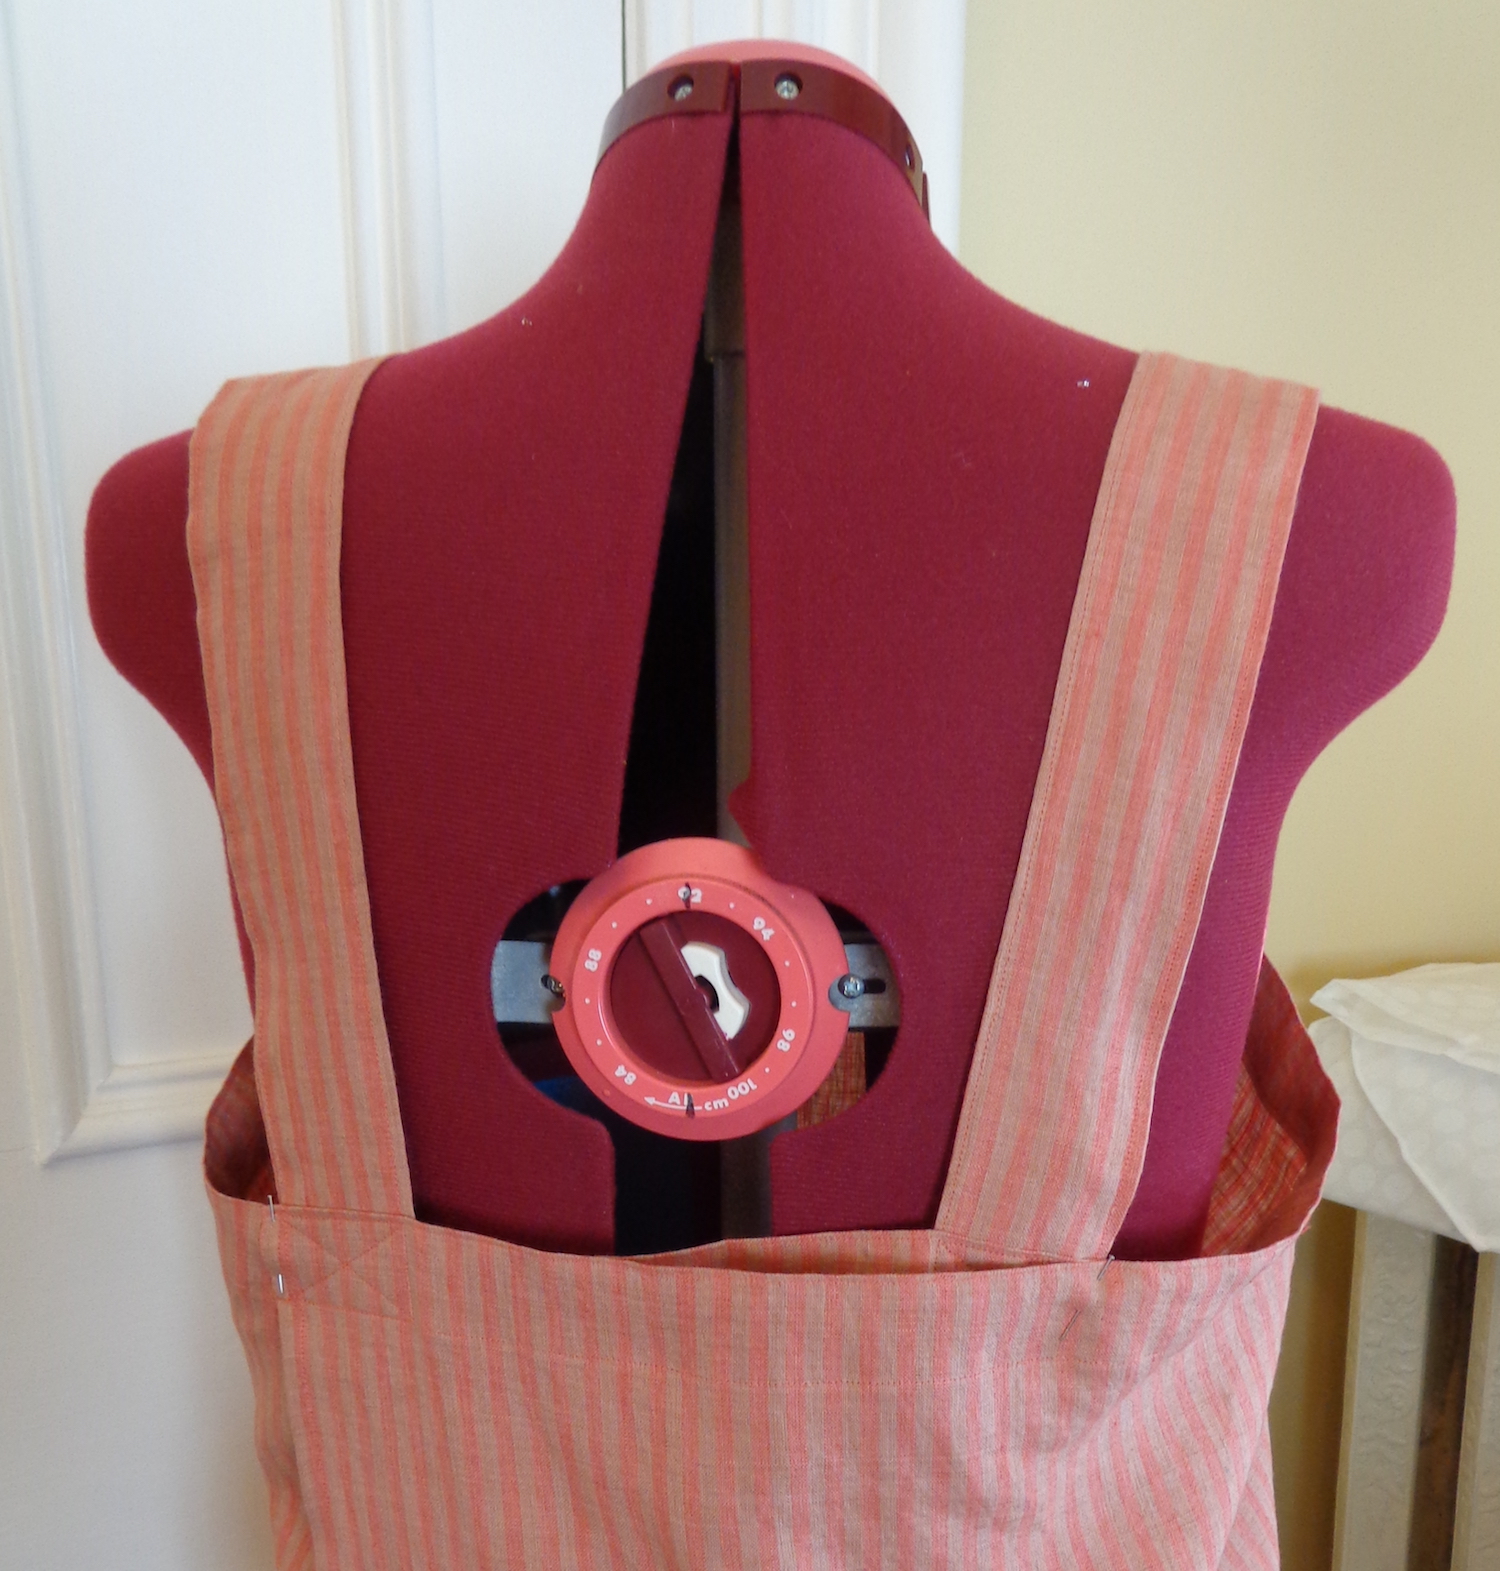
I played around with the first one because I know I won’t wear it the way it is and figured out a solution. I pinned the back in place so that the width around the bust was about a few inches bigger than my own measurement and tried it on. I fiddled with the pins until it was easy to get the apron on and off even with the back fixed in place, then I sewed it down.
It kind of defeats the point of the whole design, but it’s more comfortable (my bum stays covered!) and I like how it looks. I’ll actually wear it this way. I just used a basting stitch right over the topstitching line from the outside of one strap to the outside of the other, so it’ll be easy to pull out if I change my mind.
Here’s (drunk) Nellie to show you that it hangs better with the back like this.
I’m going to try another free apron pattern next and will show you that when it’s done.
Sometimes, you just need a quicker project. I have a lot of projects on my needles right now, but most of them use small needles, which means slow progress. I’ve finished eight repeats of the pattern on my Rowan Lace Scarf and am partway through the fifth ball of the six provided in the kit. I’ve almost finished the body of my Noro Mitred Jacket. I’m coming down to the hem on my Spector pullover, which may be the slowest knit on the planet for me. (Will it languish on Sleeve Island? Maybe…) And I’ve been knitting a lot of Barbie clothes. There’s a whole pile of them waiting for their ends to be sewn in. Last weekend, I felt in need of some more immediate knitting gratification.
And then, an ad from Fleece Artist sailed across my screen. Ooooooooo. I’m a complete sucker for their gorgeous yarns.
The Halo Jacket is a free pattern from Fleece Artist. (That’s one of the pattern images from Fleece Artist.) You can download it from their website, or grab a copy here on Ravelry. It’s knit side to side with two yarns held together, a fingering yarn and a mohair-silk laceweight yarn (which creates, hey, a halo!) Here are the yarn bundles at Fleece Artist — as usual, their colours are absolutely scrumptious.
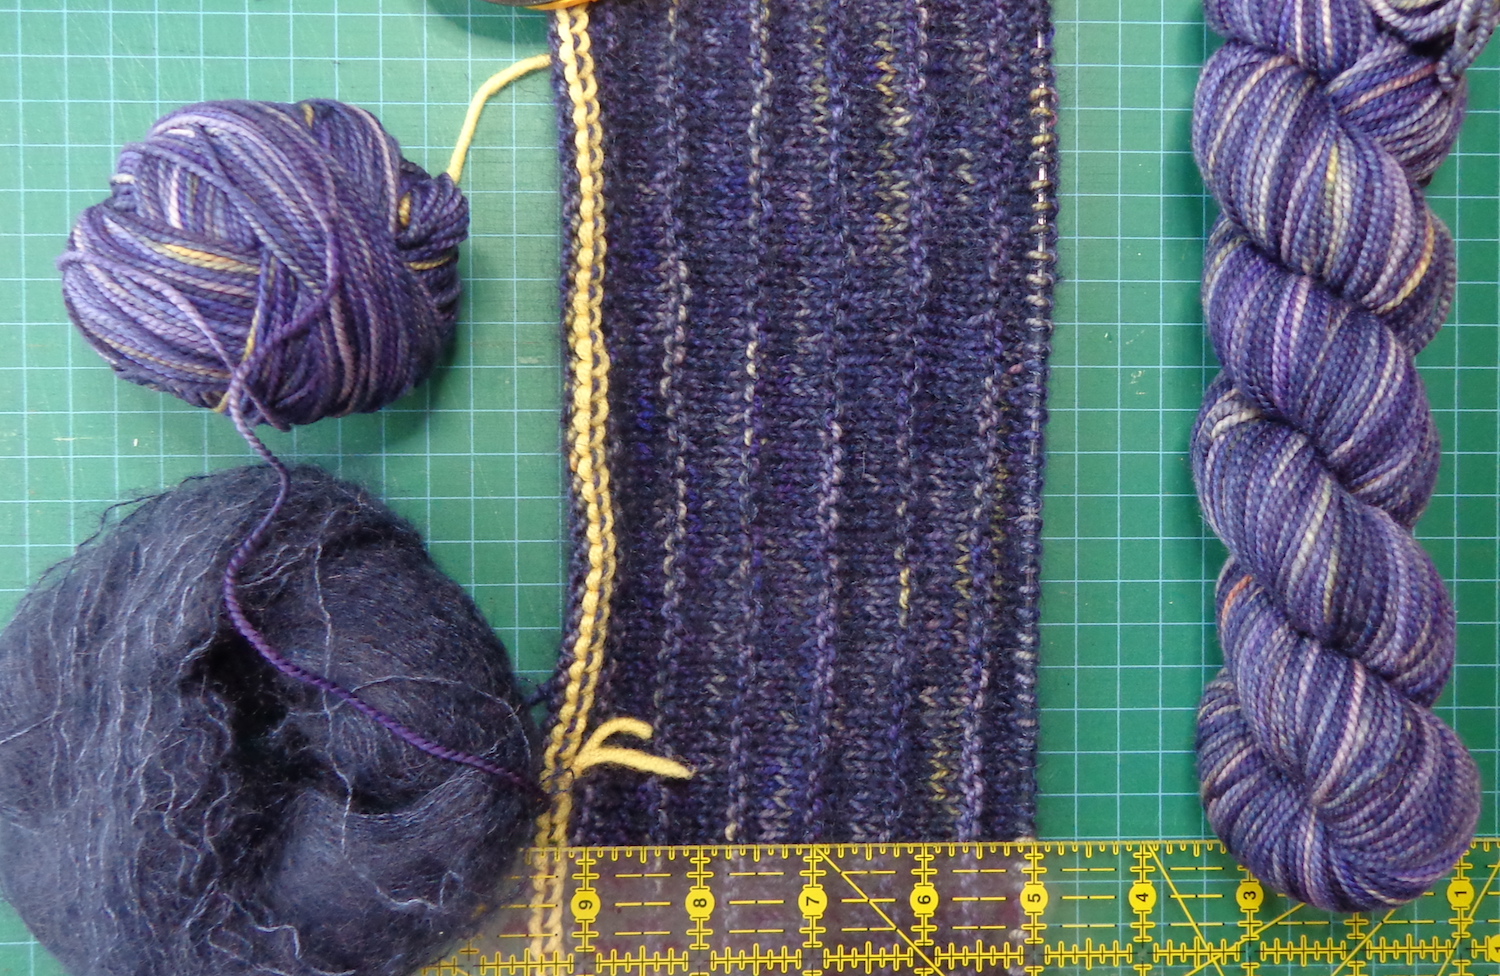
But….in the interests of managing my own yarn inventory, I decided to shop the stash. I have some Koigu KPPPM in a purpley-blue, which I bought for a sweater I ultimately decided not to make. I also have some Rowan Kidsilk Haze in Turkish Plum. I’m a little short of yardage in the Koigu, but fortunately, the original pattern (the one that wasn’t knitted) required two coordinating colours. I have the coordinating colour and will use it on the cuffs and collar if necessary. The best part is that those bits are knitted last, so I can decide after the majority of the garment is done.
Here’s my start:
I’ve pinned it down because it wants to roll into a tube! The actual colours are darker than they appear in the photo, but look at how much the KSH darkened the KPPPM. I hadn’t knit up this Koigu because it wasn’t dark enough – although it’s very pretty – but I love it combined with the KSH. The fabric is wonderfully squishy and soft.
I seem to be on a bit of a bag-sewing binge lately. Here’s a bag I made from a fun dragon print.
The pattern is a free download from kokka-fabric.com. It’s in Japanese, but there are illustrations of the assembly and measurements to cut the pieces. You can find their free downloadable patterns here, and this bag pattern here.
I chose to cut the pocket from the accent fabric, because the dragons were big enough that it would look silly if they didn’t match up. I then sewed a strip of dragon fabric along the top edge of the pocket to finish it, and also sewed in a ribbon loop with a clasp and a charm. The ribbon is long enough that I can put my keys on the clasp, then tuck them inside the pocket. Lots of reflections on that shiny pleather pocket in the picture! In real life, the charm really snaps against it.
One thing I liked about this design was that the two strap pieces are cut in slighlty different widths. It doesn’t specify on the pattern, but clearly the wider one should be of the contrast fabric so there’s a little peek of it around the outside edge of each strap as a contrast. It’s tough to see in black on black, but the pleather is shiny.
Using black faux-leather as the contrast was a challenging choice. Not just black on black, but it’s slippery and you can’t really iron it. Pressing down seam allowances isn’t an option because it will melt. I cut fusible knit interfacing to the finished width of the straps and applied it to the pleather using a pressing cloth. That worked brilliantly to help me fold the fabric in the right place and also made for a nice finished strap.
I used heavy quilting cotton both for the outside and the lining, but the bag is a little more flimsy than I’d prefer. (It might specify a heavier weight of fabric in the Japanese instructions.) I’m going to make another in a different quilting cotton and interface the entire outside of the bag. I’ll show you that when it’s done.
I made the medium size and chose which colour to use as I went. It was a good pattern and a nice knit.
I like the colours of it but don’t love wearing the hat. (I hate hats, really.) It fits around but is the wrong height – not enough to slouch, so it just makes my head look bigger. (My head is bigger than this foam one.) Mr. Math will adopt it, I’m sure. He loves all the hats in Felted Tweed.
Meanwhile, I’m still knitting on the Rowan shawl/stole and have used half the wool in five repeats of the pattern. It’s about 30″ long now, so will be a good length when done. It’s a lovely knit, a bit too complicated to memorize the pattern, but the yarn is giving a nice definition to the stitches. I’ll show you that one when it’s done.
I spotted this free pattern last week – Fulay Little of LittleKnits shared it on Facebook – and since I have a bunch of Rowan Felted Tweed in my stash, I thought I’d give it a try. I’m always looking for the perfect hat. Most are too small for me, but this one has directions for three sizes.
Here’s the Olof hat pattern on Knitty. (BTW, I chose the option to print just essentials and it included all the pix, which isn’t the way that usually works.)
Here’s my first attempt:
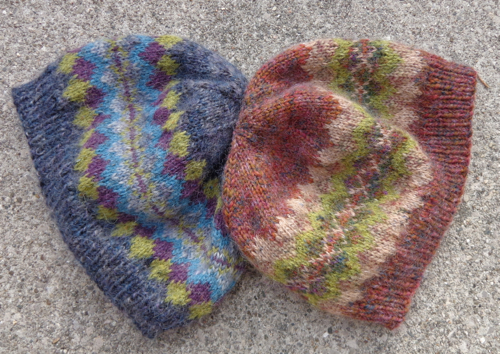
I chose the Camel (the beige) to offer some contrast to the Bilberry (purple) and the Watery light teal), but the hat is too beige – even though that star band which is half done will have a green background. You’ll notice it’s off the needles, which is a portent of doom – or in this case, frogging. I’m going to switch some colours around.
On the upside, I enjoyed the corrugated ribbing, which was a new thing for me. The hat also fits well, though I might make another in the biggest size just to have one that’s a bit droopy. Rowan Felted Tweed really is wonderful for fair isle work. It’s such a nice soft yarn and I like how the stitches smush together a bit. (That’s a technical term. LOL) Here are several other projects I’ve knit in Rowan Felted Tweed:
Fair Isle Hat from Vogue KnittingBute by Lisa Richardson
Hmm. I’m looking at that grey hat on the left. It’s using two shades of Rowan Colourspun, plus three of Felted Tweed – those three were a subscribers’ gift from Rowan. The pattern was a scarf that I didn’t much want to knit and I’d forgotten all about it. It was the Garter Slip Stitch Scarf by Lisa Richardson. Here’s a Ravelry link with a project pic. They look quite good together, don’t they? I decided to frog right back to the purple ribbing and switch out the camel for the avocado.
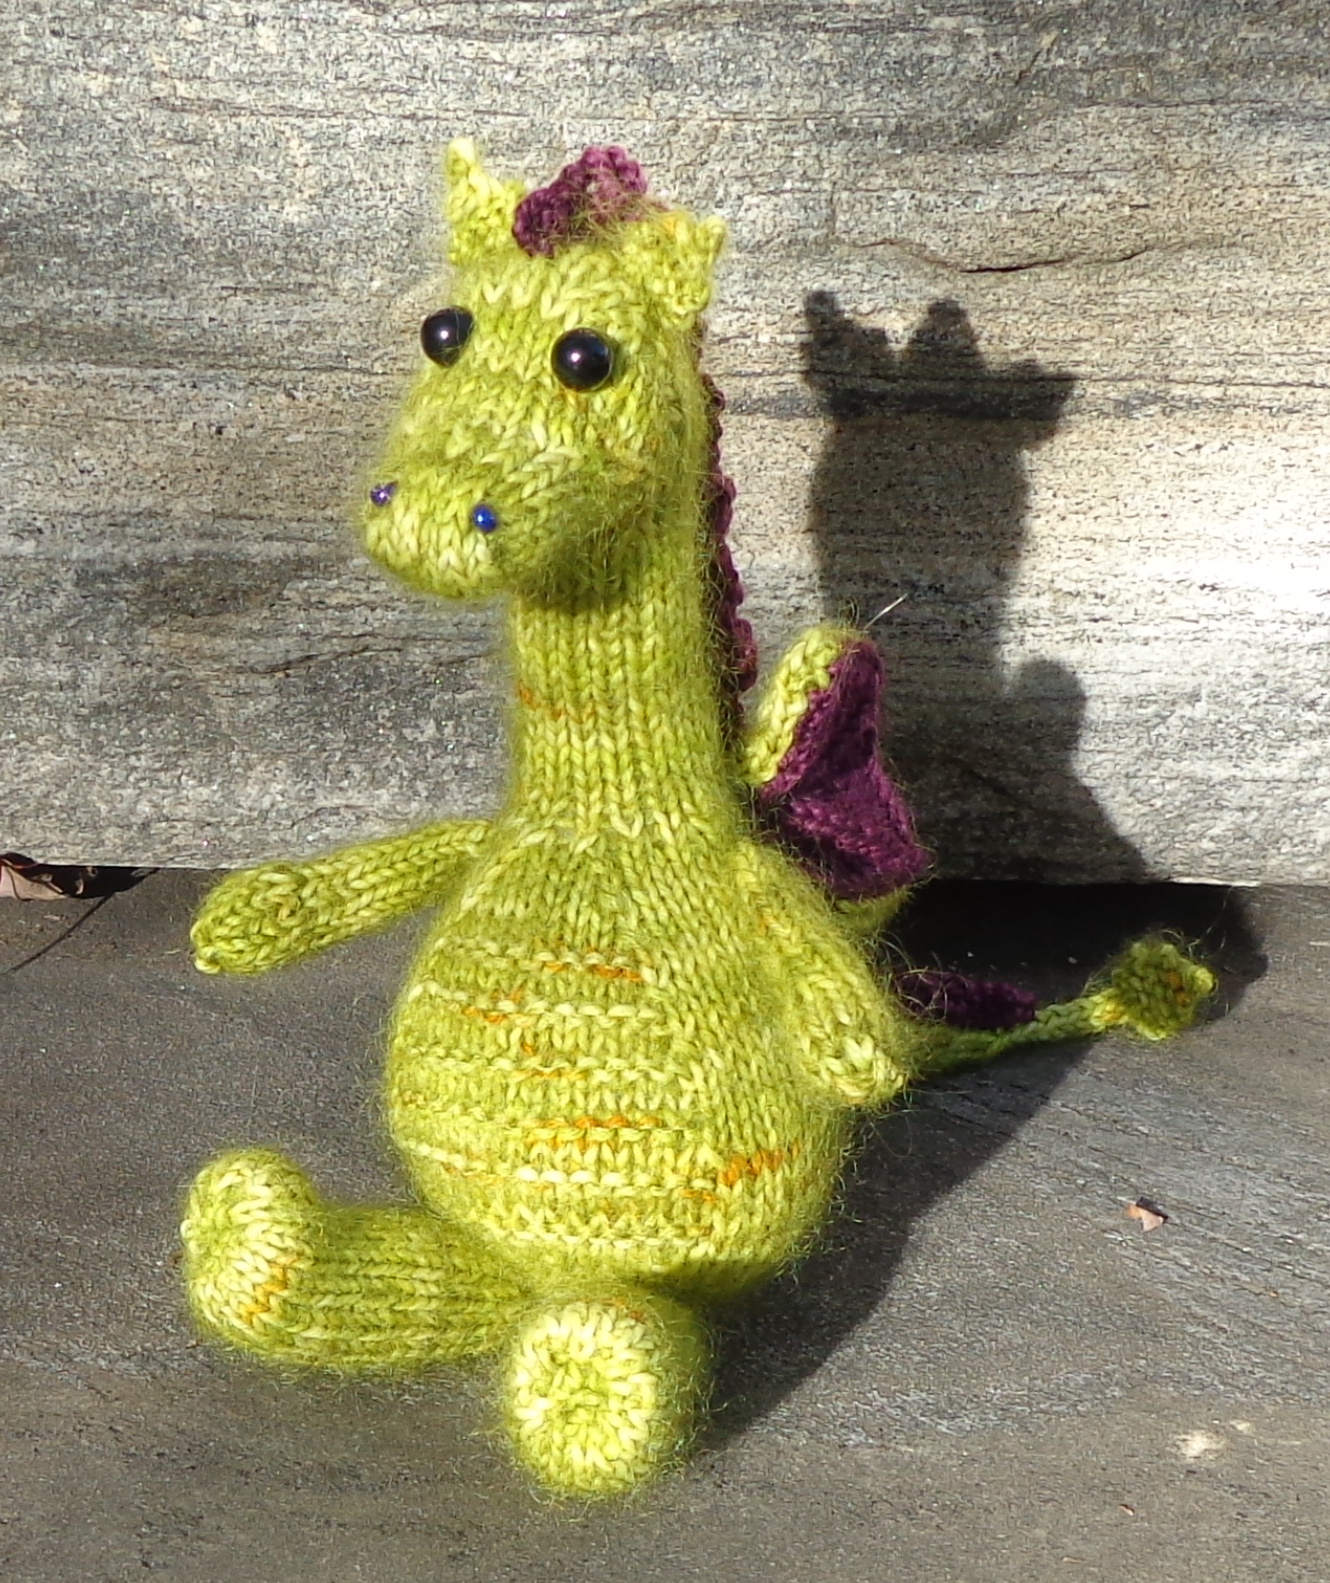
This little guy has been sitting around for a long time with just one arm and no eyes. I finally got him finished up this past weekend, and he’s just as cute as I’d hoped.
I knit him out of a fingering yarn—Lichen & Lace 80/20 Sock, in Citron—held together with a strand of Rowan Kidsilk Haze in the fabulous shade called Jelly. He’s not just lime green: he’s fuzzy! The contrast colour is Shibui Knits Sock. (It’s discontinued so that’s a Ravelry link.) All the yarns came out of my stash of partial balls so I’m not sure how much I used.
I did make a few changes to the pattern. I added ears, as suggested by other Ravellers, and used a navy seed bead for each nostril. I also made the wings in two colours, suggested on Ravelry, and am really pleased with how they look. There are a lot of projects for this little guy on Ravelry and I’m not sure who first suggested the contrast wings or the ears. Both are terrific ideas!
Like most toys, this dragon is a bit fiddly to assemble but totally worth it. I couldn’t find small enough eyes until after I’d stuffed and sewn the head – I came across them quite by surprise, but then, you never know what you’ll find at Len’s Mills – so maybe I’ll have to make another. This guy has button eyes instead.
I love the detail at the end of his tail!
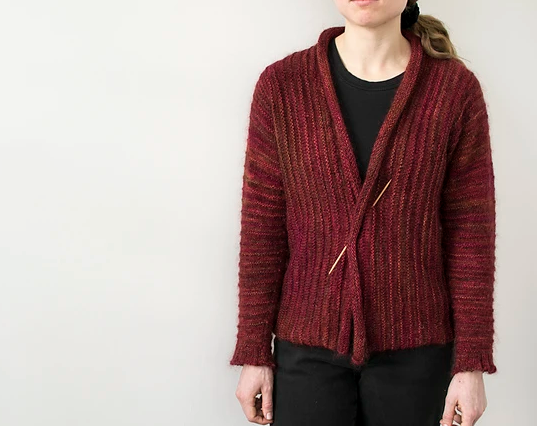
We did go to the Woolstock Fleece Festival last weekend, which was held in Paris, Ontario, this year, and it was wonderful to be able to squish yarn again. There were a lot of indie dyers in attendance and the displays were beautiful. I found a purple handpainted sock yarn that’s perfect to finish my Crystal Twist Shawl. I bought a cake of a gradient dyed fingering yarn – Merino Silk Shawl Length – from Coriand3r Knits, which was just what I’d been hoping to find for the Don’t Panic shawl by Nim Teasdale. And I fell hard for yarn from The Loving Path—I bought a kit for a Love Note sweater from them but am knitting a cardigan with it instead. That project has jumped to the front of the line, so I may have a finished project to show you soon. All in all, it was a wonderful day. 🙂
I knit some mittens this past week—even though it was a zillion degrees outside. This pattern was free and it looked intriguing. I had some yarn in my stash so away I went.
The pattern is called Alaska Mittens by Anna Zhuravleva—here’s a Ravelry link—and it’s still free as I write this. It calls for aran weight yarn, and I had some Sirdar Tweedie Chunky in my stash—that’s a Ravelry link, too—it’s discontinued so I’d found it on sale once upon a time and just liked it. I have three colourways but used the dark green, which is #285.
Here are the mittens, knit in the M size:
I found this pattern a bit confusing and ended up writing all over my chart while knitting the first one. The second one went more smoothly as a result. You work Row 2 fifteen times, and since the next row is labelled R3, I missed that the first time – I changed it to be R17 and renumbered the rest of the chart. I also added a G on the rows that I was to add a gusset stitch and drew a line across the chart where the palm changes from ribbing to stockinette. I think there is one mistake in R13 of the original labelling of the chart – the two knit stitches should be purls.
The chart for the fingertips really confused me, so I drew it out again. I wanted the decreases to be one stitch in from the edges, so there are two stitches that run up to the top of the mitten. The chart shows it that way, but if there are two knit stitches, you can’t K1, SSK without taking up the third stitch. I also had to work two additional rows in the middle before doing the middle twist, as it occurs every 4 rows, not every 2.
I also found the thumb a bit too wide for me at 16 stitches and took it down to 12. I had added four extra rows of ribbing to make a longer cuff on this pair. These mittens weigh 73g and I have 76g left of the green. I’m hoping I can knit another pair with just the specified cuff length.
I cast on another pair in another colourway of the Tweedie Chunky and am working it along with a strand of Kidsilk Haze. The result is very squishy and soft:
This one has the cuff in the specified length. I also started the gusset increases four rows later, so I’ll have two less stitches for the thumb—instead of having to decrease twice, I’ll just have to decrease once to get the thumb the right width.
You have to pay a bit of attention with this pattern, but the mittens are really nice. I particularly like that the cables mirror each other on the left and right mittens. They fit well, too.
It’s been quiet here for a couple of weeks, partly because I’ve been pushing to finish a book and partly because I have a lot of projects on the go. I’ve had new project disease this summer, both in my writing and my crafting, but finally some things are getting finished up.
Today, I have two doll dresses to share with you. I like to sew and knit for dolls and Astro-Jen is a fellow enthusiast. She has different dolls than I do, though, so I picked up these two at the thrift store to check the fit of things. One is an EverAfterHigh doll – Briar Rose – and one is a Monster High doll – Clawdeen. They were both naked with tangled hair when they came home with me, but otherwise in good shape. I cleaned them up and untangled their hair, then bought them some shoes online. They’ve been sitting naked (except for their shoes) on my bookshelf for a while, and when I found this pattern, I knew it was time to do something about that.
I don’t know much about the body molds for these dolls, but many patterns suggest that they are the same. MIne aren’t. My MH doll is longer and thinner. The issue may be year of manufacturer: like all Mattel dolls, these have a copyright date on their back waists for the body mold. The EAH doll is 2012 and the MH doll is 2009.
And here’s a better look at those new dresses:
The pattern I used is Yet Another Monster High Dress by Samira Jessica. It’s a free download at Ravelry (that’s a Ravelry link) and an irresistibly cute pattern as well as an easy knit. The first one (turquoise) is knit of Koigu KPPPM without a contrast colour. I used Sugar Bush Drizzle for the underskirt, and just picked up the stitches at the waist to knit it in. Drizzle is a lot like KSH – it has the same content but I think the colours are cleaner. I like the muted and sometimes smoky colours of KSH for myself but for dolls, the bolder hues work well. I added a line of eyelets before the hem for a ribbon, then KFB again to create a ruffle at the hem. Because of the fullness of the underskirt, I had to undo the garter stitch hem of the main dress and add a similar ruffle to that hem.
The purple one is knit of Shibui Knits Sock with contrast in Lichen and Lace 80/20 sock. For this one, I worked back and forth at the neck until the arms were cast off, leaving a back slit, then joined in the round and continued. I knit the body a little longer than the first one, added two rows of contrast garter stitch at the hem and ruffled the hem, too. Because this dress is a bit longer, I didn’t knit an underskirt. I added a button at the back neck, which is a bit big but exactly the right colour, and made a loop to close it.
Now they can sit on my shelf in their dresses and boots.