A Knit Messenger Bag for Barbie

This pattern is from the website of free knitting patterns for Barbie called Sticka till Barbie that I mentioned before. Here’s the designer page on Ravelry.

This purse is A-1 (the first pattern under Accessories/Accessoarer) which is orange on the pattern. It’s a clever little pattern, mostly knit in stockinette with the bag seams in reverse stockinette and the flap in garter stitch. Instead of crocheting the shoulder strap as specified, I knit mine. I used sock yarn—the purple one is that Mad Tosh Twist Light that I used for the Timely Twin Set (still more left! LOL) and the red is some Diamond Yarn sock yarn. Here they are:

messsenger bags knit for Barbie by Deborah Cooke

Size-wise, it’s more of a messenger bag than a purse, but I like the results a lot. The purple one is for my EverAfter Briar Rose doll, so it got a rose button for a clasp.

A Question of Fit

I often have fitting adventures when I sew for myself, but I never expected to have so many fitting challenges for Barbie. Among my recent fails has been this top for Barbie. It’s a cute pattern and very cleverly designed, but it was my first big lesson about fit for my 1/6 scale friend.

This is another free pattern from the Sticka til Barbie website: a sleeveless top with some great bias shaping detail. It’s pattern 174 (that’s a Ravelry link) which also includes a trumpet skirt.

Knit Top 174 from Sticka til Barbie website, knit by Deborah Cooke

This little top is knit flat and seamed up the centre back. I knit the first one (reddish) in MadTosh Merino Light and it was very snug on my vintage Barbie. VERY snug. It was tough to get on her at all. Hmm. What was wrong? I used up one stitch for the seam, but that didn’t seem excessive.

My friend Terri is a tailor and we talk about fit a lot. One of the things she considers when fitting women is shape, and the location of curves. She talks about drawing an imaginary line down center front and another down center back, then one down each side seam. This divides the bodice into four quadrants—but they probably aren’t the same size. One woman with a 40″ bust could be buxom with a narrow back, so maybe each front “quadrant” is 13″ wide and each back one is only 7″ wide. Another could have a broad back while yet another could be asymmetical. Knowing where your curves are means that you can adapt the pattern to fit. So, this little top isn’t taking that into account at all. Vintage Barbie is very buxom, yet this top divides into four equal quarters. It has no back or front. Of course, it will be snug for Barbie.

With this in mind, I knit a second (green) top in Malabrigo Sock, joining it to knit in the round – which gave me one more stitch because there wasn’t a seam – and added two stitches to the front, one on each side. This one is still snug – in fact, it’s not a lot bigger than the first one because the Malabrigo Sock is a thinner yarn. Hmm.

I switched to larger needles for the next one and a thicker sock yarn. This is the bright red one. I also added one repeat to the length. It came out bigger, longer and thicker. It’s a better fit for vintage Barbie. I’m not so fond of how thick it is, though.

The curious thing is that in the pattern picture, the top looks loose in the bust. What’s different? The doll modelling the top is not a vintage Barbie.

McCalls 7550

Similarly, I had issues with the sundress from McCalls 7550 being too snug in the bust for my vintage Barbie. After writing that blog post, I made the suit (shown in shades of taupe on the pattern envelope) in some scraps of silk dupioni. The jacket was snug but fit all right as long as she had nothing underneath. (Not perhaps the best look for semi-formal wear.) The dress was so tight that it was ridiculous, and the jacket wouldn’t go over it at all. That one went into the trash.

Once again, the doll modelling the clothes is not a vintage Barbie and that’s the key.

There is a difference in measurements between vintage Barbie and newer Barbie, as shown on this free download of slopers for Barbie. (This blog post includes instructions on drafting patterns from the sloper. Look in the sidebar of the website for Downloads, then you want BarbieBasicPatternSet.pdf) There are two styles accommodated here: vintage Barbie and what she refers to as the newer Barbie body style from the early 2000’s.

There are, though, a lot more variations than that. I have a number of Barbies, some having been my dolls and some from the thrift store, and when I line five of them up, it’s easy to see the changes in body style and dimensions. Have a look at them naked:

Barbie body styles, photographed by Deborah Cooke

From the left – vintage repro Barbie, Silkstone Barbie, Twist-and-Turn Barbie, Bellybutton Barbie and Model Muse Barbie. The bust size changes between these three body types, as does the height – and the dimensions of the foot. It looks like the curves of the original Barbie were made less dramatic, beginning with the Bellybutton Barbie – vintage and TNT are very similar in shape, but Bellybutton has a smaller and higher bust as well as a thicker waist. Then the vintage shape made a comeback with Silkstone and other collectibles, with some changes. Silkstone is slimmer and taller than vintage, for example, with a higher bust. Model Muse is another thing altogether, the slimmest of all of these and also taller than vintage, TNT and Bellybutton. This doesn’t consider other 11.5″ dolls from other manufacturers and their dimensions or the current body styles. Given the scale, it’s pretty easy to see that something that fits one of these dolls might not fit the others. Model Muse can wear the two tops at the top of this post – in fact, they’re a bit baggy on her.

Of the slopers posted in the link above, “old style” will fit vintage and TNT. “New Style” will fit Bellybutton. That body type was used on a lot of dolls, including My Scene dolls (which have bigger heads), and can be easily identified by the cross-hatch “panties” – and the bellybutton, of course. Silkstone can wear “old style” but it will be loose around the middle. I haven’t figured out Model Muse with her tilty hips.

This means that Barbie is that most annoying of dressmaking clients—the woman whose measurements change over time. (Even her height and shoe size changes.) Just as with any other dressmaking, I need to know my client’s measurements to get the best fit.

We’ll talk more about that next time.

Knit Purses for Barbie

Sometimes you need a quick project and some instant crafty gratification. Here’s a recent favorite of mine – some knitted purses for Barbie.

The patterns are from a website of free knitting patterns for Barbie called Sticka till Barbie. It’s in Sweden and is amazing. (The pictures are teeny, but it’s worth a good look.) There really are more than a thousand patterns for Barbie and about 300 for Bratz dolls—including 8 years of ABBA costumes. (Click ABBA on the menu bar to see, then they’re sorted by year.) There are project pictures on Ravelry and since they’re larger, it’s easier to see details there – here’s the designer page on Ravelry.

purses for Barbie knit by Deborah Cooke

On the right is A-7 – a circular drawstring bag. I knit mine iwith some red MadTosh and black Malabrigo Sock, adding a bit of detail above the colour change. I put a little cardboard square in the bottom. The drawstring is a manufactured cord instead of a knitted one.

On the left is A-5 on the same page – a striped tote bag. This one’s knit sideways – you do the stripes first, join the strip into a ring, then pick up stitches for the handles. Someone on Ravelry suggested a provisional cast-on and 3-needle bind off, which seemed like a good idea to me. I grafted the loop together, though.

These are quick knits and a bit addictive, plus a great way to use up scraps of sock yarn. I know I’ll be knitting more!

If you knit for dolls, this site is a great resource.

The Faceless Bunny

Debbie Bliss: Noro Collection

I needed a quick project in April and made this bunny, then forgot to show it to you. The pattern is by Debbie Bliss – it’s included in the book Debbie Bliss: Noro Collection (that’s a Ravelry link). There’s also a bear, and both are knit in Noro Kureyon. (I bought this book to knit the sweater on the cover but have never done it. Hmm.)

You can also download the bunny pattern free (right now) at the Knitting Fever website, right here.

I knit mine in some discontinued yarn from my stash: it’s Louet Bonnie (that’s another Ravelry link), a bulky weight yarn with a wool base then a silk thread that is gradient-dyed. Here he is:

Stuffed bunny designed by Debbie Bliss and knit by Deborah Cooke in Louet Bonnie

Of course, you could knit the bunny in any weight yarn, just adjusting your needle size to make a nice tightly-knit fabric to keep the stuffing inside. I knit mine on 3.25 mm needles which is what the pattern specifies.

I had the idea that I’d knit a bunny friend and seam the second with the garter stitch side out, but that hasn’t happened and it might not. Like most toys, it’s a bit fiddly with lots of pieces to stuff and sew together, but the result is cuter than I expected.

Juniper Moose

Juniper Moose, a free pattern at Knitpicks

Juniper Moose is an adorable stuffed moose, and the pattern is free right now from Knitpicks. (Here’s the link.) That’s the official image from Knitpicks at right. Isn’t the moose cute? It was designed by Rachel Borello Carroll – here’s her Ravelry page showing all her patterns and here’s her website. There are a lot of cute stuffies: I’m looking at her hedgehog pattern as well.

Because everyone needs a stuffed moose for the holidays, I dug into my stash and cast on. I had some Sirdar Tweedie Chunky in brown and beige, which apparently had been waiting for this project. The yarn is discontinued, so here’s a Ravelry link. A tweed moose seemed ideal to me.

I did drop down a needle size, and worked with 5mm needles. That seemed a better match with the yarn, and I prefer to have a denser fabric with toys so the white stuffing doesn’t show through. (If I knit it again, I might go down to 4mm, because the stuffing does show through a bit, esp in the rivers between my DPNs.) I also decided to use buttons for eyes, instead of the safety eyes recommended, as no children will be playing with my moose.

The pattern is really well written and quite easy. Of course, there are many pieces – that’s the way of it with knitted toys. Here are all the moose pieces:

Juniper Moose knit in Sirdar Tweedie Chunky by Deborah Cooke, unassembled

I decided against the wreath and just gave him a ribbon. Here’s my assembled moose:

Juniper Moose knit by Deborah Cooke

I made one modification: Juniper Moose has no tail, but of course, real moose do. I joined the main colour yarn where the base of his tail should be and worked an inch of I-cord before binding off.

I think he needs a pompom nose, but I don’t have one. We’ve entered lockdown so it will have to wait. He is cute, though, don’t you think?

Cupido Cowl in Colourspun

When I finish a knitting project, I often think about using up all the leftover yarn, rather than returning it to the stash. I finished my Wilhelmina reindeer cardigan (that link goes to my blog post) in Rowan Colourspun (that link goes to Ravelry, since the yarn is discontinued) this fall and have quite a few balls of that yarn leftover. I also have some left from the mister’s Skye vest (blog post link), even after making my own Comfort Fade cardigan (blog post link). I’ve made a pullover out of Colourspun too and, while I don’t like the fit of the body so much, I love its big squishy collar. That made me think of cowls.

The Cupido Cowl pattern is free on Ravelry and that’s a Ravelry link. There are several thousand projects, so there’s a lot of eye candy to explore. (Four of them were worked in Colourspun, too.) Although it calls for aran weight yarn, it’s the kind of pattern that can be worked in any yarn. I liked the appearance of the pattern stitch, and the directions by another Raveller for making it in two colours (see my Ravelry project page for the link) so cast on. Because Rowan Colourspun is a DK weight yarn, my cowl will be smaller in diameter and I’ll have to work more repeats to get the depth of the cowl shown. How much shorter? How many more rows? There was only one way to find out.

I cast on with the red (Appletreewick) and used the green (Pen Y Ghent) as the contrast colour. I used 4.5mm needles as that’s one size up from the recommended size for this yarn. I figured that would make a more supple fabric. Colourspun has a slow variegation in each colourway and both of these colourways include similar accent colours. I knew this would blur the distinction between them. Here’s the glorious tweedy-looking result:

Cupido Cowl knit in Rowan Colourspun by Deborah Cooke

The colours do look brighter in the pictures than they appear in real life.

And here’s the finished cowl:

Cupido Cowl knit in Rowan Colourspun by Deborah Cooke

In the end, I worked 9 repeats of the pattern stitch instead of 8 and used about 60g of the red (just over one ball) and 50g of the green (1 ball). I could have made it deeper, but I ran out of Pen Y Ghent. The finished cowl is 7.5″ deep and 42″ around.

Sorbetto by Colette

Sorbetto by Colette

The pattern for Sorbetto, a sleeveless top, is a free download from Seamwork. You can get yours here.

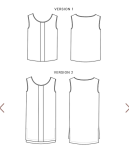
There are three views: a sleeveless top, a longer sleeveless top and a top with short sleeves:Sorbetto by Colette

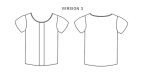
I thought it would be great to have a basic blouse pattern and like the simplicity of this one.

First I made version 1 in a woven rayon print, and here’s the result:Sorbetto by Colette sewn by Deborah Cooke

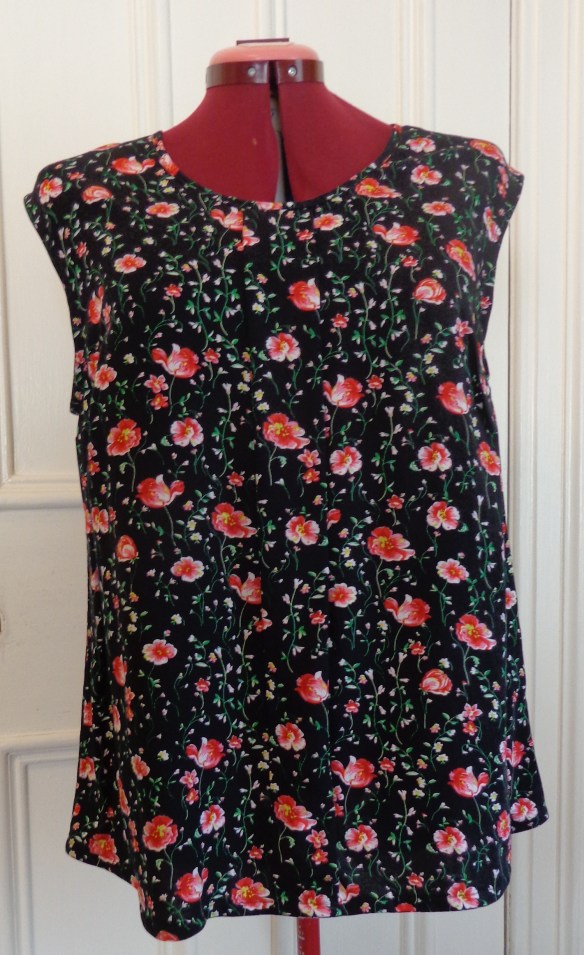
This top was easy to sew and fairly quick to make. It fits me reasonably well. (The bust dart is in the right place – kind of a surprise since I’ve been lowering bust darts on everything – so if your girls are perky, you might want to double-check its location before you cut.) You can see that the front pleat kind of disappears when you use a print fabric.

I don’t love the top, though, and had to think about that. Why does it feel frumpy?

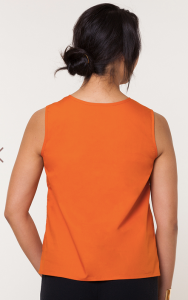
I went back and looked at the pattern pictures from the Colette website. The orange top actually looks a bit snug at the underarm on the model and the top definitely is more narrow in the shoulders than mine, especially across the back. I bound the seams instead of turning under the seam allowance, but that only adds 1/4″. The shoulders on my blouse are too wide, even for Nell.

Sorbetto by Colette Sorbetto by Colette

Cutting for my bust size and ending up with a top that’s too wide in the shoulders is a familiar issue for me. It isn’t a huge deal with a sleeveless blouse, but means I don’t want to make the version with sleeves until I work that out. The top also catches me a bit across the hips when I sit down, which means it needs to be either wider at the hem or shorter overall.

One issue at a time. I decided to try a version with a shirt tail hem. I chose another woven rayon print from my stash. Both of these rayon prints came from Fabricland, and I think they were both included in a huge feature of rayon prints at $5/m last year. I love woven rayon prints and bought a bunch of yardage then. I’ve cut a dress out of each of these prints, so cut these blouses from the remnants, using the rayon as muslin. This rayon, though, is much softer than the navy one, which is more crisp, and wow, what a difference that made. There is nothing that can make you regret a million miles of bias binding like a soft, floaty fabric! After much gnashing of teeth, here’s the result:Sorbetto by Colette sewn by Deborah Cooke

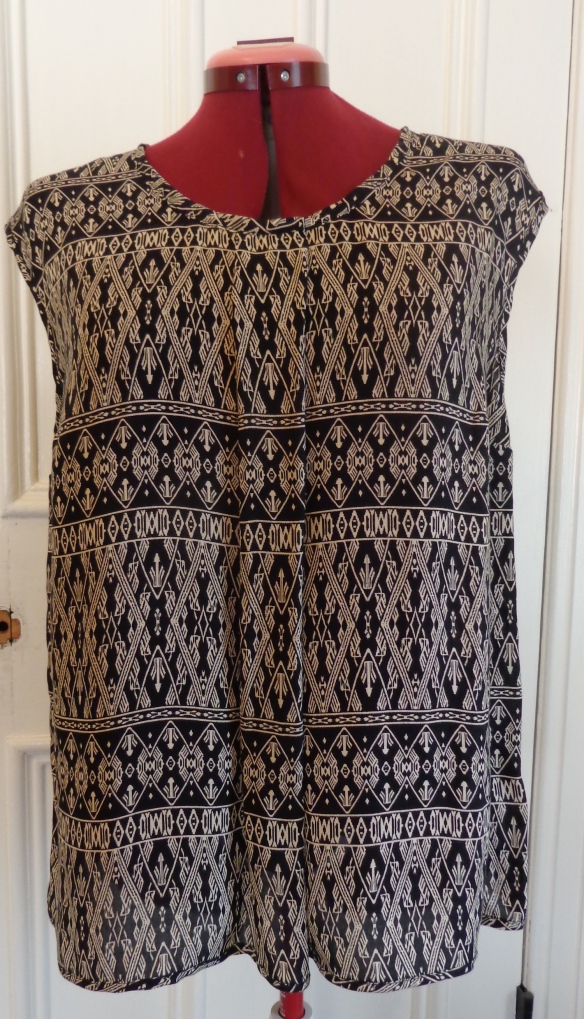
It turns out that I don’t love the shirt tail hem, plus I had some issues getting it right at the side seams – because I’d felled the seams. One side is great; the other, not so much. (grrrr.) There is a tech article in this month’s Threads magazine about that very challenge, so I’ll have a look and learn.

Oops a one way design
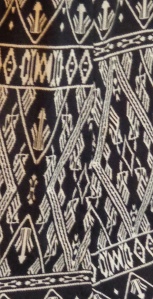
This is a top of many errors – I was sure the print wasn’t a one-way design but I was only looking at the wider stripes. Look how the narrow ones between those wider ones alternate. Oops. It IS a one-way design, but I had to invert the back to cut it out of the remnant.

I also inverted the front pleat by mistake. (No pix. I forgot.) And I originally sewed the front pleat as a tuck at the neck and didn’t sew it down. This made a floaty top, but also made me look a LOT more buxom than I am by creating a deep shadow at center-front between the girls. (You could do that on purpose if you wanted to look more curvy.)

That look was a non-starter for me. I took the neck apart, fixed the direction of the pleat and sewed it down for just 8″, leaving the lower part of it open. This was mostly because I didn’t want to re-do the hem, but actually, it works well with the fabric this way.

In comparing the two test tops, I much prefer the crisper rayon. The shoulders are still too wide, but I didn’t want to just trim them back because the neckline is a bit wide, too. (That explains the frump factor.) Instead, I pinned in the center back seam, as if I’d trimmed off 3/4″ and tried it on (to make sure it would go over my head). It did and fits much better through the neck. I don’t want to redo that bias binding, but that gave me a modification for future tops.

Sorbetto by Colette sewn by Deborah Cooke in Kaffe Fassett Exotic StripeI went back to my pattern and modified it. I cut an inch off the hem, cut 3/4″ off the center back of the back pattern piece, and re-angled the side seams so that they’re 3/8″ wider at the hem. The additions to the side seams make up the 1.5″ taken out of the center-back so the hem is the same finished width.

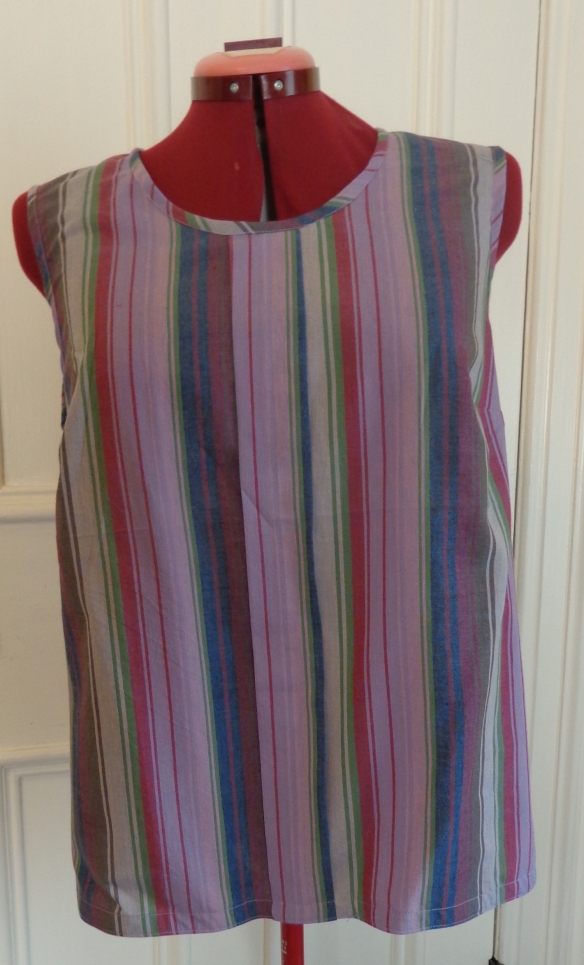
Then I cut another Sorbetto in Kaffe Fassett cotton in one of his yarn-dyed stripe fabrics. I hemmed this one with self-bias because I thought it needed some structure at the hem to hang properly. It also would be better in a crisper fabric than the Exotic Stripe, but here it is!

I’m pleased with this version. 🙂 And now, I have a pattern to make LOTS of quick summer tops in a hurry. Ha.

BIPOC Designers

If you’re thinking of supporting some black, indigenous and/or artists of color in your knitting endeavors, here’s a wonderful resource. This list on Ravelry includes free patterns and patterns enrolled in Ravelry’s in-store sales program. There’s over 20 pages of serious eye candy to tempt you to grab a pattern and get out your needles.

BIPOC Designers Bundle by ChaseClark

Iced in Noro Kochoran

I haven’t shown you any knitting lately because I’ve been working on this beast. It’s heavy wool on big needles but still a lot of knitting. Here’s the sweater:Iced by Carol Feller knit in Noro Kochoran by Deborah Cooke

The pattern is Iced, which is a free pattern from Knitty and a top-down cardigan. Here’s the page on Knitty where you can print the pattern and here’s the Ravelry page.

The yarn I used is Noro Kochoran, a discontinued bulky yarn that’s a blend of wool, angora and silk. I’ve had it in my stash for quite a while. (That’s the Ravelry page for the yarn, since it’s not on the distributor’s site anymore.) My colourway is #75. Here’s a shade card that I found online:

Noro Kochoran shade card#
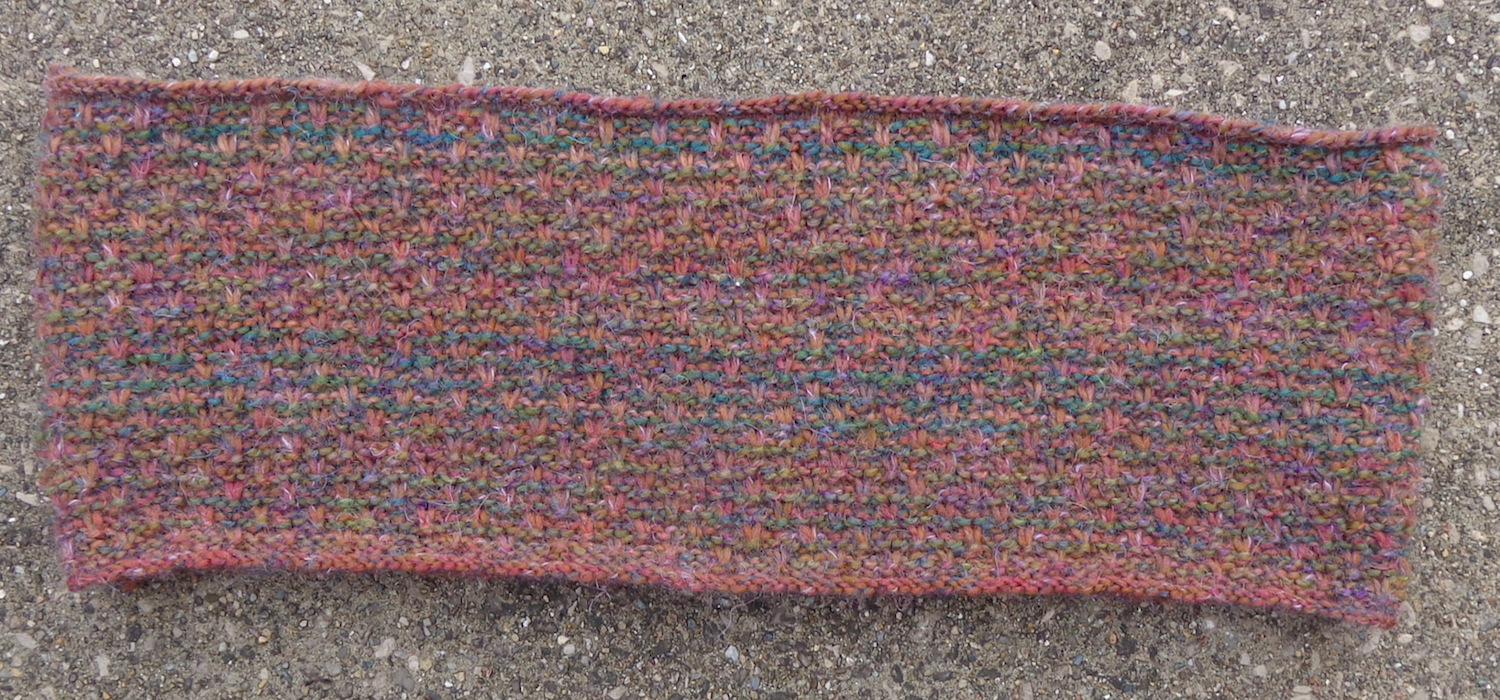
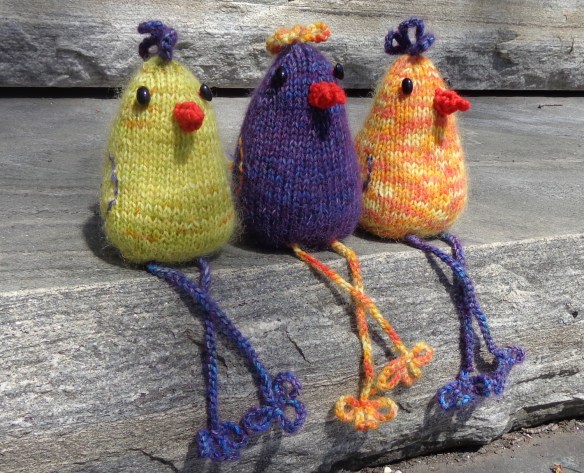
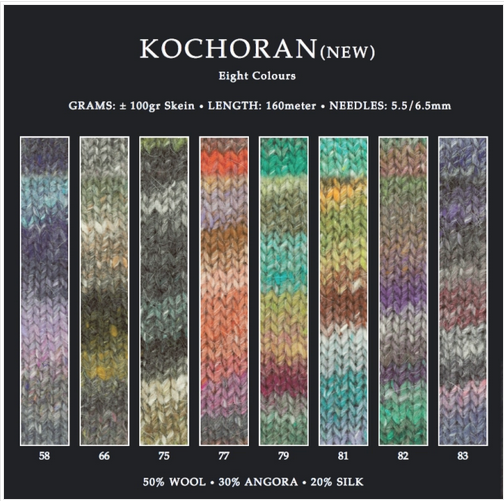
75 is third from the left. I also have #83 which is on the far right. It’s a really fuzzy yarn and was a bit of a splurge at the time. In the skein, it didn’t look so stripey, but (of course) it is. It shed a bit while I was knitting, but I hope it’s done with that.

I’ve been looking for a pattern for this yarn for quite a while, and was inspired by a Ravelry project of this sweater in this yarn. That knitter said that pattern and yarn were a perfect match, so away I went. On the needles, the tension looked a bit loose – it matched gauge for the pattern, but seemed too loose for the yarn. I knit a swatch and washed it and was much happier with it – the yarn fulled nicely when it was washed.

I did drop a needle size for the collar after knitting it on the specified needles and thinking it was too loose. I’m much happier with it now – even though it was three nights’ of knitting unraveled to redo it. I later unraveled the rows of garter stitch at the hem and reknit them on the smaller needles to match. I didn’t have 7mm needles small enough to do the same at the cuffs, so I knit their garter stitch cuffs on 6mm needles. I can tell the difference but I doubt anyone else will. Here’s the sweater with the fronts overlapped, which is how it would actually be worn. (I was just showing off my matchy-matchy! LOL)Iced by Carol Feller knit in Noro Kochoran by Deborah Cooke

The result is a very snuggly cardigan. It has that “bathrobe” look that shawl-collared cardigans so often have for me (maybe that’s because of the stripes) but I like it anyway. I haven’t put buttons on it yet and probably won’t.

Here’s my Ravelry project page.

Sonny vest by Sarah Hatton knitted in Colourscape Chunky by Deborah Cooke
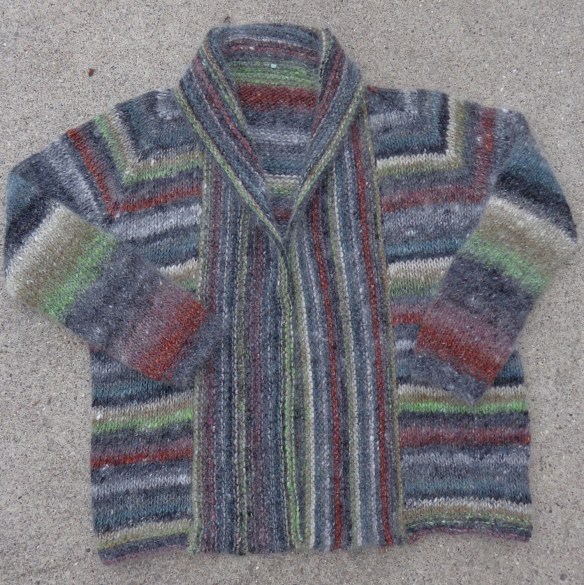
I used about 6 skeins of the Kochoran so there are 4 left. I realized that the yarn has exactly the same weight/yardage as Rowan Colourscape Chunky – woo hoo! – which gives me another pattern stash. I’ve made this vest for Mr. Math of the Rowan yarn – it’s called Sonny and was designed by Sarah Hatton – which took 490 yards, so I have enough of the Kochoran, maybe even to be matchy. (Fingers crossed.) I’ve now cast on this vest in the Kochoran.

Here’s my Ravelry project page for the vest at right. I think it’s going to look really good in this yarn.

Meet Bart

Earlier this month, I wanted to knit something cute to cheer up my sister-in-law, who is in isolation. (We took her a box of goodies and did a contact-less delivery, waving to each other through the glass.) I remembered this cute Rowan pattern, which I found again on Ravelry: Esther, Ernie and Enid Easter Chickens.

I chose some Sugar Bush Itty Bitty from my stash of leftovers (the colourway is Sailor’s Sky Delight) and cast on. I made socks of this yarn a while back. The leftovers seemed like a good choice for a cheerful chick.Basic socks knit by Deborah Cooke in Sugar Bush Itty Bitty

The chick is named Bart because Mr. Math said it looked like a bartlet pear when it was first stuffed. I used lentils to weight the base and some other yarns from my leftover sock yarn stash for the details.

Here’s Bart.Bart the chicken, knit by Deborah Cooke Bart the chicken, knit by Deborah Cooke

Of course, Bart was leaving 😦 so I cast on another one for Mr. Math. I used the same Itty Bitty, but this time I knit it with a strand of Kidsilk Haze in Essence, which is a pale yellow.I thought a fuzzy chick would be a good thing.

I also made two changes to the pattern, both in the base, for Bart II. First, I didn’t cast on the stitches for the base as instructed: I picked them up from the middle of the main piece, saving myself a bit of seaming. The base is a triangle, but shaped with K2tog on both the left and right side. Here’s Bart’s base to show you:

Bart knit by Deborah Cooke

The lack of symmetry irked me. For Bart II, I did the first decrease as an SSK. Here’s the base of Bart II to show you the difference.Bart 2 base with SSK at right edge and K2tog at left edge, knit by Deborah Cooke

You can see how much fuzzier the chick ended up with the KSH, too.

I had to make three. They’re Bart’s Band and here they are:

Bart's Band knit by Deborah Cooke Bart's Band knit by Deborah CookeWhat do you think?