I had an email earlier this week from my niece, who wanted to know how to knit socks. For some reason, she thought I might know. (Ha.) Since she lives far away, I can’t sit down and show her. I need to explain how to do it. I knit socks so often that I don’t pay a lot of attention to what I do (and don’t use a pattern anymore) so I got out my needles, cast on, and wrote down what I was doing as I went. The result is here, for my niece and anyone else who wants to knit socks.
Here we go.
Start with the yarn.
Picking the yarn for a project is probably the most fun part. So many possibilities! For socks, you’ll want a sock yarn – which means that the fiber is mixed with nylon so the socks wear better. Also, new knitters tend to have uneven tension, so wool is a good choice – it’s the most forgiving. (Cotton is merciless because it has no stretch. If you want cotton socks, knit them as your second pair – or maybe your tenth!) So, a yarn that is wool blended with 10 or 15% nylon is a great choice.
The yarn you choose will either come in 50g balls or 100g balls. The 100g balls will usually have 400m or more, which is perfect for two socks, pretty much independent of what choices you make. With 50g balls, two balls might not be enough. I have some Lorna’s Laces Shepherd Sock here, for example, which has 215m in 50g. Lots for a sock. I’m casting on with Kroy Socks, though, which is a four ply yarn. It’s a little thicker so there’s only 152m in 50g. That’s a bit short for a sock. I buy a third ball with this yarn, just to be sure. Once you’ve knit a few pairs of socks and have ends leftover, you can always knit the toes in a contrasting color.
 Pick your needles.
You’ll need a set of double-pointed needles (DPNs) or a pair of short circular needles in your needle size of choice. It’ll be between 2.0mm and 2.5mm, depending upon the thickness of your yarn and your own tension. Tension is personal. You might knit tightly and need to use a bigger needle to get a nice fabric. You might knit loosely and need to use a smaller needle to have a good result. The knitted fabric shouldn’t be so tightly knitted that it’s stiff, and it shouldn’t let too much light get through, either. There’s a balance to be struck. I’m going to cast on with my tried and true 2.25mm DPNs. (Thrift shops, btw, are great places to get needles cheap.)
Cast on.
There are two main ways to knit socks: “cuff-down” means that you start at the cuff and knit down to the toe; “toe-up” is the other way around. Let’s knit cuff-down. You want a stretchy cast-on so it’s easy to pull on the finished sock. I use the long tail cast-on. There are a ton of online videos demonstrating this, if you haven’t learned it already.
For socks, I cast on 72 stitches. Some people use 64, but I hate tight socks. Hate. Hate. Hate. (This is one of those choices that will affect how much yarn you use.) Distribute your stitches across 3 of the DPN’s (Yup, 24 on each one.) and join without twisting. If you’re using short circulars, put half of the stitches on each needle and join without twisting.
 Fussy Knitter Tip – If you’re knitting with self-striping yarn that comes in 50g balls and you have the matchy-matchy disease, be That Customer and go through the selection until you find two balls that start at the same place in the stripe sequence. Commercial yarns (like Kroy Socks) have a striping sequence that repeats at precise intervals. If the ball starts in the same place, you cast on each sock from the new ball, you’ll get socks that match. This can be a bit of a mind-melting exercise as mills wind self-striping yarn in either direction of the color sequence. So, you can be looking for balls that start with B-C-D of an A-B-C-D-E sequence, and will come across ones that are D-E-A as well as those that are B-A-E. Remember that puzzle-solving is good for avoiding dementia. If you have the matchy-matchy disease badly, choose a point to make the cast-on knot that’s easily repeatable – maybe the point where one color changes to the next.
Ribbing.
You can rib a little or a lot. I hate socks that fall down almost as much as tight socks, and ribbed socks stay up. I rib all the way to the heel, then on the top of the foot to the toe. (Ribbing uses more yarn than stockinette stitch, so this is one of those choices.) You can rib 2/2 (K2, P2) or 4/2 (K4, P2) or 6/2 or any repeat that divides evenly into 72. You can rib for an inch or two inches, then change to stockinette. You can rib 2/2 for two inches then switch to 6/2 to the heel. This is my favorite combination because ribbing goes slowly. I knit the leg 6″ for my socks, and 8″ for Mr. Math’s socks. You can vary this, but as soon as the sock goes over the calf muscle (knee socks) you need to make some adjustments. We’ll talk about knee socks next week.
Fussy Knitter Tip – When you knit on multiple needles, it’s easy to get a gap in your knitting where you change from one needle to the next. This is called a “ladder” because it looks like one. To avoid ladders, try three tugs. When you change needles, give your working yarn a little tug. After you knit the first stitch on the next needle, give your working yarn a little tug. Third time’s the charm – after you knit the second stitch on the needle, give your working yarn another tug. Presto. No ladders. This tactic also works if you get a loose knit stitch right before you switch to purl in your ribbing. Give that knit stitch a tug, then the purl one, and no more loose stitch.
Turning the Heel.
This is the trickiest bit, and it’s not that tricky. (You can do it.) First, you’re going to knit a heel flap that goes down the back of your foot. Then you’ll do some decreases to turn the work so you’re knitting the bit that goes on the bottom of your foot. Then you’ll pick up stitches on each side of the heel flap so that you’re knitting in a circle again. You’ll decrease down to your original stitch count in gussets. After that, it’s straight on to the toe.
 If you have a sock yarn that includes a spool of matching nylon thread (Lang Jawoll does this. The spool is buried in the middle of the 100g ball.) use it for this part. Just knit with it along with the sock yarn for the heel flap and the turning of the heel. It’ll help the socks to wear better.
1. The Heel Flap
A heel flap should be a little less than half the width of the sock. Half of 72 is 36, so we’ll make ours 34 stitches. After you’ve knit the leg as long as you want it to be, arrange your stitches so that there are 34 on the first needle. Slip 1, knit 1 across these 34 stitches. Turn. Slip 1, purl to end. Turn. Repeat this sequence, working only on these 34 stitches, until you have a heel flap that’s about two and a half inches deep.
 Fussy Knitter Tip: I like when ribbing lines up, no matter what I’m knitting. Since I’m knitting these socks in 6/2 rib, there are nine repetitions around the sock. I chose to have four knit bands descend into the heel. To make it symmetrical, I didn’t work the last two purl stitches in the last round of the sock leg. Instead, I moved them on to the next needle and worked them as the beginning of the heel flap. That gave me (8 x 4 +2) 34 stitches for my heel flap.
2. Turning the Heel
This is a sequence of decreases which turn your knitting so that you’re knitting along the bottom of the foot instead of down the back of the heel.
Slip 1, K to 2 stitches past the middle of the row, SSK, K1, turn. Count how many stitches are left unworked. Add three. This is your magic number.
Slip 1, P your magic number of stitches, P2tog, P1, turn.
You’re creating a little wedge in the middle of the row. For each right side row, K to the stitch you slipped in the previous row (it’s the one before the little gap), SSK and turn. For every wrong side row, P to the stitch you slipped in the previous row (right before the little gap), P2tog and turn. Do this until all the stitches at the base of the heel are part of the wedge. (On this sock, the turning of the heel coincided with a color change in the striping sequence, so the turn is dark pink. I wish I’d done that on purpose because it’s very cool, but it was just dumb luck.)
If you aren’t at the end of a right side row, knit across the stitches to get there.
Fussy Knitter Tip
– Needle management is fiddly at this bit. You might need to use a stitch holder or extra needle to get all the picking up done. If you’re using two circulars, keep the top of the sock on one needle, and put everything else on the other one. If you’re using a set of four DPN’s, keep the top of the sock on one needle, and divide the bottom between two other needles. If you have a set of five DPN’s, keep the top on one, each side of the heel flap on one, and the bottom on one.
3. Picking up Stitches
All those slipped stitches up the side of the heel flap are screaming for you to pick them up. (Just listen.) Use a spare needle and pick them up. Pick up an extra one at the top of the sock, before the live stitches you still have on your other needle. Knit up the side of the heel flap, knitting together the last two stitches (to avoid a hole.)
Fussy knitter tip – Twist those stitches along the sides of the heel flap when you knit them, to avoid holes.
I keep ribbing on the top of the foot, so I rib across the top of the foot. (Knit the knit stitches and purl those purl stitches.) On the other side of the heel flap, you’ll pick up the same number of stitches as on the first heel flap—including an extra one at the top—SSK, and knit down to the bottom of the heel. Your row starts and ends at the middle of the row on the bottom of the foot. You’ve got all your stitches on your needles again, the heel is turned, and we’re almost home free.
4. Decreasing from the Heel
You have lots of stitches for the heel but too many for the foot. You need to get back to 72 stitches again. This is simplest if the top of the sock is on one needle all by its lonesome. Work across the bottom and up the side until there are three stitches on your needle. K2tog, K1, then work across the top of the sock. On the other side of the sock, K 1, SSK, then knit to the end of the round. Knit one round. Repeat these two rows until you have 72 stitches again.
I had, for example, 28 stitches on each of my side needles. I needed to decrease down to 17 on each needle to get back to the 34 I started with for the flap. Now that the decreasing is done, I have little triangular gussets on each side of my sock, and 72 stitches in total.
Ha. Told you it was easy.
Knit the Foot
You’re going to knit the foot until the sock reaches the joint below your big toe. (The one at the end of the first metatarsal.) Then it’s time to decrease for the toe. Keep knitting in the round for at least three inches, then try on the sock. When the sock covers your foot up to that bone, it’s time to decrease.
Decrease for the Toe
You’ll probably need to redistribute your stitches. The toe decrease happens on the left and right sides of the foot. If you’re using four DPN’s be sure you have exactly half of your stitches (36) on the top needle and 18 on each of the bottom needles. Consider the beginning of your row to be in the middle on the bottom of the sock, between those two DPN’s. Knit until there are three stitches left on the first needle. K2tog, K1. On the second needle, K1, SSK, K until there are three stitches left, K2tog, K1. On the third needle, K1, SSK, K to end. You’ve just decreased four stitches. K one row. Repeat until there are sixteen stitches in total. Break your yarn, graft your toe stitches (Kitchener stitch is your friend) and you’re done!

Now you just need to make another one to match. 🙂


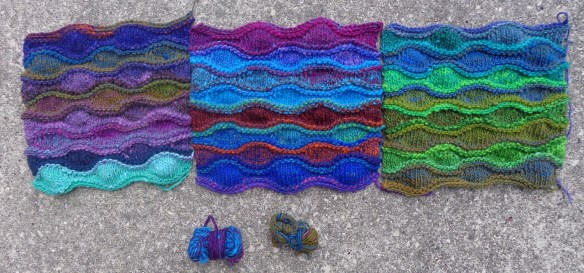
 The repeat on the colour was longer than the amount of yarn needed for one ball. I just knit the four, then matched them up the best I could.
 It’s interesting how the mitts matched more easily, even though this was the smaller size. The repeat on the gradation must be shorter in this colourway.
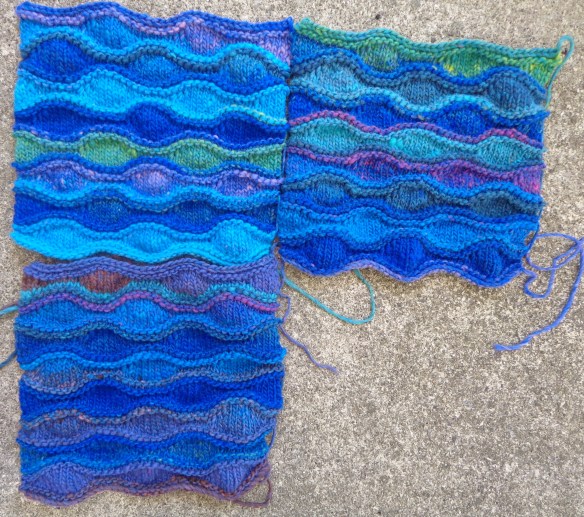
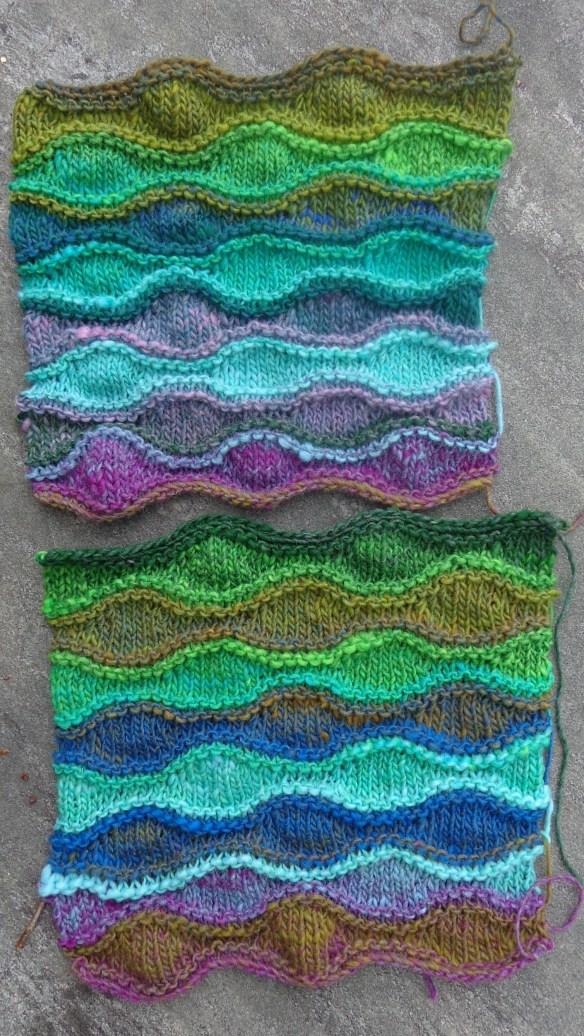
 This is the edging from the pattern. It’s a nice shell stitch, which fits perfectly with the waves.


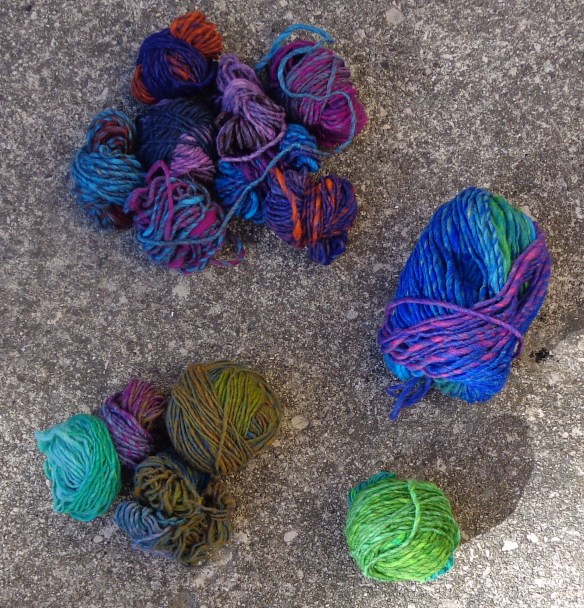
 I’m surprised to only have 13g of yarn left, but several of the colourways were spun thicker than the original one. I have 8 complete blocks of the first colourway I used (the one from my stash – 254), plus it’s in two of the leftover blocks, and there’s still a bit of leftover. I had 7 skeins. In contrast, I bought 7 skeins of the last colourway (327) which was spun much thicker. I got 7 squares out of that, plus half of one of the last three, and the other bit of leftover.
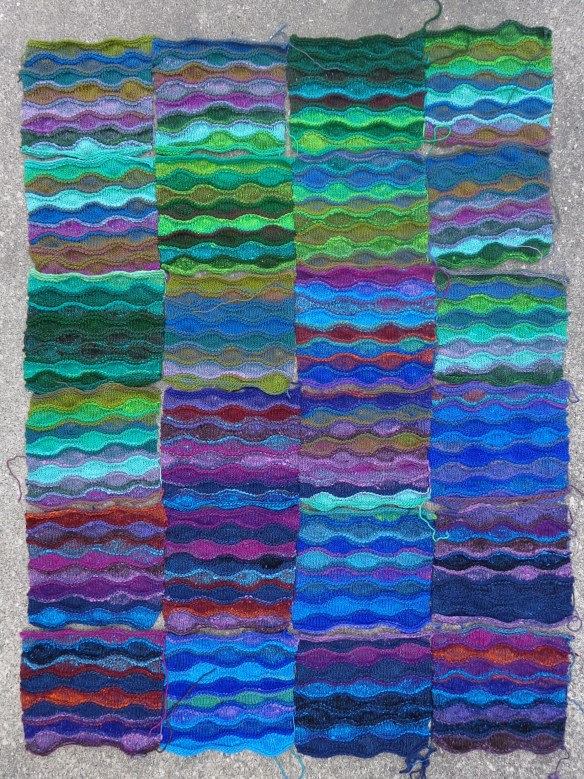 Now I have a lot of blocking and sewing to do.