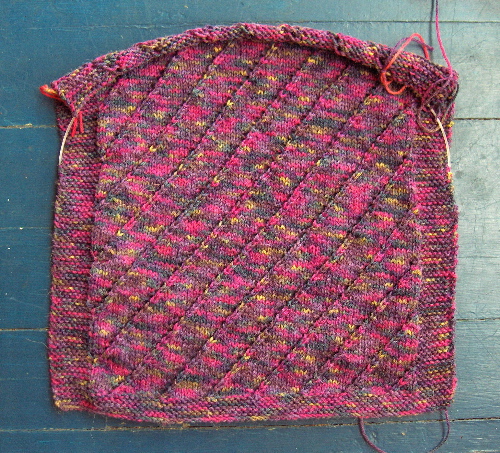
Ta DAAAAAAAA! Here’s one end of my Slippery Slope Scarf/Stole. (It’s a slippery slope because once you make one lace shawl, you’ll need to make another. And another. And – well, you get the picture.)
Technically, this is not lace but only lacey. Afficionados of lace knitting insist that true lace requires YO’s or patterning on every row. With this pattern, you do all the work on the right side then just purl back. You get a rest row, which means it’s not “true lace”. Now you know. It’s still pretty.
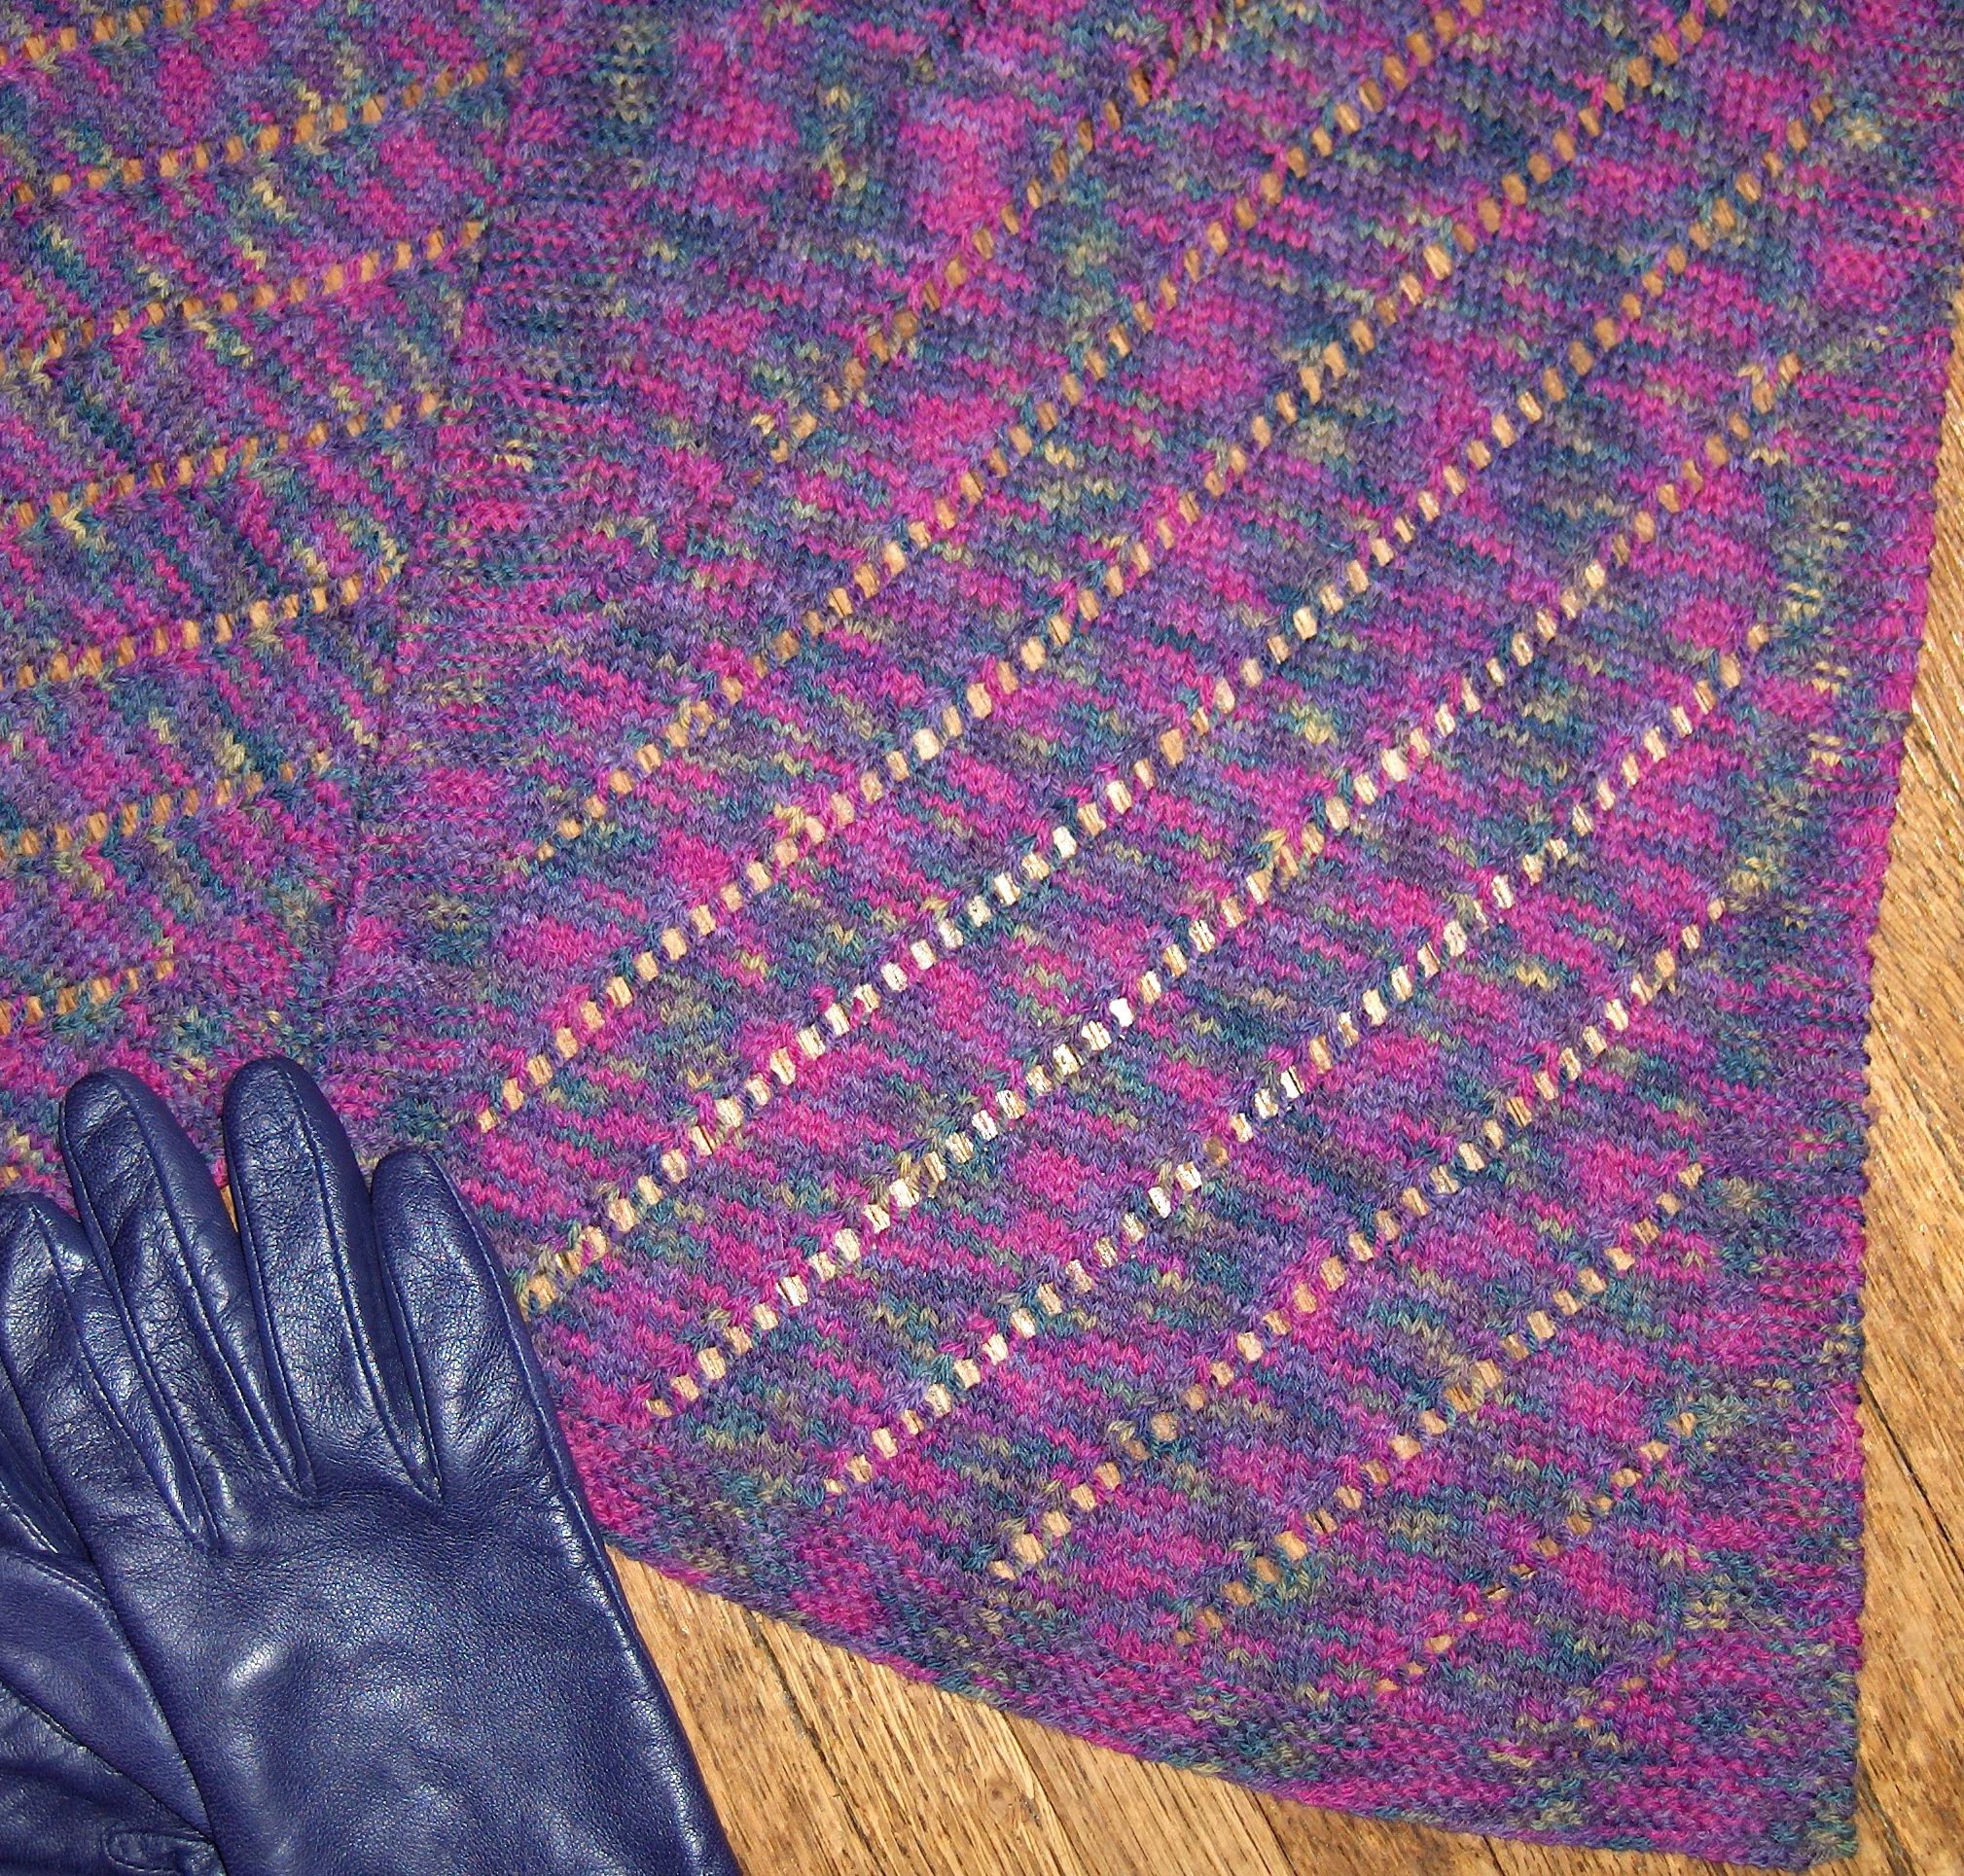
Because it’s not blocked – and may never be blocked – and because it was photographed on a dark surface, you can’t see the lace holes too well. Here’s another shot:

This easy lacey pattern is based upon the number eight:
• it has eight rows of garter stitch at either end.
• it has eight stitches that stay in garter stitch up either side.
• And the pattern in the middle is a repeat of 8 stitches. That means you can make it as wide or as narrow as you like without doing a whole lot of math.
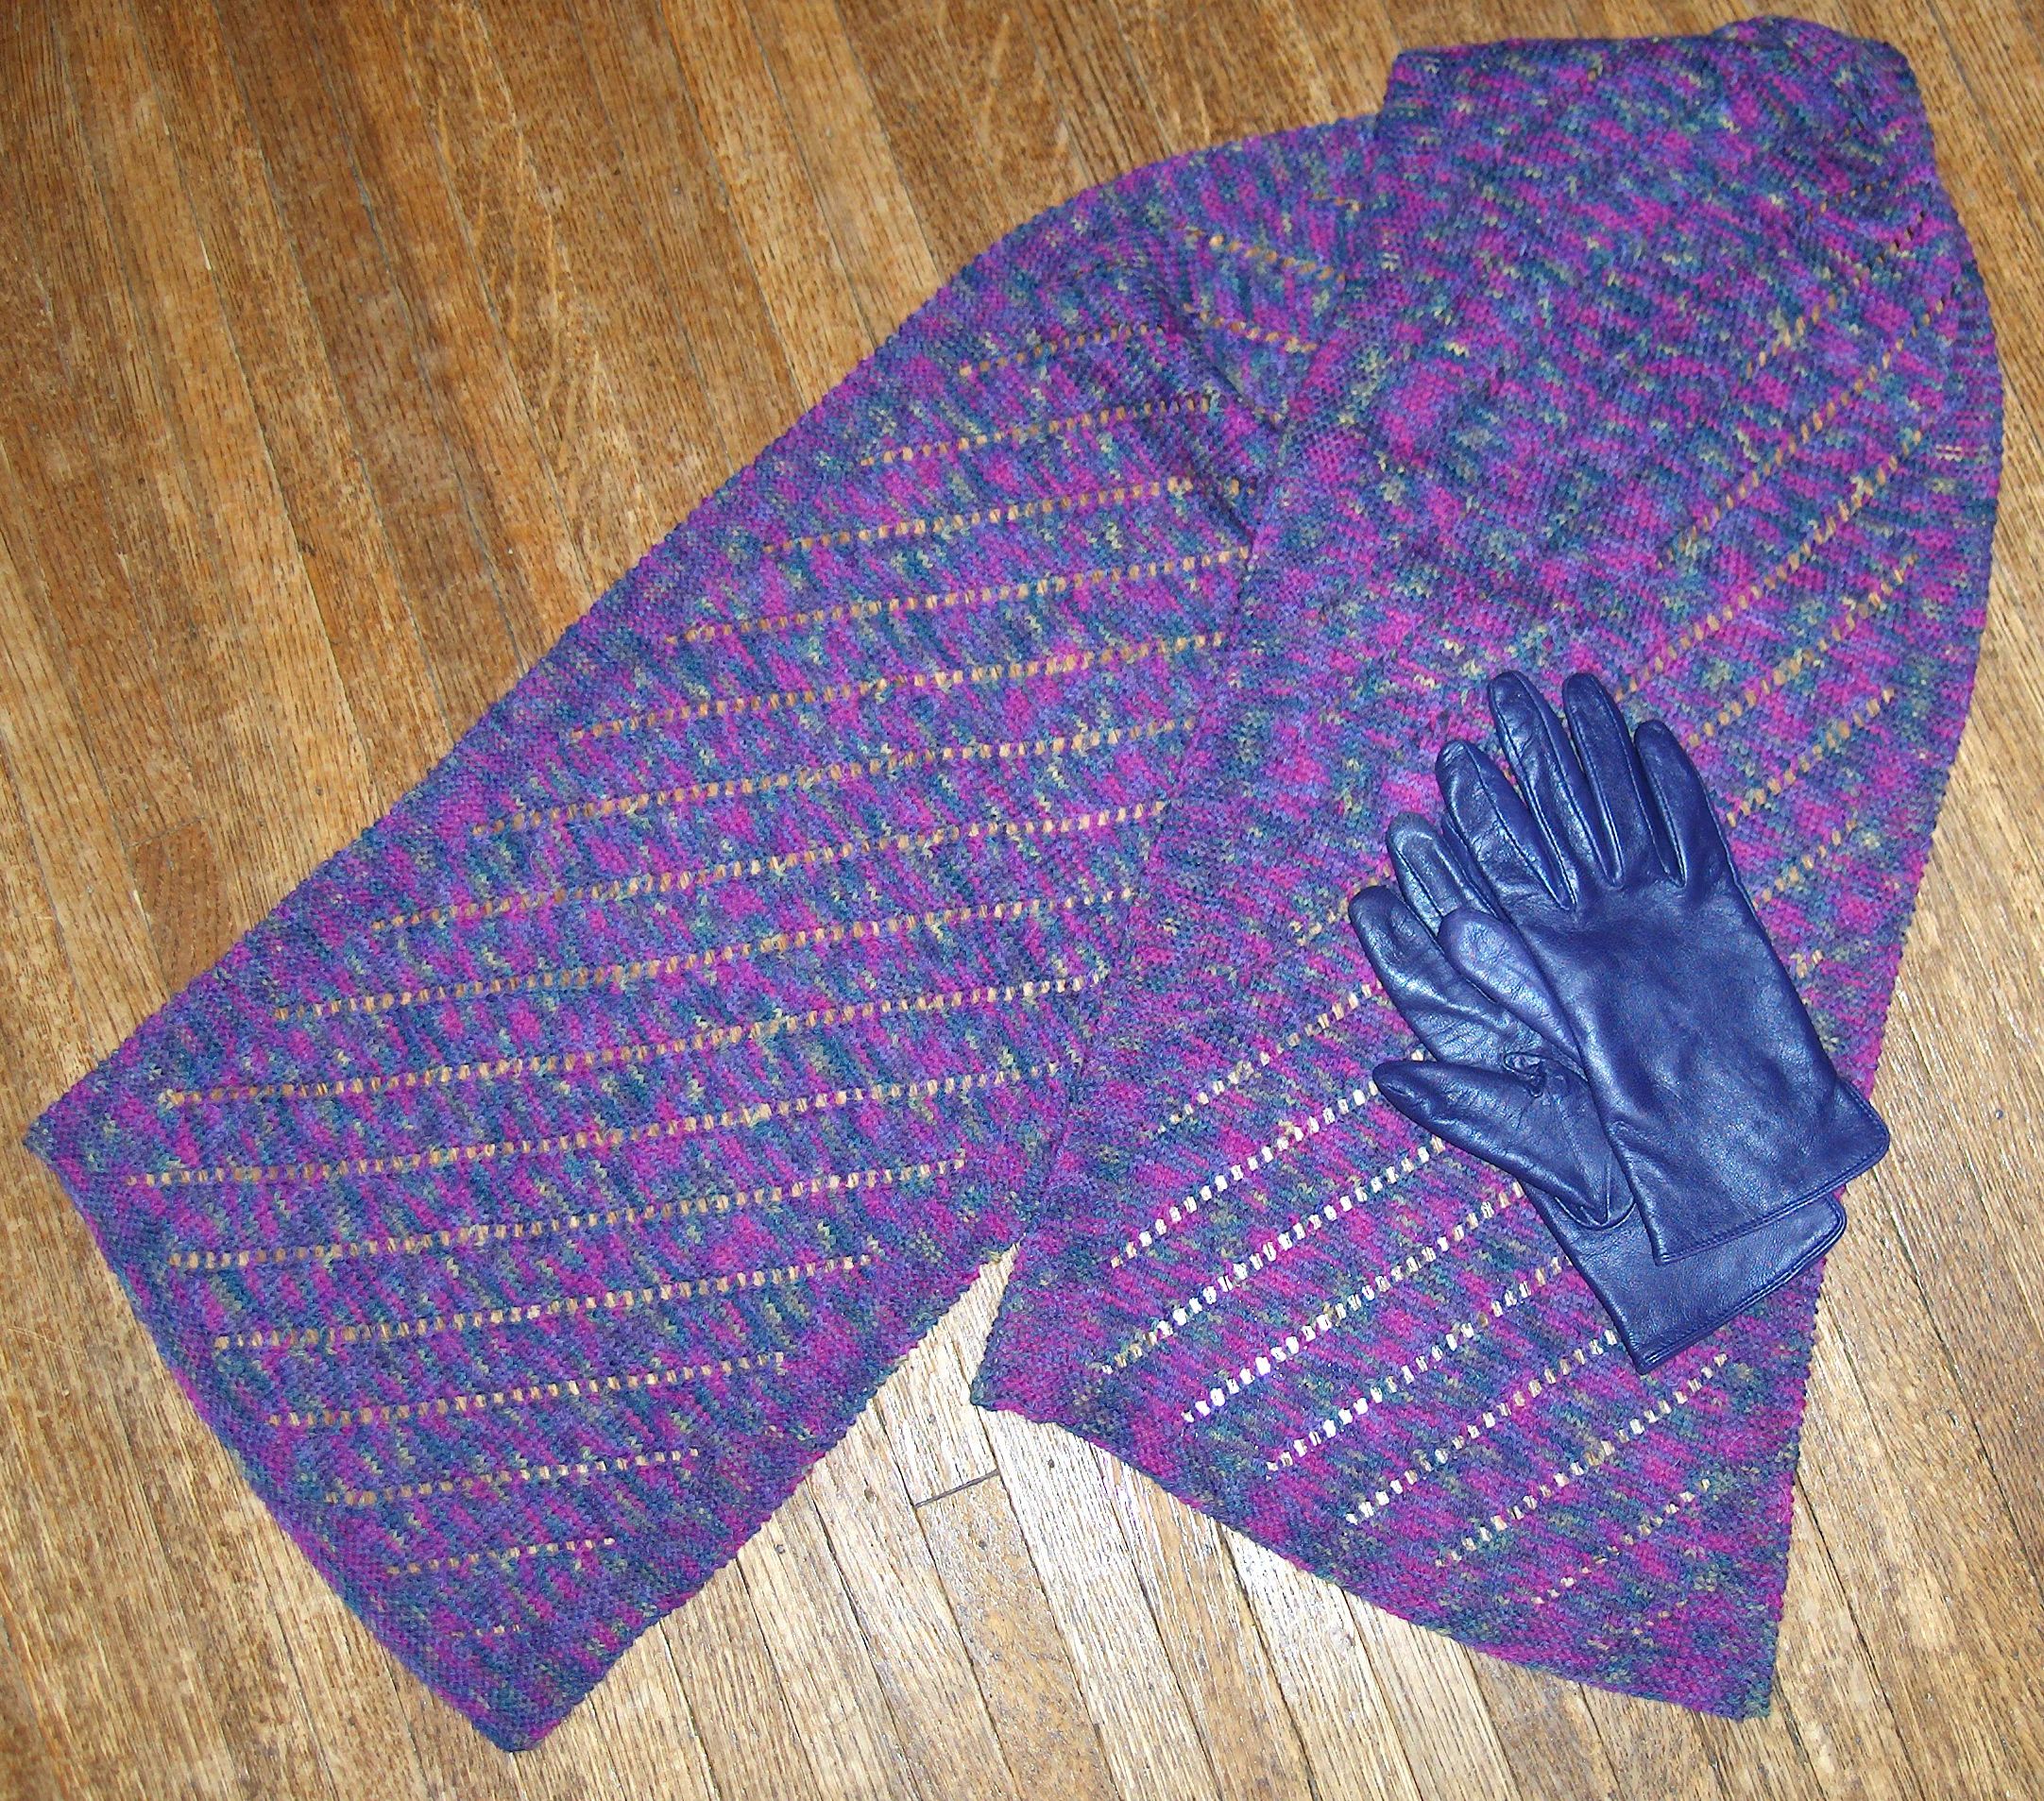
Why use a garter stitch border? Well, it’s a bit more trouble than not using one, but the finished product looks as if you had a plan. You did. If you just knit a scarf in a pattern from a stitch dictionary, well, it looks like that’s exactly what you did.
Let’s look like brilliant planners instead.
The garter stitch border also keeps the edges of the scarf from rolling. Plain stockinette rolls, which doesn’t look too chic.
 Here we go!
I’m assuming that you have some yarn you like, some yarn that is a sock yarn or a fingering weight. You could also have a heavier yarn – it won’t hurt my feelings if you do! – but the calculations below, such as they are, are based on fingering weight.
1/ Pick Your Yarn.
My yarn is a house brand from Diamond Yarns, which is a distributor here in Canada. This is their alpaca/wool blend sock yarn ( 70% superwash merino, 20% alpaca and 10% nylon) which is called “Fancy Free”. It might be handpainted or it might be space dyed. It’s pretty either way.
Sock yarns that are space-dyed often have a picture on the label, showing how the self-patterning works up. If you’re making a scarf or a wide scarf, that’ll be a pretty fair representation of what you can expect.
With fingering weight, plan to make a scarf with 400 m, a wide scarf with 600 m and a stole with 800m. That’ll ensure that the finished scarf/stole is long enough. Let’s assume that a scarf is 8″ wide, a wide scarf is 12″ wide and a stole is 16″ wide – buy the right number of balls to give you the yardage needed to make the width you want.
2/ Cast on.
If you have 400m/yds of fingering weight yarn, then cast on 56 stitches on size 3.5mm needles for a scarf.
If you have 600m/yds of fingering weight yarn, then cast on 72 stitches on size 3.5mm needles for wide scarf.
If you have 800m/yds of fingering weight yarn, then cast on 88 stitches on size 3.5mm needles for a shawl.
3/ Knit the garter stitch border.
The border is 8 rows of garter stitch – that’s 8 rows knitted. Knit 7 rows.
Row 8 Make-Life-Easier Trick: When you knit row 8 in garter stitch, place your markers as follows: K8, place marker, k to last 8 stitches, place marker, k8.
Markers don’t need to be fancy. All they need to do is remind you that you need to change from garter to pattern. A length of contrasting yarn knotted into a loop makes a good marker. Some people use plastic bread ties. Others use huge beads. You don’t have to run out and buy anything – save your money for YARN! – the marker just has to move easily along the needle and contrast with your knitting. When you get to a marker, just move it from the left needle to the right – don’t knit it! (If you do knit it and you’re using scrap yarn, you can just cut it and pull it out of your work. Go ahead – ask me why I thought of that.)
4/ Begin the pattern.
The pattern for this scarf is an easy 16-row repeat. I’ve written it up here including the 8 border stitches, but keeping them separate from the pattern – the border stitches are those K8’s on either end of each row.
Row 1: K8, K3, *K2tog, YO, K6. Repeat from * to 5 stitches before marker. K2tog, YO, K3, K8.
Row 2 and all other even numbered rows: K8. Purl to last 8 stitches. K8.
Row 3: K8, K2, *K2tog, YO, K6. Repeat from * to 6 stitches before marker. K2tog, YO, K4, K8.
Row 5: K8, K1, *K2tog, YO, K6. Repeat from * to 7 stitches before marker. K2tog, YO, K5, K8.
Row 7: K8, *K2tog, YO, K6. Repeat from * to 8 stitches before marker. K2tog, YO, K6, K8.
Row 9: K8, K7, *K2tog, YO, K6. Repeat from * to 1 stitch before marker. K1, K8.
Row 11: K8, K6, *K2tog, YO, K6. Repeat from * to 2 stitches before marker. K2tog, YO, K8.
Row 13: K8, K5, *K2tog, YO, K6. Repeat from * to 3 stitches before marker. K2tog, YO, K1, K8.
Row 15: K8, K4, *K2tog, YO, K6. Repeat from * to 4 stitches before marker. K2tog, YO, K2, K8.
5/ Knit on.
Keep knitting. If you see pools developing in your scarf and don’t like it, you’ll need to either rip back and use a different cast on count or pick a different yarn. (“Pools” are little blobs of colour, say where the red in the space dyed yarn ends up gathering on each row. I have some very small pools of pink on my scarf, but because they’re small they don’t bother me. We’ve all seen ugly pools, great oceans of one colour gathered together in a massive blob. Ugh.) Because the rows are the same length, whatever the self-patterning does will be consistent for the whole scarf.
Begin the second garter stitch border when you have done:
• 23 more repeats (24 in total) of the 16-row pattern for the scarf
• 27 more repeats (28 in total) of the 16-row pattern for the wide scarf
• 29 more repeats (30 in total) of the 16-row pattern for the stole
6/ Knit the second border.
Finish the pattern on an even number or purl side row, then knit your 8 rows of garter stitch. Then cast off.
7/ Sew in your ends.
And block if you need/want to. There it is!
Tomorrow, we’ll talk about calculating counts in different weights, and next week, we’ll look at some variations.


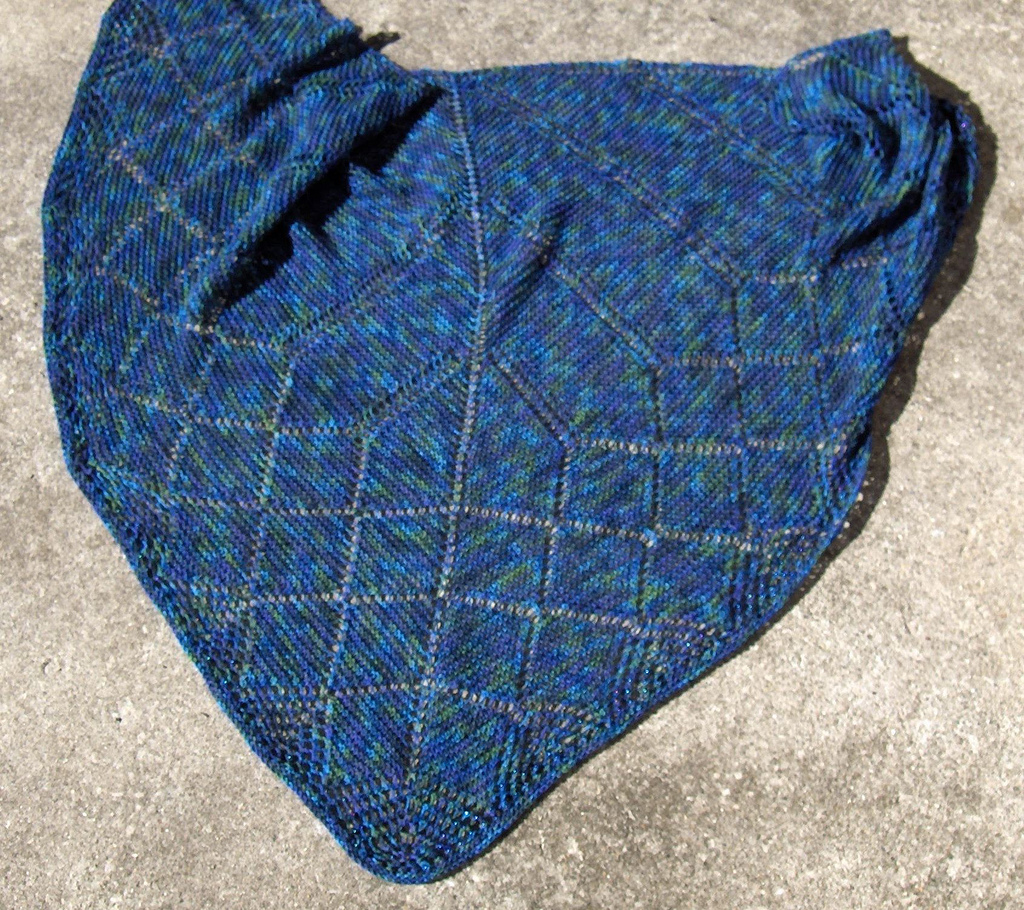 A good thing too, as there were a few mistakes. I knit a second version in garter stitch, while the first was in stockinette. Same pattern instructions – the only difference is whether you knit or purl the wrong side rows. The garter stitch one came out a bit smaller, a combination of smaller needles and the tendency of garter to pull together. I also added some stitches into the mesh bit in the middle of the shawl – it’s a bit tight on the green version – and added beads to the blue one. You can see the blue version and the beads in a detail shot posted on Ravelry with the pattern.