All Those Fabric Bits

Last time, I told you about watching Kate’s videos at her YouTube channel, The Last Homely House. I went back to her channel to watch more and chose a video about using up scraps – because it was first in the queue of her most popular videos. (It’s right here.) She shares her enthusiasm for Terry Rowland’s scrappy quilt. I was sufficiently inspired to see what I have in my bag of bits and ends.

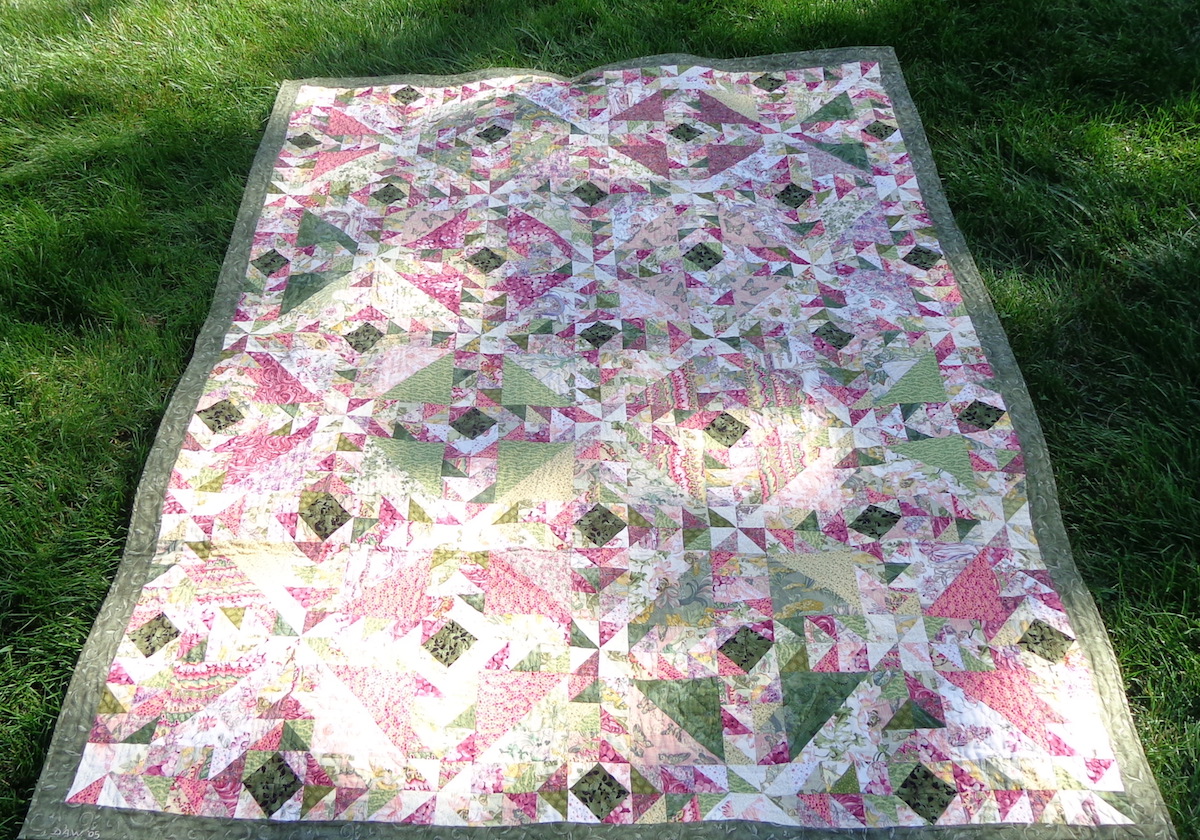
A lot of my bits are from specific quilts. For example, I had a bunch of half square triangles leftover from this Lady of the Lake quilt. The palette is pretty specific on this quilt, all olive greens, pinks and burgundies. The first fabrics chosen were a selection of fat quarters featuring Alphonse Mucha drawings, all Art Nouveau ladies. I just love those prints.

Lady of the Lake quilt pieced by Deborah Cooke

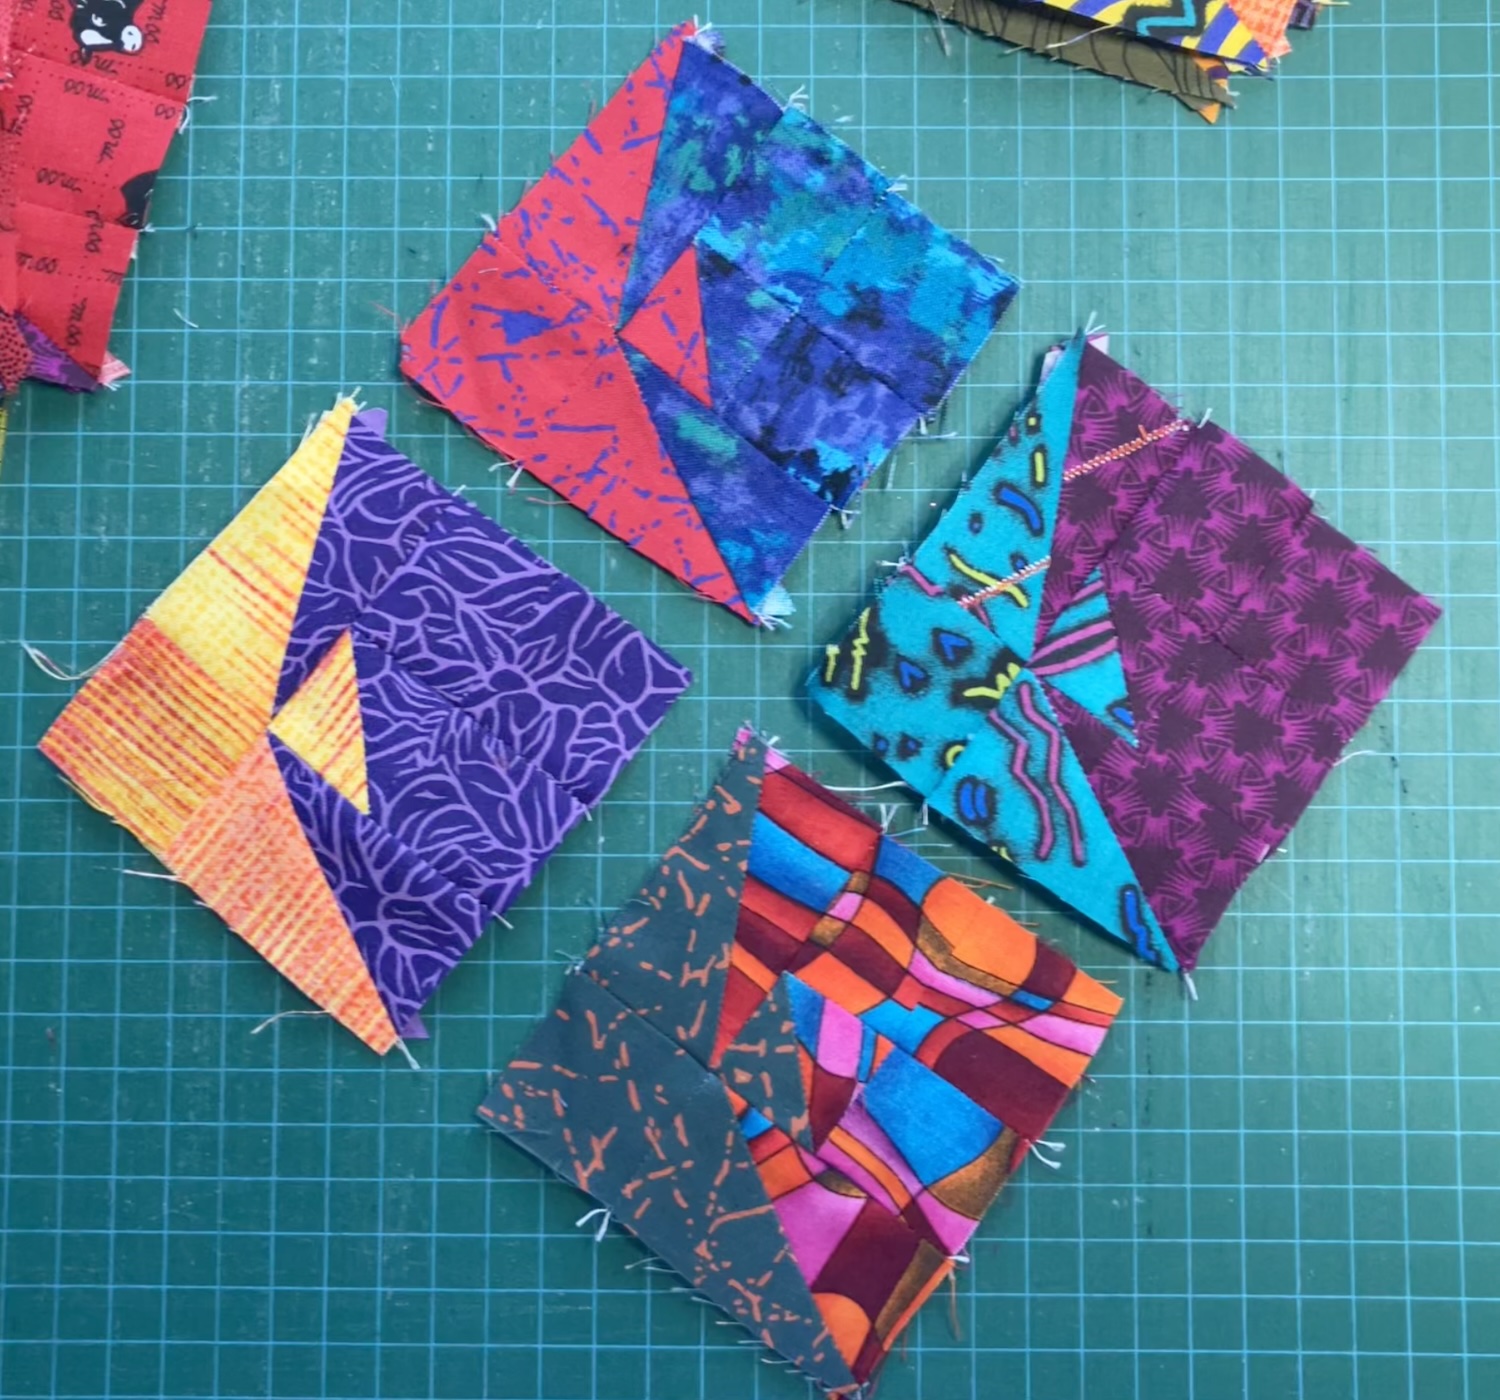
I started to piece the leftover bits into blocks:

leftovers from the Lady of the Lake quilt, pieced together for a mini quilt by Deborah Cooke

I have a few strips of fabrics from the quilt and will add as many borders as possible. This will be a mini quilt to practice my machine quilting – although it’s a good size to be a matching pillowcase. Hmm. I’ll show it to you when it’s done.

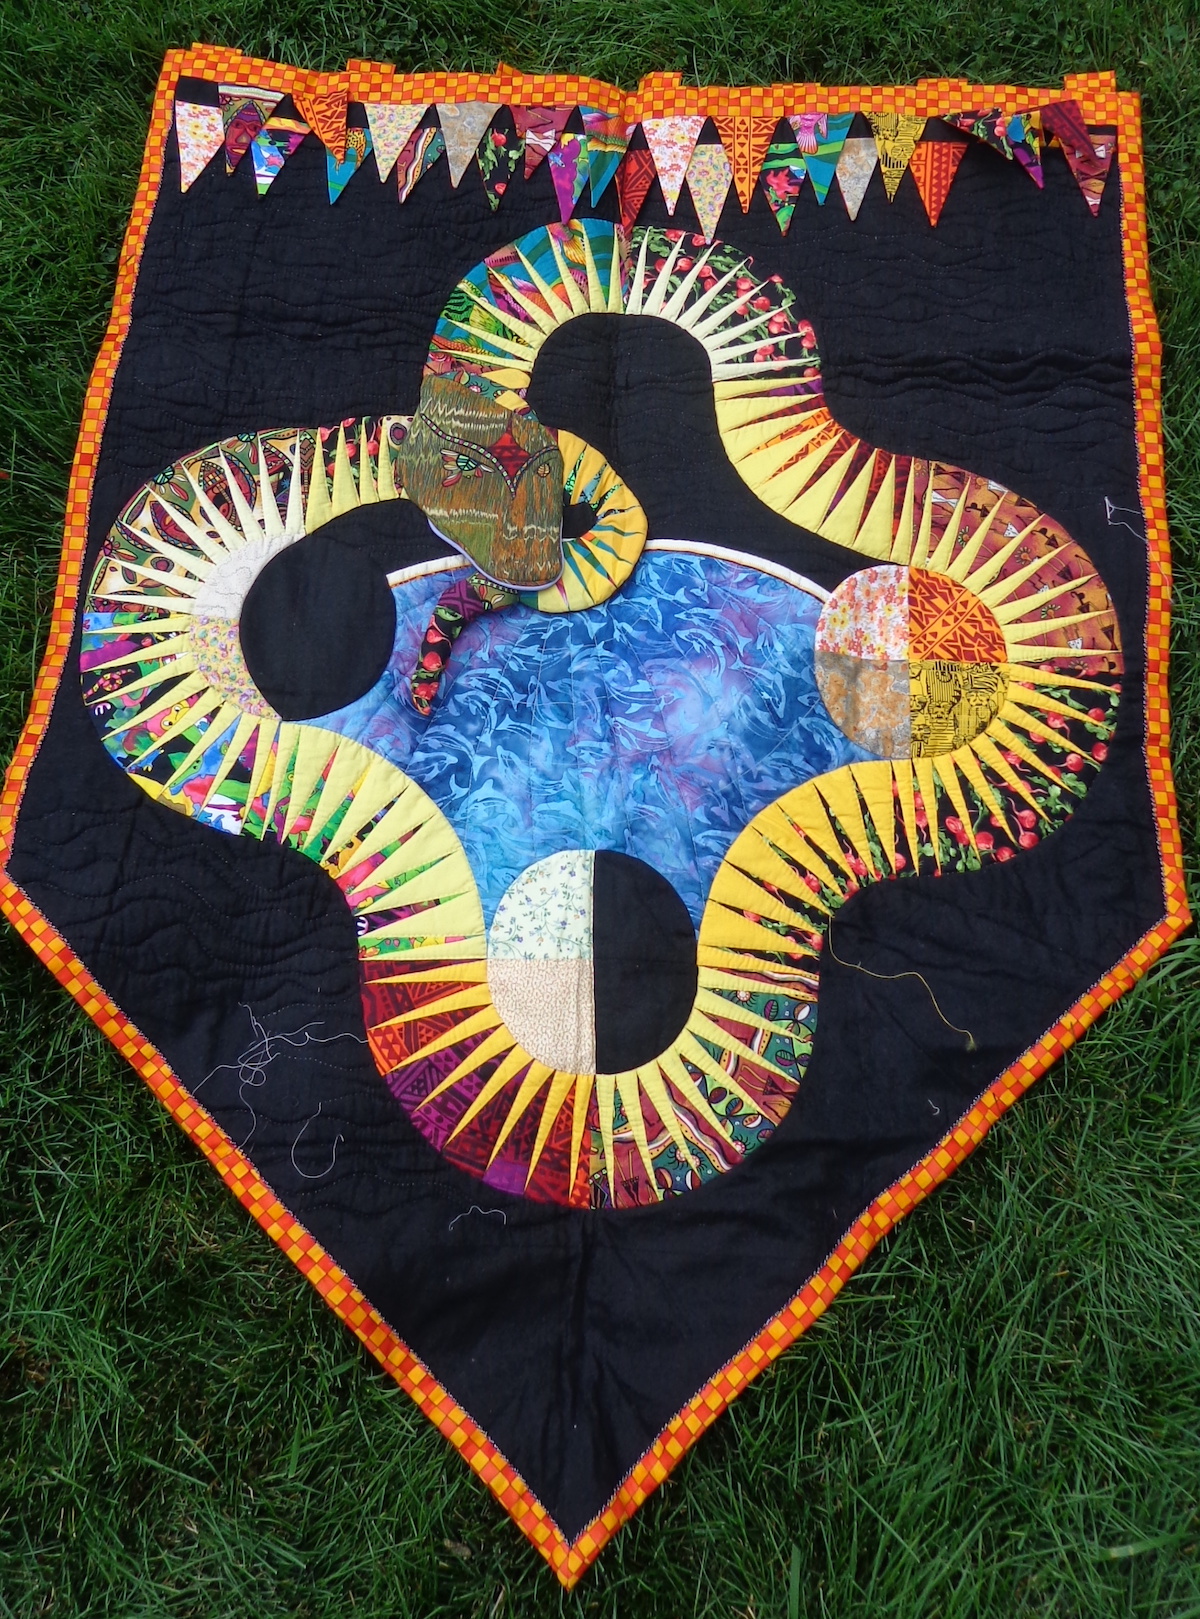
I also found the Franken Fish, long forgotten by yours truly.

fish pieced by Deborah Cooke

I called these the Franken Fish because I made a mistake and patched it up. These fish were cut from charm squares – each square was just enough for one set of pieces, so there’s a fish of any given fabric and a background of any given fabric. I made a cutting mistake though and because there was no extra fabric, I patched the pieces.

fish pieced by Deborah Cooke

Their scars are all in the same place. They are Franken Fish.

I must have seen the block somewhere and liked it. I have a vague memory of scribbling it on some random piece of paper in my purse. Now the Franken Fish need an ocean to swim in…

I found a lot of bias already cut. There’s a tremendous amount of the pink, which probably means I had plans for it. I wonder what they were.

cut bias in the stash

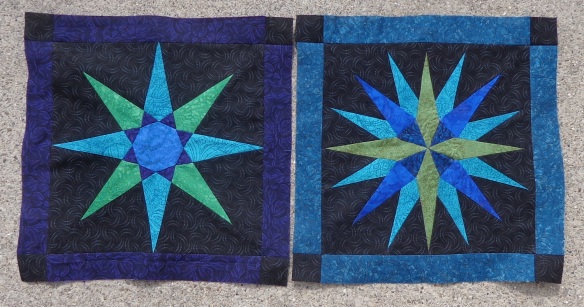
And I found these two pieced stars, fussy cut from Kaffe Fassett’s Kimono print.

Star cut from Kaffe Fassett's Kimono, fussy cut and pieced by Deborah Cooke

Interestingly, the camera reset itself on the second one and dimmed down the colours, as if it was saying ‘whoa. That’s a lot of fuschia and orange together.’ LOL It is!

I must have made these while piecing my Pineapple Star, which used a lot of that Kimono print.

pineapple star quilt made by Deborah Cooke

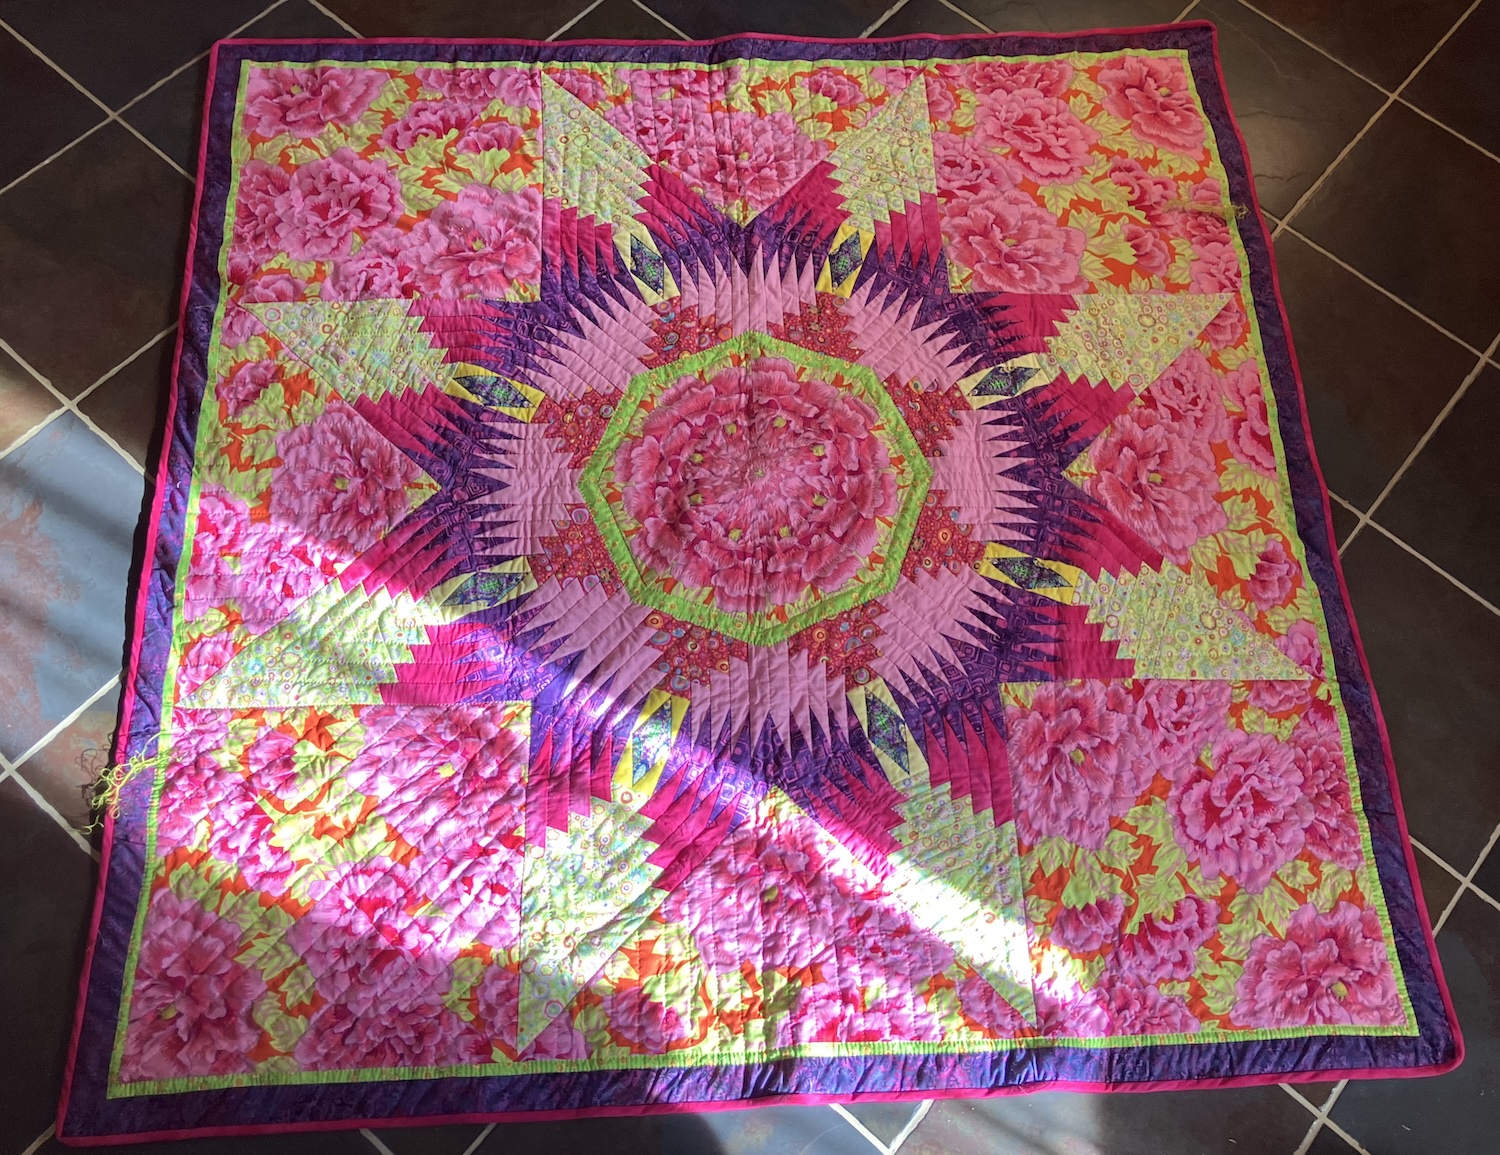
Somewhere (ahem) I have many bits and pieces of Kimono in triangular shapes. I need to find them and make more of these smaller stars because I really like them.

There are more bits and ends, too, but let’s start with these. 🙂

This exercise proved to be more like poking about a hard drive of saved works-in-process than opening a dictionary. Instead of raw materials (bits and ends), I found all sorts of forgotten beginnings. I’ll be finishing these incompletes up first – then I’ll have a look at the remainder for a true scrap-busting project.

First one to be finished will be the Lady of the Lake scraps. Stay tuned!

Storm at Sea Quilt

This is one from the vaults. Last year, I went through all of my unfinished projects and found this quilt top, which I’d forgotten about. It’s a pieced quilt top in the Storm at Sea pattern, which was always one of my favorites. I bought cotton for the backing and folded it up to put it away, maybe 30 years ago.

It’s not a perfectly flat top by any means, so I layered it up to quilt on the machine. I figured it would be good practice. Here’s where I’m at.

Storm at Sea quilt, pieced by Deborah Cooke, quilting in progress

Of course, I had to use a stripe with red roses on the border to liven up that blue and white. I just love red. 🙂 I haven’t decided on the binding fabric yet. Looking at it here, maybe it should be navy.

This might be the test quilt that I toss in the washing machine to see what happens.

You can’t really see the quilting in the photo – maybe a bit at the top right – but it’s about half done. I decided to do a wavy pattern on the diagonal that turns back at the centre – so overall there’s a big X and I never have more than half of the quilt under the arm of the sewing machine. I quilted the Escher quilt that way and it was comparatively easy. Big difference there, though, as the top was absolutely flat. (This one has some puckers and tucks.) That was a good size for machine quilting – as a max – so that will be my new benchmark.

Escher quilt from kit pieced by Deborah Cooke
Finished Escher quilt
Singer 185 sewing machine

I’m using my vintage Singer 185 for this, because it’s such a rock. My stitches are more even this time – progress is made! – so that’s a good thing. The thread is a Gutermann cotton quilting thread in variegated shades of blue.

I don’t love machine quilting. I don’t love how it looks and it’s hard work – my hands hurt after doing a bit of it – so it’s teaching me to make fewer quilts and certainly to tend to smaller ones.

After this is done, I’ll quilt the mermaid quilt, which is a teensy bit bigger. More diagonal lines turning back at the middle, methinks. I’m debating whether I should quilt the blue dragon myself or not. I’m also wondering with those two whether I could do the borders of the blocks on the machine, then quilt inside the blocks by hand. Hmm. So many details to ponder!

Mermaid Quilt pieced by Deborah Cooke
Mermaid in blue jeans quilt
In the Beginning Dragon Quilt Kit pieced by Deborah Cooke
In the beginning blue dragon quilt

I still have a couple of quilts that I’ve started to quilt by hand, which need to be finished up. The pineapple star has corners now and is about half quilted – in lime embroidery thread. 🙂 The ourobouros dragon banner needs more quilting on the black background. The dragon is done.

Pineapple star quilt pieced by Deborah Cooke
Pineapple star quilt in progress
Ourobouros quilt banner by Deborah Cooke
Ourobouros quilt in progress

Then there are two big ones to go to the long arm quilting place. Phew. I think I’ll leave that until the fall. I got all the borders on the Moonglow, so it’s ready to go, as is Jumpin’ Jack Flash.

Maine Ocean Quilt

It’s been quiet here lately because I’ve been buried in writing and publishing tasks. Last week, though, I took a little fiber break and got this quilt top finished. I quilted it on my Singer 185.

Blue squares pieced and quilted by Deborah Cooke

This one was inspired by a quilt I saw on our road trip to Maine: the cabin where we stayed had a quilt in this pattern on the bed. Theirs was red and white, but I really liked the simple pattern and how effective a design it made. I doodled it down, then came home to sort through my stash. I really like this colour combination. The top has been waiting to be quilted for a while.

Since the colours reminded me of the ocean, I quilted it in waves – they go diagonally across the middle square, then I started to quilt around and around. After finishing the third (outer) square border around the middle, I had to respray the outside border with temporary adhesive – all that wrestling of the fabric had made the layers come apart again. The backing is a printed cotton sateen from my stash, and the border is the same Kaffe Fassett Roman Glass in purple that’s in the quilt.

Here’s a picture of the pieced top in the sunshine:

Maine Ocean quilt by Deborah Cooke

This one was a challenge to quilt on the machine – I think it’s either the maximum size that I can manage or close to it. It’s 72″ by 72″ finished. I have one more that’s about this size (the mermaids) and I’ll probably try to do my Storm at Sea on the machine – it’s a teensy bit bigger. (Ha. No pix of that one. It’s been waiting a looooooooong time to be quilted!) The bigger ones will have to go to the long arm quilter to be finished up.

I also have a lap top pieced in these fabrics which I’ve been handquilting with embroidery floss. It has flannel on the back and is a very cozy piece of work. I’ll try to get that done soon and post a pic.

Test Lap Quilt #2

More on machine quilting today and the second lap quilt that I made. The one was inspired by this YouTube video called Five Ways to Use Ugly Fabric. I was intrigued by the title! She makes a number of suggestions then offers a tutorial for a lap quilt that requires twelve 14″ squares.

Instead of using ugly fabric, I chose fabrics I like from my stash but haven’t used, mostly florals, mostly red and black. The design reminds me of Stained Glass Quilts, but without the black sashing. (Here’s a tutorial on making those. They were really popular about 30 years ago.)

Red Scrap Quilt by Deborah Cooke

Here’s that “ugly” quilt top, which isn’t very ugly at all. There are twelve squares but they’re a bit tough to pick out. The only horizontal and vertical seams inside the borders are between the blocks. Look for three squares across and four down – each one is broken into 9 pieces.

The one fabric that breaks the rule of red-and-black is that green one with the chrysanthemums. I always loved it but have never used it. Now it’s here forever. Also the paisley one with the cream background technically follows the rules (there’s a bit of black in the outlines) but it’s also a less consistent choice. The styles of the prints are so different that I would never have put them together but it’s kind of fun to have them mixed like this. Two are Kaffe Fassett fabrics that I never used because the scale of them was so big. (One is black with huge red and pink flowers, while the other has a purple vase with long blue sprays of flower stems.) Hmm. That one floral is the only one with a lot of yellow. Maybe there are more outliers than I thought!

This quilt is bigger than the first test quilt – it’s 42″ by 54″ – but still a small quilt.

I did buy backing fabric for it out of the discount bin and had to piece the batting from that last piece of the roll. I’d originally planned to use the black cotton quilting thread, but instead I went looking for Aurifil thread, which is supposed to be the best. I found a wonderful cherry red in that which I couldn’t resist.

I had a plan to do my first free motion quilting on this one, using my Pfaff 360, but that machine needed a bit of TLC first. I did a few rows of quilting on a vintage Elna instead, using a cam from the embroidery stitches, then thought it would be too much to do the whole quilt that way. (Even though it is pretty.) I wanted to change to a straight stitch and the Elna didn’t want to go. (More TLC needed.)

Here’s that decorative cam stitch:

Decorative stitch from Elna SU cam

So, it was back to the trusty Singer 185K and the walking foot. As a result, this quilt has wavy lines of quilting, just like the last one, instead of free motion quilting. I still like it. Here it is:

Red Scrap Quilt by Deborah Cooke, completed

One difference is that I wanted to quilt the borders all around, in an enclosing square instead of quilting from edge to edge. That meant that I had to pull both threads to the same side at either end of each quilting line inside the borders, tie them off, then thread the ends onto a needle and bury them in the quilt. That took some time but wasn’t as tedious as I’d thought. (Hint: leave long ends in future.)

Until my machines get their TLC, I’m foiled as far as learning free motion quilting. I’m going to carry on with the walking foot, though. The lines are kind of fun when they wave and when they aren’t perfectly parallel, they have an organic appearance that will work for some of my quilt tops. There’s still room for improvement in my lines and my stitch length, too, and certainly I need practice supporting the weight of the quilt as I work.

In addition to giving us some picnic quilts for the car, these test pieces have convinced me of one thing: done is better than perfect. I never believed that until now, but all the imperfections that I see when I examine each quilt closely aren’t noticeable when you look at the whole thing. So, I’m going to continue with my quilt tops that need to be finished up, working from smallest to biggest as I get better at moving the weight of the quilt around.

Escher Quilt by Christopher Weinhold (kit) pieced by Deborah Cooke

Next up is my Escher quilt. Since it’s all diagonal lines anyway, I’m going to quilt it with chevrons – down from the left side on the diagonal to the middle, then pivot and quilt up to the right side on the diagonal. I haven’t yet decided whether to do that the whole way down, or to invert the chevron halfway down. That would make a big X instead of the Y in the piecing, which might be fun. We’ll see.

Test Lap Quilt #1

One of my goals for this year was to finish up my quilts. I have a lot of quilt tops pieced but they haven’t become finished quilts. Part of this is because I’ve always pieced by machine but quilted my tops by hand, so the first part of the process is much faster than the second. Either I needed to hire someone to quilt my tops, or I needed to learn to machine quilt them myself. I went for option B and ordered a walking foot for my machine.

This (ironically) meant that I needed to make more quilt tops in order to practice machine quilting before taking on my existing quilt tops. Also, I thought it would be easier to work with a smaller quilt first, and my existing tops are mostly big. So, I began to piece lap quilts from scraps.

This one was inspired by this YouTube video from Missouri Star, Make a Summer Squares Quilt. They suggest using a jelly roll with two contrasting solid fabrics, but I dove into my scrap bag instead. I have a lot of strips in there, many of them from my Escher quilt, and it drives me crazy to waste fabric. I grouped strips into lights and darks to piece them together, using a Kaffe Fassett stripe in greens cut crosswise and KF yarn-dyed solid mauve as my contrast squares in the middle. Here it is:

Scrappy Test Lap Quilt by Deborah Cooke

I used all the pieces leftover from the Escher quilt but was missing two strips to make enough blocks for this layout. I used some lime Roman Glass in my stash then added one non-KF fabric – it’s the lime with polka dots that’s in the border. Because fabric was so tight, I didn’t really manage the light and dark assignment of colours in the Missouri Star quilt, but I like how bright and cheerful mine is.

The walking foot was delivered while I was piecing this, so I got right down to quilting by machine for the first time. (eek) I added one more tool to my arsenal – Odif 505 temporary fabric adhesive. (That’s an Amazon link.) You spray it on the batting then iron the fabric to it, then flip it over and do the same with the backing. It keeps the layers from sliding around as you stitch and is pretty awesome. (It washes out.)

Singer 185 sewing machine

I watched this video and thought this diagonal quilting was something I could do. The trick was that I’m using my vintage Singer 185 for this project, which is a workhorse but a straight stitch machine. (My Elna has an appointment for a sewing-machine-spa-day next month!) In the video, she uses a wave stitch chosen from the machine’s options. I decided to make my own waves, even though they’d be less regular.

I used Guterman 100% cotton thread in black, a Schmetz 14 sharp “chrome” needle, and my new walking foot. I set the guide on the foot for an inch but didn’t follow it faithfully. I wanted a more organic look to the “waves” and I like how they worked out. There are a few tucks but I expected that since my borders were a bit wavy (which comes from sewing fabric cut on the crossgrain onto strips with a bias edge. Next time, I’ll be more careful!)

It was a bit of a wrestle moving the fabric, but I got used to it. And my waves improved over the course of quilting. I noticed that the 185 likes to stop with its needle up, so I learned to crank it down before doing anything else (to avoid any little jumps). My curves were also smoother when I didn’t stop in the width of the quilt. Faster and smoother is better, too. Lessons learned. 🙂

There are a lot of things you can buy to make this machine quilting easier, but I’m trying to keep a lid on expenses until I decide whether I like it or not. Instead of buying quilting gloves, for example, I used a new pair of garden gloves. I did find it a bit tough to move the quilt, even with the walking foot, so I ordered a LaPierre Studio Supreme Slider (that’s another Amazon link.) This is a reuseable plastic sheet that you lay over the machine bed to make it smoother and more slippery.

The cool thing about this quilt is that it came completely from the stash and my scrap bag, even the batting. I’d bought a big roll of 100% cotton batting to layer up all my quilt tops and this is 1/3 of the last piece. (The very last piece is destined for Scrappy Test Lap Quilt #2 which is a bit bigger than this one.) The backing is a piece of yarn-dyed cotton that I got at the thrift store, leftover from the Purl Soho apron I made for the mister.

Back of the scrappy test quilt made by Deborah Cooke

You can see some pins there – I’ll sew the bias binding down by hand on the back side. The finished quilt is about 30 by 42″.

The one thing I’d change was the colour of the thread for the quilting. I used black, because I didn’t know what to pick, but I don’t love the look of the black on the solid mauve border. So, in future, I’ll hold the quilting thread against the most solid fabric to choose a colour.

On to the next one! I’ll have some knitting to show you soon, too – a cowl, a new pair of socks and a cardigan.

More Moonglow Quilt Blocks

I showed you a bit of this quilt already, which I’m making from a kit. (Here’s my earlier post on the Moonglow Quilt.) I’ve been making slow progress on this quilt top. I switched to paper piecing for these two blocks and am happier with the results. Here are blocks #4 and #5:Moonglow blocks 4 and 5 sewn by Deborah Cooke

The strange thing is that I’m not really enjoying the process of creating this quilt. I’ve admired it for years and wanted to make it since first glimpse. I’ve done paper piecing with Judy Niemeyer’s quilts, like this one, Jumpin’ Jack Flash (which still needs to be quilted):

Jumpin' Jack Flash quilt by Judy Niemeyer pieced by Deborah CookeMoonglow Quilt by Jinny Beyer
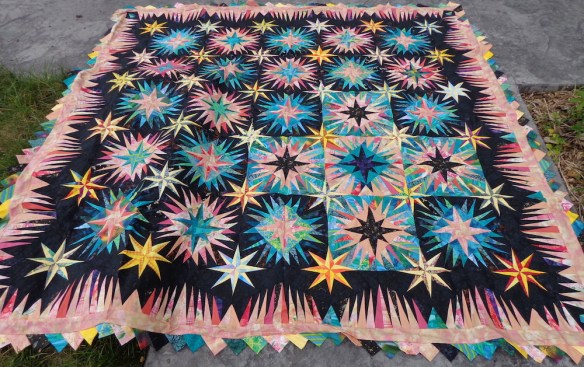
But I’m not feeling the love with the Moonglow. It feels like a chore, which is disappointing. I think it’s because the blocks are hard to sew together. I paper-pieced the star of #4, for example, but the octagon in the middle had to be appliqued in by hand.

For #5, only the four outer quadrants could be paper pieced and it wasn’t a lot of fun getting that green star in the middle so that the center laid flat. I did the middle three times and finally stitched it by hand. It’s still not perfect but I’m done with it. #6 is a star with a star in the middle – it’s the second one from the top in the fourth column – so we’ll see how that goes.

Instead of savoring every moment, I’m kind of glad to have only 7 blocks left to piece. :-/ Next are the two in the second column, then the four corner blocks (there are actually two designs and you make two of each), and finally the middle block. My mood will probably change when I start assembling the top together, since I’m likely to get excited about the result when I see it coming together. I’ve cut the outer borders but haven’t sewn them yet, and haven’t decided how to quilt this one.

In the meantime, onward….