I usually knit socks, but recently someone at my sewing group talked about sewing socks from leftover pieces of jersey knit. I was intrigued and had a look around the internet, then drafted my own pattern. Here’s a pair of my finished sewn socks:
These are sewn from a Dutch print on cotton jersey that I used for one of my Mirri dresses. It was expensive, so I kept every shred – plus I really like it.
The pattern for these is a tube, pieced from two long rectangles. One has darts for the heel so needs to be cut a bit longer. Originally, I measured the length of my foot for the pattern, but ended up shortening it by about 2″ – because of the stretch of the jersey knit. I first tried these with rounded toes but the fit wasn’t good, so I shaped the toes for left and right socks. Here’s my pattern now:
It’s 4.25″ wide, with a .25″ seam allowance on each side. I have skinny feet. 🙂 These end just above the ankle and things are getting snug – if I wanted to make taller socks or knee socks, I’d need to widen the pattern and maybe even shape it to fit the calf.
Here are the other two pair I made of scraps:
They don’t look like much when they’re laid flat, but they are quick to make. I serged the darts, then all around the perimeter. It literally took minutes to make three pair. I just used a zigzag to hem the tops, but could have used the twin needle instead.
They’re more like sock liners to me, but then I tend to wear thick socks when I wear socks. They’d be easy to make to match another garment and would be fun to wear with shoes that will only allow a thin sock. I might also wear them as sock liners this winter. The tan and black ones are made of a sweater knit and they’ll be the warmest of them all.
Have you ever sewn socks?
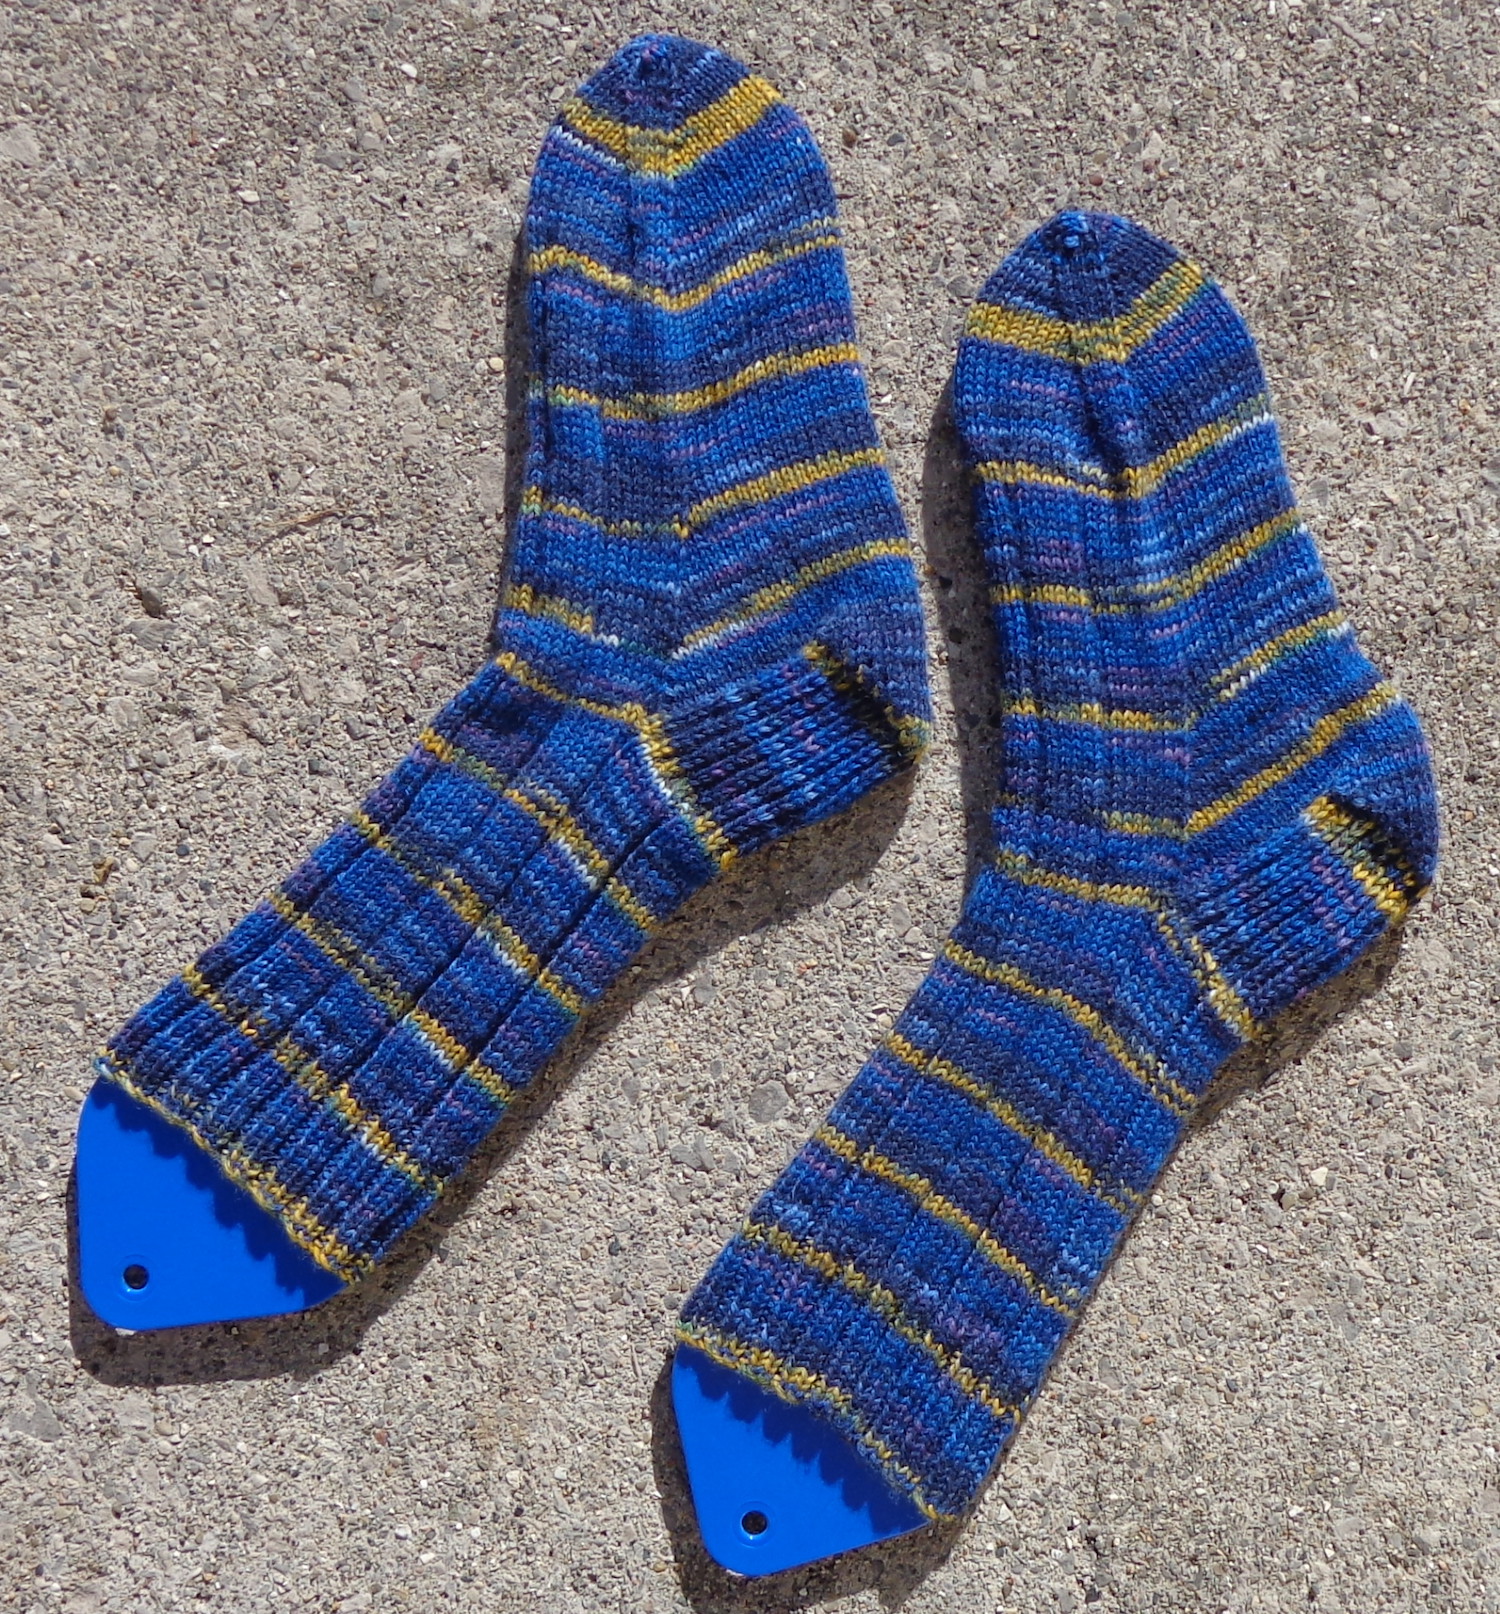
I also finished kniting a new pair of socks for myself in self-striping yarn.
This is Online Supersock 6-fach Stripe Color, which has been well-aged in the stash. I think I bought it originally to make socks for the mister, but he missed out this time. 🙂
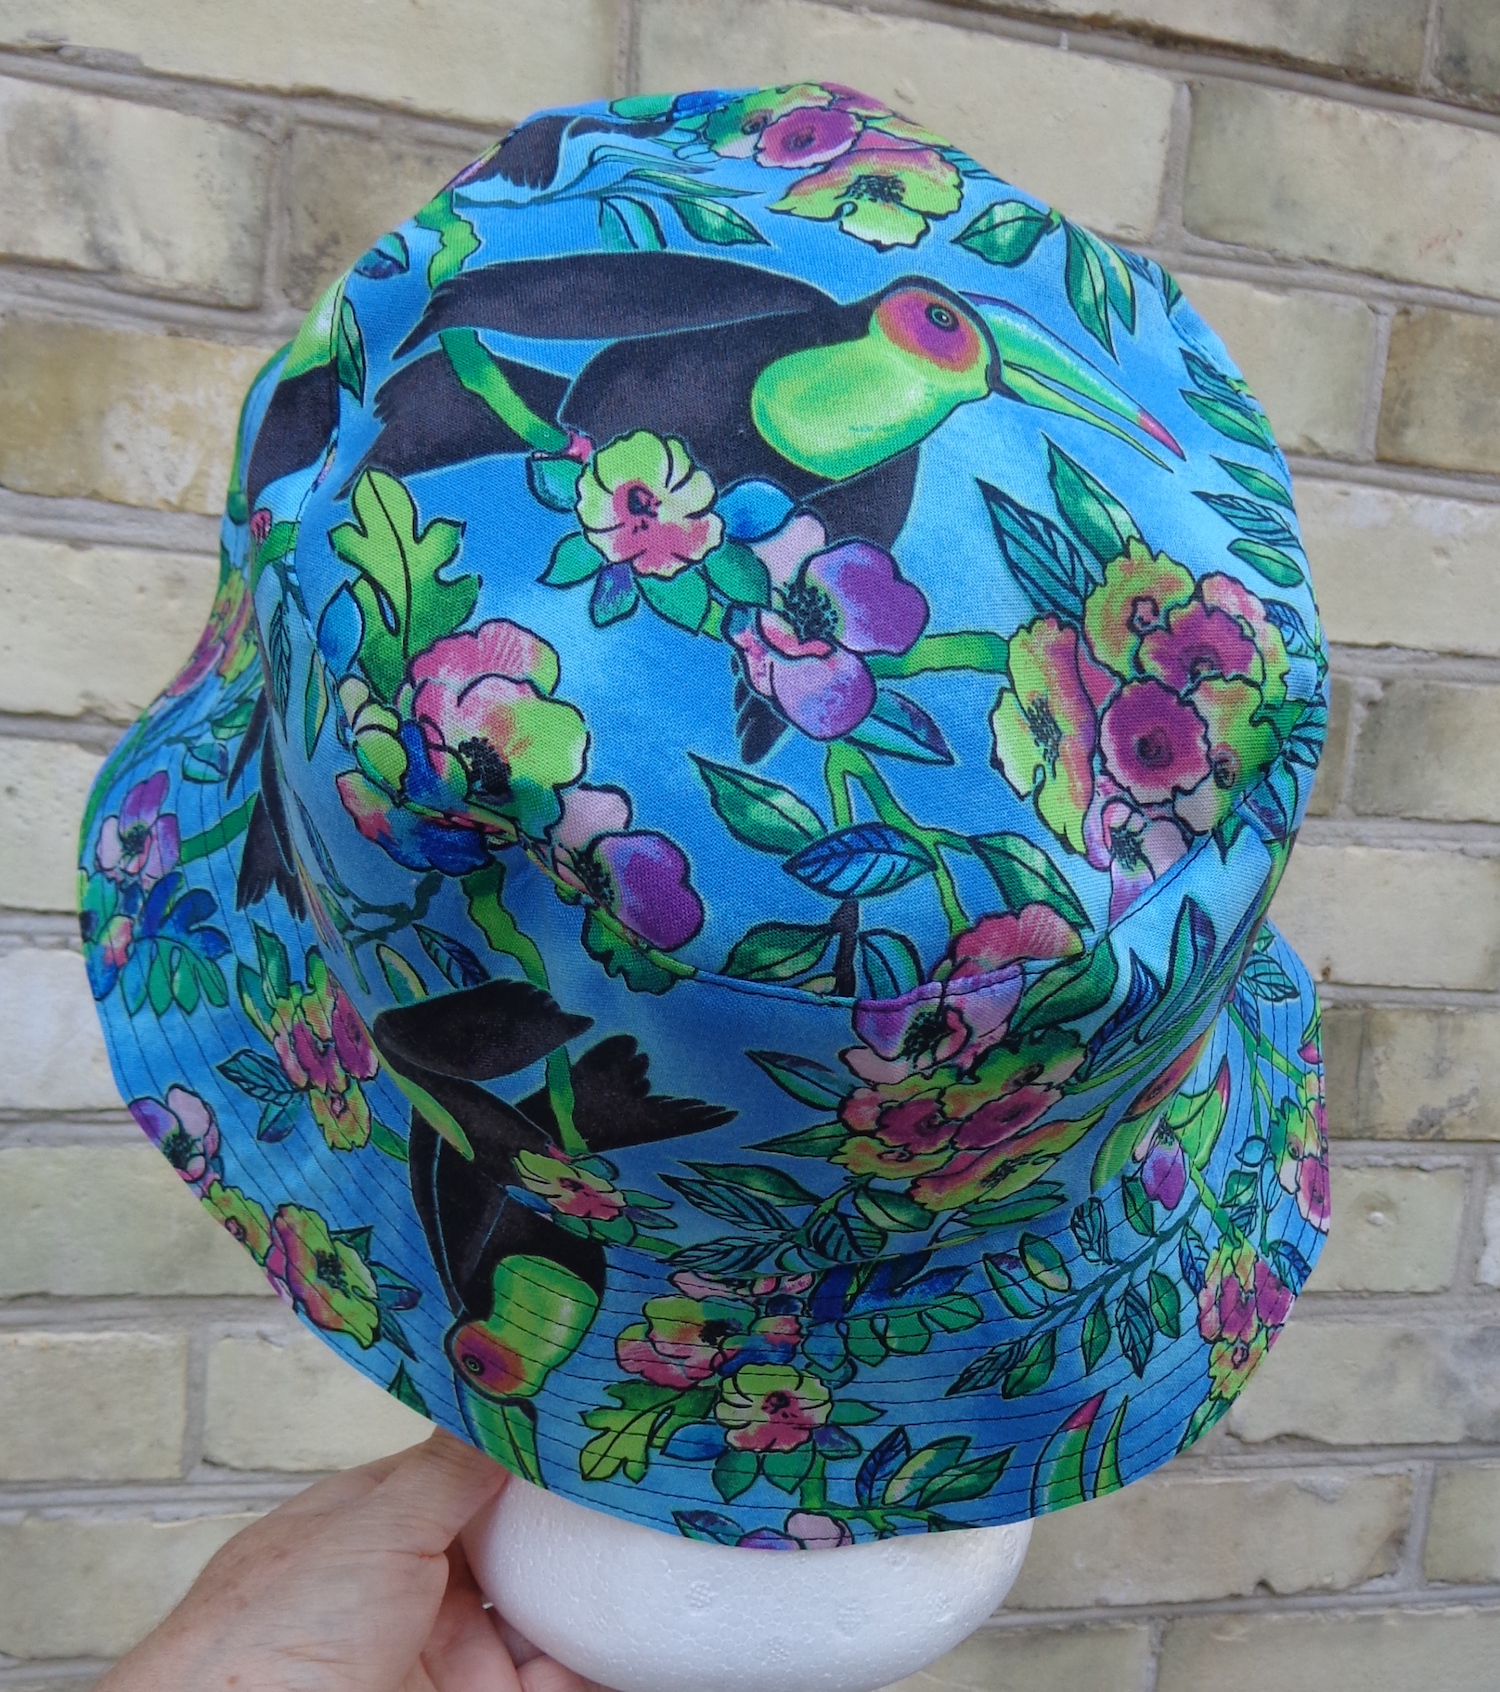
A while back, I saw a post on FB from a person sewing bucket hats out of Kaffe Fassett quilting fabric. (I’d include a credit, but the post is long gone.) They were gorgeous! Predictably, I was inspired.
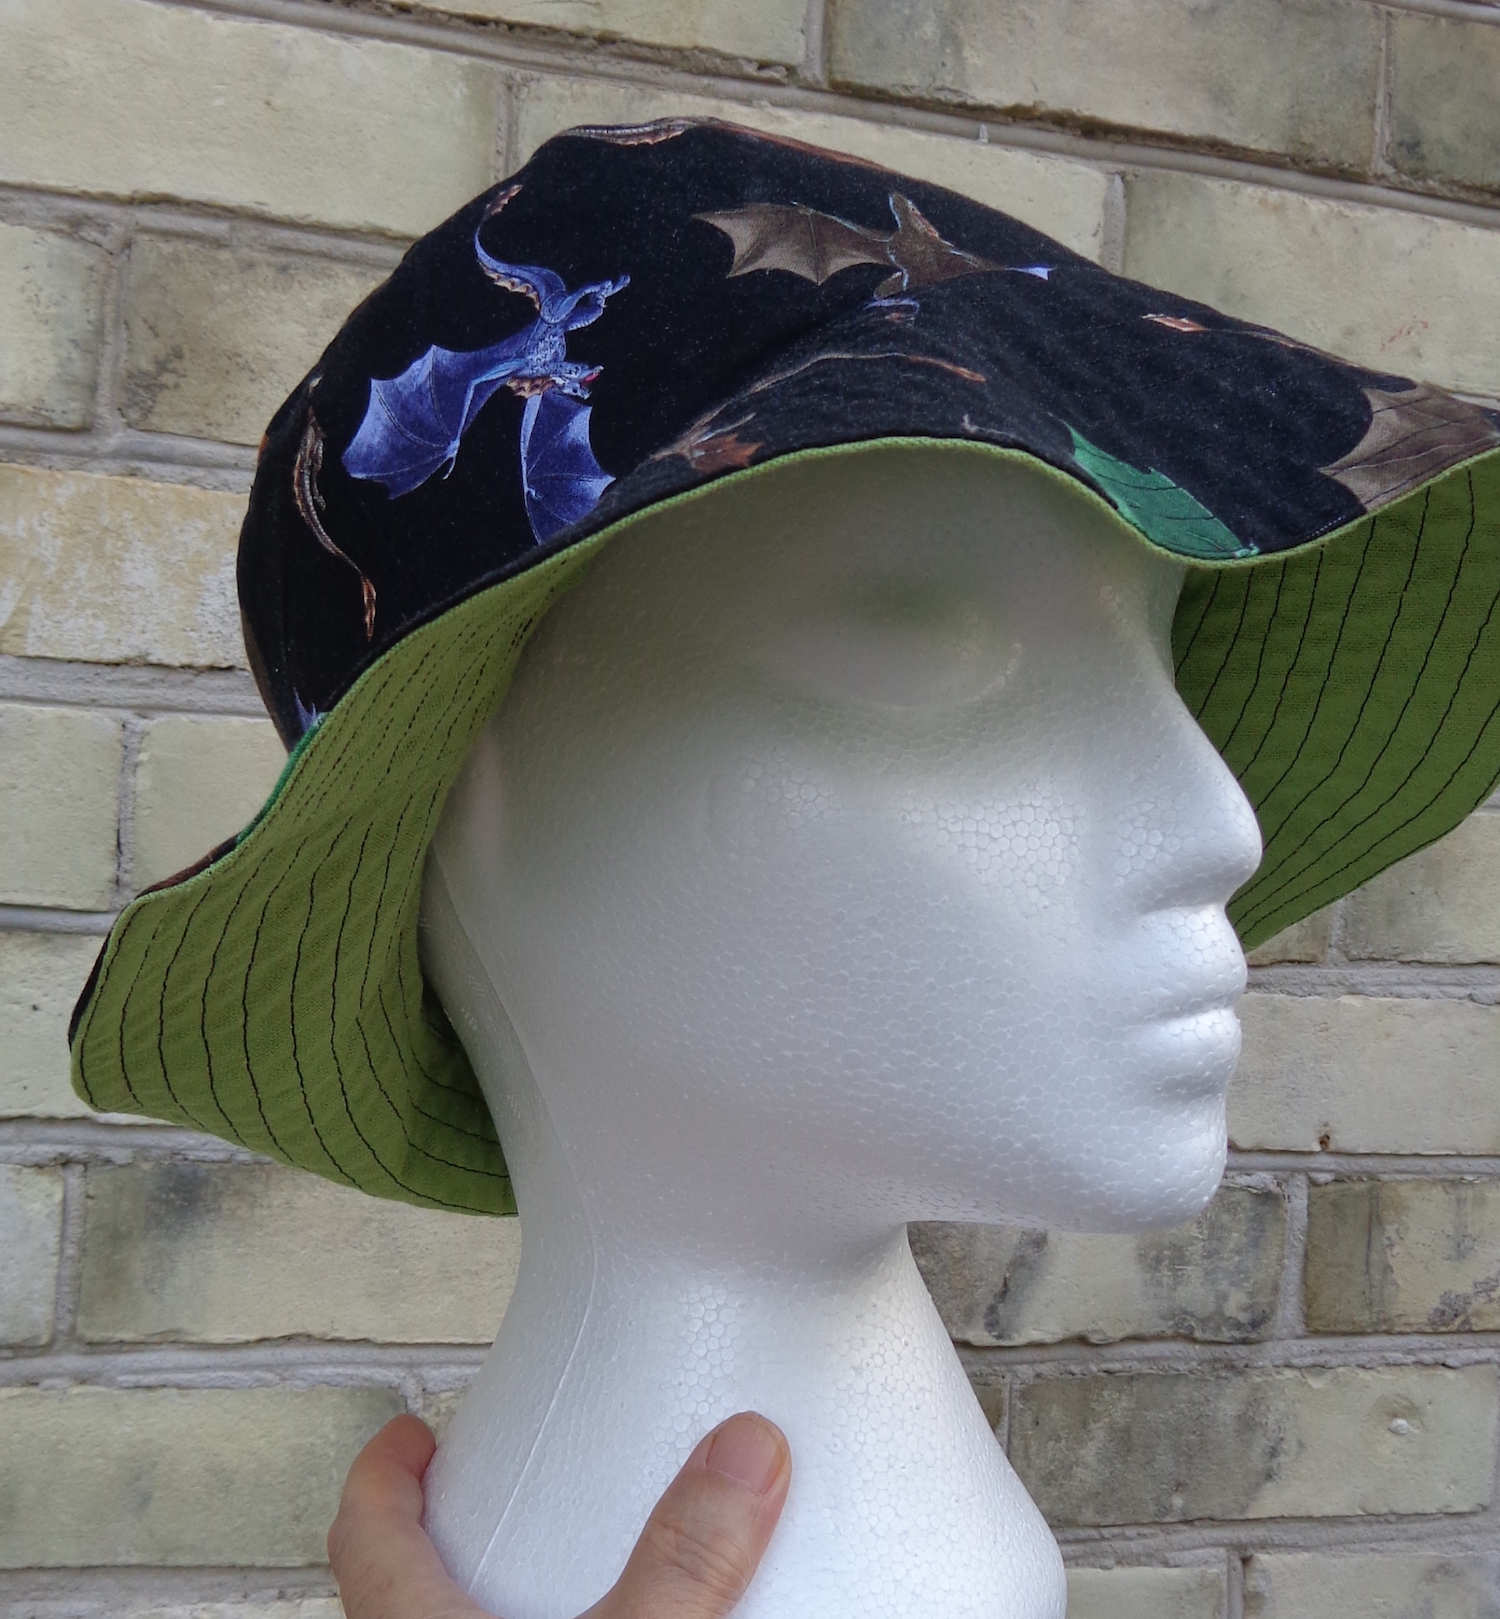
This one is a bit deep in the crown for me, although it fits well when I have my hair up. The mister tried it on (he needed a hat, too) and thought the crown was too deep. I revised the pattern for him, making the crown 3/8″ more shallow, and here’s the result:
The outside of this one is a light denim. (It looks as if I have bad intentions toward the hat-head, doesn’t it?”
These both look as if they have a broad brim, but that’s because the hat-head has a small head. On me, it has a much narrower brim.
Then I made a couple for my SIL. She wears her hair up all the time, so was excited to have some hats that will fit. For the first two, I used a fusible knit interfacing, the one I use for pretty much everything. These two have a stiffer interfacing – a woven non-fusible adhered to the fabric with Stitch Witchery – as I thought it might make the brim stand out better. They have a lot more body.
I centered one of the toucans on the top of this one, just for fun.
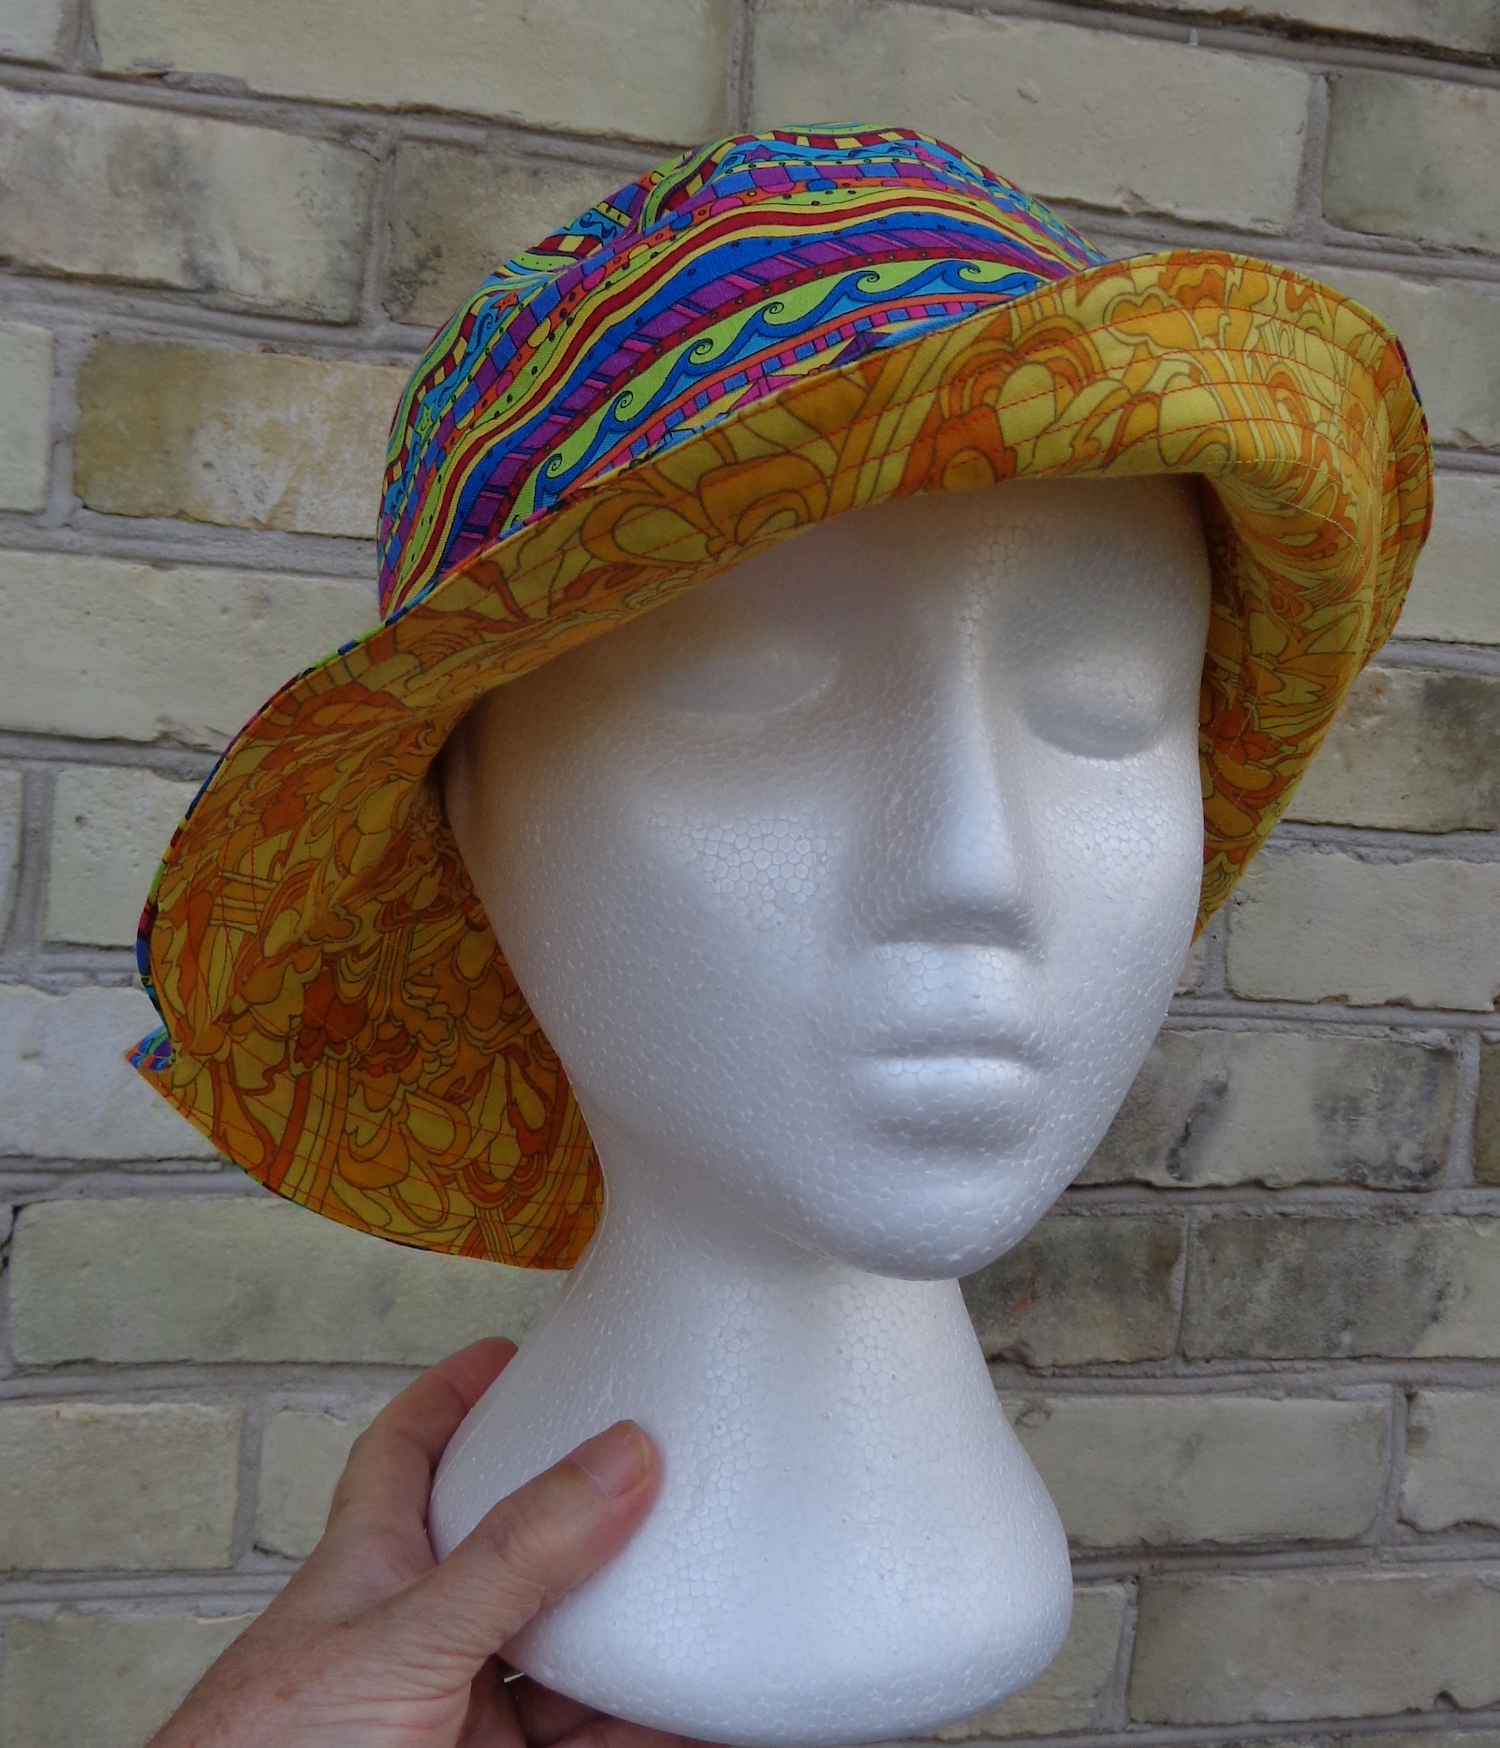
And here’s the final one, with the lighter interfacing again and a fun Yellow Submarine fabric inside. The brim is much floppier.
I realized that I’ve never posted here about The Herd, which is my collection of vintage sewing machines. Now’s the time to start! I’ve been pulling them out of the closet this year to give each one a run, so why not post about the machines, too?
The first one to break out of storage was my Singer 185. It’s a 3/4 size machine in a lovely vintage green.
The Singer 185 is a straight stitch machine and a real workhorse. As you can see, I found it along with the Singer buttonhole attachment in what my husband calls the spaceship box. (You can also find it in a plain cardboard box, the way my mom’s was.) This buttonholer makes the most awesome keyhole buttonholes. You attach it like a huge foot to the machine, and choose the size of the buttonhole from cams included with the attachment. (If you ever see one and don’t have one already, grab it!)
My 185 is in the Singer canvas covered box, part of which is the base of the machine. There’s also a version with a light green plastic carrying case, which also provides a base. I’ve seen these for sale but think they’re a bit flimsy and I don’t love the green. You might also find this machine set into a table. It was also made in taupe and brown. According to the Singer UK website, the green 185 was available only in the US and Canada. The machine was manufactured from 1958 to 1963. The story is that you can tell from the machine number where it was made: the 185K was made in Kilbowie Scotland; the 185J was made in St-Jean-sur-Richelieu, Quebec, Canada; the 185 (without a letter) was made in the US. There’s evidently a bit of mixy-mixy with this that might be an English Canada thing – mine is badged as a 185K, which means it was made in Scotland, but it’s green, which is a North American product. It has North American wiring and the badge on the motor says Made in Canada, so I suspect the machine was made in the UK and wired in Quebec. Maybe it was imported and the wiring was changed once it arrived. (?) Maybe that’s why it has the canvas-covered box instead of the green plastic one. I’ve seen others that say “Made in Canada” on the machine itself, but mine doesn’t have that.
You’ll find the serial number of the machine on the bottom on the underside of the front. (You have to take the machine out of the case to see it.) Mine is EN771159. The ISMACS website maintains a list of Singer serial numbers and their manufacture dates: this machine was in the batch of 50,000 99’s and 185’s made in August 1958.
The beauty of a straight stitch machine is that there’s not much to go wrong. Mine doesn’t have a manual anymore, but it was in good working order. Even the tension was fine. Mine came without extra feet or attachments, but all the regular Singer feet work on it and even my cheap eBay walking foot is fine. The lever to the right of the stitch length selector has a screw on it so you can set its position – you push it up to backtack, then it’s easy to return to your set stitch length. There’s a blog post here on the Mermaid’s Den site about servicing a Singer 185 if yours needs more TLC than mine did. (The link there to the manual on the Singer site is a dead link, just FYI.)
I used this machine to piece both of my test quilts, and to quilt the first one. I also pieced the Mermaid Quilt with it. I like it a lot. It’s a little more clattery than my other machines but it works just fine. The feed dogs don’t drop but I quilted easily with it using the walking foot. I discovered that it tends to stop with the needle up, so when I took a pause in quilting, I had to remember to put the needle down before anything moved. That’s really not a bit deal. The electrical is still fine on it, but I unplug it when it’s not in use, just in case. I think I paid about $75 for it at an antique market, which included the buttonholer.
Next time we visit the Herd, we’ll talk about my vintage Elna collection. 🙂
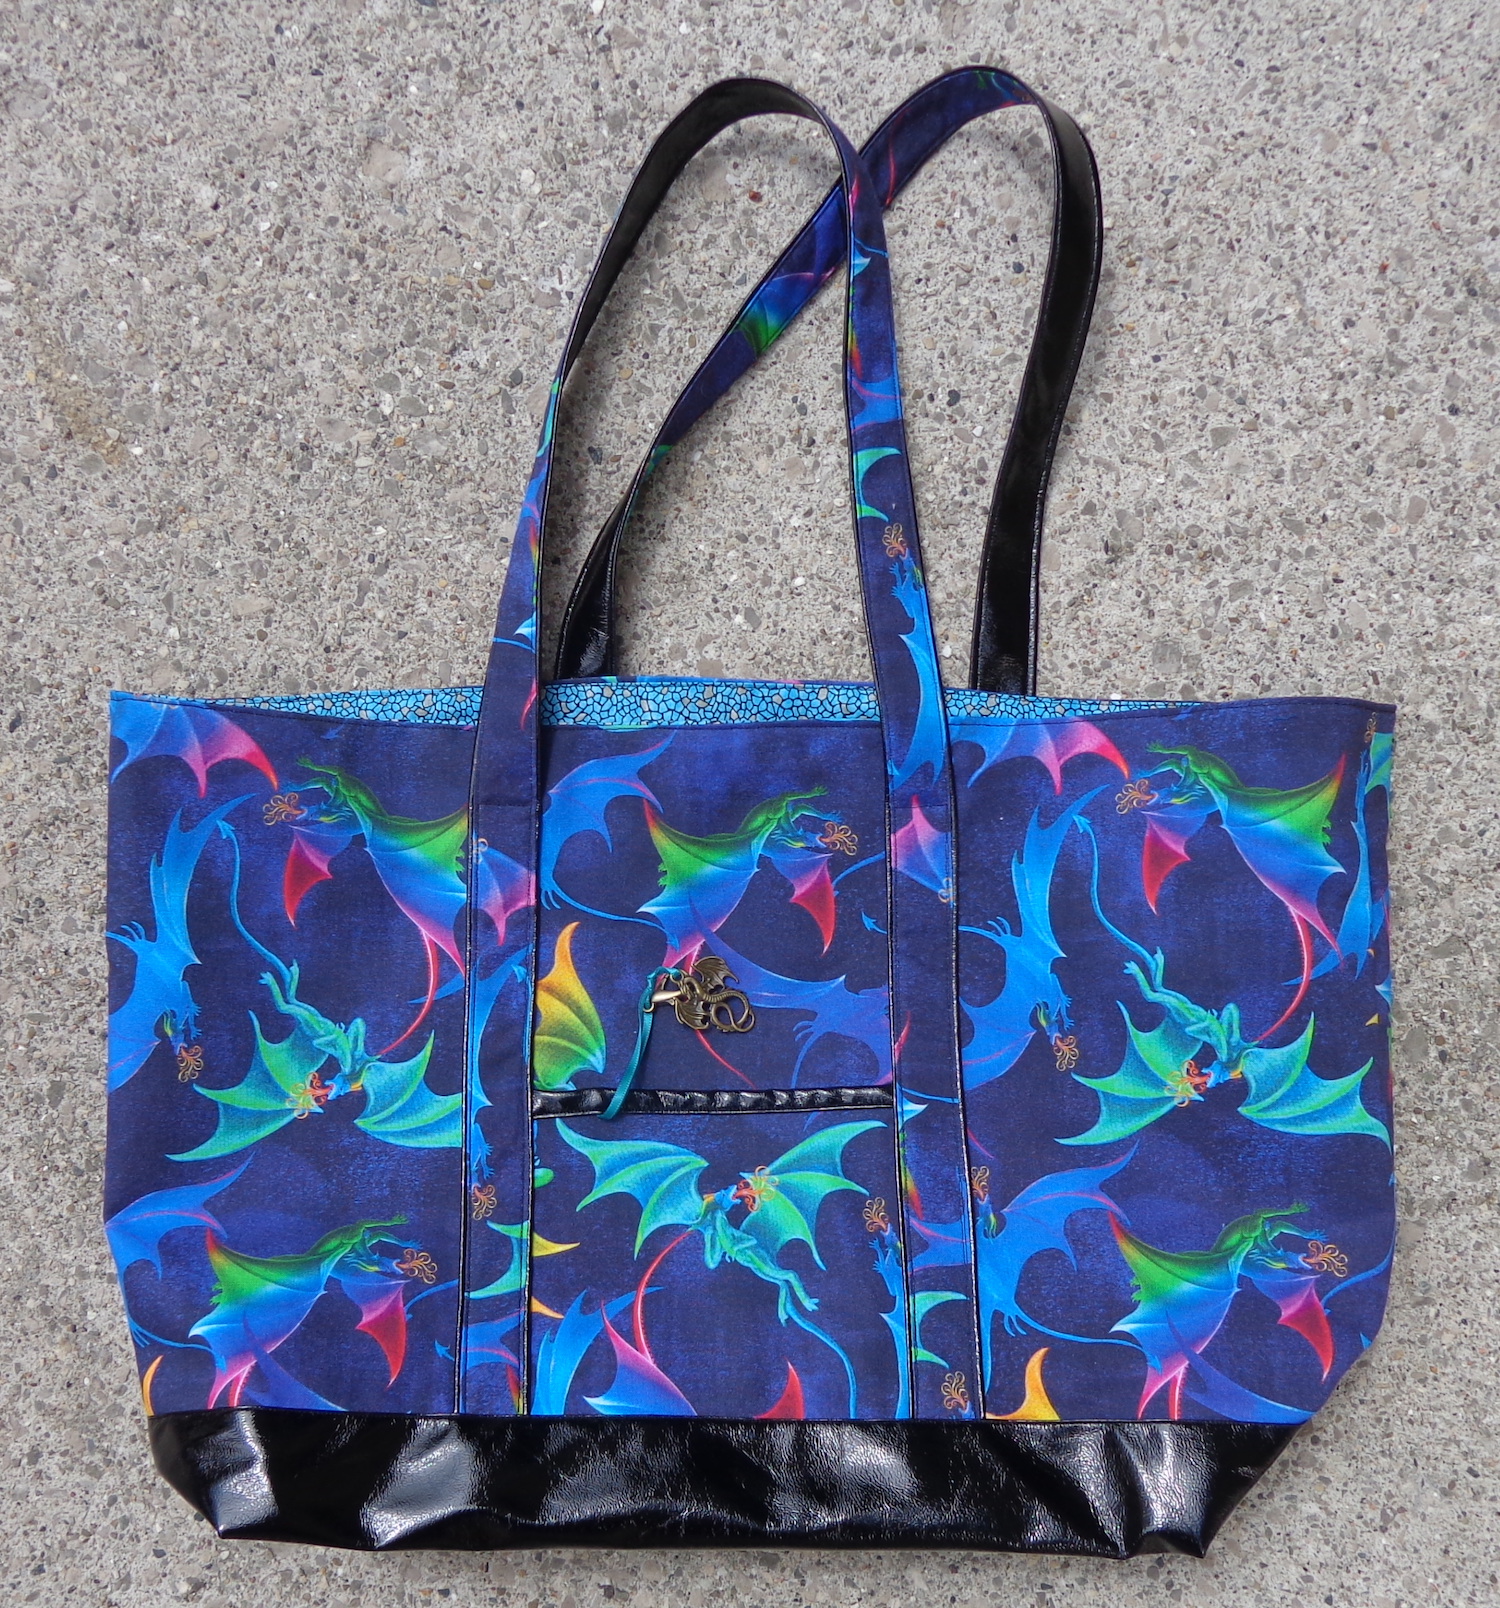
A few weeks ago, I showed you a tote bag I made from a dragon print fabric. (The post is right here.) Well, I’d cut out a few more and finally got them sewn up. First, one in a different dragon fabric.
The pattern is a free download from kokka-fabric.com. It’s in Japanese, but there are illustrations of the assembly and measurements to cut the pieces. You can find their free downloadable patterns here, and this bag pattern here.
Once again, I used the black faux-leather as an accent for the pocket as well as on the base and the straps. What I did differently this time was interface the entire outside – all the dragon fabric – to give the bag more stiffness. I still think it’s a bit floppy and the pattern would work better in a canvas or drapery fabric.
Here’s another one in a different print:
This was a bit tough to match up since the design is so regular but not quite printed on the grain. I did my best. 🙂
I like them both, but now it’s time to make some re-usable grocery bags. I’m making a variation of this pattern – no outside pocket, straps of nylon webbing and bigger dimensions – out of drapery fabric from my stash. I’m also putting feet on them and bases for stability, and some of them will have zippered tops. I’ll show you those bags when they’re done.
My Monster High and Ever After dolls are mostly thrift-store finds, which means they usualy come to me naked or close to it. I buy shoes for them online, but make clothes for them otherwise. I had written a post about a dress I made for my dolls from a free downloadable pattern – I also made a cloak to go with it that I figured out on my own. – but realized this week that I hadn’t published it. (I sent the dress and cloak to Astro Jen as a gift for her girls and didn’t want her to see them before they arrived – then I forgot to queue up the post. Gah. That’s why it published yesterday.) It’s right here. I need to finish the variations of that dress and cloak that I’d cut out for my own girls, but will show you both when they’re done.
Today, we’ll have a look at some tights I made for the girls last weekend.
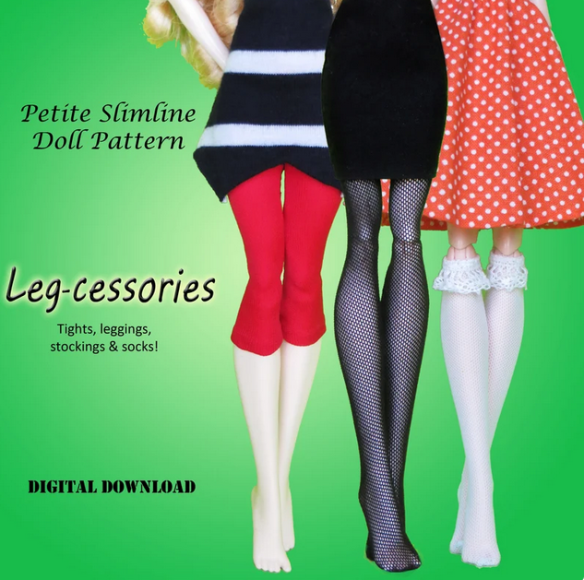
The pattern is Leg-cessories from DGRequiem – here’s the pattern on Etsy. It’s a PDF download that you print out.
Here’s the designer’s Etsy store, and here’s her website and store. She offers a lot (a lot, a LOT!) of cute patterns for different dolls.
So, yes, this is a paid pattern, but it offers many options. There are socks and stockings/pantihose, plus tights in four lengths. (I want to make knee socks with lace tops still. They’ll look great with those little knitted dresses.) Even better, the instructions are really good and filled with tips for getting good results. It includes instructions for both machine and hand-sewing, and also there’s a sizing chart for the dolls. I only made tights so far, but I think this pattern is a good deal.
These two pair are my favorites.
The girls seem to like them, too.
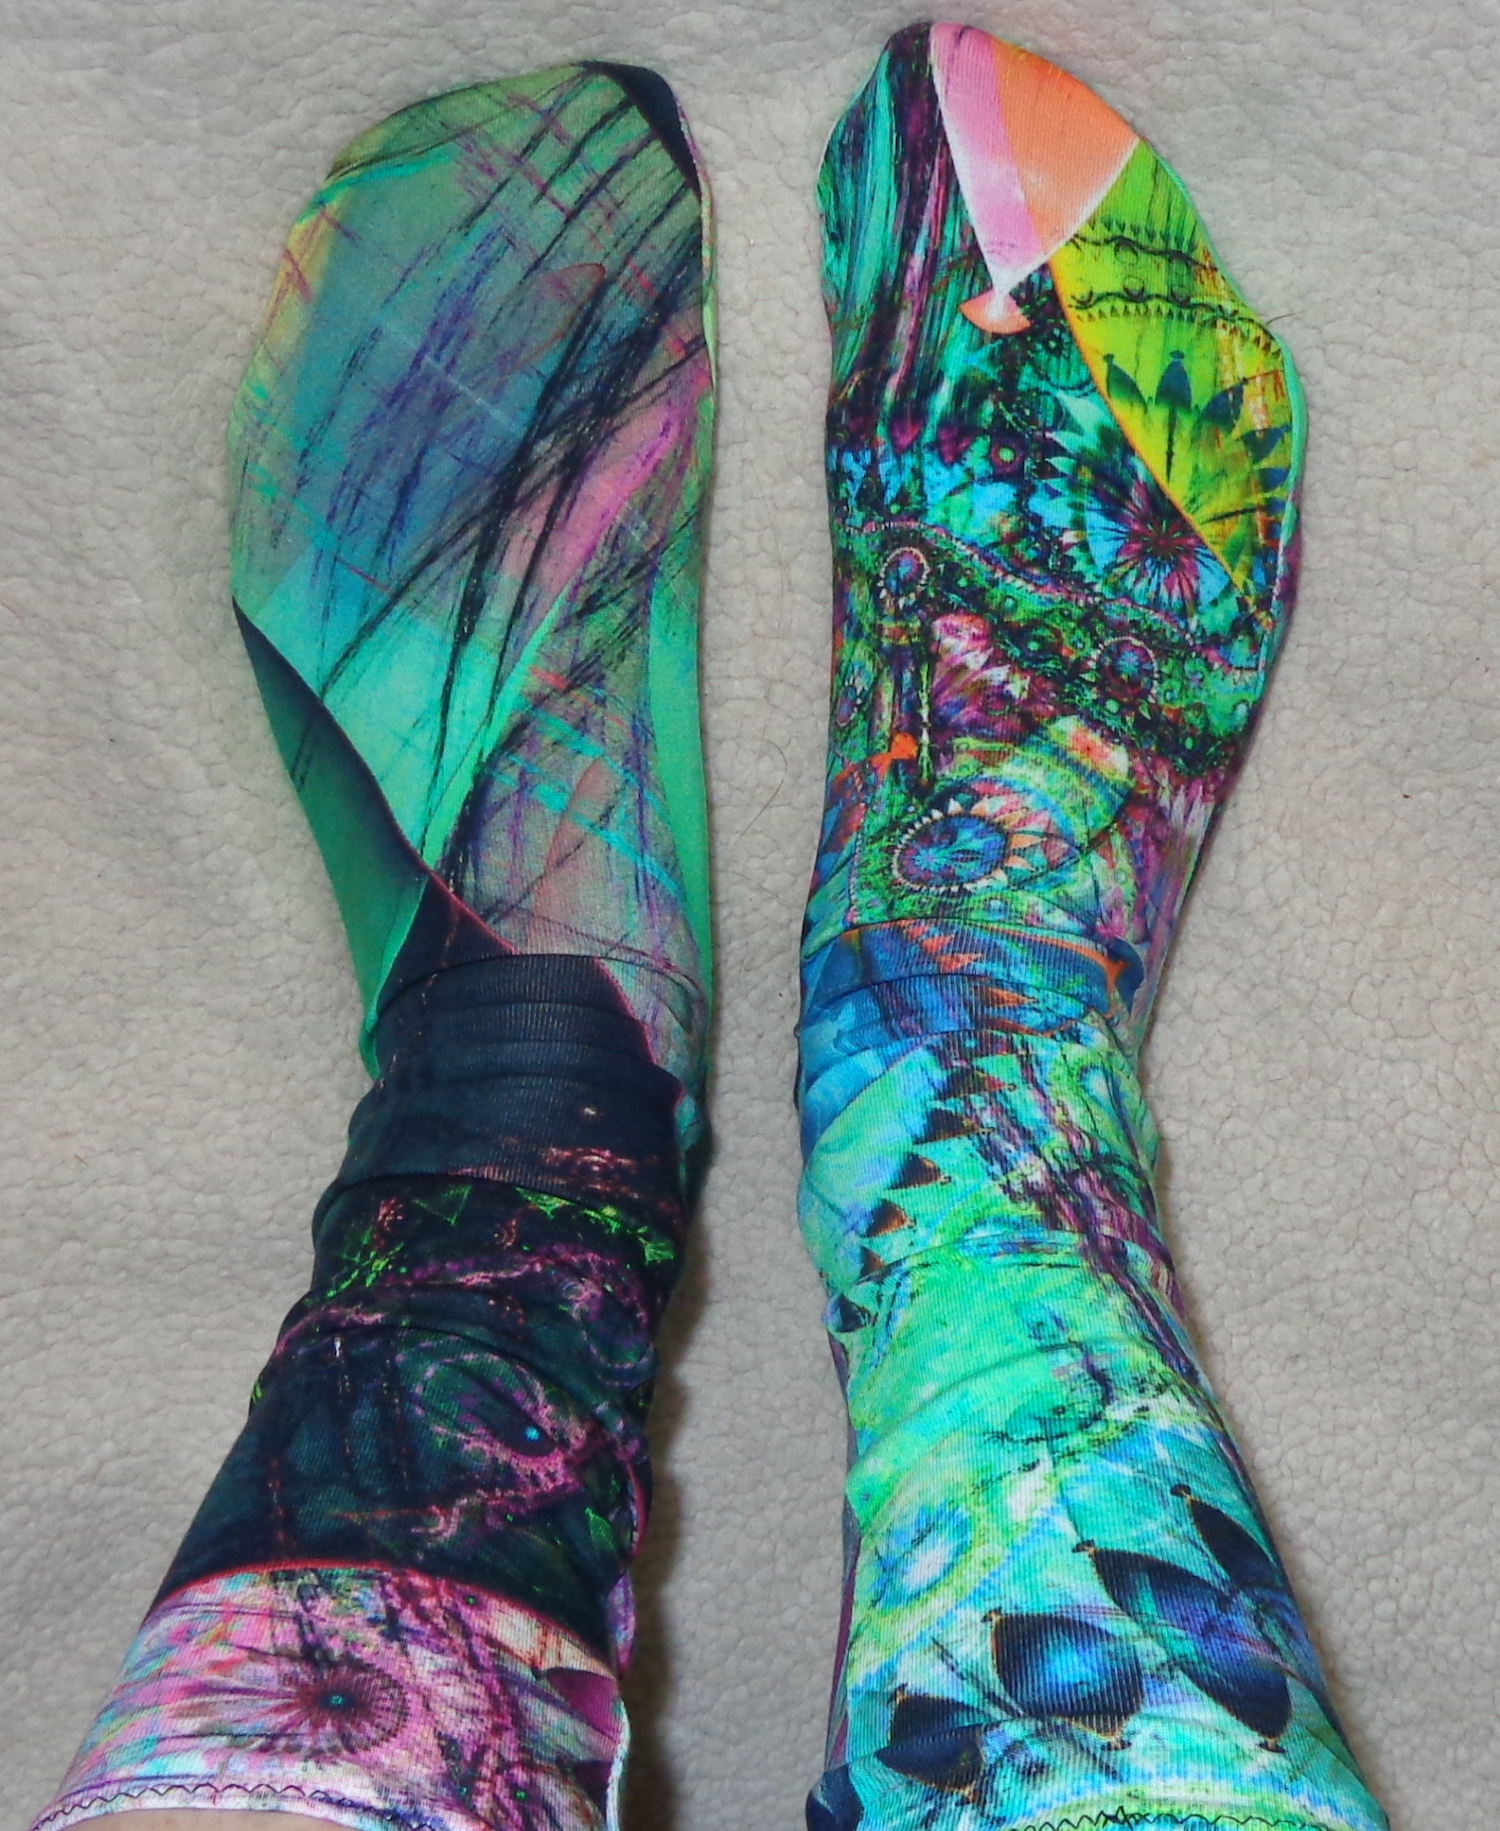
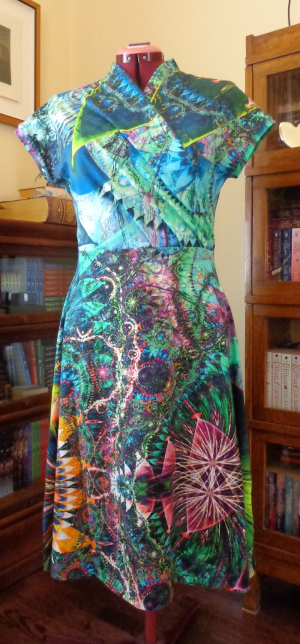
They’re both cut from scraps of a cotton knit with a really large-scale pattern and repeat, but lots of teensy detail. The repeat is about 45″ in length. Here’s the Mirri dress I made from this print (it’s also at left) and here’s the link to the product page of the online shop where I bought it. The product page is still live, even though the fabric is sold out. You can see better detail of the fabric there.
I did some strategic cutting from my scraps, to end up with two legs from the same area of the print. They don’t even look like they’re from the same fabric, and I could make a dozen more unique pair. (And, yes, I just might.) This was also the easiest fabric to sew. It’s a cotton with lycra and a bit thicker than the others.
Did you notice that the girls have cardigans, too? I’m writing out that pattern to share it with you as a free download. Frankie also has one of the purses from a 5-Surprise Mini Fashion by Zuru (That’s a Chapters link.) because yes, after Astro Jen sent me the two pink purses, I surrendered to temptation and bought a pair of surprises myself. This green bag was in one of them, and the homage Louis Vuitton tote that I was coveting was in the other, so that worked out well.
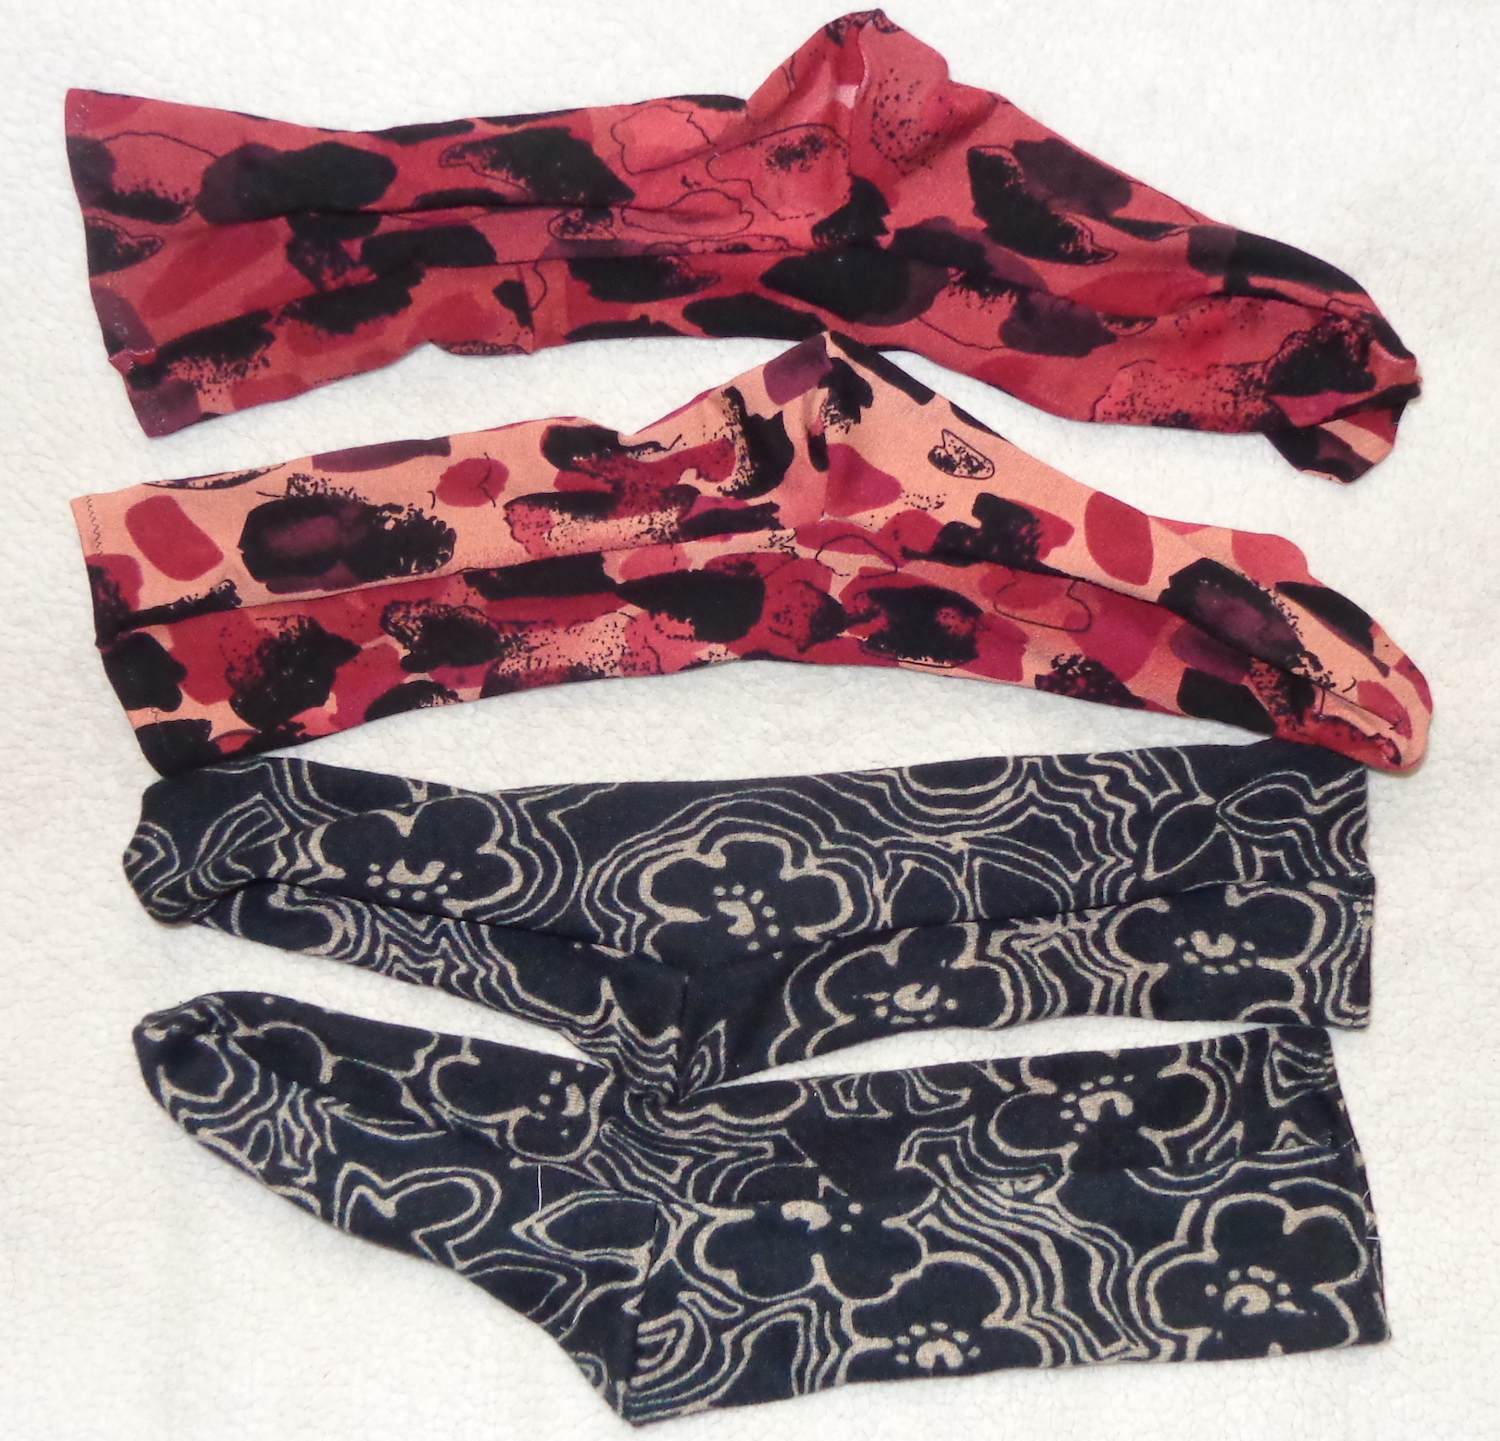
But back to those tights. Here are a few more pair that I made last weekend:
These are like potato chips: I can always go for one more pair. I could have fitted them tighter (there are instructions for that) but the girls like to share and the EverAfter High girls aren’t quite as thin as the Monster High ones. The pair on the left were fussy-cut from a knit with wide bands of patterned stripes. The repeat on it is about 18″ so it was possible to cut several (many!) pair, all of which came out differently. (My naked Skeleta is coveting these.) The purple pair were also fussy-cut from a large scale paisley print. (Clawdeen wants those.) The next two were the obvious choices, cut from small-scale prints that are closer to being in scale for the girls. (Although, again, the brown print has areas that are predominantly teal, which would give a different look.) The last pair were also fussy-cut – that starry pattern has a lot of variation over the repeat and some “suns” that could fill half a piece. I chose places with smaller stars and similarly coloured background. Lots of tights for the girls!
And they have a space to keep them, too. Look at those empty clothes racks.
This is another of my DIY wardrobes for dolls. (That link is to my first one, for Barbie.) I used a paper box with magnets on the lid flap, and stood it on end. The back wall of the wardrobe should be the bottom, and the box top lifts. Now it drops down to be the dressing room floor. This box has a floral print on the outside and gold foil on the inside, which I like a lot. For this one, I made a U-shaped insert of bookbinders’ board and “wallpapered” it with a pretty print paper. It’s held in the U shape by the two clothing rods, which are bamboo skewers glued in place. They have bamboo beads at each end as escutcheons and all the bamboo was coloured black with a Sharpie marker. There are some hooks on the right wall, too, made of bent headpins. The mirror is a bevelled one from Michaels, framed with beads and backed with gold paper. The dresser is a make-up organizer from the dollar store. The rugs are screenshots of carpets printed on cardstock and cut out. (The front one is glued down.) I didn’t make a handle for this one and might not bother. (I’ll be busy sewing more clothes.)
Back to the leggings pattern review – this is a good pattern with lots of customizable options, clearly written with great instructions. I’ve bought several more patterns from this designer and will show you the results soon. (The girls are excited.)
My friend, Astro-Jen, collects EverAfter High and Monster High dolls (as well as others), so last winter, I made a dress for her doll. I started with this free pattern from ChellyWood.com called Small Doll A-Line Dress pattern. She offers a TON of free pattern downloads on her site, right here, sorted by doll height. The directory for 10″ dolls (like EAH and MH) is right here. I started with the green dress pattern at the bottom.
I cut the fuller skirt of View C and added a crinoline with a lace edge, much like McCalls 5770 for Barbie. The biggest challenge for making this dress is how tiny it is. The bodice is lined, just like the McCalls pattern, so all the ends are tucked inside. I used fusible interfacing (cut in a 1/4″ strip) to finish both the hem and the center back edges. I turned the hem just once and stitched it with twin needles, instead of trying to fold it twice.
Here’s the finished dress I sent to Jen, made in a rayon woven print. Of course, there’s a ribbon for a belt and a satin rose sewn to the front. 🙂
I also made a cape for her doll. I kind of winged the pattern, drafting an oval with the neck opening at one side. The fronts are curved so there’s a short flutter at the front and I made the hood big enough to go around the doll’s head. I cut it of black velvet, lined it with sand-washed silk (which is a special kind of hell to work with) and added two ribbon tabs at the neck. They have a snap on them, and a “jewel” on the front, which is a gemstone charm without the jump ring.
I don’t have any knitting to show you this week, although I’m making good progress on two projects. I finished the body on my Spector pullover and tried it on – it fits! That was exciting. Now I’m charging down the first sleeve. The other project I’m trying to finish was stranded on Sleeve Island for a long time. It’s my Audrey cardigan, which had to go into time-out when I realized the sleeves were far too wide and had to be frogged. One sleeve is done and I’m making good progress on the second. I’ll show you both sweaters when they’re done.
In the meantime, I saw some quilting fabric that I just had to buy – because, well, dragons. It’s from Studio E and the collection is called Rainbow Dragons. At right are the dragon panels.
There are two free PDF pattern downloads available using the prints in the collection – you can see them here – but I’d rather make up my own.
This is the alphabet panel I bought, which is just plain fun:
There are things I love about these panels – yes, dragons! – and things I discovered in cutting that add to the challenge of it all. The letters aren’t all the same size, which makes sense since they have different shapes. The bigger issue is that there isn’t the same amount of space between them – you can’t cut them apart so each letter has 1/2″ all around. Look at C and D, for example. They look spaced out but there isn’t even 1/4″ between the tip of the flourish on the C and the end of the serif on the D. There are also shaded images of dragons in the background – they’re more obvious in this photo than in real life – so adding a little piece of background to square up the letter will always show. Hmm. The designer must not have intended that the letters be cut apart, but that’s what quilters do!
As much as I love the side banner, I can’t figure out how to use it. There are exactly two repeats with no space between them for a seam allowance and no seam allowance at either end. Plus there are two different background gradations on each side, so you can’t piece one good one out of each pair. It’s not available as separate yardage either, which is a shame because it would make a rocking border. Hmm. I don’t actually know what to do with the border hexagons on the other dragon panel either. Inspiration may strike as I work.
The first solution was obviously to dip into the stash and I had a good time with that. I do have a rainbow selvedge-to-selvedge gradation in my stash that goes perfectly with these prints, so that’s been pulled out. I also tugged out a number of orange and yellow prints, including one with flames. (I default to turquoise, purple and pink, so am trying to mix it up a bit.) I’d already bought these flying dragons from the same line to make a brighter dragon tote bag. They’ll going into this quilt instead.
I don’t have a design wall, so there’s fabric all over the floor. My dog likes to walk across it, or even sleep on it, just adding to the challenge of it all. 🙂 I’m quite excited about this project and will show you my results!
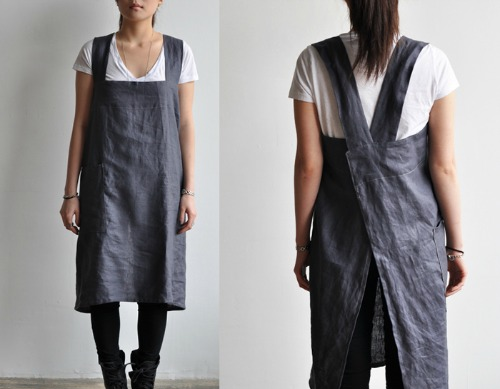
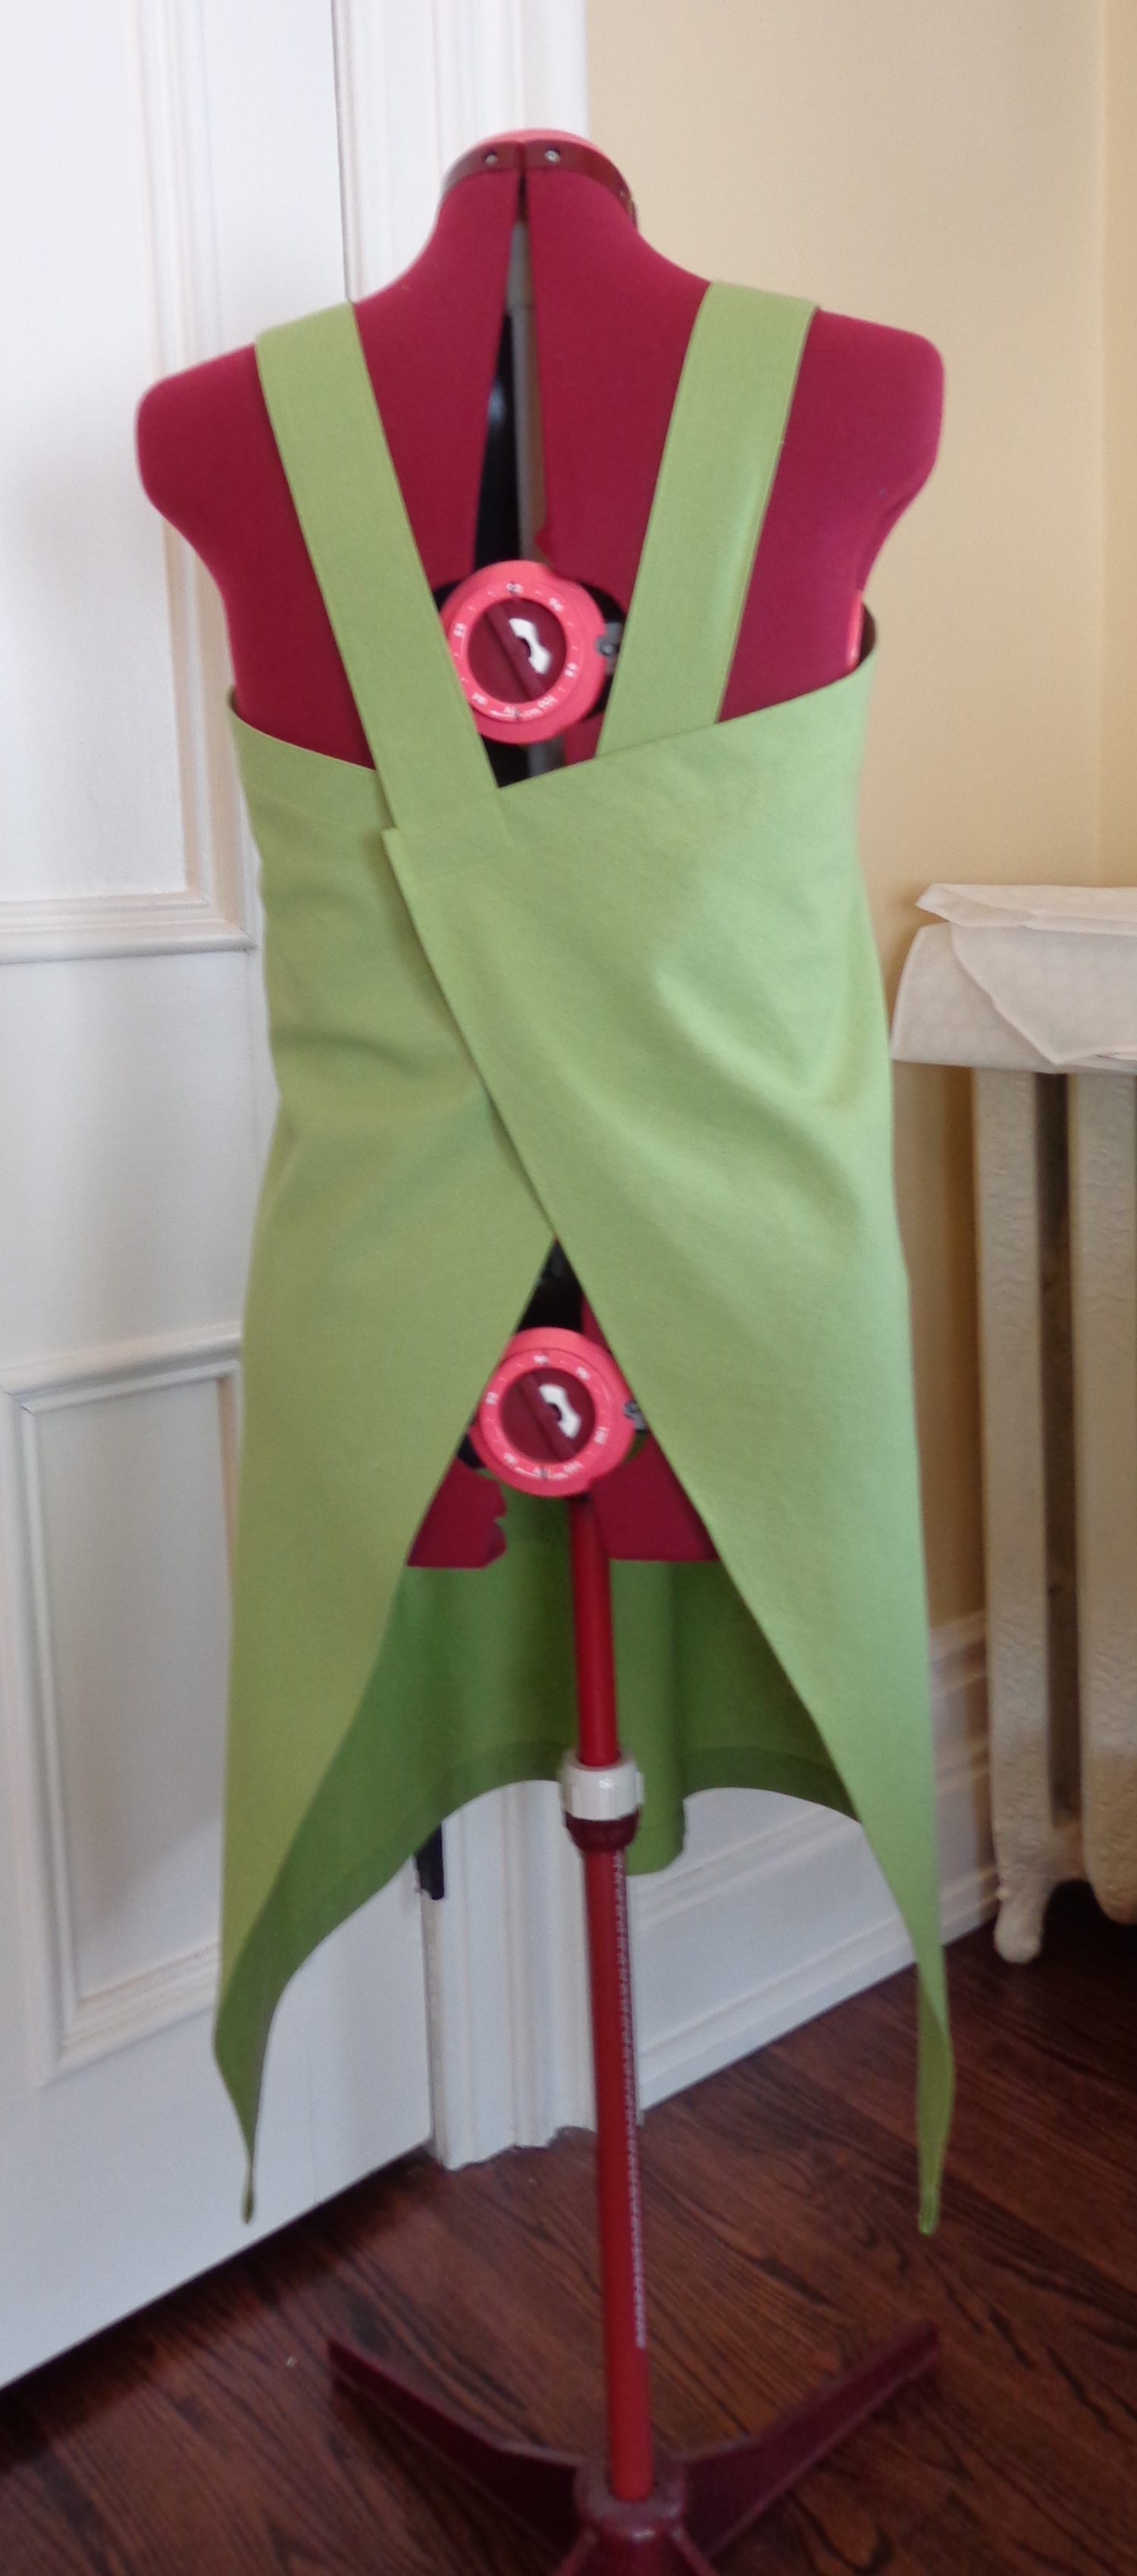
Everyone’s linen apron journey seems to start in the same place, with this image:
It’s a picture from Pinterest of a Japanese-inspired linen apron, once for sale but no longer available. It looks so simple! It looks so easy to make.
But, um, no.
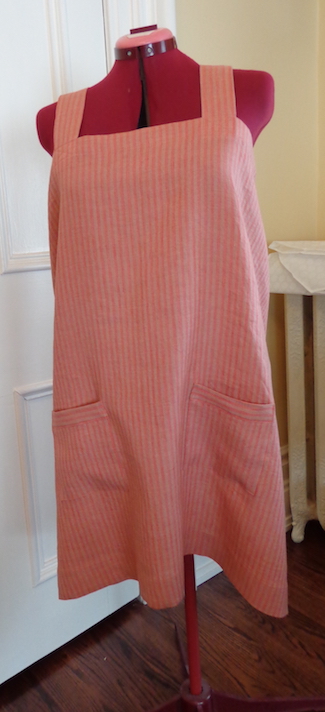
In my quest to make one of these aprons, I found this post on the Daily Sew blog, with videos. This is an excellent resource and you should definitely check it out. I followed this plan for my first apron. I used a piece of linen I’d bought as a remnant. It was one of those online purchases that left me feeling meh – the colour was called Watermelon, but really, the watermelon is striped with oatmeal and the overall effect is Puce. (Although that wouldn’t have sold as well.)
The plan was to cut my piece 120cm (20cm wider than my bust) and 90cm long, because I like really deep hems on linen. (Like old tablecloths.) At each end, I did a narrow hem, at the top, I turned down 1″ twice, and at the hem I turned up 2″ twice. The straps are 55cm long but I cut them wide (almost 8″) so that there are four layers of cloth in each strap. (Fold both long ends to the center, then fold the strap in half and topstitch.) I added a contrast cuff on the top of the pockets because I thought after cutting them that they could be bigger. I learned this tricky and tidy pocket construction making my Butterick 5537 bathrobe.
I loved working with the linen.
(Oops, Nellie looks a little drunk in the first picture!)
In the end, though, this is not a flattering garment – and it looks better on Nellie than it does on me, because our measurements have diverged of late. There’s a LOT of extra fabric around the bust which makes it feel frumpy. I’m a pear, so I don’t need extra fabric there or pooling around my waist. Hmm.
Then I recalled a conversation with my friend Terri the tailor. When I first was intrigued by this design, she was skeptical. She said something to the effect that square pieces of fabric on grain don’t drape well on curved bodies. *BING* I decided to try another version with the body of the apron cut on the bias.
I LOVE this version.
Version #2 is cut from a linen and cotton blend (55/45) that was on sale for $4/m at Fabricland because it’s from a previous season. I liked the colour and it’s perfect for this experiment. Because it’s 135cm wide, I couldn’t get the entire 120cm by 90cm on the bias in one piece. I cut for the length of 85cm (sacrificing my fat hem, boo) but only ended up with a width of 105cm. I cut another 20cm by 85cm panel on the bias, and decided to put it down the center front to make a vertical line. I cut the straps and pockets on the straight of grain.
Here’s my second finished apron:
Those two seams down the front are felled and actually they make a nice line for the inside edge of the straps and the pockets. These straps are a little closer together than on the first version, which also improves the fit. I didn’t have a green thread in exactly the same colour so I used one that was a bit more lime, and I like how that looks, too.
You can see that it hangs in a more flattering way on Nelie than the other one. It also looks better on me. (Bonus!)
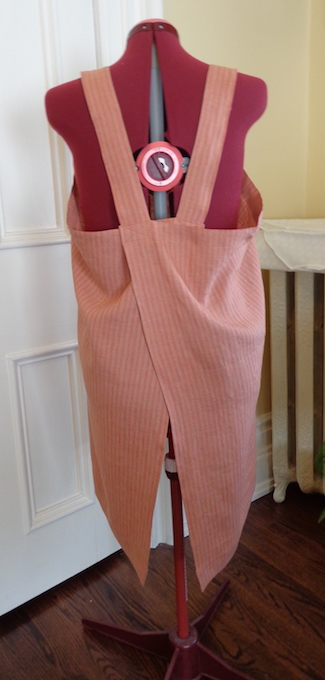
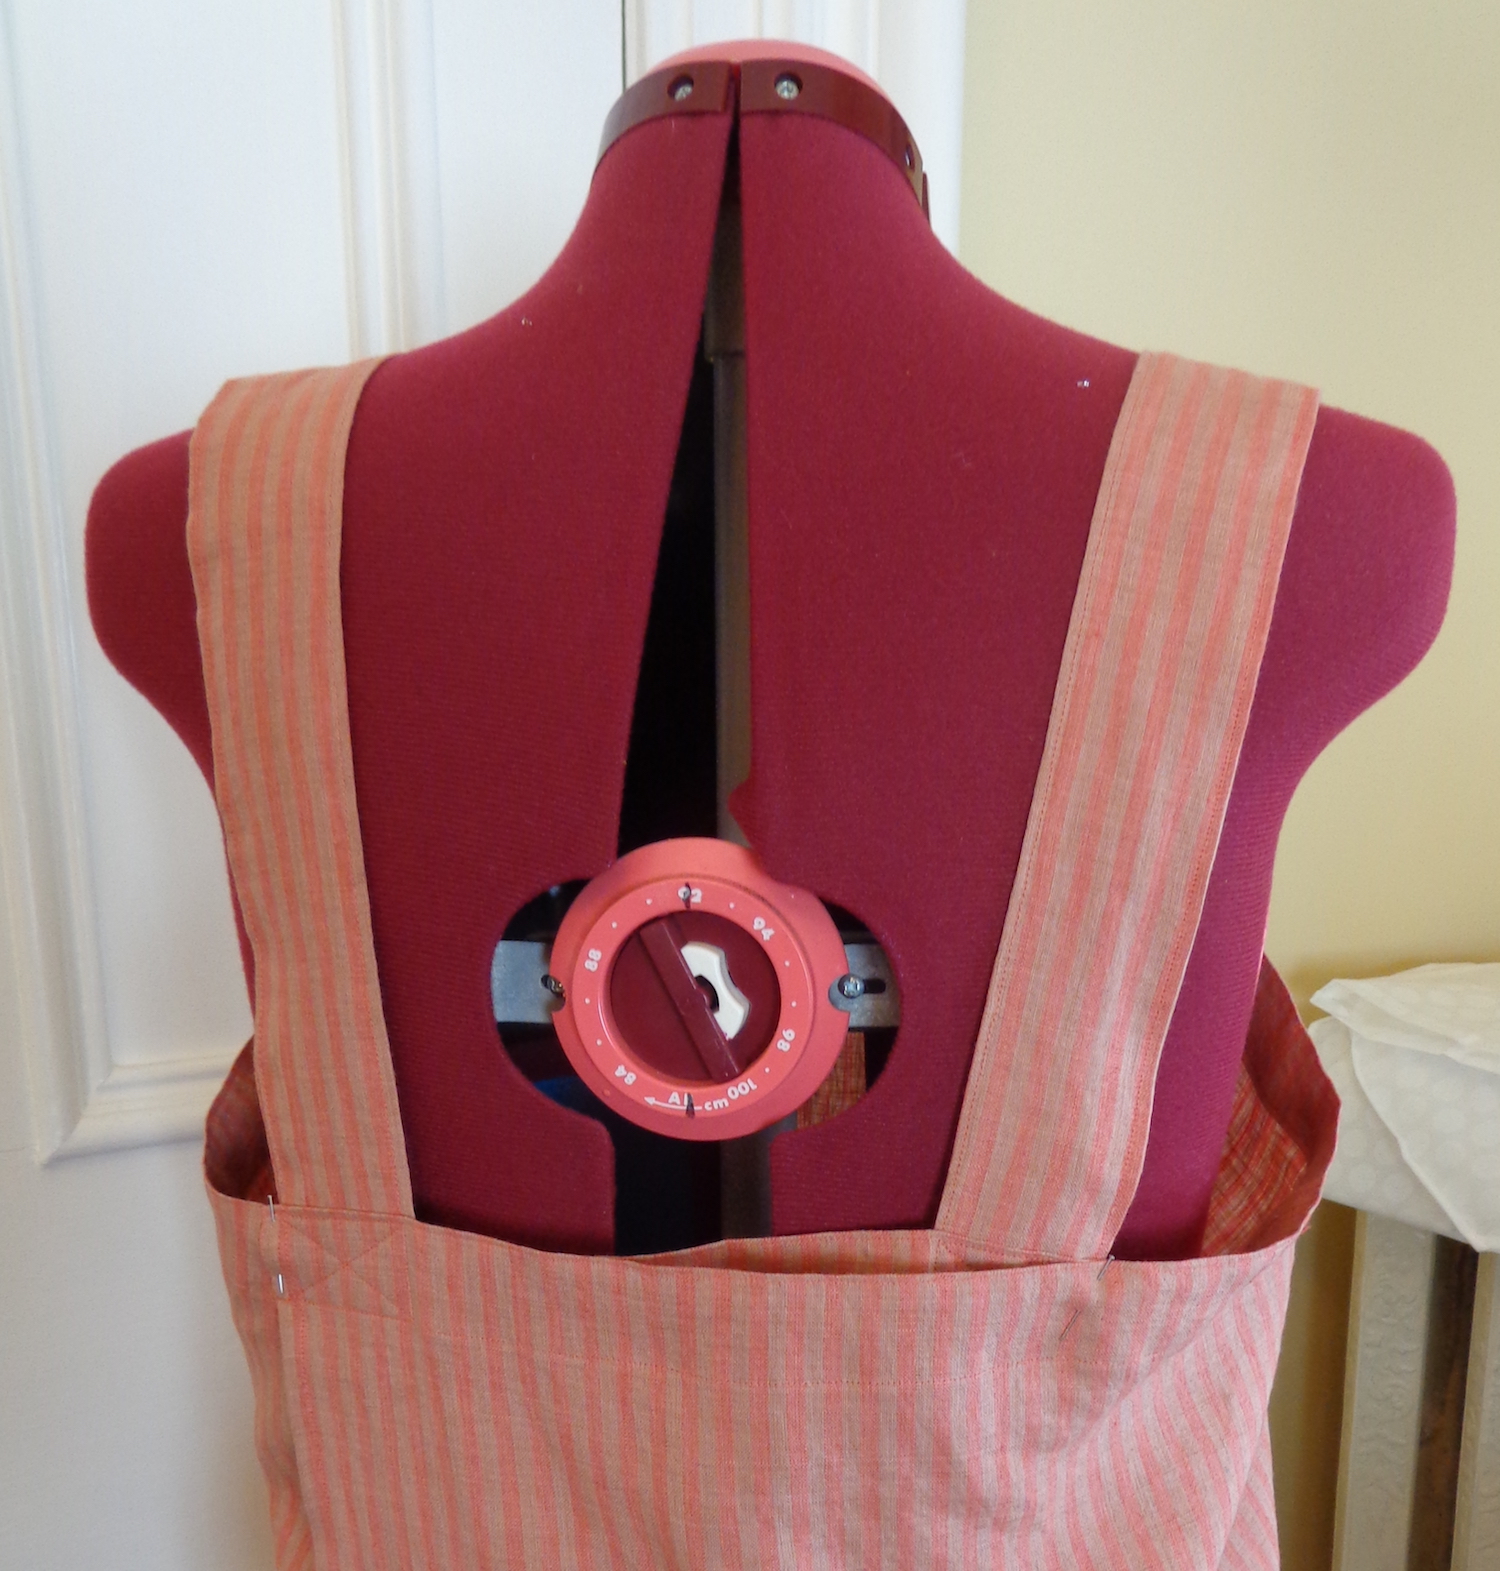
But wait. Why is it smaller in the back than the first one?
I did some measuring and realized I made a mistake with the first apron. I pulled a thread to get the straight crosswise grain and cut a piece the right length but the entire width of the cloth. That’s 135cm. I forgot to trim that edge. (Now I remember that I was going to use that strip for the straps, but it wasn’t wide enough, so I cut them out of the rest of the fabric and forgot to trim the piece down.
That’s why there’s so much fabric in the first one – it’s a bigger piece of fabric. (Duh.) But, the bias cut version does hang a lot better.
I played around with the first one because I know I won’t wear it the way it is and figured out a solution. I pinned the back in place so that the width around the bust was about a few inches bigger than my own measurement and tried it on. I fiddled with the pins until it was easy to get the apron on and off even with the back fixed in place, then I sewed it down.
It kind of defeats the point of the whole design, but it’s more comfortable (my bum stays covered!) and I like how it looks. I’ll actually wear it this way. I just used a basting stitch right over the topstitching line from the outside of one strap to the outside of the other, so it’ll be easy to pull out if I change my mind.
Here’s (drunk) Nellie to show you that it hangs better with the back like this.
I’m going to try another free apron pattern next and will show you that when it’s done.
I seem to be on a bit of a bag-sewing binge lately. Here’s a bag I made from a fun dragon print.
The pattern is a free download from kokka-fabric.com. It’s in Japanese, but there are illustrations of the assembly and measurements to cut the pieces. You can find their free downloadable patterns here, and this bag pattern here.
I chose to cut the pocket from the accent fabric, because the dragons were big enough that it would look silly if they didn’t match up. I then sewed a strip of dragon fabric along the top edge of the pocket to finish it, and also sewed in a ribbon loop with a clasp and a charm. The ribbon is long enough that I can put my keys on the clasp, then tuck them inside the pocket. Lots of reflections on that shiny pleather pocket in the picture! In real life, the charm really snaps against it.
One thing I liked about this design was that the two strap pieces are cut in slighlty different widths. It doesn’t specify on the pattern, but clearly the wider one should be of the contrast fabric so there’s a little peek of it around the outside edge of each strap as a contrast. It’s tough to see in black on black, but the pleather is shiny.
Using black faux-leather as the contrast was a challenging choice. Not just black on black, but it’s slippery and you can’t really iron it. Pressing down seam allowances isn’t an option because it will melt. I cut fusible knit interfacing to the finished width of the straps and applied it to the pleather using a pressing cloth. That worked brilliantly to help me fold the fabric in the right place and also made for a nice finished strap.
I used heavy quilting cotton both for the outside and the lining, but the bag is a little more flimsy than I’d prefer. (It might specify a heavier weight of fabric in the Japanese instructions.) I’m going to make another in a different quilting cotton and interface the entire outside of the bag. I’ll show you that when it’s done.
I usually clean my desk when I finish a book, but last week, things went a bit further. I published a book that had fought me from start to finish (inevitably, this means that I love the result) and so I did a long-overdue spring clean on my office. I also have my sewing table in there and a bunch of yarn stash, so this was a huge sort, clean and reorganization process. I found many projects in the works that I’d forgotten about, and now that everything is shiny and clean, I’m determined to finish some of them up.
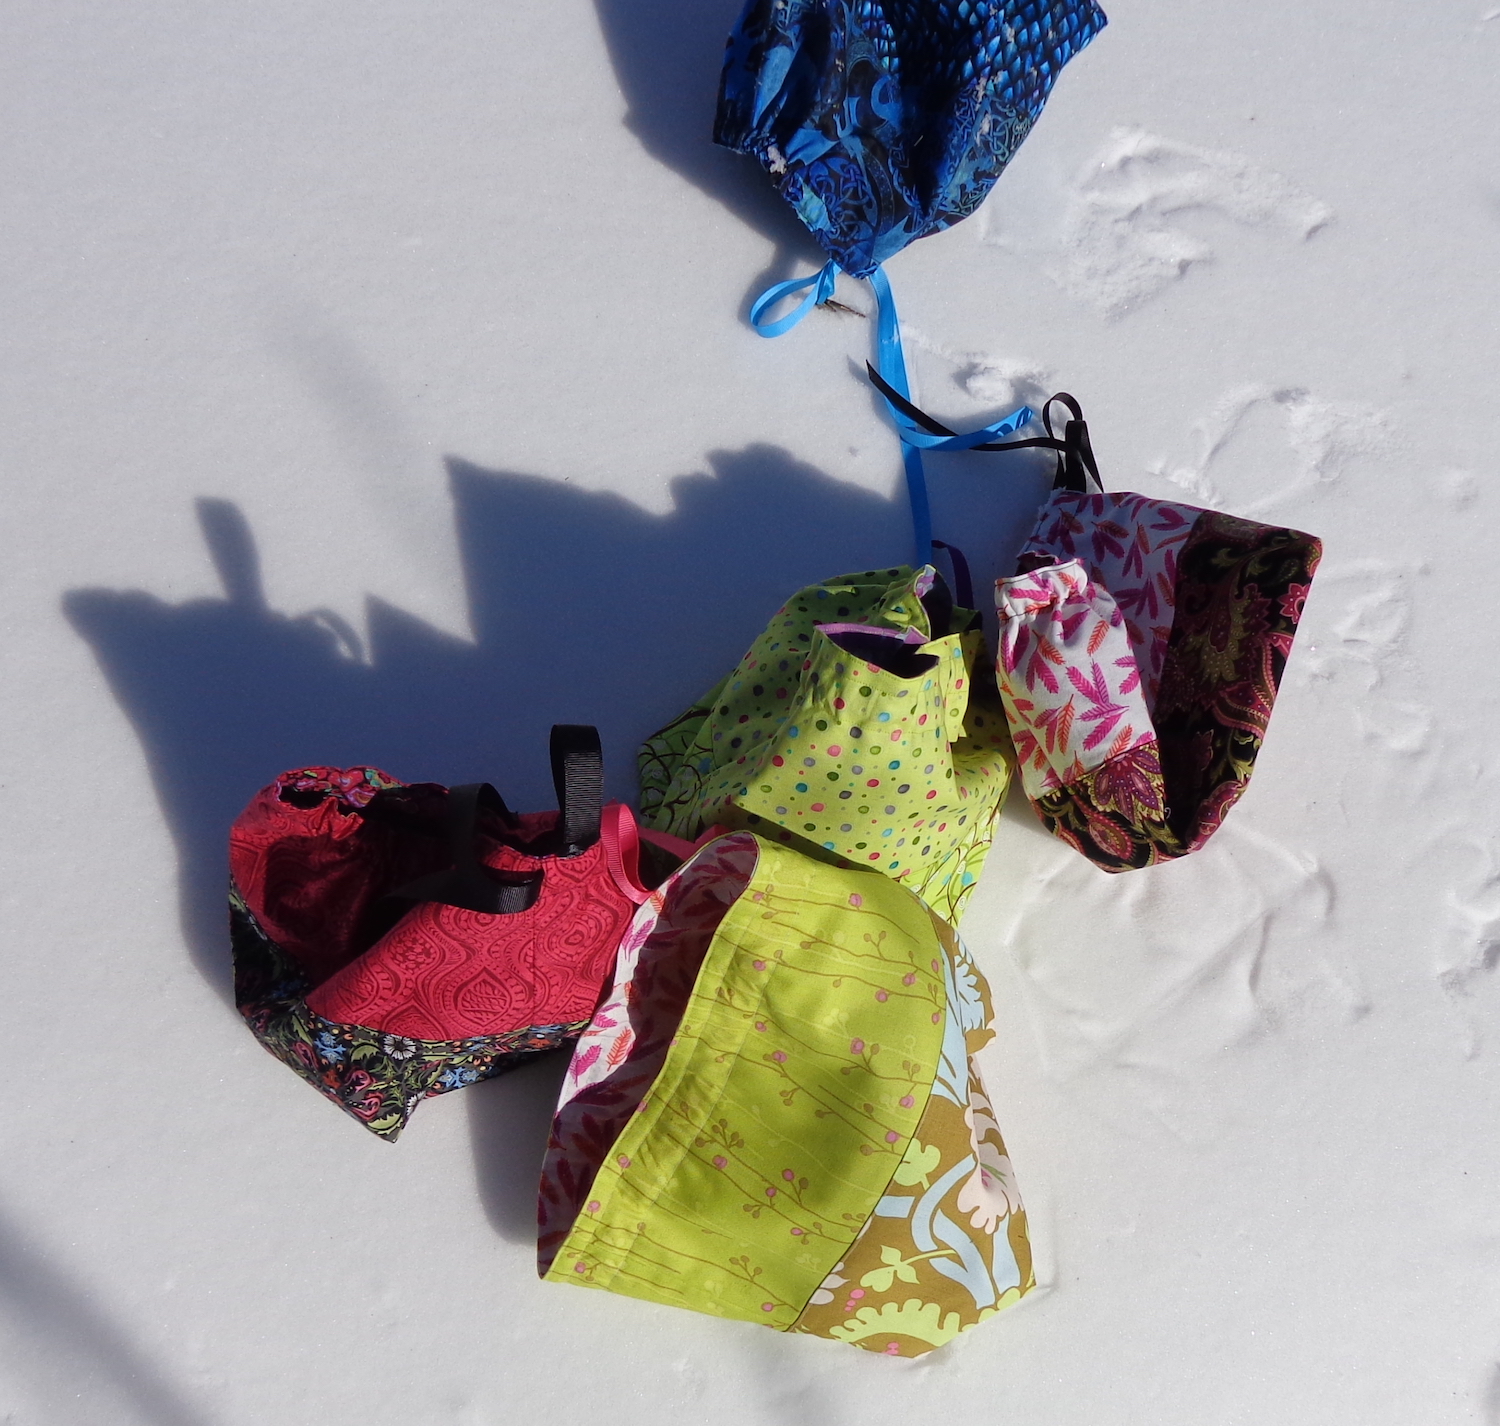
First up, I completed some knitting project bags. I had made some a few years ago (here’s that blog post) and at that time, I’d cut out some more. Last week, I pulled out the pieces. There were some combinations that didn’t sing for me, so I ended up cutting more pieces 🙂 plus I found the remnants from my dragon quilt and put them to work. In the end, I have eight new project bags. I don’t need them all, but they’re not taking up space in my to-be-sewn pile anymore.
(This was a bit of a challenging photo-shoot, btw. We had a blizzard over the weekend and while it’s sunny today, the wind is wild. That blue bag was in the snow indent below the black and pink one when I went to take the picture.)
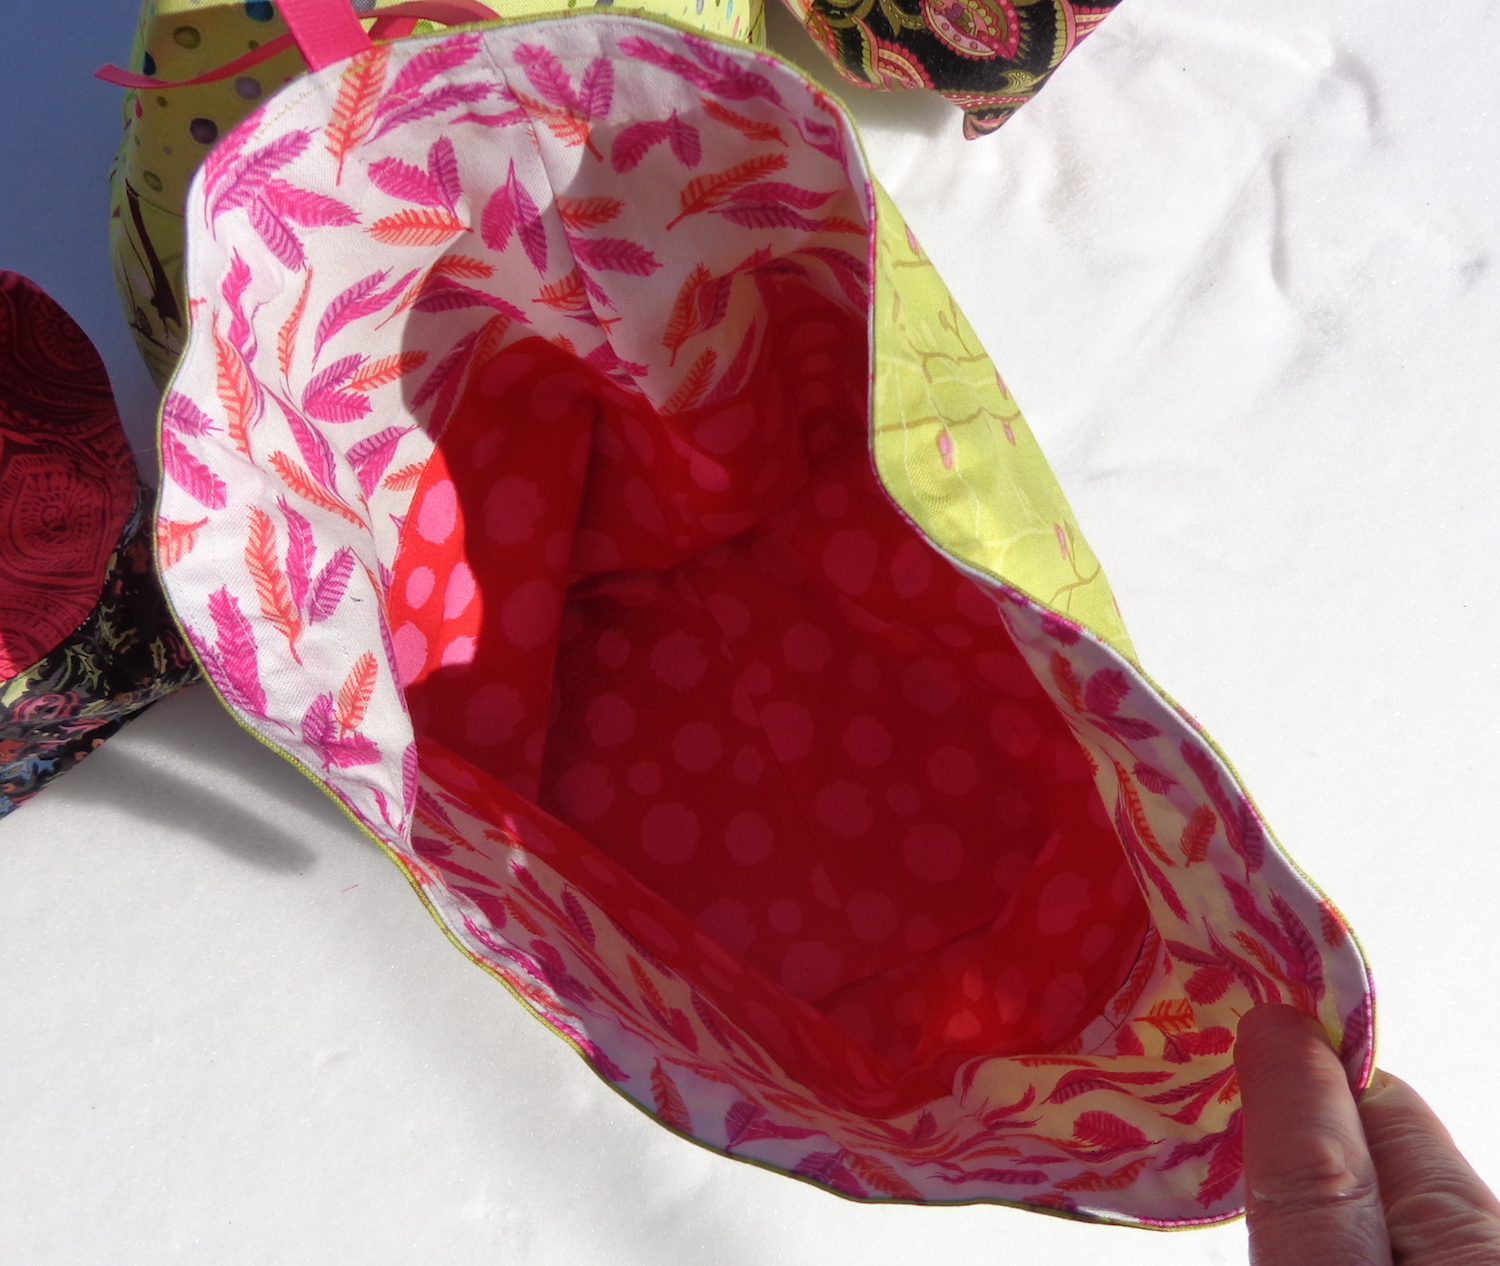
I’m still using the free pattern mentioned in that blog post, but I’ve finalized some more changes. Each of these new bags has a zippered interior pocket – the zipper is in the seam between the two parts. Once the zipper is sewn in, I sewed a square of matching fabric behind it to make the pocket. I often take a small pair of scissors with my knitting and don’t want them to cut the yarn. A zippered pocket is also a good way to keep track of a darning needle.
None of these new bags are interfaced, because the additional layer of the pocket gives them enough structure, I think. I added a loop of grossgrain ribbon as a handle at the top, and also another loop of ribbon with a clip and a charm, just for fun. Each zipper has a pull of the same ribbon used for the charm and clasp.
This one reminds me of a pink grapefruit. It’s the green one at the middle bottom in the picture above.
Here’s the dragon one. I’ll definitely keep this one myself!