Things have been quiet here on the blog. I’ve been writing a lot and solving a lot of publishing things – I’m still knitting and crafting but have been waiting to have a finished project to show you.
Here’s one.
This project jumped onto my needles after our trip to the Koigu Tent Sale in August. You might remember my acquisitions:
Those three reds were screaming to become a shawl, along with the grey/red mix and one of the lighter greys off to the right. (Not the lightest one.) Those two light greys look like a progression in hue, but they’re actually two dye lots of the same colourway. The right one is a bit more blue.
I showed you the shawl in progress, but here it is again:
I used a longer colour transition than the one recommended in the pattern: this is the one that The Unique Sheep suggests with their graduated colourways. It takes 24 rows when you’re working back and forth, 12 if knitting in the round. When changing from A to B and knitting back and forth:
With B, work 2 R. With A, work 6 R. With B, work 4 R. With A, work 4 R. With B, work 6 R. With A, work 2 R.
In the round, the row counts would be 1, 3, 2, 2, 3, 1.
It’s interesting how much evident the colour changes are in a photograph than in real life.
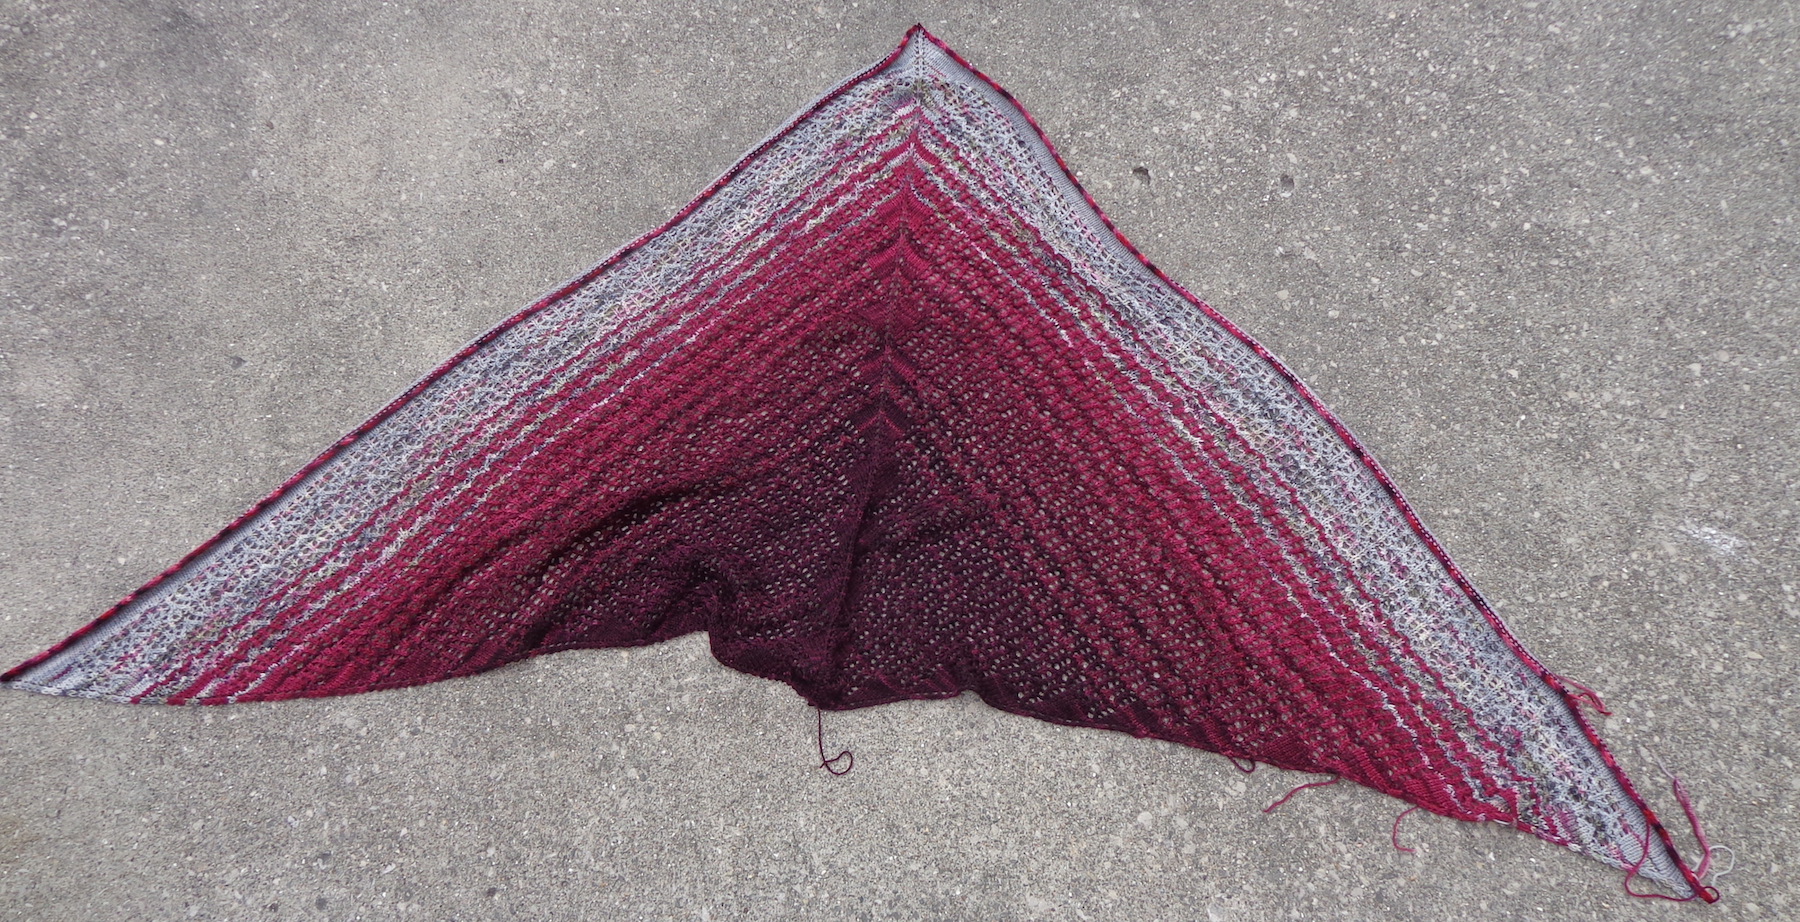
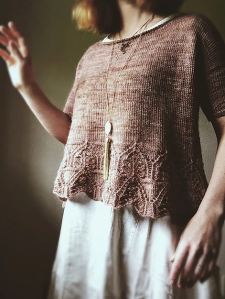
Here it is, fresh off the needles:
This used pretty much all of those five skeins of Koigu KPPPM – the bind-off I-cord is knit in the leftover red from my Lunenberg Cardigan. My Ravelry project page is here.
Here it is, stretched out to block. I was amazed that it blocked to 80″ – wingtip to wingtip – by 45″ deep.
Here it is finished up (well, the ends need to be stitched in.)
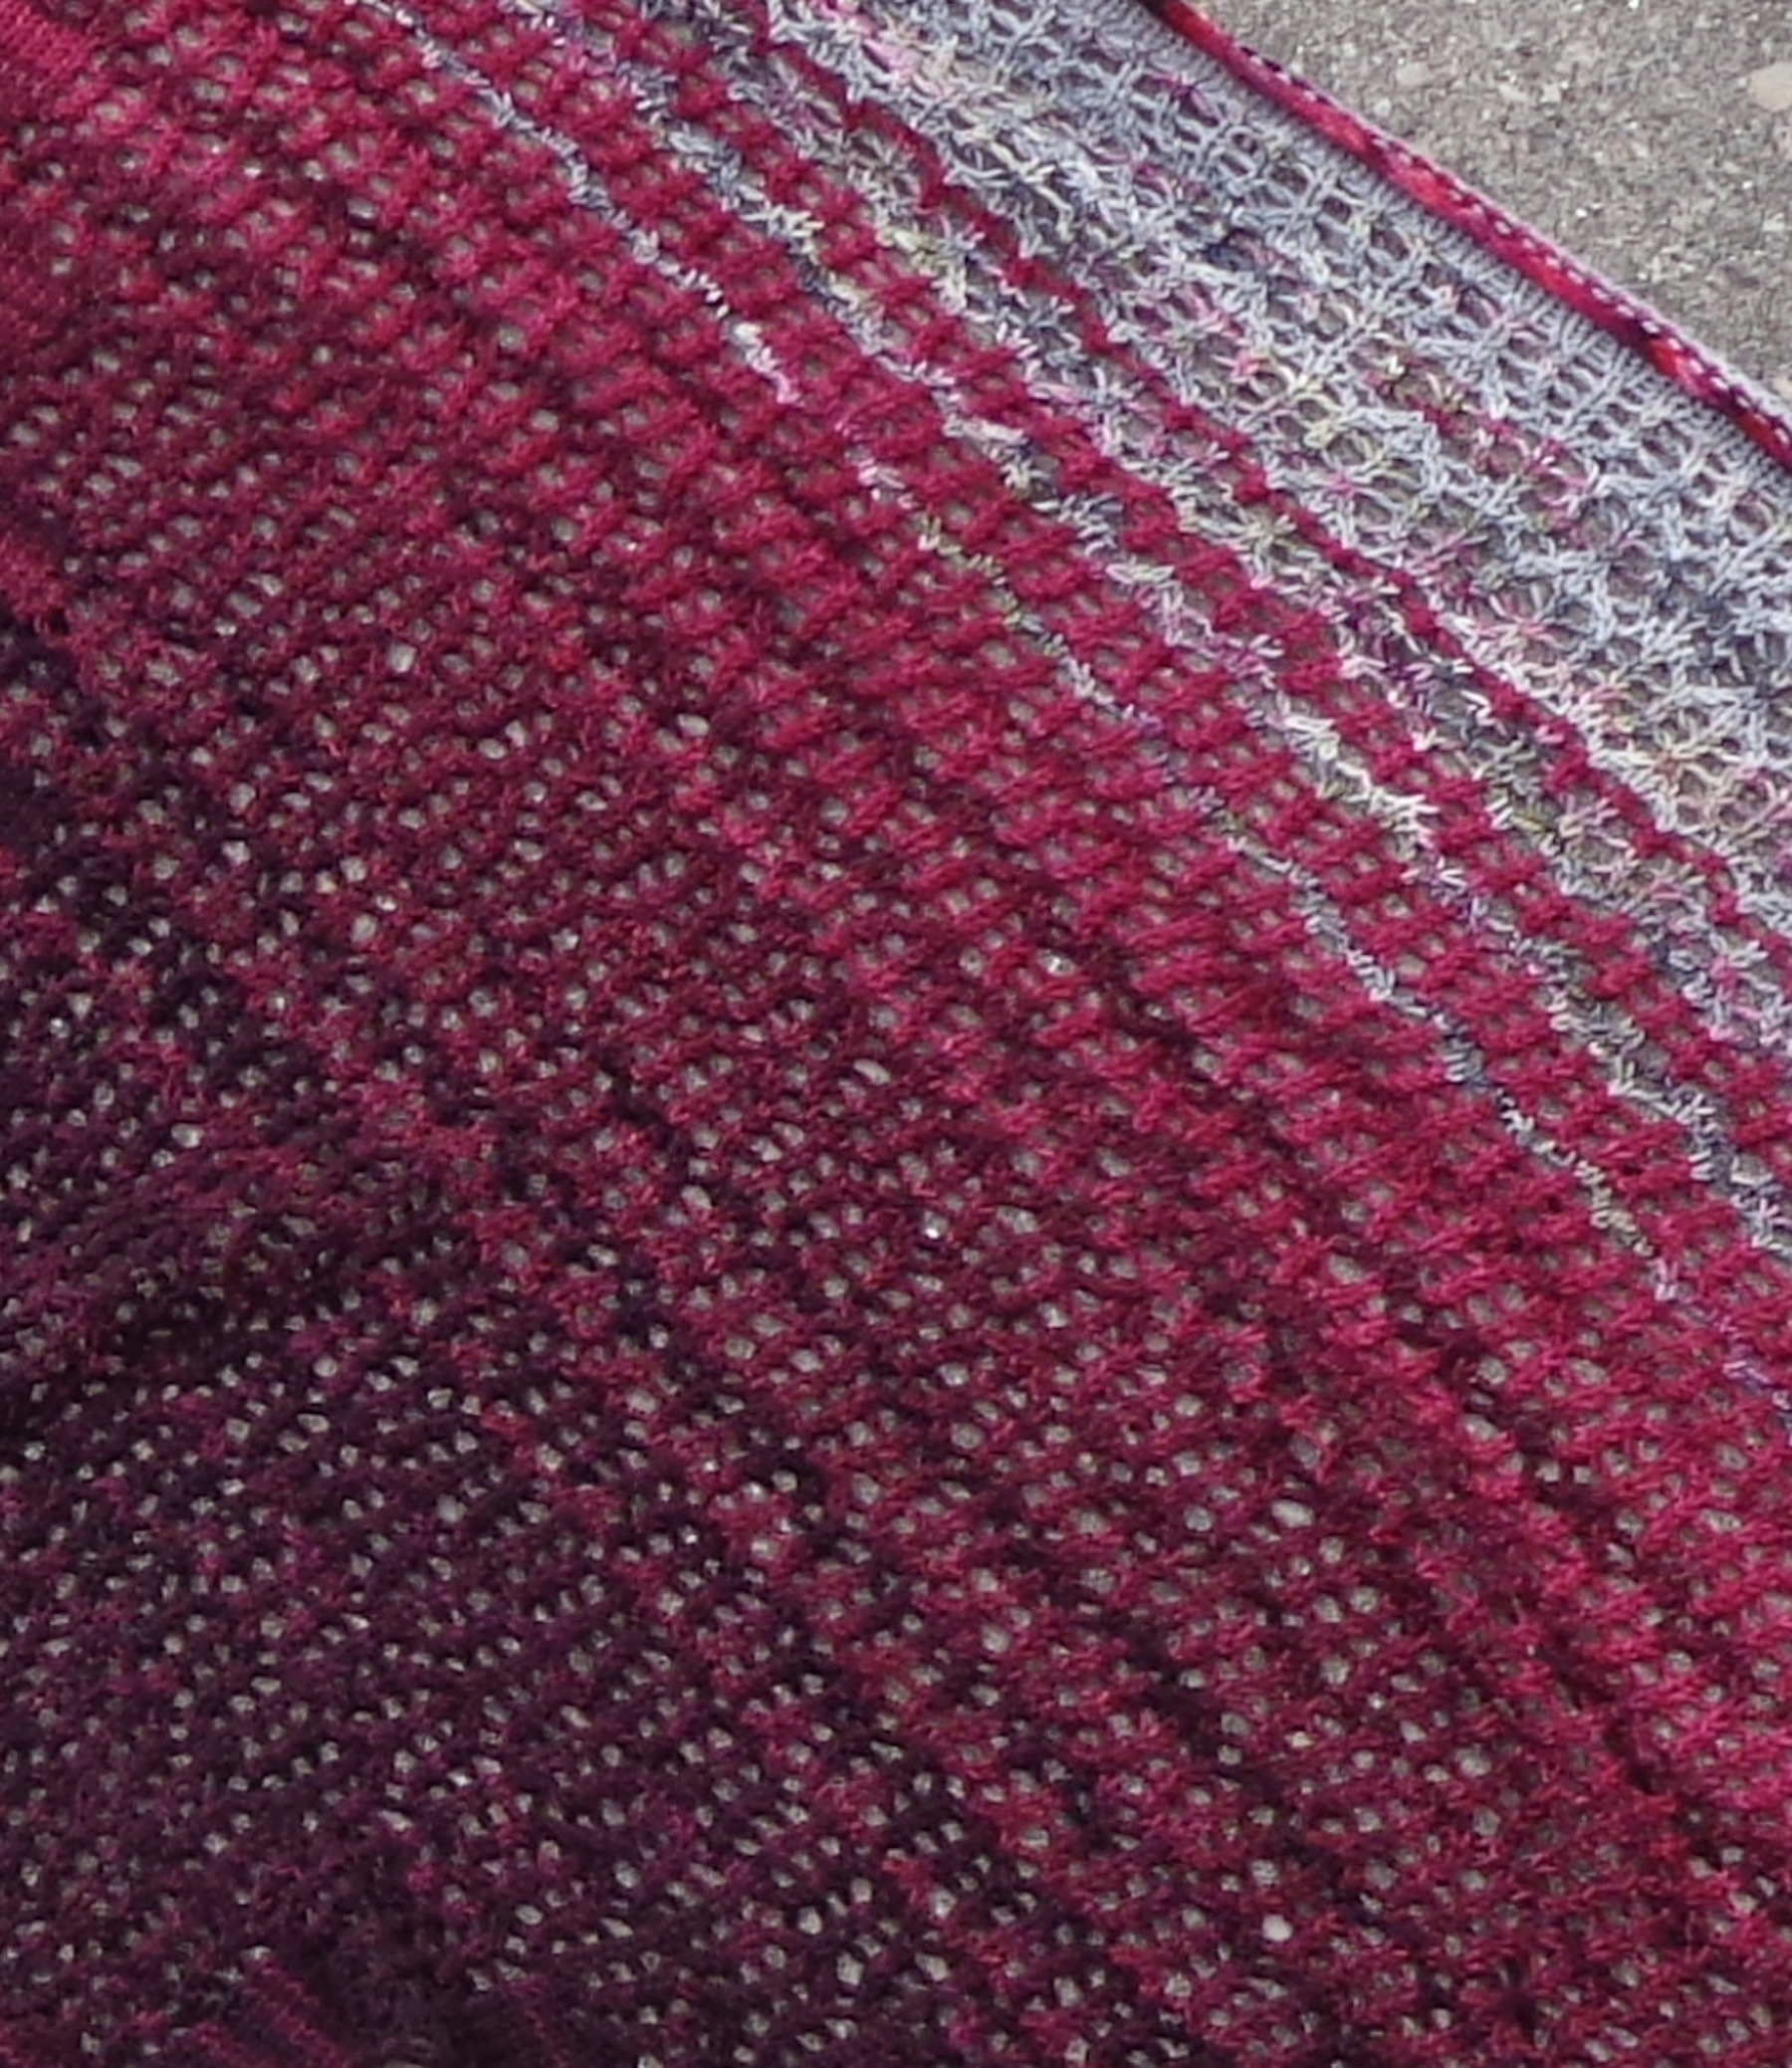
And a detail shot:
I did think it was too stretched after I’d blocked it, so I tossed it into the dryer with some towels that were finished up. (Just for about 10 minutes.) That took it down 4″ in the length and about 8″ across the top, and also improved (to me) the look and feel of the stitches.
I want to make another shawl, maybe not with the same stitch pattern, from those skeins to the right of the reds. I’ll start with the almost-black and work down to the pale grey. That will give me four skeins, so it will be a bit smaller than this one. I have a partial skein in a lovely purple-pink mix that will be great for the I-cord bind-off.
I’ve also been working on an Entrelac scarf for the mister in that Noro from the thrift store. I’ll show you that next week, whether it’s done or not. 🙂
I’m a day late this week in posting. Holiday Mondays tend to throw my game. I wrote on Monday, but didn’t get the other things done.
One thing we did in August was run away for the day to the Koigu Tent Sale. We always take a picnic and enjoy the scenic drive – plus, of course, there’s yarn that comes home with us.
Here’s what I bought this year:
It’s all Koigu KPPPM. (That link will take you to the Koigu site.)
I’m always looking for purply-blue yarn, esp since I used up the Koigu KPPPM that I had in blue for my Halo cardigan. I think this lot on the left will replace that lot 🙂 for a Latitude sweater. (That’s a Ravelry link.) I still have a lighter blue and white for the contrast.
The turquoises on the bottom row coordinate with the leftovers from my Navelli and will likely become a shawl.
The row with the burgundy through the black will become two shawls with gradient hues – the reds have already jumped onto my needles for another Charlotte’s Web shawl. (Another Ravelry link there.)
Here’s a picture of it in progress:
So far, these are in the order of the stash pic above, but I’m going to end with one of those pale greys. They’re the same colour but different dye lots – the left one will finish out my red shawl and I have scraps of another red – from my Lunenberg cardigan – for the I-cord bind-off. I prefer that to a fringe. The black and grey shawl will only have four skeins, so it’ll be a bit smaller. I have bits of a purple-pink mix to bind off that one which will be fun.
It’s interesting how much easier it is to see the colour changes in a picture than in real life. I’m using a 24R transition instead of the 16R one suggested in the pattern, the same sequence recommended when using Unique Sheep gradients. (My Urdr shawl is an example, though knit in laceweight.)
I also found some Noro Silver Thaw at the thrift store recently (that’s a Ravelry link) which will probably jump queue and leap onto my needles.
There are three skeins but I’ve already balled up one of them. I wanted to see how the colourway would work, whether it would stripe or fleck. It will stripe, like most Noro yarns, so I’m going to make an entrelac scarf and hat from this lot.
I have been AWOL lately and apologize for that. August was insanely busy with a Kickstarter campaign to fulfill and a book to finish and publish—plus the usual August garden and canning to be done. I did some crafting, but didn’t take pictures—until now.
The girls scored some new chairs recently, and today’s the day to share.
I started with this tutorial and free pattern at Resin Rapture (who creates the most amazing dioramas. Go on and look. I’ll wait.) which is for a 1:6 scale chair. I downloaded the pattern and followed the instructions to make the chair and pad it. (It’s a lot harder than you’d think to cut foamboard so the edges are perfectly square.)
There are two options presented for upholstery, gluing the fabric on or making a slipcover. The pattern creator preferred a slipcover. I wasn’t so fussed about having a slipcover as the final finish, though. I don’t like them in real life , so didn’t want them for my dolls—and while it’s removable and washable, I think the chances of my washing a slipcover for a doll chair to be pretty low. (Non-existent, actually.) I watched the video from Bentley House Miniatures linked in the tutorial (it’s right here) for making and upholstering a 1:12 scale chair. The fabric is all glued onto the chair for the final finish.
It seems that when it comes to minis and making for dolls, there are people who glue and people who sew. I wanted the finish of the Bentley House mini, but I shared Resin Rapture’s concerns about glue and fabric. They don’t always play well together. So, I made my own combination—for this first one, I tried to ensure that all the glue was where it wouldn’t be visible.
I didn’t take in-progress pictures, so here’s the 1:6 finished chair.
I made my own pattern pieces for the chair covering – I liked how BHI worked from a rough shape and trimmed once they were in place, so I left a lot of excess to be trimmed later. I glued the front piece so that the glue was on the seat and under the front of the chair. Then I pressed down the two vertical edges on the back piece, and sewed it to the side pieces on the machine. After pressing the seams, I positioned it on the back of the chair, wrapped the fabric over top and bottom, and glued it in place on the inside back of the chair and under the bottom of the chair. I pulled the sides around and folded under the front edge beneath the arm rest (the straight vertical that meets the front) and put a teeny bit of glue on the seam allowance to secure that edge in place. I also turned the bottom edges under and glued them on the underside.
I trimmed the curved edges so that the seam allowance was about 3/4″, then clipped the curves and folded the fabric over the chair. The glue is only on the inside of the chair. I clamped some of these bits until they dried.
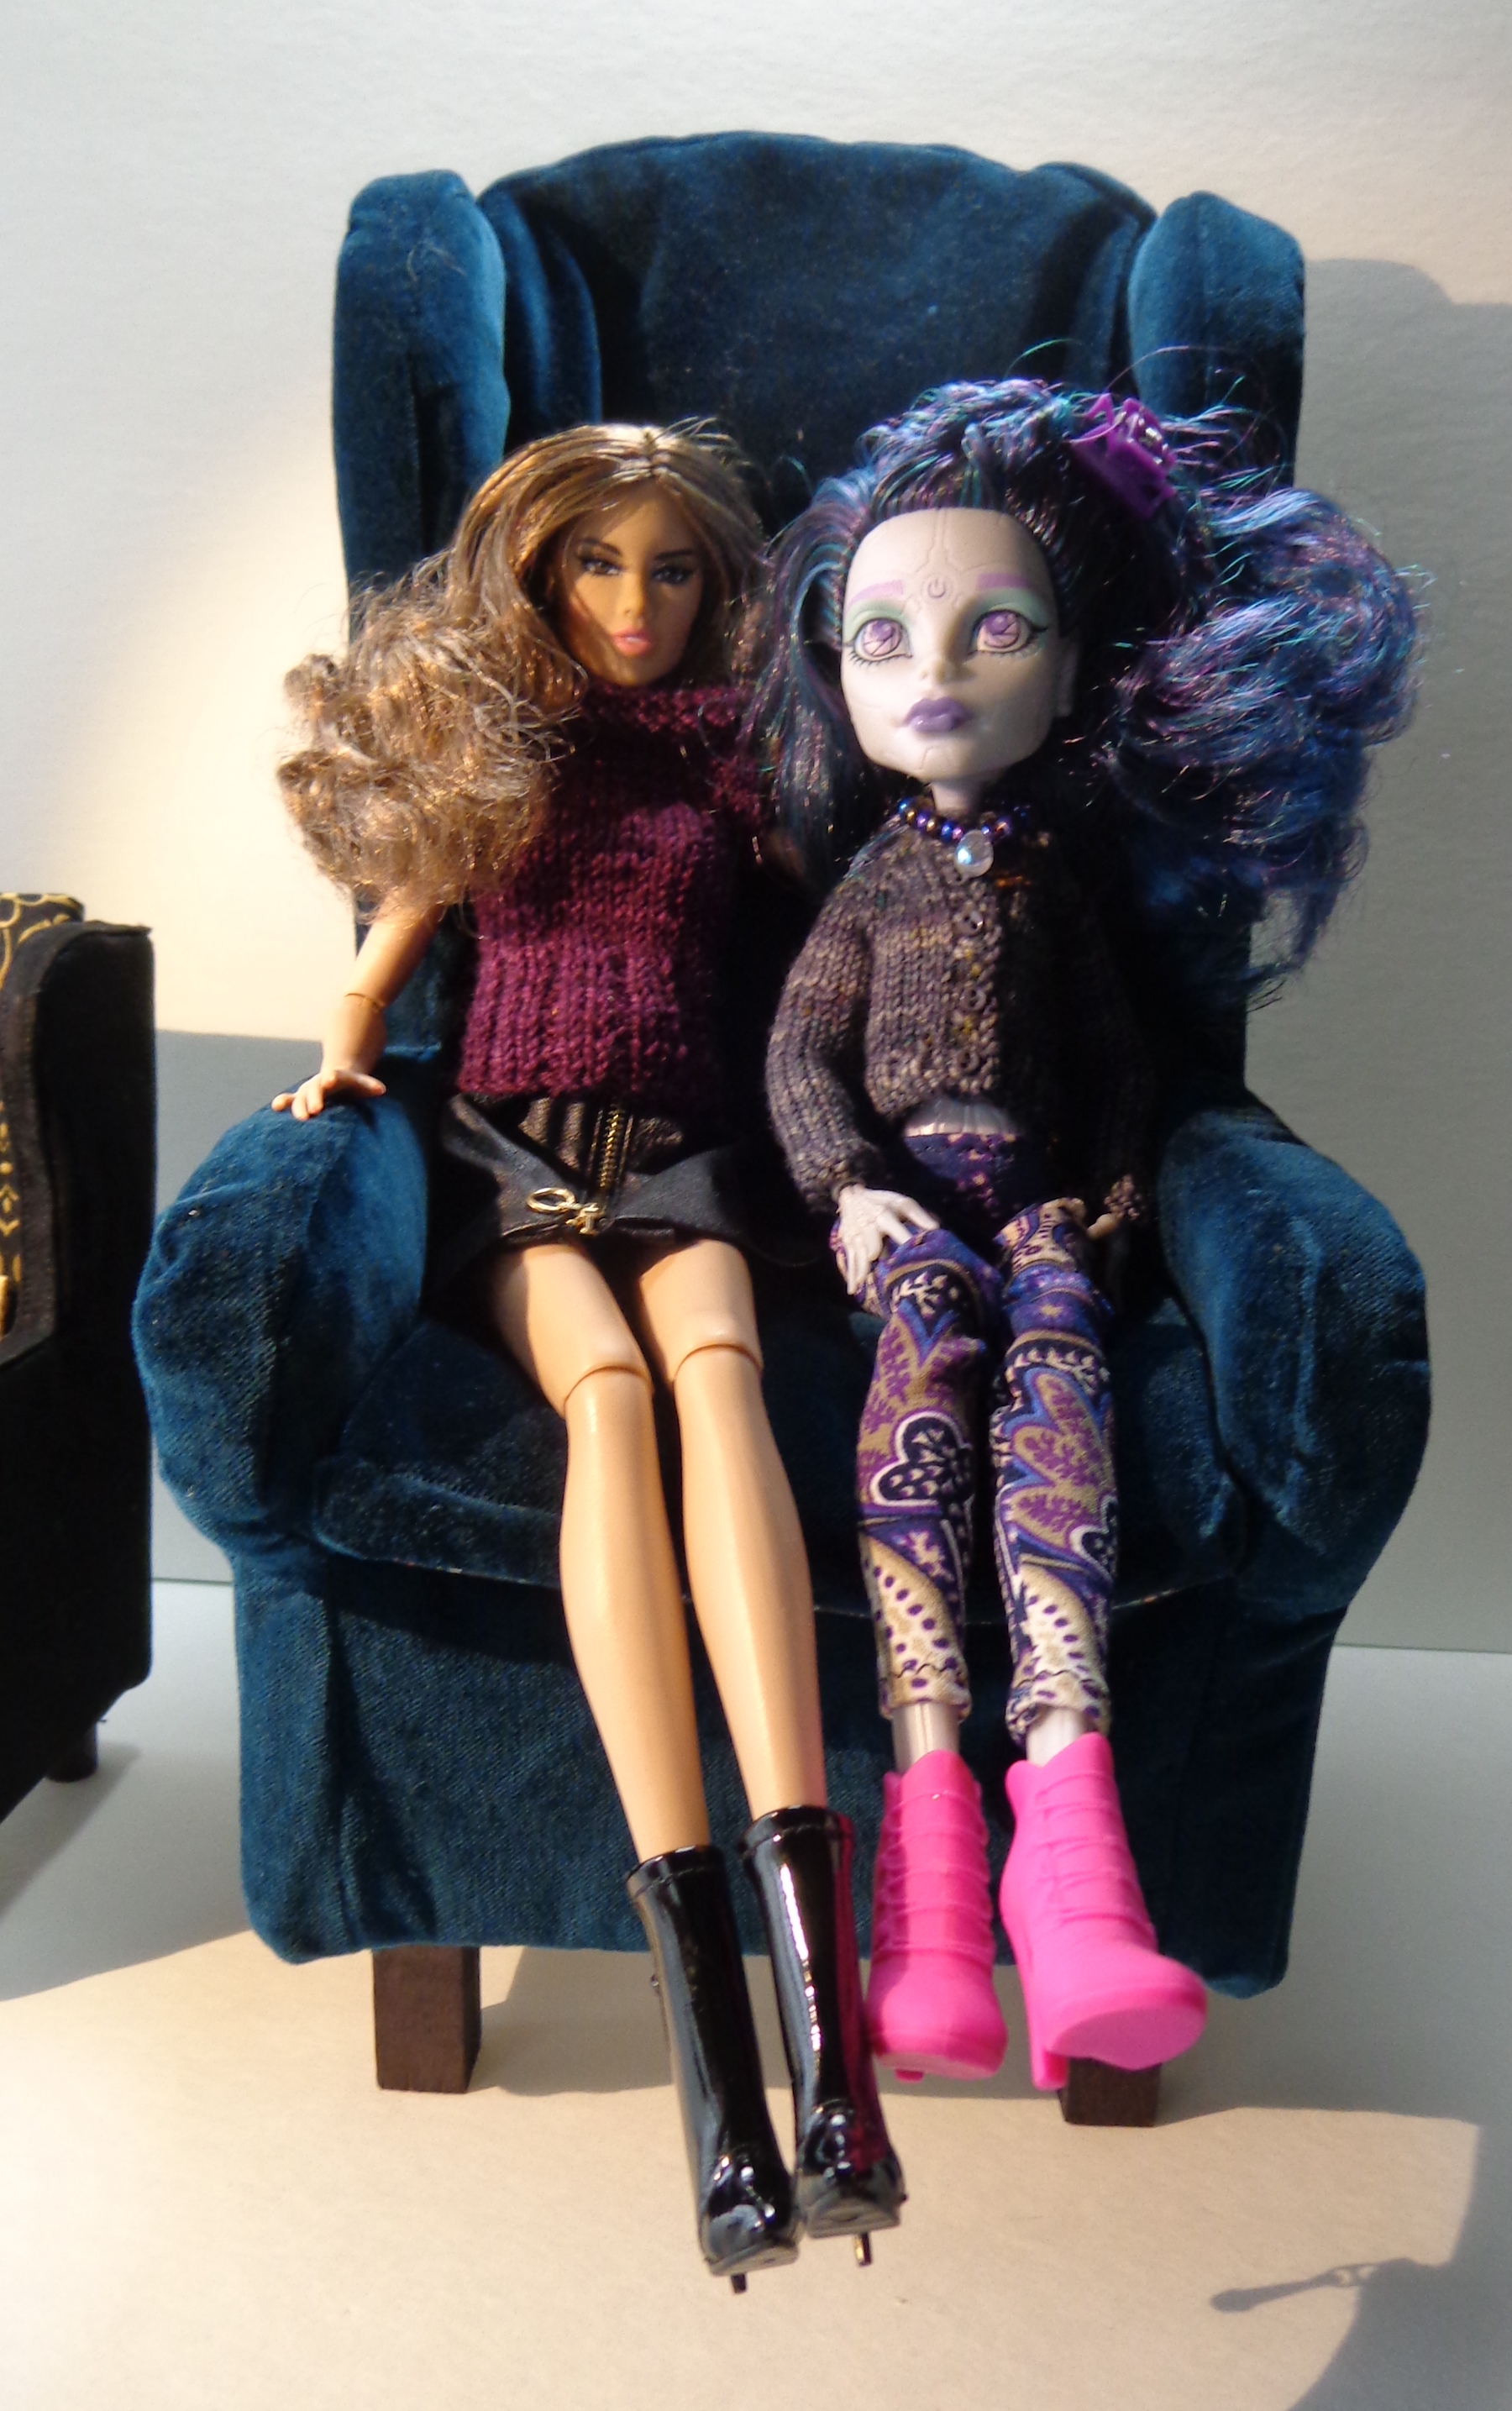
Here’s a Monster High doll in the chair with some mini-books. (That’s Elle Eedee, who arrived naked from the thrift store.)
I created a template for the inside of the sides, trimming it until it was the right height. The template is the size of the heavy fusible interfacing and the fusible webbing – for the fabric, I added 1/4″ all around. I fused the fabric (wrong side down) to the interfacing, then set the fusible webbing against the wrong side, turned in all the edges and pressed them in place. I had to be careful with this as there was fusible webbing exposed in the middle of each piece and you don’t want that stuff melted to your iron. I could have trimmed it so it was only on the edges and will do that next time. Then these two pieces were glued in place on the chair. Again, I used clamps until they were dry.
I modified the strips that run down each arm from the back of the chair, too. Once again, I used interfacing to make a finished strip of perfectly consistent width. I topstitched it on each side, turning under and topstitching one end. That one goes at the top. Then I glued it in place, counting on all those layers keeping the glue from seeping into view (and being pretty frugal with the glue, too.) I pushed pins into the foamboard down the length of these pieces – every 1/2″ or so, to hold each one in place – and left them until the glue was dry.
I made my two cushions – seat and back – but cutting them out of foamboard, then building them up with multiple layers of padding. I fussy-cut their upholstery from a contrasting fabric, glued it onto each cushion, then glued them in place. All the glue is between the cushion and the chair, where it will never be seen.
The legs are 1 cm dowels cut into 3 cm lengths, as specified in the original pattern, then “stained” with Sharpie marker. I did sand down the bottoms to give them a little shape. Because these legs are round instead of square, I added a bottom piece to the chair in foamboard to create more surface area for gluing the legs in place. (The pattern piece is the seat with the corners cut out of it.)
I added a little cushion, too. The Resin Rapture pattern also includes some book covers and a book template for the foamboard and I made these, but they’re not in the pic.
Here’s Jade Feelin’ Extra, enjoying some downtime in her new chair. (She’s my one and only Integrity Toys doll – I like her, but she’s very tall and skinny to me. She’s 12″ tall.) She’s nicked Elle’s books, which are these 1:12 scale fairy tale books (printable PDFs) from Etsy.
Next, modified the templates for my 1:4 girls and changed up my method.
I didn’t love the glue on the black chair since no matter how careful I was, I got some on the visible part of the fabric. (The solid black may have been a bad strategic choice.) It’s a water soluble glue, so I managed to get most of the offending bits off with a damp cloth. Still.
This time, I made the chair the same way and padded it the same way. I added some pieces inside the bottom of the chair to make a stop for the final piece that goes on the bottom. That also gives another edge for gluing it in place.
Then I made a slipcover our of teal velveteen, sewing it together on the machine but leaving the back piece unattached. That piece that runs down the top of the arms is tricky to fit in place, so I’m thinking about how it could be changed or simplified. I fitted it, adding more padding to the chair over the arms, then pinned it in place and sewed the back piece on by hand. (The foamboard is great this way as you can jab pins right into it to hold things in place.) The result is a lot like a slipcover, but more fitted and it’s never coming off. I then stretched the fabric tight over the bottom and glued it there, putting the glue on the inside bottom of the chair and using clamps to hold it until it dried. The legs are square this time, cut from a longer piece, sanded and stained with a Sharpie.
Here are the two chairs beside each other:
One mistake I made in my drafting of this variation of the pattern is that I didn’t trim enough from the width of the upholstery and cushions for the inside back and seat. They’re kind of fluffy and could have been trimmed down another 3/16″ or so.
This time, the cushions are actual fabric cushions, without any foamboard. Because velveteen doesn’t always love being against velveteen, I cut one side of each cushion from a cotton lawn with a teeny print that coordinates – turns out they’re reversible now, which is kind of neat. (And yes, there is a certain irony that I bought this lovely expensive lawn for a blouse for myself years ago, and the first cut out of it is for chair cushions for the girls. I need to start sewing for myself again!) And I made a little throw cushion of the velveteen. I’m thinking I might need to embeliish it.
The 1:6 girls wanted to try the big chair. (You can see that I could have padded the arms more.)
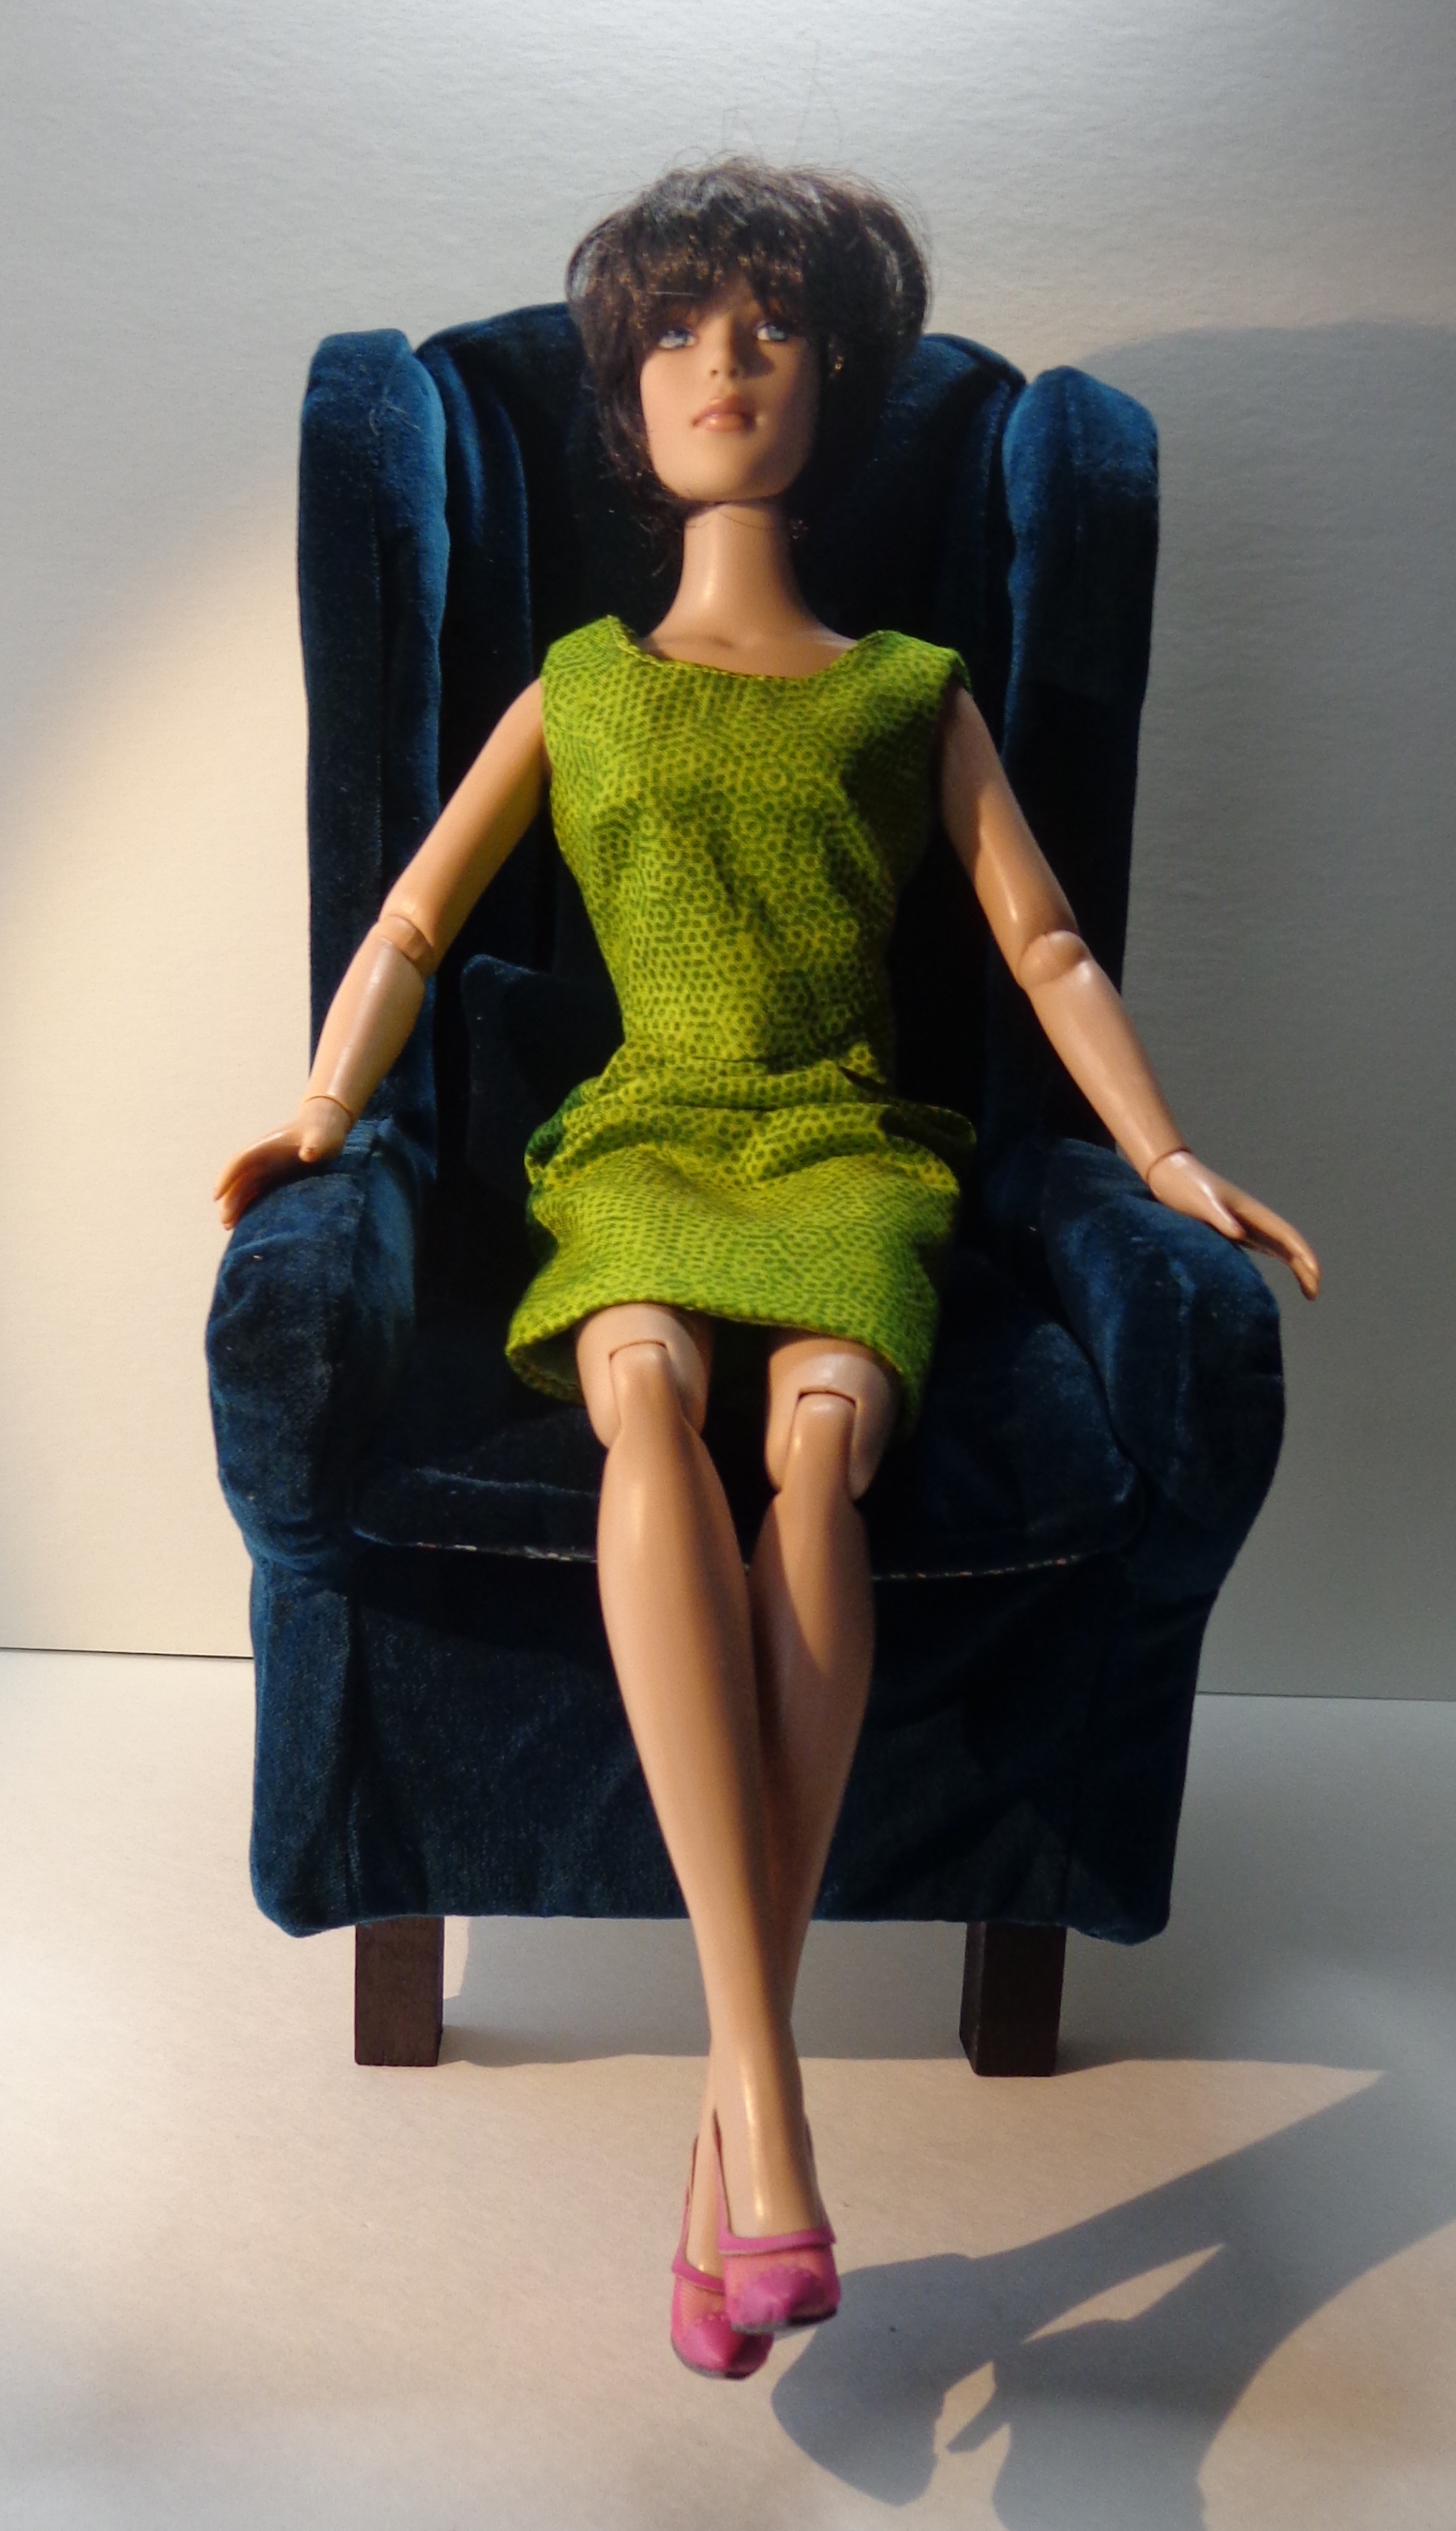
Here’s the completed chair, and here it is with Sydney, its rightful occupant in 1:4 scale.
I’m going to make another one upholstered in fake leather (because everyone loves a challenge, right?) but will make a few changes. I’ll cut the inside chair pieces narrower so they nestle in place better. I’ll also cut them of a plain cotton, maybe with fake leather pieces at top and bottom where that fabric might show. I’ll leave more fabric at the bottom of each piece for turning under, too. And I’m still thinking about how to modify that strip that goes down the arms. Hmm.
For now, though, the girls have somewhere to sit, although they’ll have to take turns.
I’ve also discovered that I really like making furniture for the girls out of foamboard.
I made a bookcase table (it doesn’t spin) and a bookcase, and have been making more books to fill it. Those books on the bookcase table and Sydney’s book are the ones from the Resin Rapture pattern, btw. I’m envisioning a library, so we’ll see how that goes.
Tegna is a pullover designed by Caitlin Hunter. here’s the pattern picture – it looks like a lovely summer top, doesn’t it? I’ve linked the picture to the Ravelry page.
I cast this on with Koigu KPPPM bought at the tent sale last summer. The colourway is 534.
My “hmmm” comes from the colour of the yarn not the pattern. I’m just not sure I love it.
I’ve finished the lacy hem bit and am alternating between three skeins as I knit in the round.
Here it is, all bunched up on the needles:
Here’s the yarn in the skein – the top row are all the same colourway, but you can see the variation between them. I started with the lighter ones – this top is knit bottom-up – and will shift into the darker ones near the shoulders. I think that will be more flattering, but we’ll see.
I suspect I had a fear of pooling, which was why I stopped. I’m going to carry on with this one and hope for the best. If it pools into a spiral, it’s going to be frogged!
And this year at the tent sale, I’m going to look for colourways that are closer to solid like those navy ones at the bottom left.
That’s the end of my on-the-needles review. Now I need to get knitting!
Despite my doubts about the tightness of the foundation I-cord, I carried on.
Here’s the jacket so far, laid flat:
I’m working to the left, which will be the left front when it mirrors the part on the right. The back is in the middle, those dips are for the sleeves, and that blue-green-pink square at the top of the mountain is the top of the center back.
The colours are pretty. I’m surprised that the colourway on each block wants to repeat itself – look at the pair on either side of the deep V for the sleeve on the right. There are two blue-green-pink squares right beside each other (although one is on the front and one on the back) then right above them pink-purple-pink, in a mirror image. That’s when I noticed this tendency so I made sure the next one didn’t mirror, by changing balls. I wanted the colour to look more random, but it isn’t. That I-cord is curling, but since it’s the foundation row, I’d need to frog everything to make it looser.
I have a suspicion that the cardigan is going to make me look like a hobbit. Here it is with the fronts folded in place. It’s bulky.
I decided to remove the wooden needle at the front – where I’ve picked up and knit the stitches for the next square – then give the work-in-progress a good soak. I don’t usually block a project that isn’t done, but I need to check what that hem is going to do. I also want to confirm the fit before carrying on. I could add another row of squares to the top to make it longer, for example, if it’s going to fall at a cropped length. It’s unlikely that I could find more yarn in the same colourway and dye lot, but the sleeves are striped – I could do alternating stripes of Ito and another solid Noro colourway. (Maybe a purple.)
To my relief, the soaking made the points in I-cord easier to stretch out flat. I didn’t pin them since this isn’t the final block, but I’m more confident that I’ll be able to convince them to do that. (If I made it again – ha! – I would use a larger needle for the I-cord.) The dimensions didn’t change much, so I’ll carry on. I’ll update you when there’s more to share.
Here’s another little cardigan from Martin Storey, originally designed for Rowan TrueSilk, a summer sweater called Peridot. (That’s a Ravelry link.) The pattern is in a book called the Rowan Truesilk Collection. Here’s Rowan’s picture of Peridot:
The only thing I didn’t like about this was the multi-coloured buttons, but that’s easy to fix. I knit mine in Patons Silk Bamboo in Sapphire. (Also a Ravelry link since the yarn is discontinued.) It’s a pretty simple sweater, which means I have no explanation for its lengthy time-out. I cast on in July 2015 and stalled after the back and one front were knit. (Sometimes Ravelry is a little bit terrifying in the information it provides. 2015! Gah.)
Recently, I picked up this project again, determined to finish it up. Here’s the completed back.
I really like this colour of the Silk Bamboo. You can see that this is going to be an a-line sweater – and the great thing about a traditional construction is that it’s easy to measure the pieces and check the fit before knitting the whole thing. This one is going to be a keeper. It has a lovely drape.
It obviously needs to be blocked after all its time in the project bag, but as usual when I pick up a stalled project, there’s less to do than I’d thought. I have most of one front done, and the sleeves are only 3/4 length. The plain knitting makes it great for TV knitting – even with the increases – so I’m working on this one again. I hope to have it done soon.
I’ve been making a lot lately for my girls instead of for myself, so my count of finished projects for myself is pretty low this year. I lost a bit of my making mojo this year, thanks to a lot of projects that made me say “hmmm”. The girls have helped me to recover a bit of that, so over the next few posts, we’ll have a look at a few of those stalled projects. Coming back to them with a fresh eye has given me some ideas.
First up, the knee socks.
I’m not sure why knee socks intrigue me so much. They’re a lot (a LOT) of knitting and I seldom wear them once they’re done. All the same, I can’t resist them. It’s inexplicable.
For example, I made these in 2009 and have never worn them. Not even once. I take them out of the drawer and look at them sometimes, though. I do like that they exist.
The current choice of knee socks is Quail, designed by Martin Storey to be knit in Rowan Fine Art. Those are Ravelry links, as the yarn is (naturally) discontinued. I’ve been eyeballing these since I bought the book when it was first released in 2013.
The pattern is in this book for Rowan Fine Art: Fine Art Collection. It should be available for sale individually, but Rowan’s buy links from Ravelry are a trainwreck since they updated their website (and didn’t update the links.)
Here’s Rowan’s pic of the socks from the book. Of course, it’s a lovely photograph as is always the case with Rowan, but one that doesn’t let you see the detail in the socks very well.
It turns out that they have bobbles, which I’m leaving out since I hate bobbles. I hate knitting them and I hate that they look like warts when they’re done. No bobbles for me.
This should mean that I need less yarn and I hope that’s true. The pattern calls for three skeins of Fine Art, which has 400m per skein. That’s a lot of yardage for socks, even for knee socks – usually you need 350 – 400m for socks and double that for knee socks, with lots leftover for knitting for the girls – even with a light fingering like this one. I have two skeins of Fine Art in a plummy colour, so right from my cast-on, I’m playing yarn chicken.
The colourway is called Rowan. (That’s a Ravelry stash link, because I think it’s fun to see pictures of a specific yarn in a whole bunch of knitters’ stashes.)
I’m knitting them in the round on 2.0mm needles. Here’s where I stalled:
The top looks huge, which is always the way with knee socks. What made me go “hmmm” was the pooling. On the cuff, it made a nice little stripe, but once the stitches were added for the cables, it made a big moving pool. I’ve started the decreases and you can see that the width of the pool is decreasing. It’ll spiral down to a narrow stripe again by the ankle. I’d rather have stripes or cables, but not both at the same time.
I made another pair of socks in this yarn, in another colourway, and they did a similar striping, just in short plain socks. Here they are:
I’m not wildly in love with this pooling, but I can live with it since the socks are just in plain rib.
Here’s the shawl I made in this same yarn, which also pooled:
The thing is that I like the pattern of the pooling in the shawl, even with the lace stitch. I think it’s because it falls into a regular stripe that doesn’t vary over the length of the shawl. It’s the changing width of the stripes that I find distracting in the socks.
So, these socks are going to Frog Pond, and the yarn is returning to the stash. I’ll use it on a shawl, I guess, or another project that has the same number of stitches per row.
Maybe one pair of knee socks to admire is enough. 🙂
This post has been sitting here in draft for over a year. My original plan was to share the pattern for this little cardigan, but I never pulled it together. It’s time to show off some of the results, though. The yarn links in this post go to Ravelry, just FYI.
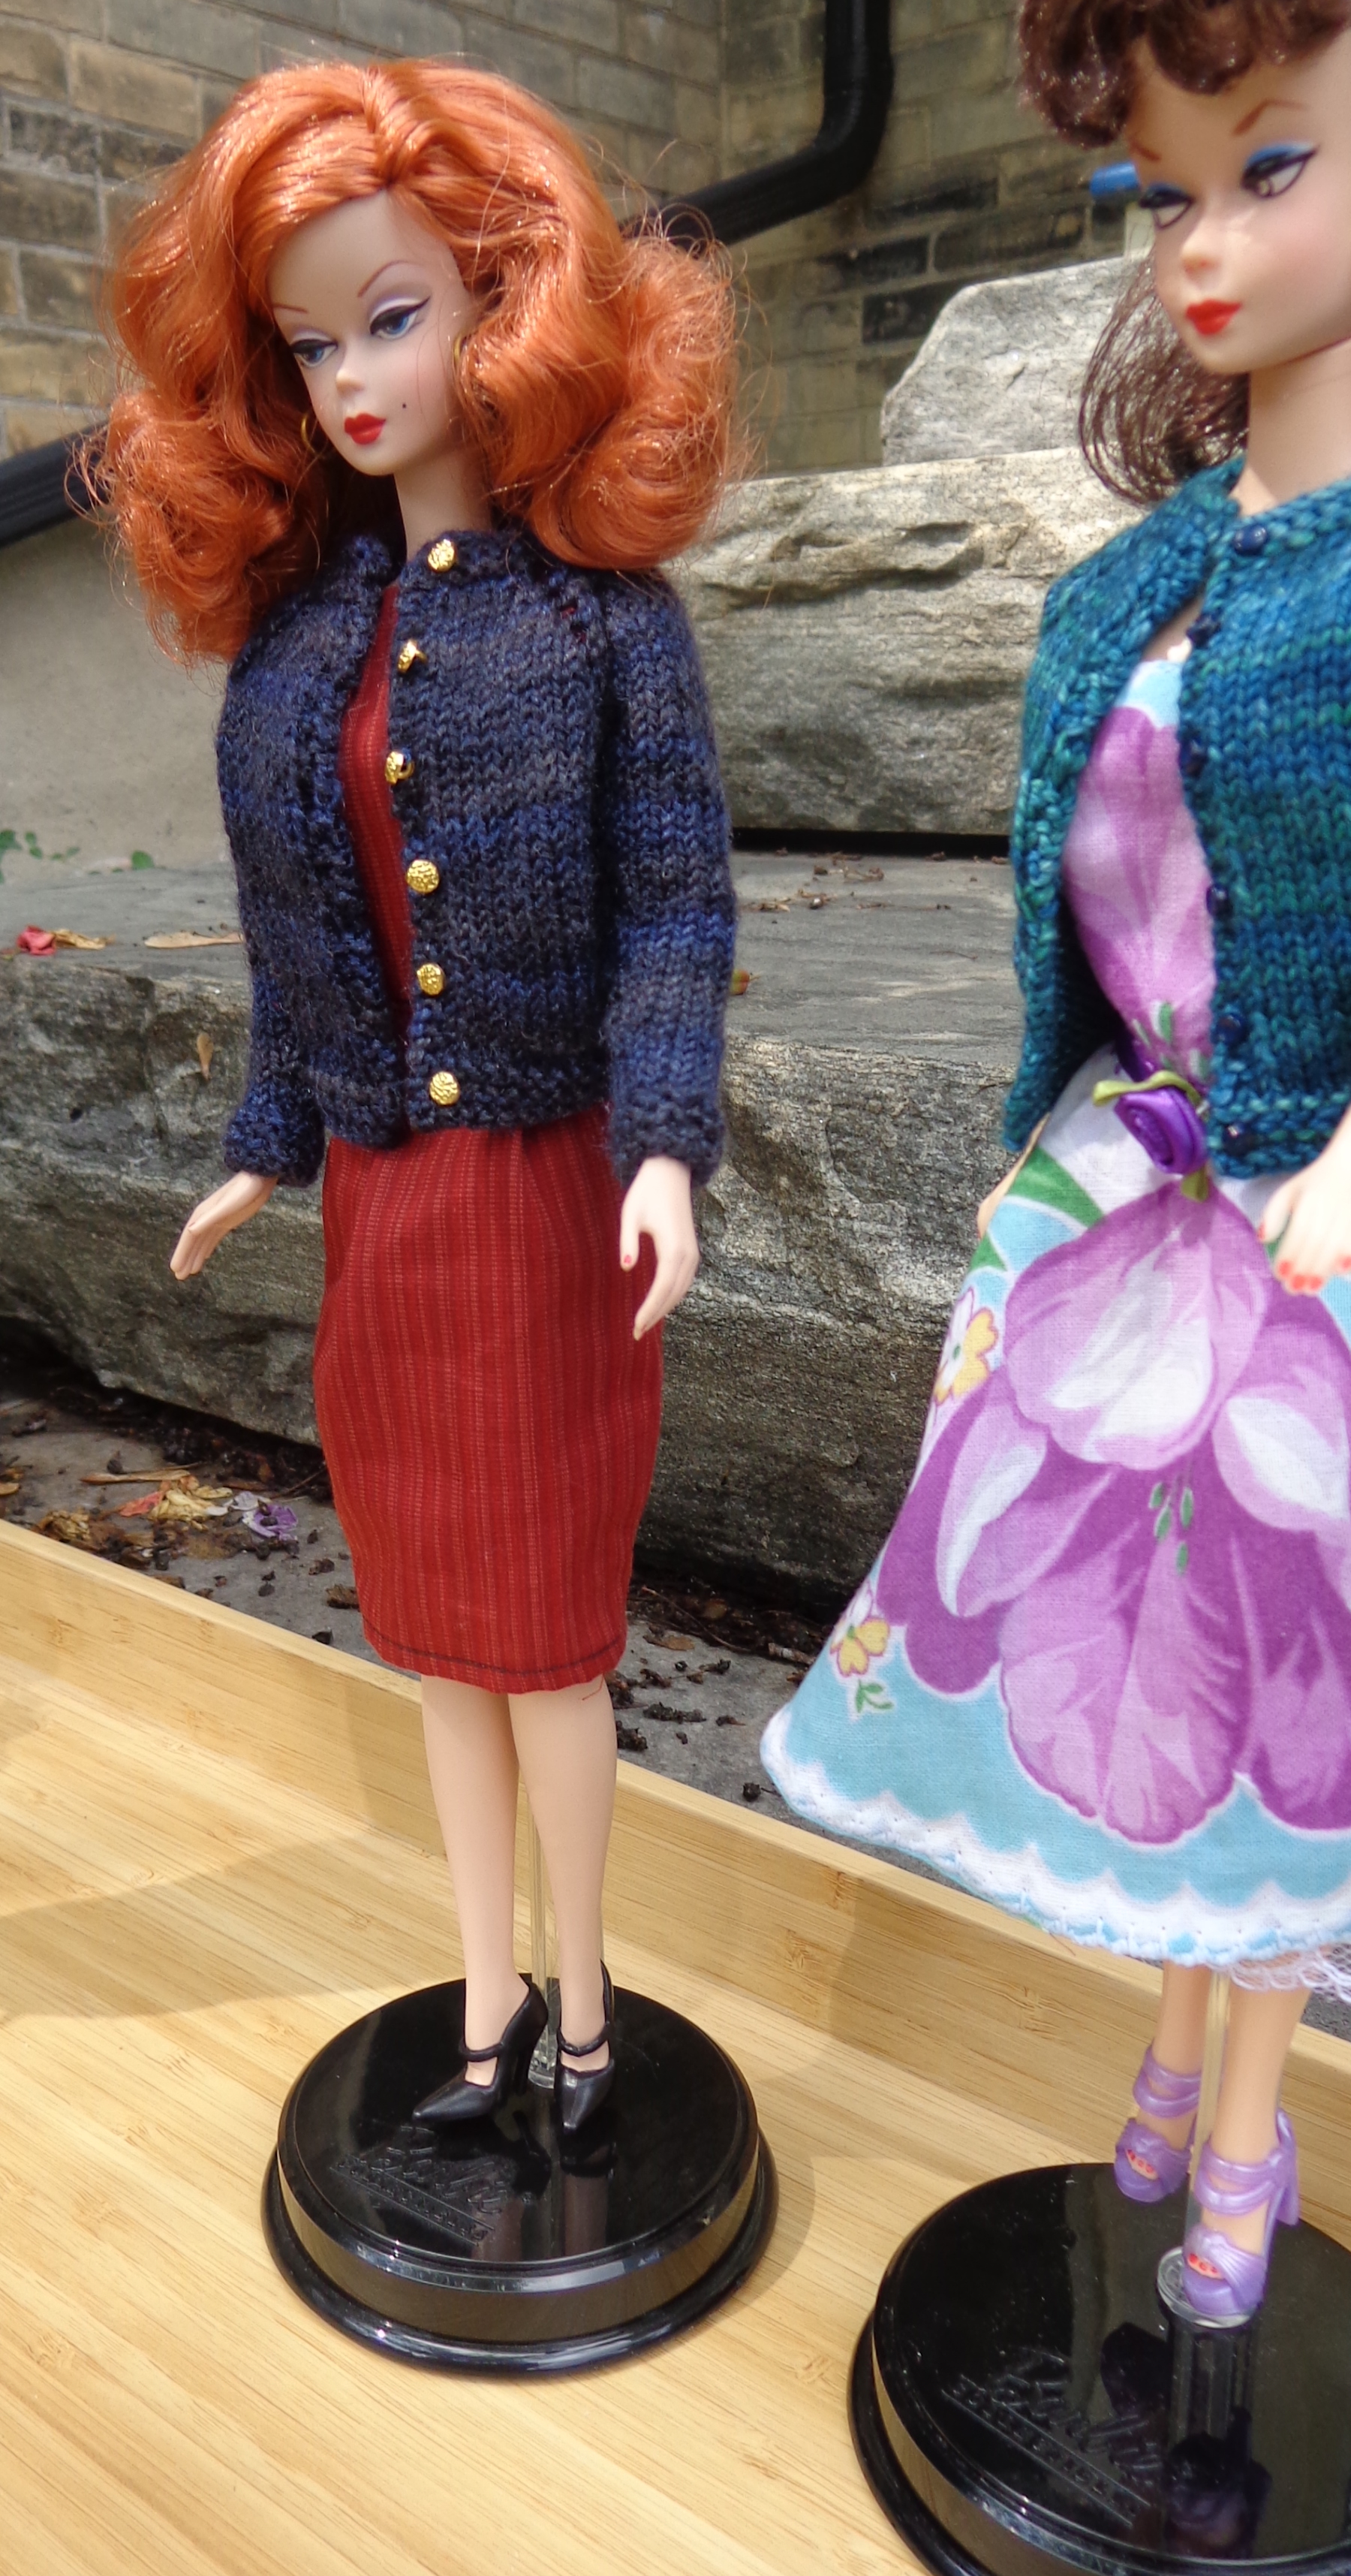
First, here are my little Monster High Girls in their wee sweaters.
These cardigans were knit from the top down, in a variation of a pattern I made up for Barbie.
Because the sleeves are skinny, you have to take off their hands to put on a sweater. It’s cropped, so their belly-buttons show. (I could knit it longer but it’s kind of cute this way.)
Here are the sweaters:
The grey one has a ribbed collar and hem, ribbed button bands and ribbed cuffs. The raglan increases are done with make-one increases, which disappears more into the fabric.
The purple one has collar, hem, button bands and cuffs worked in reverse stockinette. The raglan increases are done with yarn-overs, which creates a little lacey pattern.
The front fastens with three snaps and the buttons are just for show.
As you can see, slight variations in yarn weight end up resulting in bigger differences. I knit both of these with the same needles and instructions. The purple one, though, is a teensy bit bigger because the yarn is a teensy bit thicker. The grey was knit with The Loving Path Fibre Arts High Twist Sock (that’s a Ravelry link) which has 424m in 100g and is classed on Ravelry as a light fingering. The purple was knit with Dragon Strings Sleipnir (another Rav link) which has 343m in 100g and is classed as fingering on Ravelry.
Here’s my Barbie version of this little cardigan in several variations:
These ones all have working buttons – there are buttonholes in the right fronts. And I made the increases in all of them with YOs. Again, they’re all knit on the same needles with the same stitch counts and you can see the variation in size. Starting from the top left, the green one is knit in Malabrigo Sock (the colourway is Rayon Vert) and is the smallest. Malabrigo Sock is put up in 100g hanks which have 402m. This sweater has 3/4 sleeves, which works out well for Barbie since her hands don’t come off. (I wrap her hands to get the sweaters on.)
The russet one to the right is knit of MadTosh Merino Light (384m in 100g) in Cardinal also with 3/4 sleeves. It’s bigger – 20m less in 100g makes a difference even when you’re only using 7g or so!
The deep blue one, with long sleeves, is knit from leftover Unique Sheep Luxe from my Celestarium Shawl. It has 366m in 100g, which makes it a bit thicker. This one is pretty bulky on the girls.
The blue and grey one is knit of Rowan Kidsilk Haze Stripe (colourway Cool) which has 421m to 50g – it knits up as if it’s much thicker, though, because of the halo. I used the stitch counts for the Barbie size and it’s kind of fun how the striping came out.
Here are the girls modelling two of them. The redhead is Dusk to Dawn Silkstone, who is skinnier than repro Barbie. The navy one is particularly big on her.
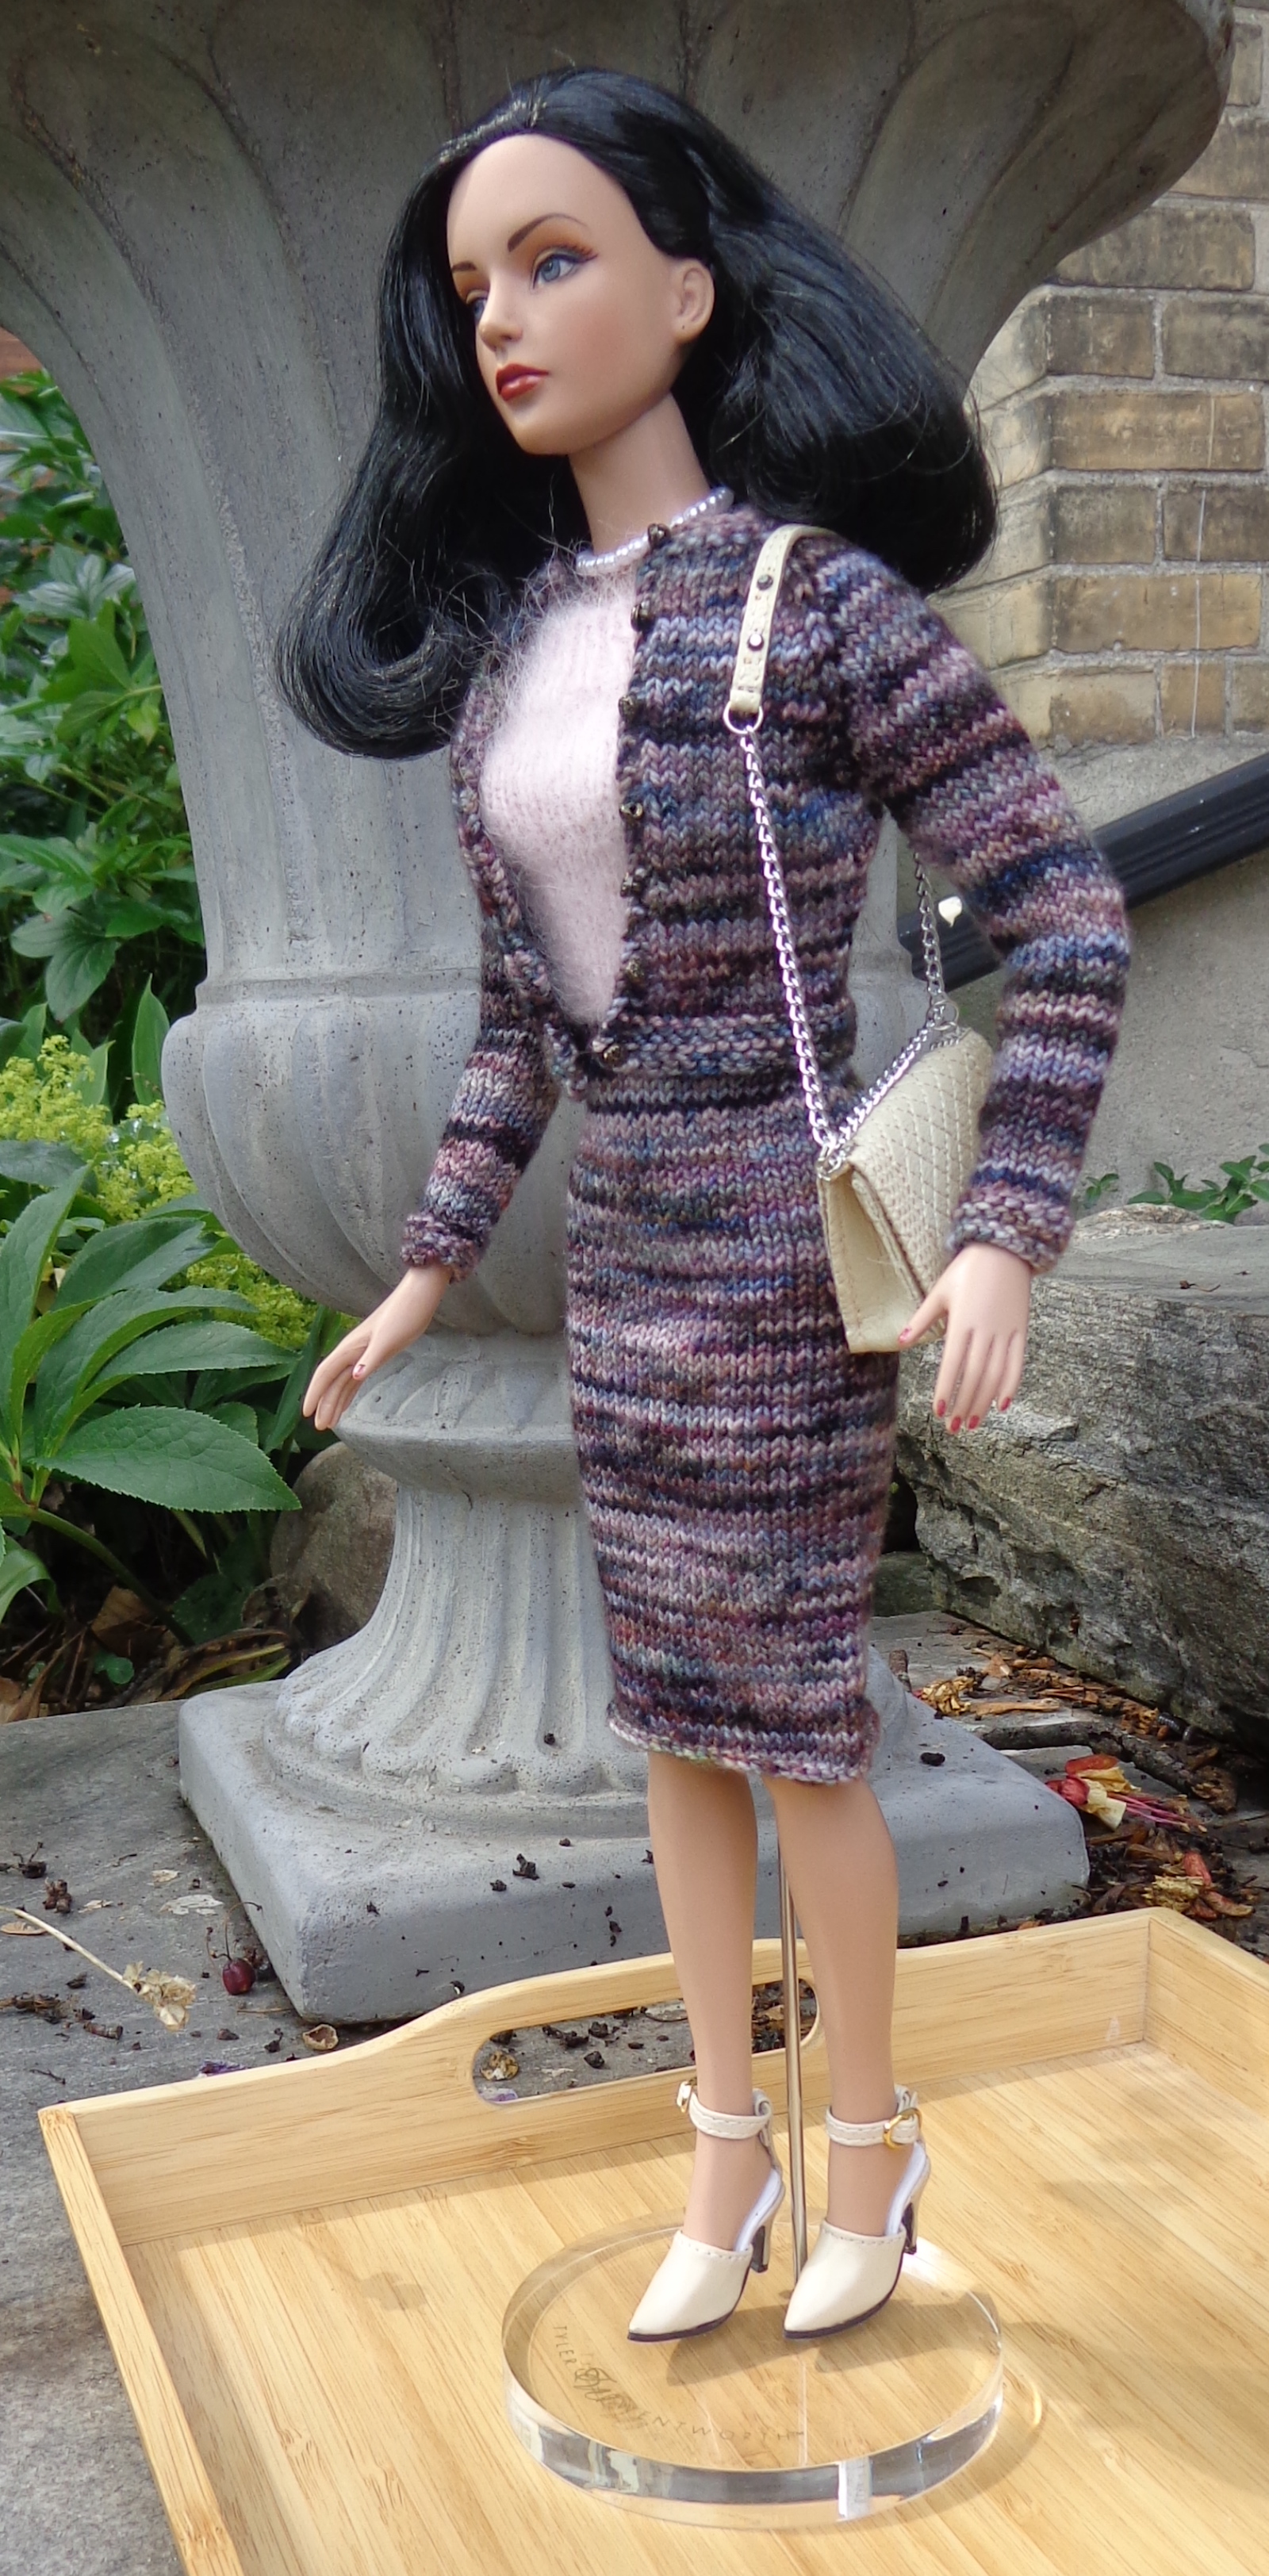
Here are two more cardigans which were adapted to fit Tyler Wentworth.
The purple one is knit of Shibui Knits Sock, which has 175m in 50g. I used the stitch counts for Barbie and realized it would be enormous after knitting the body. I stopped working on this one before knitting the sleeves, because it was so big. Recently, I realized it would fit Tyler – even with the Barbie stitch counts. It’s pretty snug for Tyler, so it’s a sweater to wear without a blouse underneath. I knit the sleeves longer on this one. (Like B, Tyler has to have her hands wrapped to get her sweater on.)
Finally, I recalculated the stitch counts for Tyler for the last one in mixed brown shades. It’s knit of Koigu KPPPM in colourway 513P – KPPPM is 175m for 50g. I knit this one a little longer and also did some back neck shaping to make the front of the collar sit better.
Here’s the last one on RTW Rouge Sydney Chase, with a matching dress.
I used the free pattern T-Shirt Dress for Tonner Dolls by Samira Jessica (that’s a Ravelry link) but divided the color. It’s a top-down knit with cap sleeves that are created when you cast off for the arms. I started with Sugar Bush Drizzle, held double, in Pink Puddle. At the waist, I changed to the Koigu KPPPM. I didn’t rib the skirt but just knit it in stockinette, then purled one row and cast off purlwise. I thought that might keep it from curling at the hem, but the hem still wants to roll up, even after blocking. I also added a little kickpleat at the center back. 🙂 If I knit it again, I’ll do some moss stitch at the hem.
I’ve been sewing for my Tyler Wentworth dolls again. This is the halter dress from Fashion Doll Clothing by Rosemarie Ionker. It’s fully lined and I’ve made three. Here are the first two:
The first is a quilting cotton floral in pink with a pink cotton voile lining. The second is a green quilting cotton with a green cotton voile lining.
Here are the backs:
They have a pair of snaps at the center back, then buttons just for show. You can see the difference in body types – Tyler on the left is the original SA body type (2002 Opera Gala Raven), while Tyler on the right is the BW body type, with more joints and pose-ability (2006 Look of the Season with a different wig). It’s interesting to me that one seems to suit more classic clothes and colours, while the other seems a little bolder. (Her raincoat isn’t quite done, but it’s faux-leather, which will give her a kind of Matrix look.)
These dolls looked like this in their original outfits:
2002 – Opera Gala Raven
2006 – Look of the Season
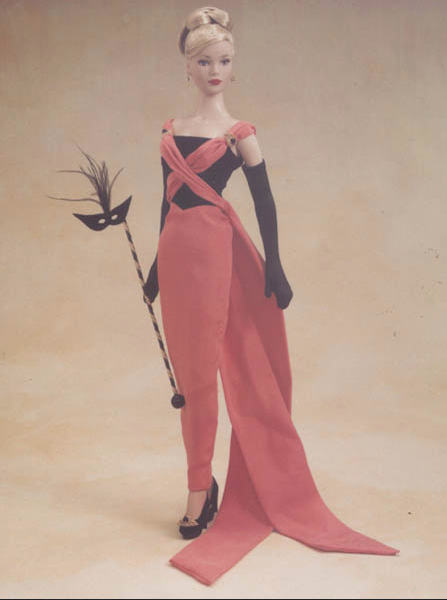
The third halter dress is made of a black floral rayon print and has a cotton voile lining in pink. It’s modelled here by another Tyler – 2001 Masquerade.
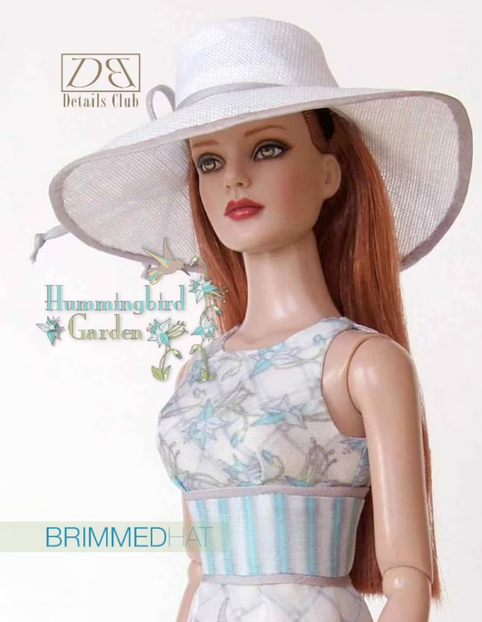
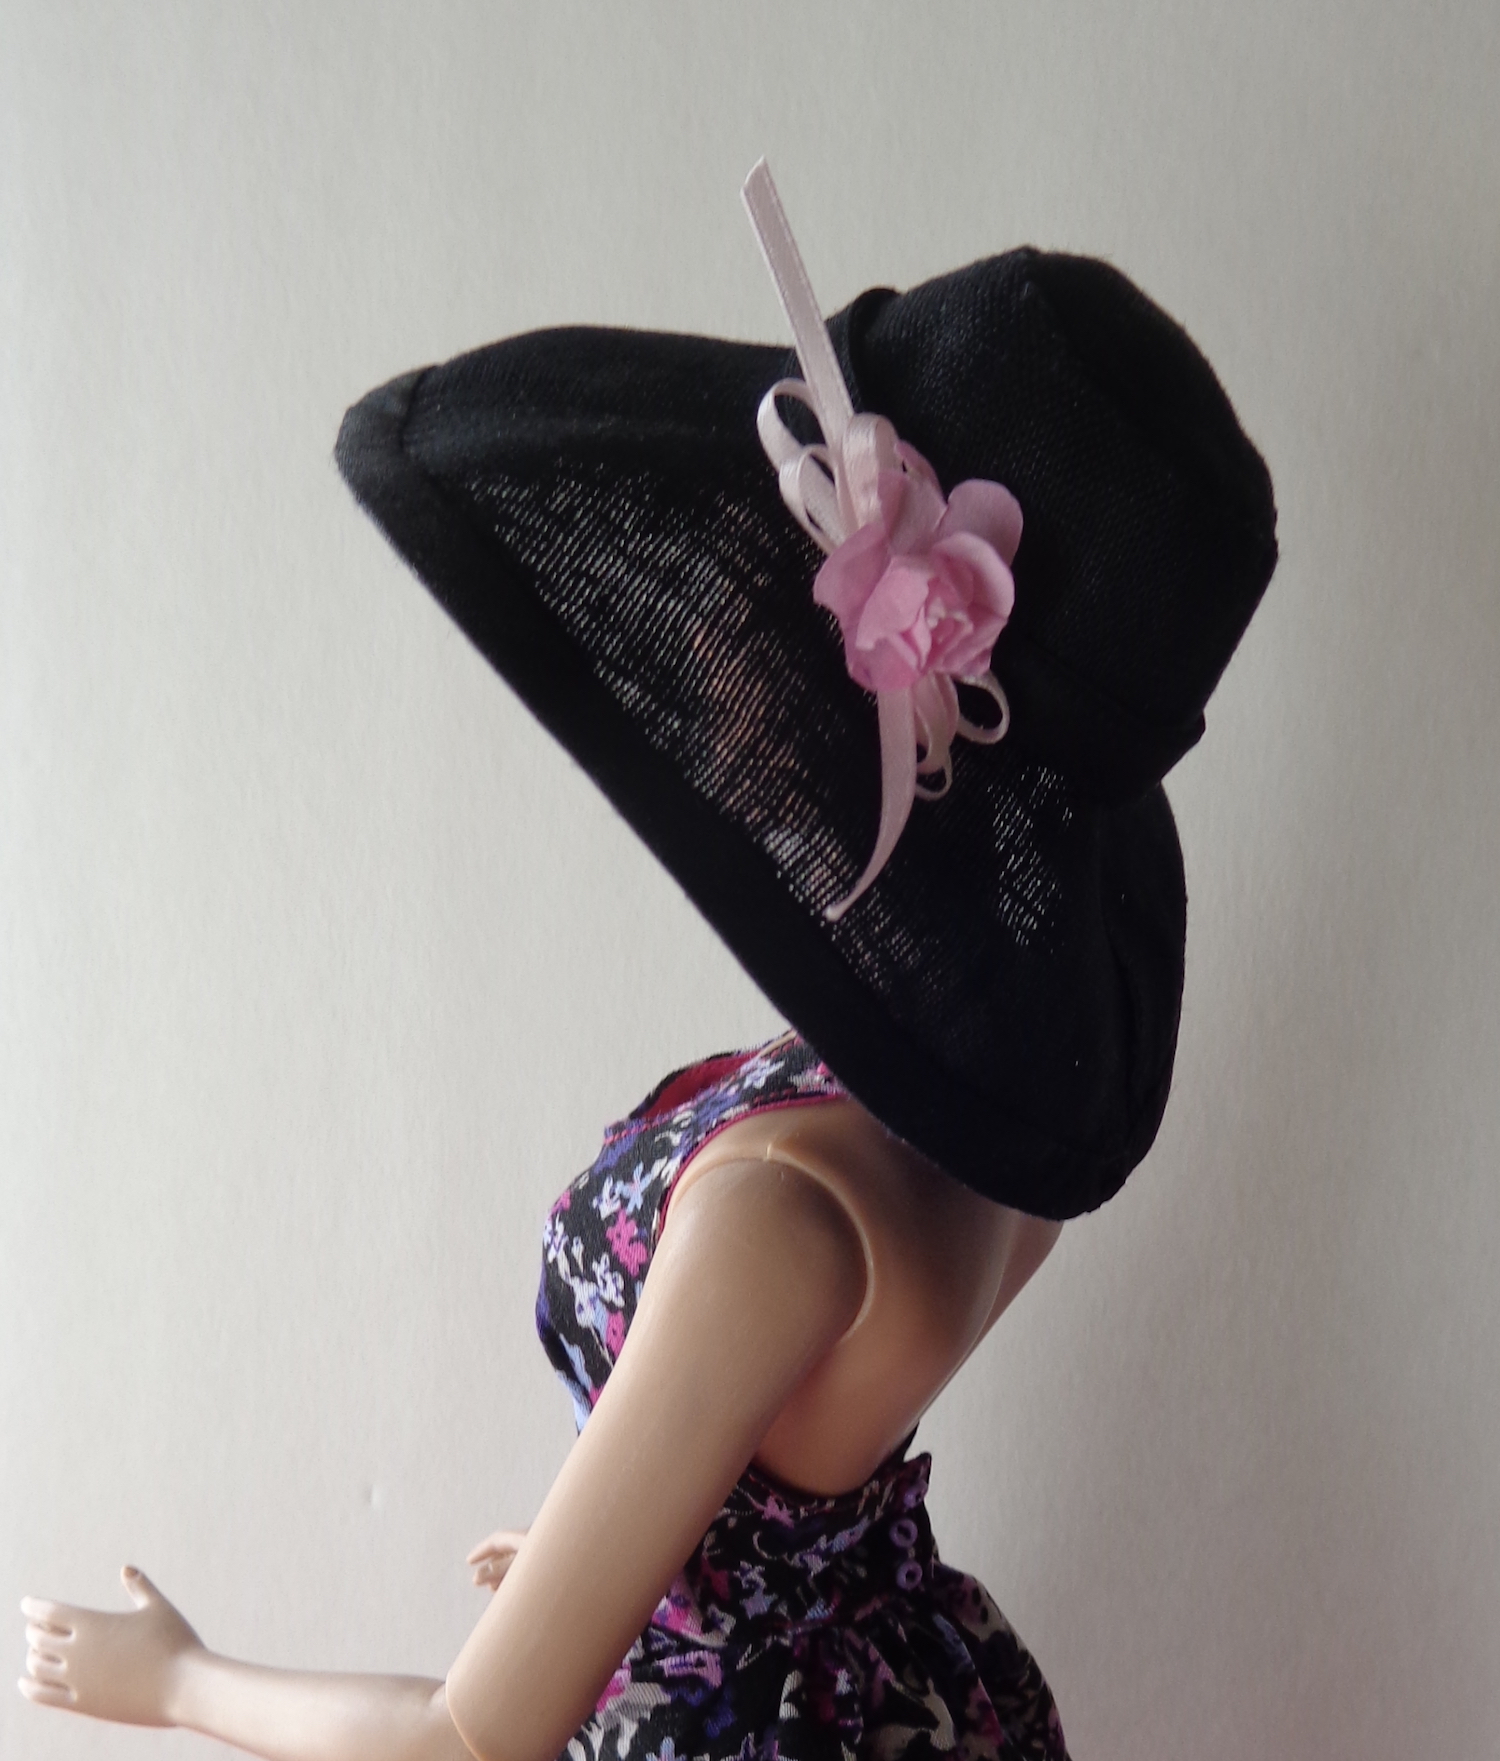
As you can see, a sundress requires a hat, so I bought this pattern from DBD for Brimmed Hat. (The link here and on the image will take you to their Etsy store.) I was really happy with their raincoat pattern, so went back for more.
The pattern calls for linen and I made this first one in black. I mucked up the directions a bit so the edging is a bit wider than it should be but it came out pretty well despite that. I also didn’t cut back the brim as instructed because a wanted a big glamorous hat.
Here’s the floral decoration on that first one.
2001 – Masquerade
And here’s Masquerade in her original dress. I thought it was red, but when she arrived, the dress proved to be coral.
I have another black hat and a white one cut out, as the girls seem to like them. I’m also going to try one in a light canvas, just to see. And I suspect we’ll need some tote bags, or everyone will be fighting over that red purse. 🙂
Here’s another sweater that made it off Sleeve Island this spring. It’s my Spector designed by Joji Locatelli (that’s a Ravelry link) in Madeline Tosh Merino Light (that’s a link to the MadTosh site.) I started this one in July 2020 and actually finished the first sleeve before stalling out. Mine is knit in four colours of MadTosh ML – Saffron, Red Phoenix, Spicewood and Simmer Pot.
It’s a kind of a rib stitch, so it’s stretchy in the crosswise.
I’ve blogged about this one before: here’s the first post about it, just after I cast on.
Part of the reason this project stalled out was that I tried it on after finishing one sleeve and wasn’t thrilled about the fit. It fits but I don’t find it particularly flattering. It’s done, though, and maybe I’ll wear it as a layer under other things next winter. The yarn is really soft against the skin.