Things have been quiet here, mostly because I’ve been writing like mad lately. I did NaNoWriMo in November, then was finishing up the book that publishes next week – it was almost twice as long as I’d expected, so getting it done was a bit of a crush.
I have also been knitting though. 🙂
First, I have three hats to show you.
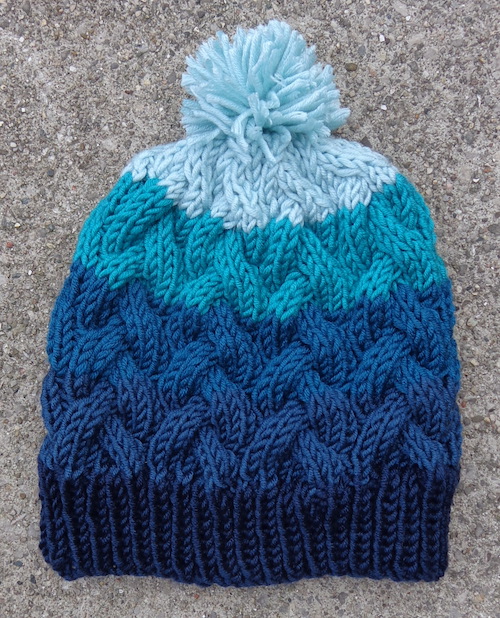
I found a package of three Pantone X Caron braids in the cutout bin at Spinrite a few years ago. (That’s a Ravelry link because these braids are discontinued and no longer on the Yarnspirations site.) This colourway is called Morning Blues. I think they might have been a little off-weight in certain colours – which would explain them being discounted – as I had some fiddling to do to get a result I liked.
The middle one is that old fave hat pattern of mine, First Snow (which is no longer available.) It has a faux-fur pompom. I wasn’t fussy about where the colours changed on that one, just started the next colour when I ran out of the one I was using. It took every inch of the braid to finish. I knit two of these before but only managed to photograph one. Here it is.
The other two are knit using the Yarnspirations patter Fair Isle Hat, a free pattern which is designed for this yarn bundle and is still available. It specifies where to change colours and I had to fudge it a couple of times. I still think they came out well, though.
Next time, I’ll show you the cardigan that is challenging my eyesight…
Last summer, I showed you a cowl that I knit of a self-striping yarn called Lionbrand Scarfie, using the Ups-and-Down Cowl pattern from Yarnspirations. (That’s a Ravelry link.) I liked it but the yarn wasn’t exactly what I had in mind when I was shopping. Of course, I found exactly what I’d been looking for after the first one was knitted up.
Here’s my second attempt at this pattern:
This one is knit of Caron Cakes in Rainbow Sprinkles. (That’s another Ravelry link, since MIchaels doesn’t have the yarn on their website anymore.)
I finished it up once at the specified length, but the ribbing wasn’t symmetrical – I wanted it all in the turquoise, framing the other colours in the cable pattern.
So, I frogged it back and reknit the last bit.
I didn’t shown it to you sooner because I was waiting on one last toggle – Fabricland had five but I needed six. I bought the sixth when they restocked and now it’s done!
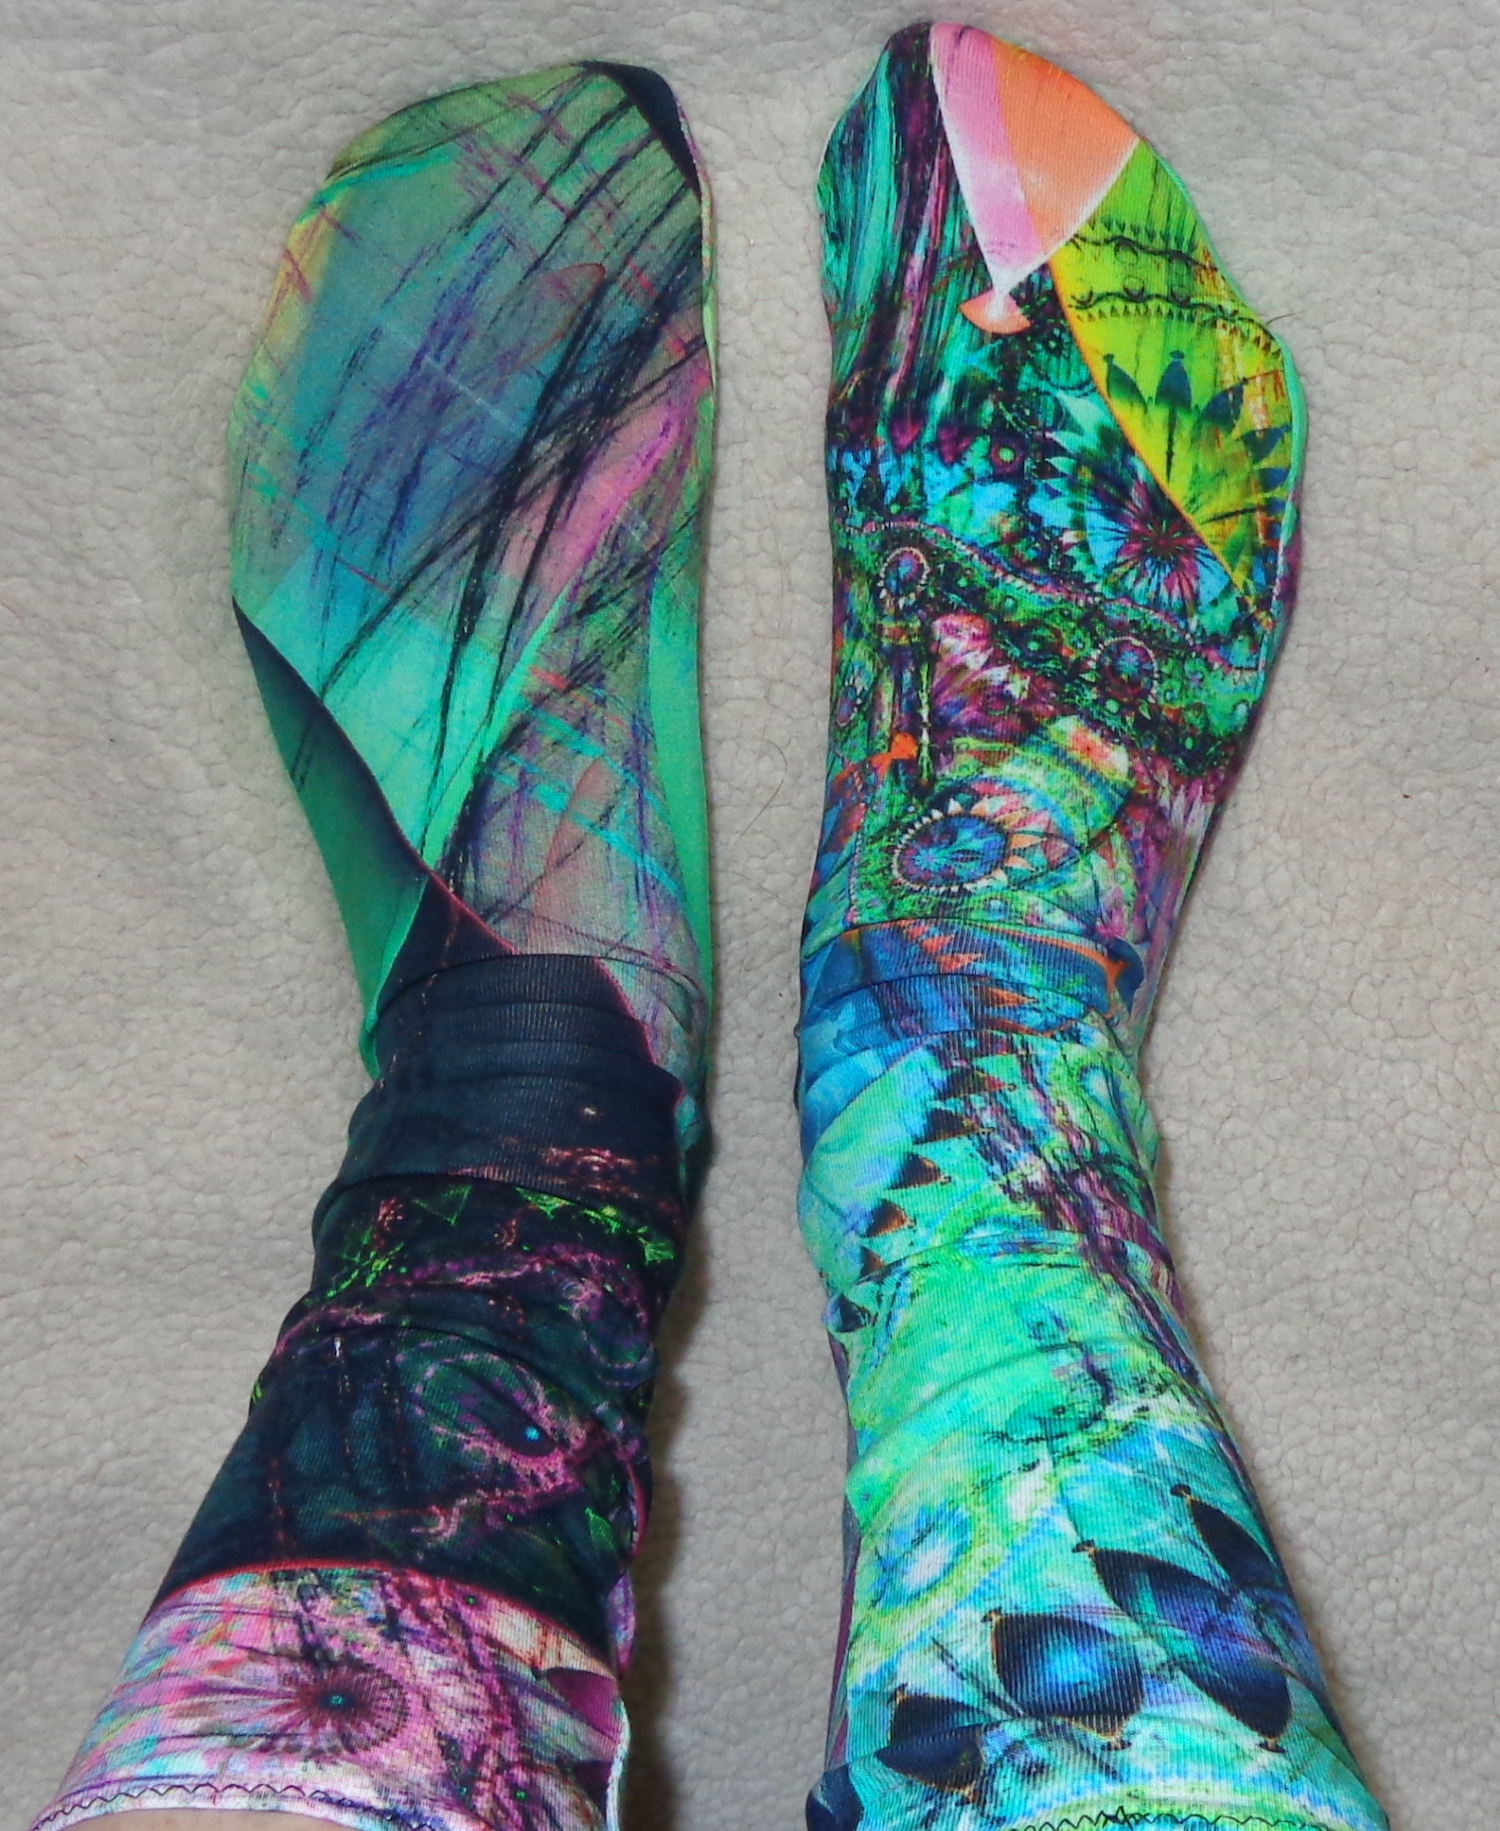
I usually knit socks, but recently someone at my sewing group talked about sewing socks from leftover pieces of jersey knit. I was intrigued and had a look around the internet, then drafted my own pattern. Here’s a pair of my finished sewn socks:
These are sewn from a Dutch print on cotton jersey that I used for one of my Mirri dresses. It was expensive, so I kept every shred – plus I really like it.
The pattern for these is a tube, pieced from two long rectangles. One has darts for the heel so needs to be cut a bit longer. Originally, I measured the length of my foot for the pattern, but ended up shortening it by about 2″ – because of the stretch of the jersey knit. I first tried these with rounded toes but the fit wasn’t good, so I shaped the toes for left and right socks. Here’s my pattern now:
It’s 4.25″ wide, with a .25″ seam allowance on each side. I have skinny feet. 🙂 These end just above the ankle and things are getting snug – if I wanted to make taller socks or knee socks, I’d need to widen the pattern and maybe even shape it to fit the calf.
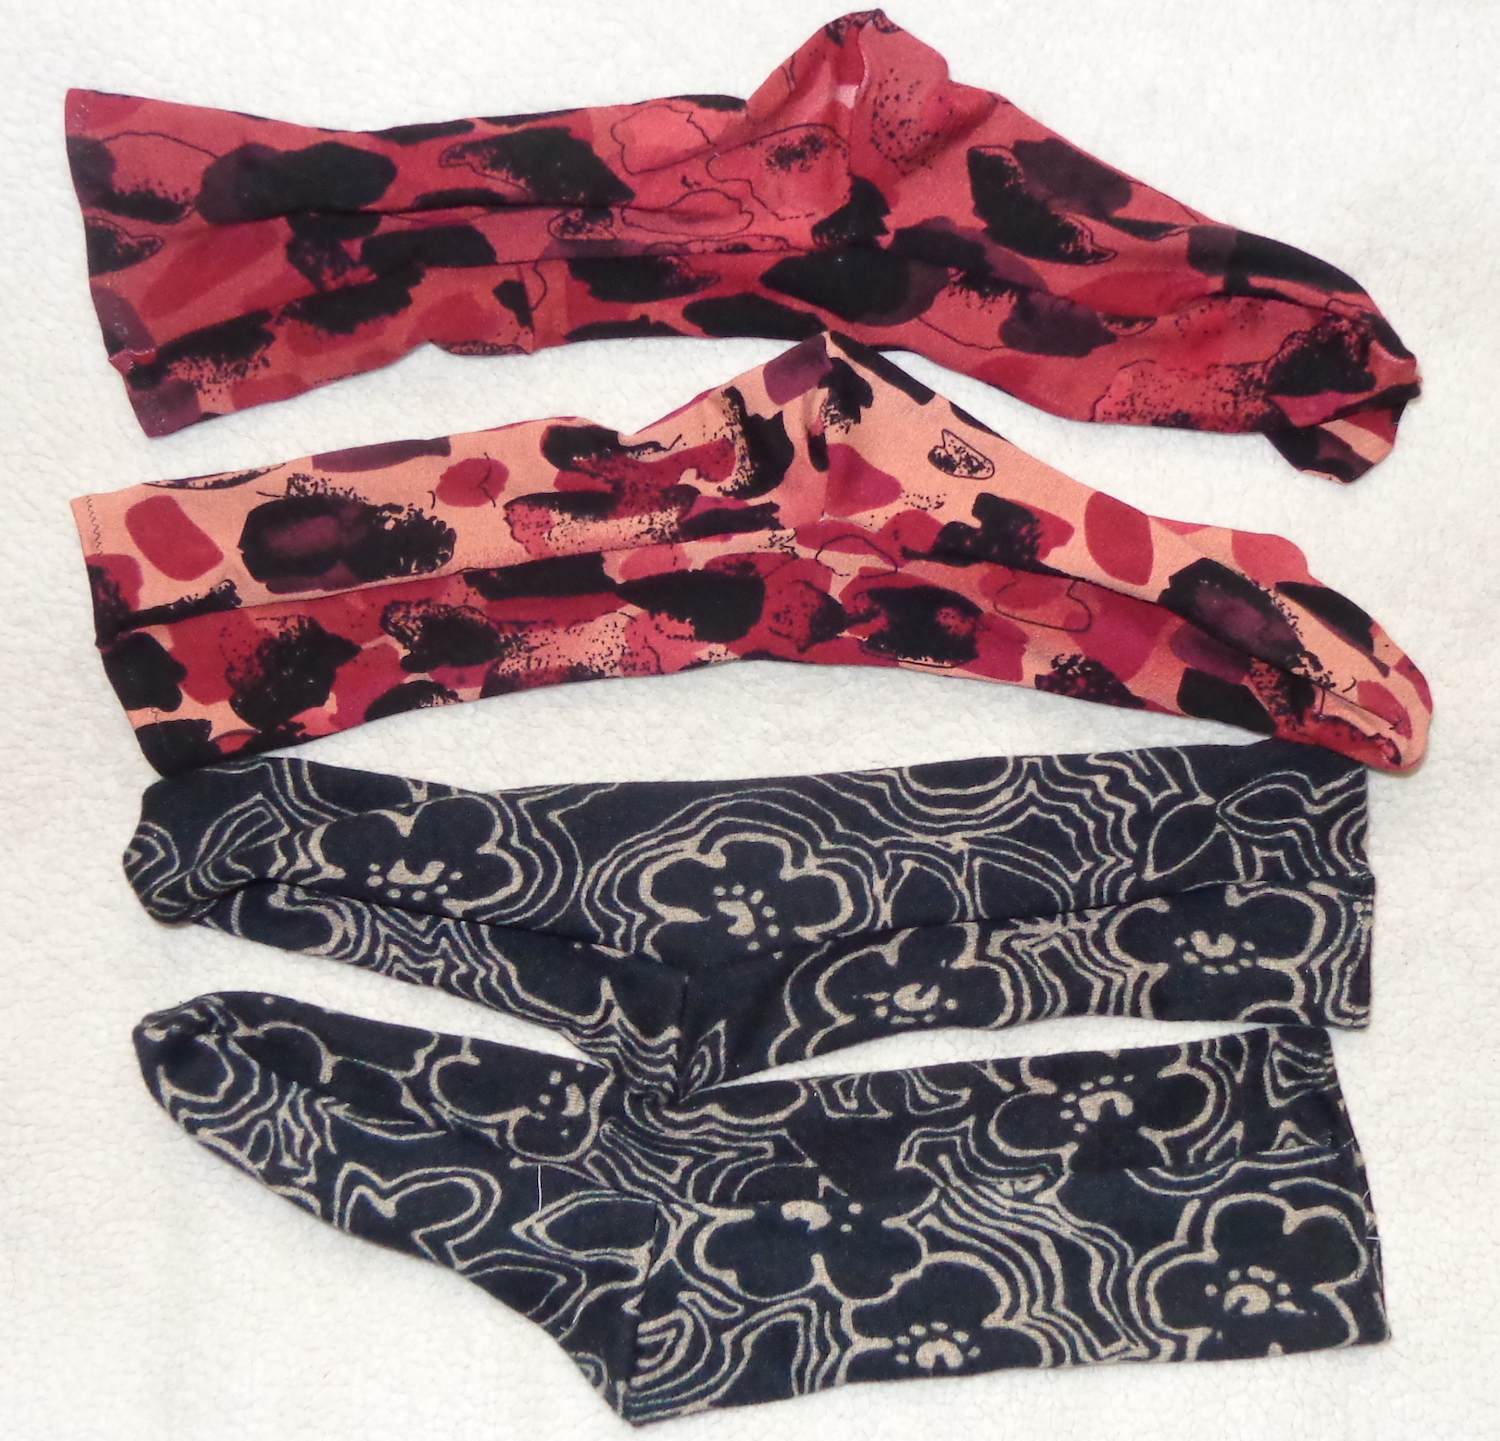
Here are the other two pair I made of scraps:
They don’t look like much when they’re laid flat, but they are quick to make. I serged the darts, then all around the perimeter. It literally took minutes to make three pair. I just used a zigzag to hem the tops, but could have used the twin needle instead.
They’re more like sock liners to me, but then I tend to wear thick socks when I wear socks. They’d be easy to make to match another garment and would be fun to wear with shoes that will only allow a thin sock. I might also wear them as sock liners this winter. The tan and black ones are made of a sweater knit and they’ll be the warmest of them all.
Have you ever sewn socks?
I also finished kniting a new pair of socks for myself in self-striping yarn.
This is Online Supersock 6-fach Stripe Color, which has been well-aged in the stash. I think I bought it originally to make socks for the mister, but he missed out this time. 🙂
It’s been quiet here lately because I’ve been buried in writing and publishing tasks. Last week, though, I took a little fiber break and got this quilt top finished. I quilted it on my Singer 185.
This one was inspired by a quilt I saw on our road trip to Maine: the cabin where we stayed had a quilt in this pattern on the bed. Theirs was red and white, but I really liked the simple pattern and how effective a design it made. I doodled it down, then came home to sort through my stash. I really like this colour combination. The top has been waiting to be quilted for a while.
Since the colours reminded me of the ocean, I quilted it in waves – they go diagonally across the middle square, then I started to quilt around and around. After finishing the third (outer) square border around the middle, I had to respray the outside border with temporary adhesive – all that wrestling of the fabric had made the layers come apart again. The backing is a printed cotton sateen from my stash, and the border is the same Kaffe Fassett Roman Glass in purple that’s in the quilt.
Here’s a picture of the pieced top in the sunshine:
This one was a challenge to quilt on the machine – I think it’s either the maximum size that I can manage or close to it. It’s 72″ by 72″ finished. I have one more that’s about this size (the mermaids) and I’ll probably try to do my Storm at Sea on the machine – it’s a teensy bit bigger. (Ha. No pix of that one. It’s been waiting a looooooooong time to be quilted!) The bigger ones will have to go to the long arm quilter to be finished up.
I also have a lap top pieced in these fabrics which I’ve been handquilting with embroidery floss. It has flannel on the back and is a very cozy piece of work. I’ll try to get that done soon and post a pic.
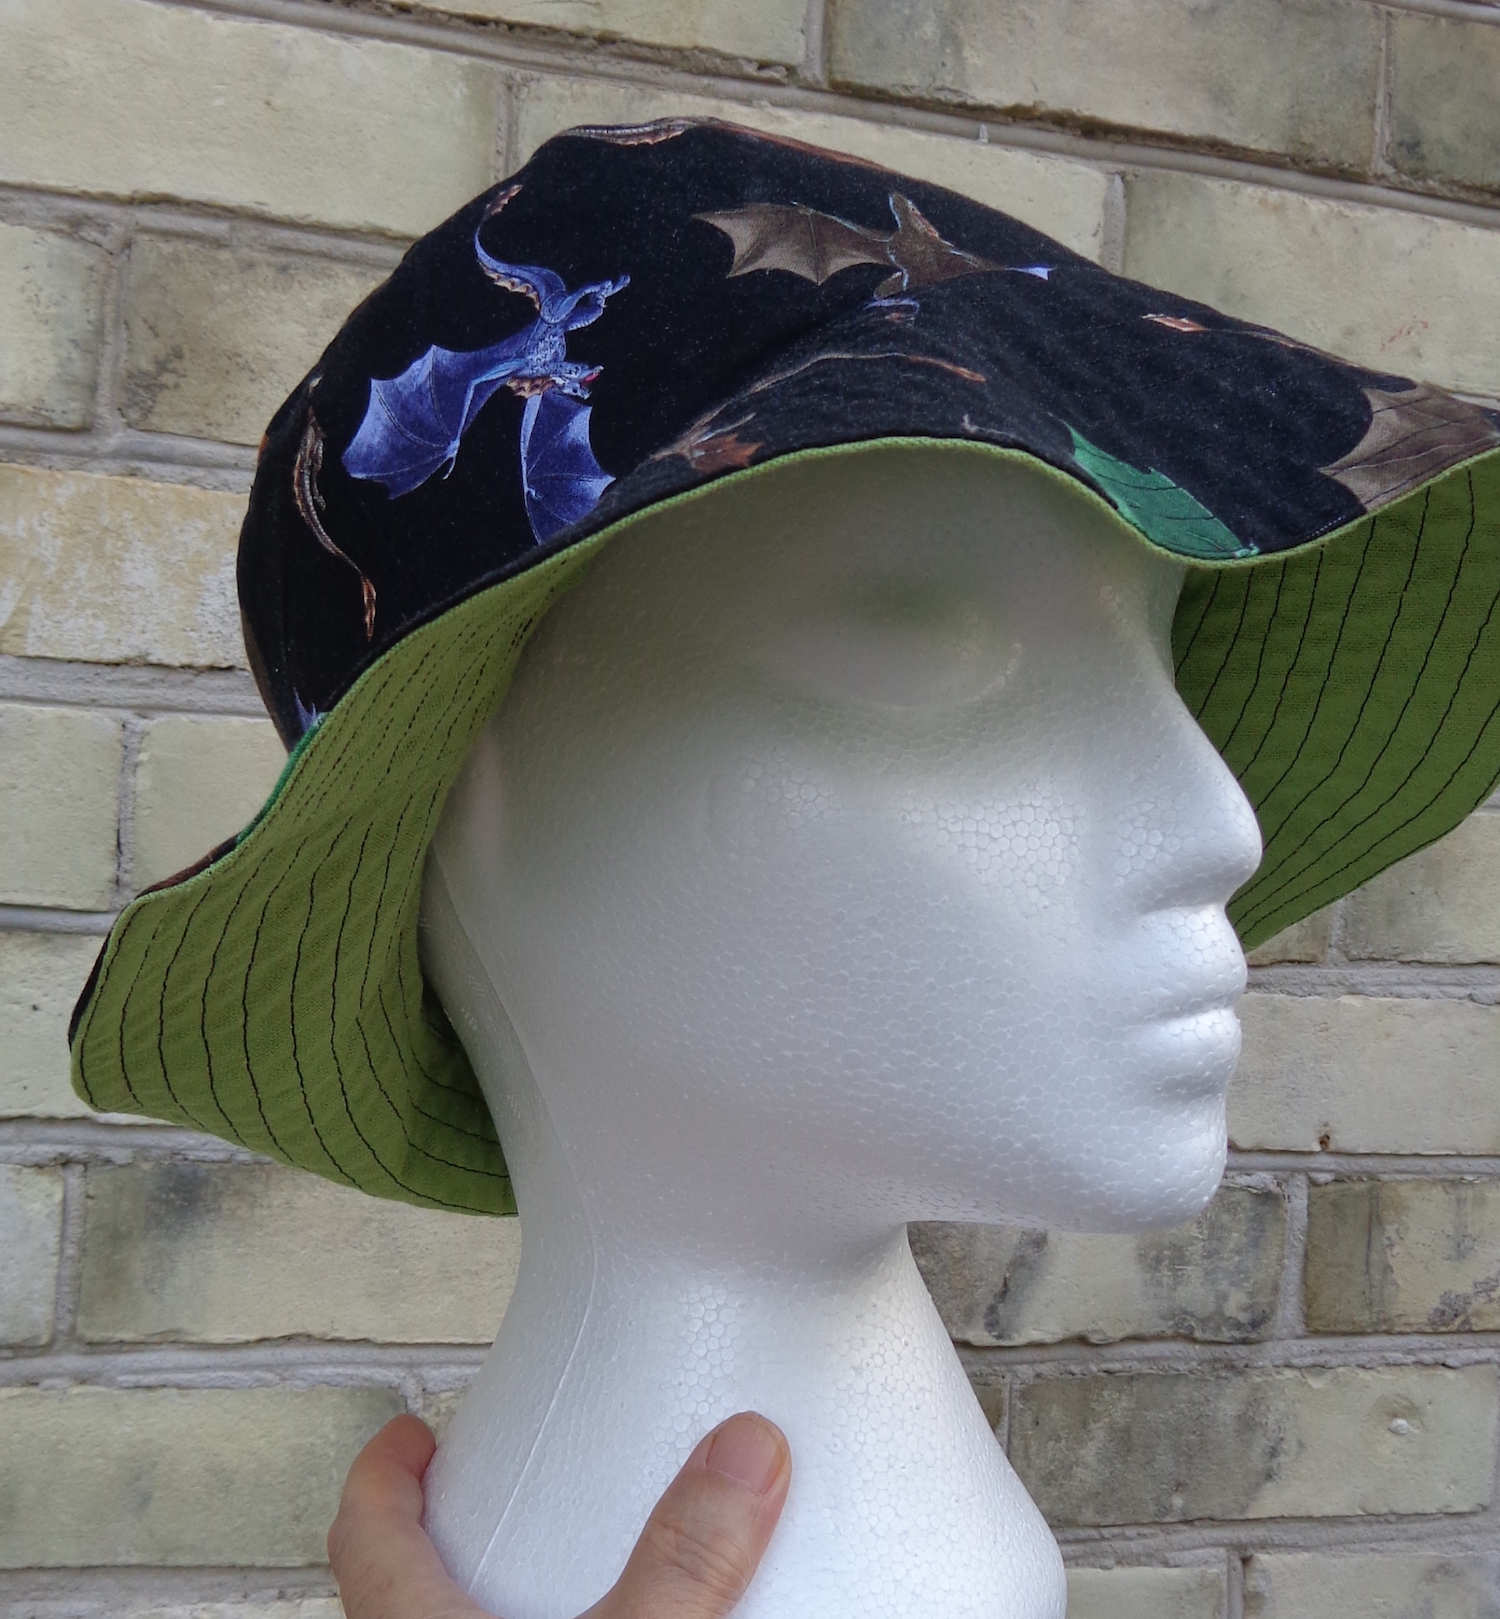
A while back, I saw a post on FB from a person sewing bucket hats out of Kaffe Fassett quilting fabric. (I’d include a credit, but the post is long gone.) They were gorgeous! Predictably, I was inspired.
This one is a bit deep in the crown for me, although it fits well when I have my hair up. The mister tried it on (he needed a hat, too) and thought the crown was too deep. I revised the pattern for him, making the crown 3/8″ more shallow, and here’s the result:
The outside of this one is a light denim. (It looks as if I have bad intentions toward the hat-head, doesn’t it?”
These both look as if they have a broad brim, but that’s because the hat-head has a small head. On me, it has a much narrower brim.
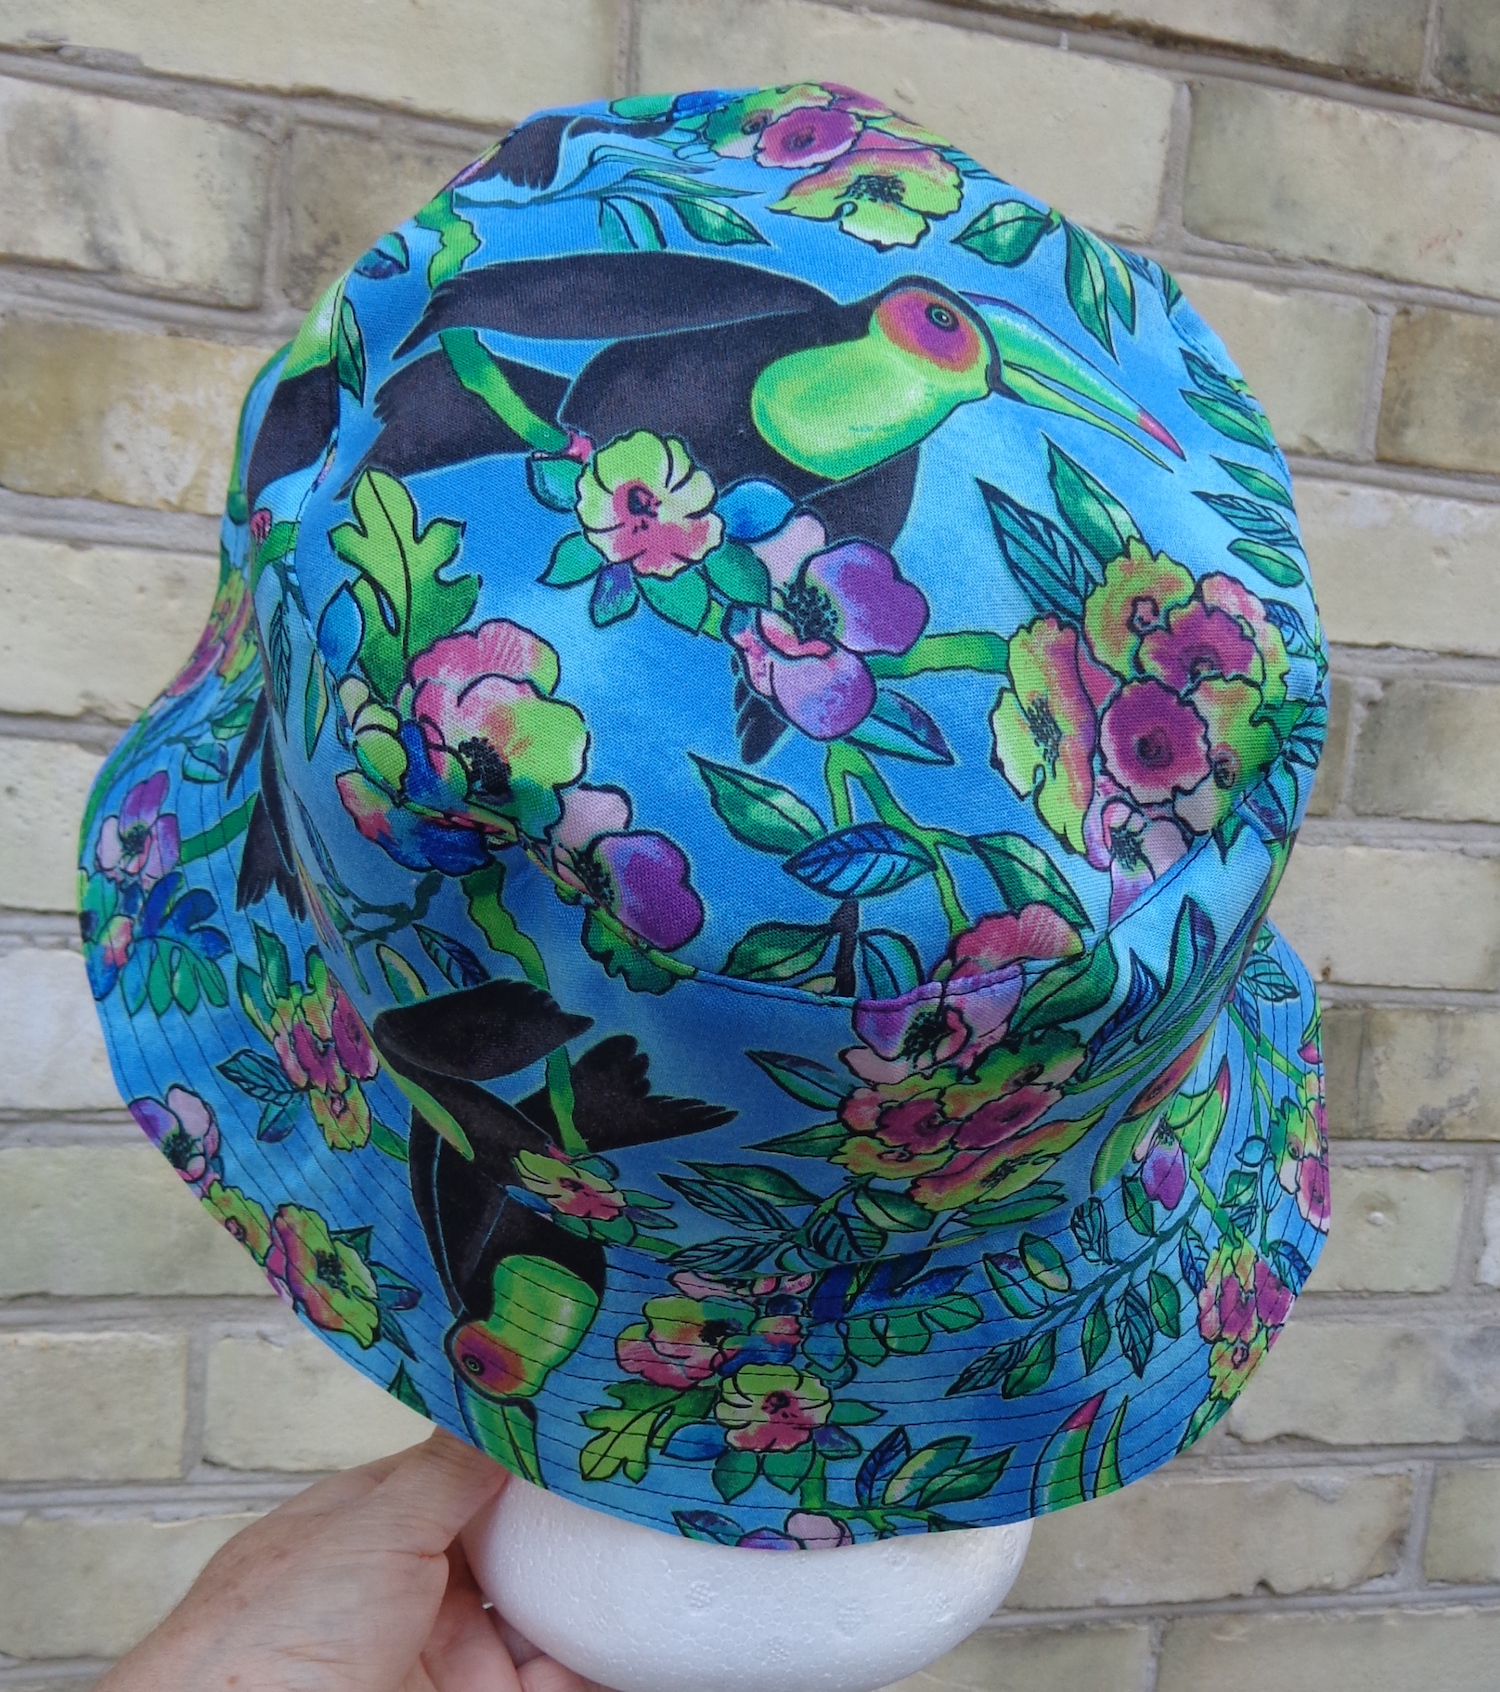
Then I made a couple for my SIL. She wears her hair up all the time, so was excited to have some hats that will fit. For the first two, I used a fusible knit interfacing, the one I use for pretty much everything. These two have a stiffer interfacing – a woven non-fusible adhered to the fabric with Stitch Witchery – as I thought it might make the brim stand out better. They have a lot more body.
I centered one of the toucans on the top of this one, just for fun.
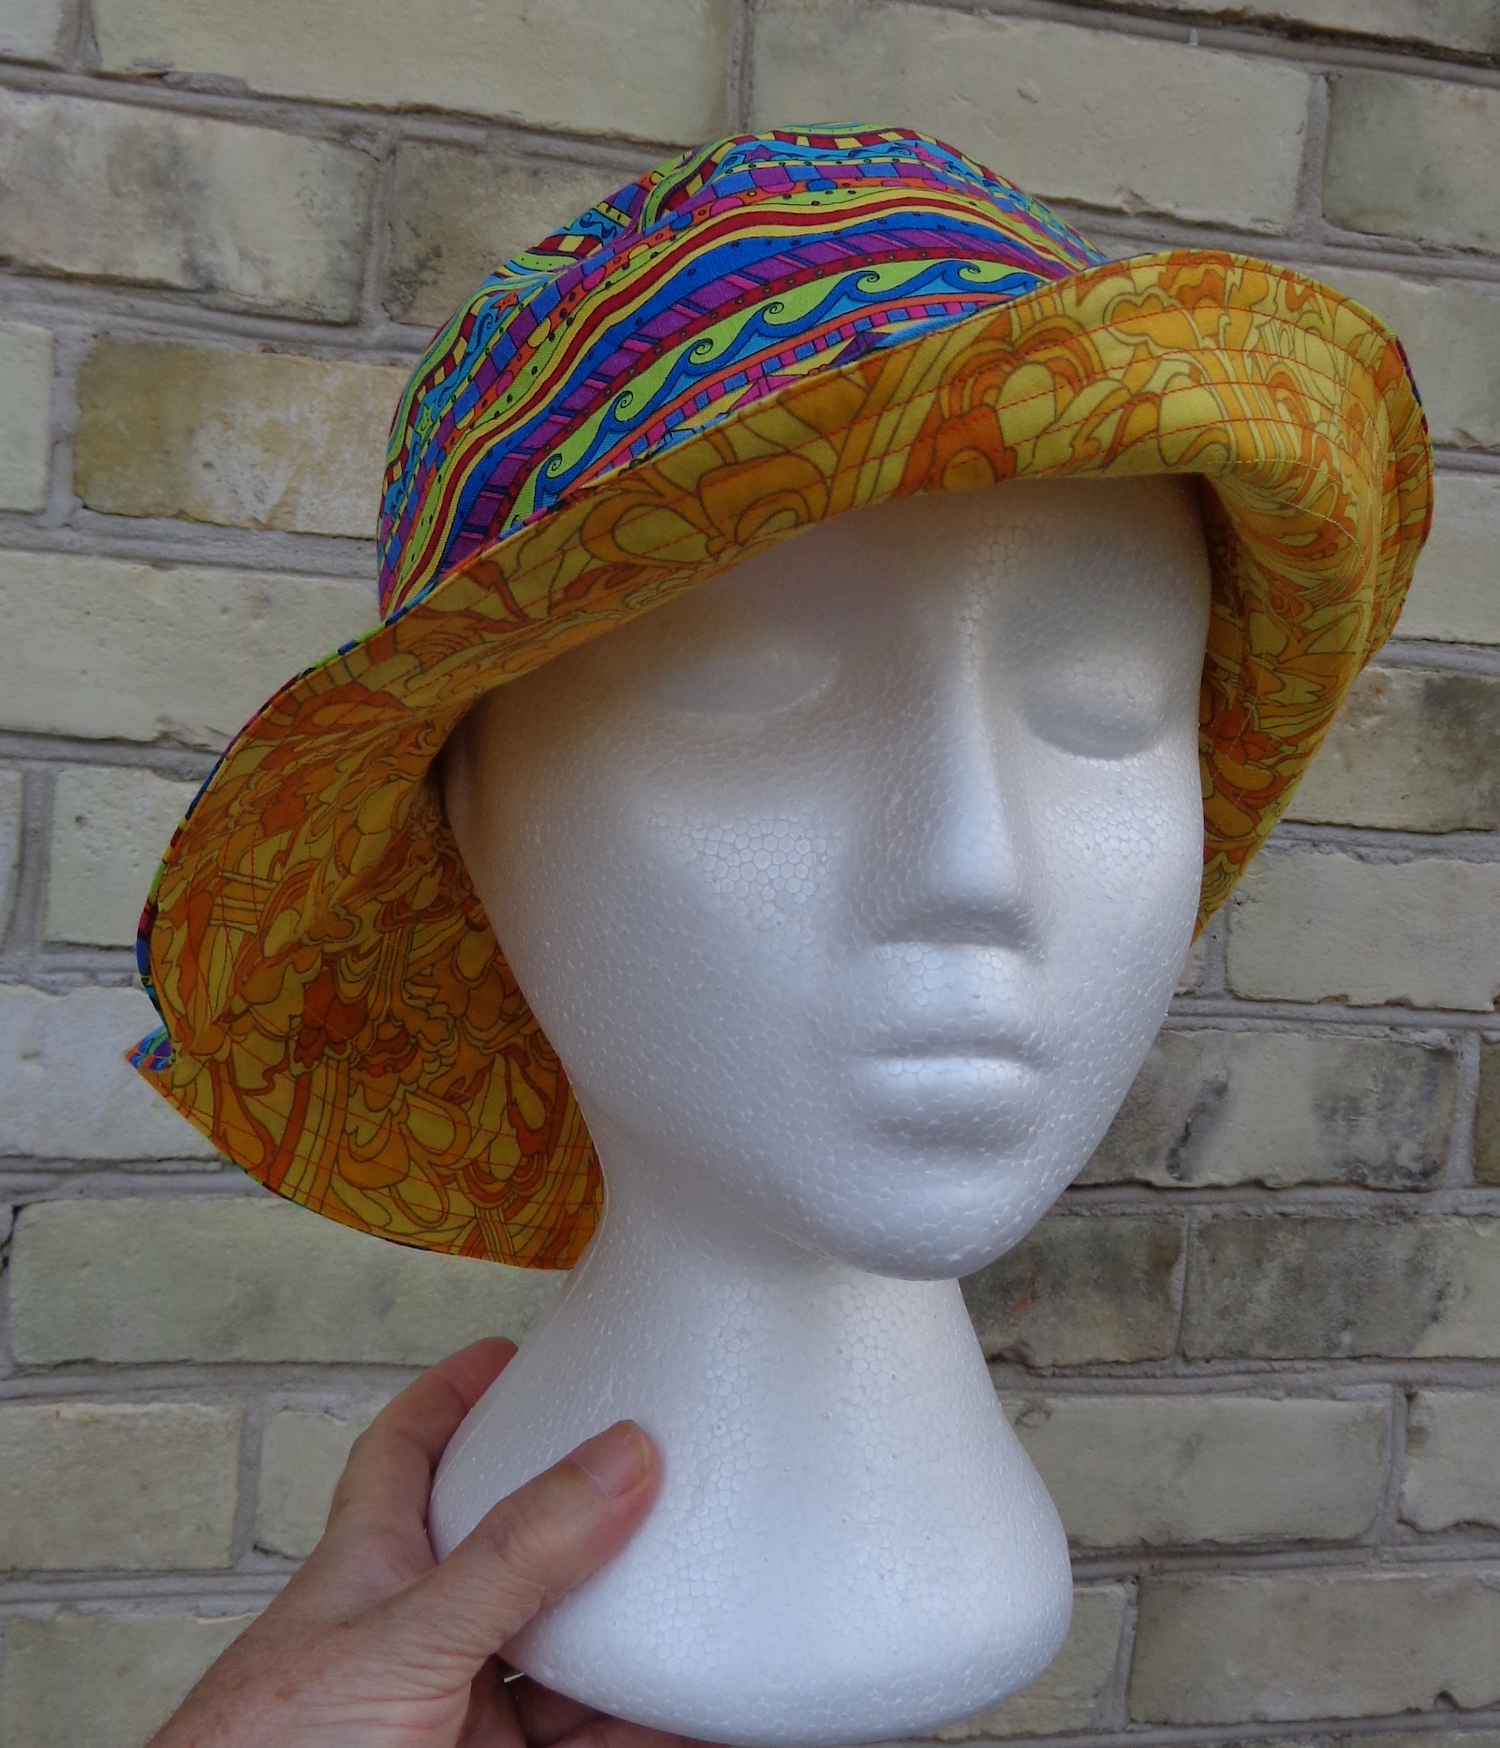
And here’s the final one, with the lighter interfacing again and a fun Yellow Submarine fabric inside. The brim is much floppier.
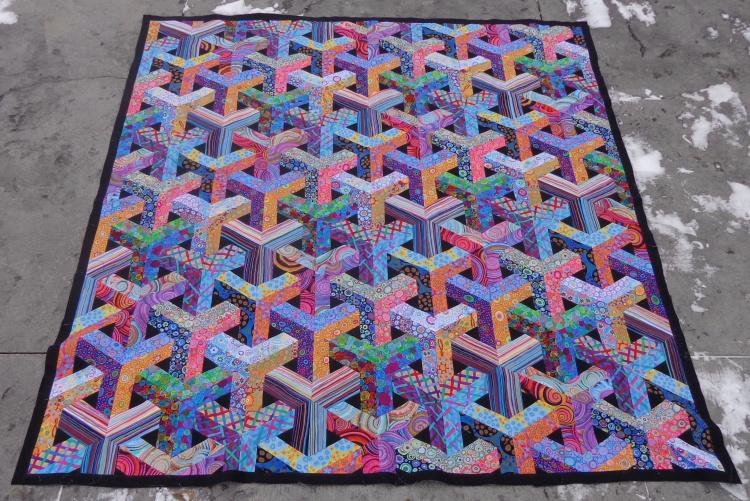
A long time ago, I showed you the Escher quilt that I’d sewn from a kit. Here’s the pieced top again from that original post. There’s snow on the driveway!
This one became my first big quilt that I machine-quilted. I’ve already completed two smaller test quilts – this one and this one. The first lap quilt used up the scraps from this quilt. This one is about 62″ by 64″, still not a full-size quilt but big enough that I had to wrestle it through the machine.
If I’d been quilting this by hand, I would have made circles or curves to contrast with the piecing. With free motion quilting, I would have made those all-over squiggles. But at this point, I’m making lines with my walking foot, so I had to come up with a different plan.
I used a cotton Gutermann quilting thread in variegated yellow, which looked nice against both the backing and the front.
The back is a quilting cotton that I’d originally bought to make a shirt for Mr. Math. He didn’t love the print, though—the birds are bigger than expected from the pix online—so it’s been in my stash, waiting for opportunity. There wasn’t quite enough of it for the entire back, especially after I matched the print, so I did a little patch of leftover blocks from the quilt top.
For the quilting design, I marked the middle of the quilt, with the plan of quilting on either side of the diagonal lines – the quilting is about 1/4″ outside of the seam on either side of the seam. I started at the top left corner—where the stripey Y is—stitched on one side of the seam, pivoted at the middle point, then quilted up to the opposite top corner. Once I’d quilted both sides of the seam, I dropped down to the next diagonal line. There’s a floral Y there. I did this three times, then flipped the quilt and did the same from the other edge. That left two triangles on either side of the middle unquilted. I followed the same idea, pivoting one column outside of the middle column until the top had all the diagonal lines quilted.
This turned out to be a really good idea and a plan I’ll follow in future. The fabric adhesive I used (Odile 505) isn’t permanent and washes out. I wondered whether it would lose its grip over the course of quilting this quilt, with all the turning and wrestling with the fabric, and it did. So, it was good to have those main lines already quilted by the time I got to the final sections.
I could have just used the walking foot to make more parallel lines but wanted some curves. I like those sinuous curves that look like water flowing. I decided to treat each black triangle like a rock in a stream—I sewed one line down the middle of each space, going around the “rocks”. I added two more quilting lines in each gap, one on either side of that wavy line and undulating between it and the straight line.
I was stumped on the binding for a day or two. I didn’t have any of the component fabrics left over, and (incredibly) anything I pulled from my stash didn’t work. The pinks were too yellow or too blue, the oranges too bright, etc. Finally, I found a piece of Kaffe Fassett Roman Glass in black and red. That colourway isn’t in the quilt top, but that design is. It’s perfect. Here’s a detail shot of one corner:
This is a small quilt comparatively, but bigger than either of my test quilts. It felt like I did a lot of wrestling to get this one done! The weight was a bit of an issue, which means I need a bigger work surface next time. Also, my walking foot didn’t walk as well as previously, maybe also because of the weight. I’ll make some changes to my set-up before tackling another one of this size. My curved lines are smoother, despite all that, and my stitch length is more consistent. I only had one teensy tuck in the top and none in the backing, which is a triumph.
Here it is:
I’m really glad it’s done. 🙂
I’m also trying to remember where I put the pattern. The kit came with the fabric and was quite a mix. The result is chaotic and fun, but I’m curious how it would look with a more limited palette, and one in which I love every fabric. I think I’ll quilt that one (if and when I do it) with parallel lines.
We took a little road trip last week and went to the tent sale at the Koigu farm. This annual event has been on hiatus thanks to the pandemic, and I was really excited that it happened this year again. Here’s an old picture of the Koigu barn, taken the first year we went to the tent sale:
Of course, I bought some (more) KPPPM home. 🙂 I have such a hard time choosing from the array of colours at this sale, but here’s this year’s selection:
The top seven are all the same colour and dye lot. They’re a little less blue than they look here, more pinky-lavender. I’ve already balled one up and cast on a Tegna. I’ll show you that when I’ve made more progress than just casting on.
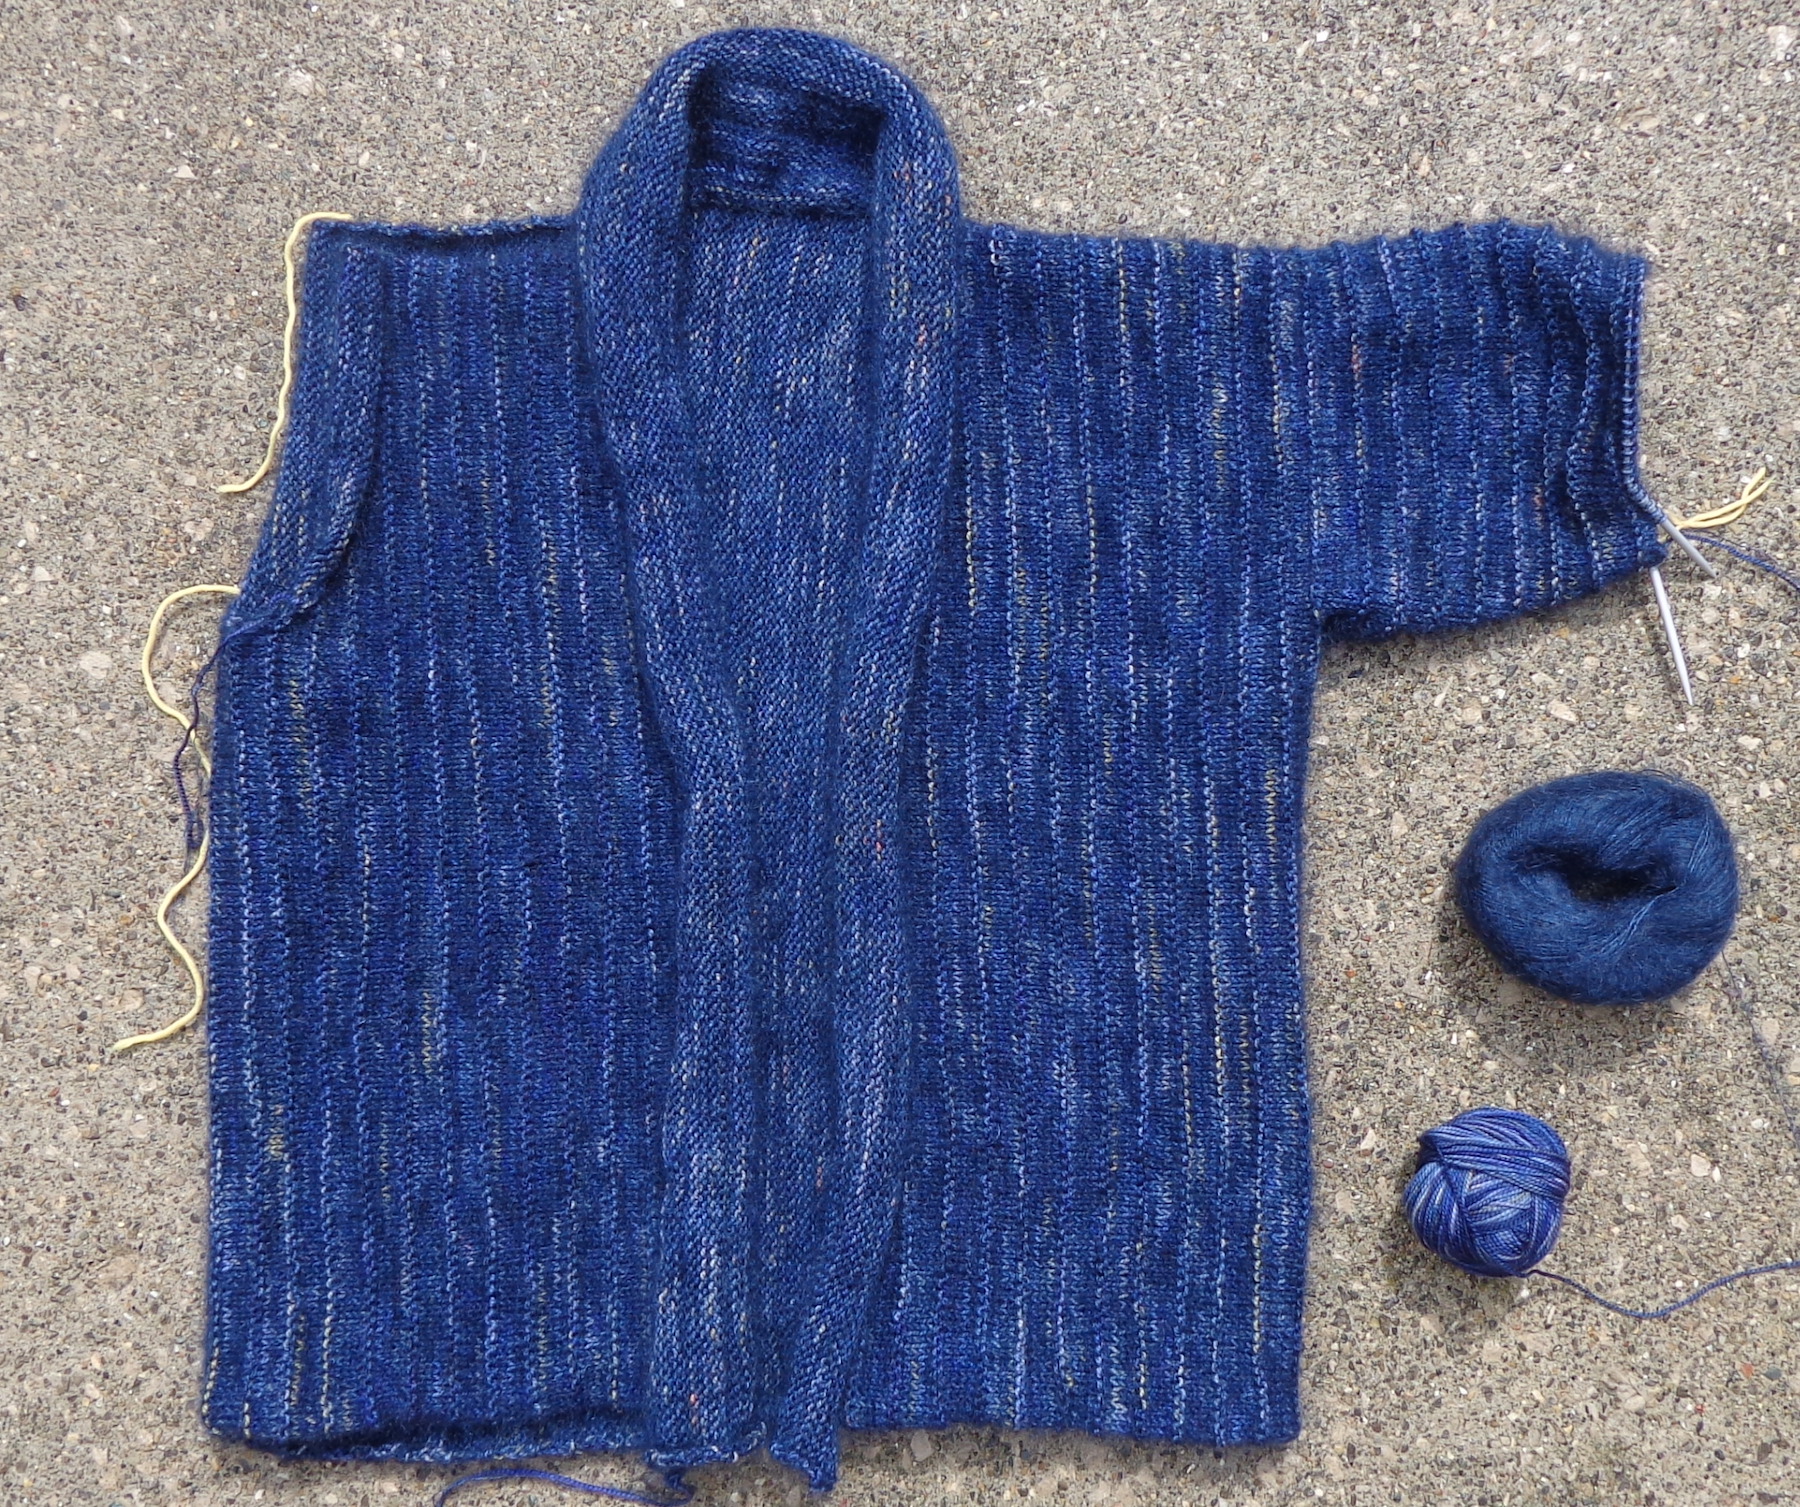
The blue at the bottom left is insurance yarn for my Halo jacket. (That’s the Ravelry link for the pattern. Here’s my previous post about mine.) I think I’m going to run out of the KPPPM blue before I get to the cuffs. (Yes, I’m knitting faster, just in case.) That’s not a huge surprise as I’m a bit short on the yarn requirements.
This jacket has an interesting construction – it’s knit sideways, starting at one side. You knit across the back and around to the centre front, then go back to the cast-on edge and knit to the other front. Then you pick up the stitches from the shoulder to knit down each sleeve to the cuff. I love the feel of the KPPPM knit with Rowan Kidsilk Haze – it’s a wonderfully squishy soft sweater. When I started the sleeves, I had two skeins of KPPPM left, so one for each sleeve, then (maybe) some of this other blue at the cuff.
Here’s my progress on Halo so far:
The other four skeins that I bought at the tent sale are just pretty. They’re more earth-toned than they look here, russet and brown with some green. Three are the same colourway and I chose the dark one because it coordinated. I think they’ll be a shawl, probably another Charlotte’s Web. The one I made for Nikoo used four skeins and it was a nice size, even without the fringe.
I hope they have the tent sale again next year. By then, I might have more of my Koigu stash knit up.
More on machine quilting today and the second lap quilt that I made. The one was inspired by this YouTube video called Five Ways to Use Ugly Fabric. I was intrigued by the title! She makes a number of suggestions then offers a tutorial for a lap quilt that requires twelve 14″ squares.
Instead of using ugly fabric, I chose fabrics I like from my stash but haven’t used, mostly florals, mostly red and black. The design reminds me of Stained Glass Quilts, but without the black sashing. (Here’s a tutorial on making those. They were really popular about 30 years ago.)
Here’s that “ugly” quilt top, which isn’t very ugly at all. There are twelve squares but they’re a bit tough to pick out. The only horizontal and vertical seams inside the borders are between the blocks. Look for three squares across and four down – each one is broken into 9 pieces.
The one fabric that breaks the rule of red-and-black is that green one with the chrysanthemums. I always loved it but have never used it. Now it’s here forever. Also the paisley one with the cream background technically follows the rules (there’s a bit of black in the outlines) but it’s also a less consistent choice. The styles of the prints are so different that I would never have put them together but it’s kind of fun to have them mixed like this. Two are Kaffe Fassett fabrics that I never used because the scale of them was so big. (One is black with huge red and pink flowers, while the other has a purple vase with long blue sprays of flower stems.) Hmm. That one floral is the only one with a lot of yellow. Maybe there are more outliers than I thought!
This quilt is bigger than the first test quilt – it’s 42″ by 54″ – but still a small quilt.
I did buy backing fabric for it out of the discount bin and had to piece the batting from that last piece of the roll. I’d originally planned to use the black cotton quilting thread, but instead I went looking for Aurifil thread, which is supposed to be the best. I found a wonderful cherry red in that which I couldn’t resist.
I had a plan to do my first free motion quilting on this one, using my Pfaff 360, but that machine needed a bit of TLC first. I did a few rows of quilting on a vintage Elna instead, using a cam from the embroidery stitches, then thought it would be too much to do the whole quilt that way. (Even though it is pretty.) I wanted to change to a straight stitch and the Elna didn’t want to go. (More TLC needed.)
Here’s that decorative cam stitch:
So, it was back to the trusty Singer 185K and the walking foot. As a result, this quilt has wavy lines of quilting, just like the last one, instead of free motion quilting. I still like it. Here it is:
One difference is that I wanted to quilt the borders all around, in an enclosing square instead of quilting from edge to edge. That meant that I had to pull both threads to the same side at either end of each quilting line inside the borders, tie them off, then thread the ends onto a needle and bury them in the quilt. That took some time but wasn’t as tedious as I’d thought. (Hint: leave long ends in future.)
Until my machines get their TLC, I’m foiled as far as learning free motion quilting. I’m going to carry on with the walking foot, though. The lines are kind of fun when they wave and when they aren’t perfectly parallel, they have an organic appearance that will work for some of my quilt tops. There’s still room for improvement in my lines and my stitch length, too, and certainly I need practice supporting the weight of the quilt as I work.
In addition to giving us some picnic quilts for the car, these test pieces have convinced me of one thing: done is better than perfect. I never believed that until now, but all the imperfections that I see when I examine each quilt closely aren’t noticeable when you look at the whole thing. So, I’m going to continue with my quilt tops that need to be finished up, working from smallest to biggest as I get better at moving the weight of the quilt around.
Next up is my Escher quilt. Since it’s all diagonal lines anyway, I’m going to quilt it with chevrons – down from the left side on the diagonal to the middle, then pivot and quilt up to the right side on the diagonal. I haven’t yet decided whether to do that the whole way down, or to invert the chevron halfway down. That would make a big X instead of the Y in the piecing, which might be fun. We’ll see.
I realized that I’ve never posted here about The Herd, which is my collection of vintage sewing machines. Now’s the time to start! I’ve been pulling them out of the closet this year to give each one a run, so why not post about the machines, too?
The first one to break out of storage was my Singer 185. It’s a 3/4 size machine in a lovely vintage green.
The Singer 185 is a straight stitch machine and a real workhorse. As you can see, I found it along with the Singer buttonhole attachment in what my husband calls the spaceship box. (You can also find it in a plain cardboard box, the way my mom’s was.) This buttonholer makes the most awesome keyhole buttonholes. You attach it like a huge foot to the machine, and choose the size of the buttonhole from cams included with the attachment. (If you ever see one and don’t have one already, grab it!)
My 185 is in the Singer canvas covered box, part of which is the base of the machine. There’s also a version with a light green plastic carrying case, which also provides a base. I’ve seen these for sale but think they’re a bit flimsy and I don’t love the green. You might also find this machine set into a table. It was also made in taupe and brown. According to the Singer UK website, the green 185 was available only in the US and Canada. The machine was manufactured from 1958 to 1963. The story is that you can tell from the machine number where it was made: the 185K was made in Kilbowie Scotland; the 185J was made in St-Jean-sur-Richelieu, Quebec, Canada; the 185 (without a letter) was made in the US. There’s evidently a bit of mixy-mixy with this that might be an English Canada thing – mine is badged as a 185K, which means it was made in Scotland, but it’s green, which is a North American product. It has North American wiring and the badge on the motor says Made in Canada, so I suspect the machine was made in the UK and wired in Quebec. Maybe it was imported and the wiring was changed once it arrived. (?) Maybe that’s why it has the canvas-covered box instead of the green plastic one. I’ve seen others that say “Made in Canada” on the machine itself, but mine doesn’t have that.
You’ll find the serial number of the machine on the bottom on the underside of the front. (You have to take the machine out of the case to see it.) Mine is EN771159. The ISMACS website maintains a list of Singer serial numbers and their manufacture dates: this machine was in the batch of 50,000 99’s and 185’s made in August 1958.
The beauty of a straight stitch machine is that there’s not much to go wrong. Mine doesn’t have a manual anymore, but it was in good working order. Even the tension was fine. Mine came without extra feet or attachments, but all the regular Singer feet work on it and even my cheap eBay walking foot is fine. The lever to the right of the stitch length selector has a screw on it so you can set its position – you push it up to backtack, then it’s easy to return to your set stitch length. There’s a blog post here on the Mermaid’s Den site about servicing a Singer 185 if yours needs more TLC than mine did. (The link there to the manual on the Singer site is a dead link, just FYI.)
I used this machine to piece both of my test quilts, and to quilt the first one. I also pieced the Mermaid Quilt with it. I like it a lot. It’s a little more clattery than my other machines but it works just fine. The feed dogs don’t drop but I quilted easily with it using the walking foot. I discovered that it tends to stop with the needle up, so when I took a pause in quilting, I had to remember to put the needle down before anything moved. That’s really not a bit deal. The electrical is still fine on it, but I unplug it when it’s not in use, just in case. I think I paid about $75 for it at an antique market, which included the buttonholer.
Next time we visit the Herd, we’ll talk about my vintage Elna collection. 🙂
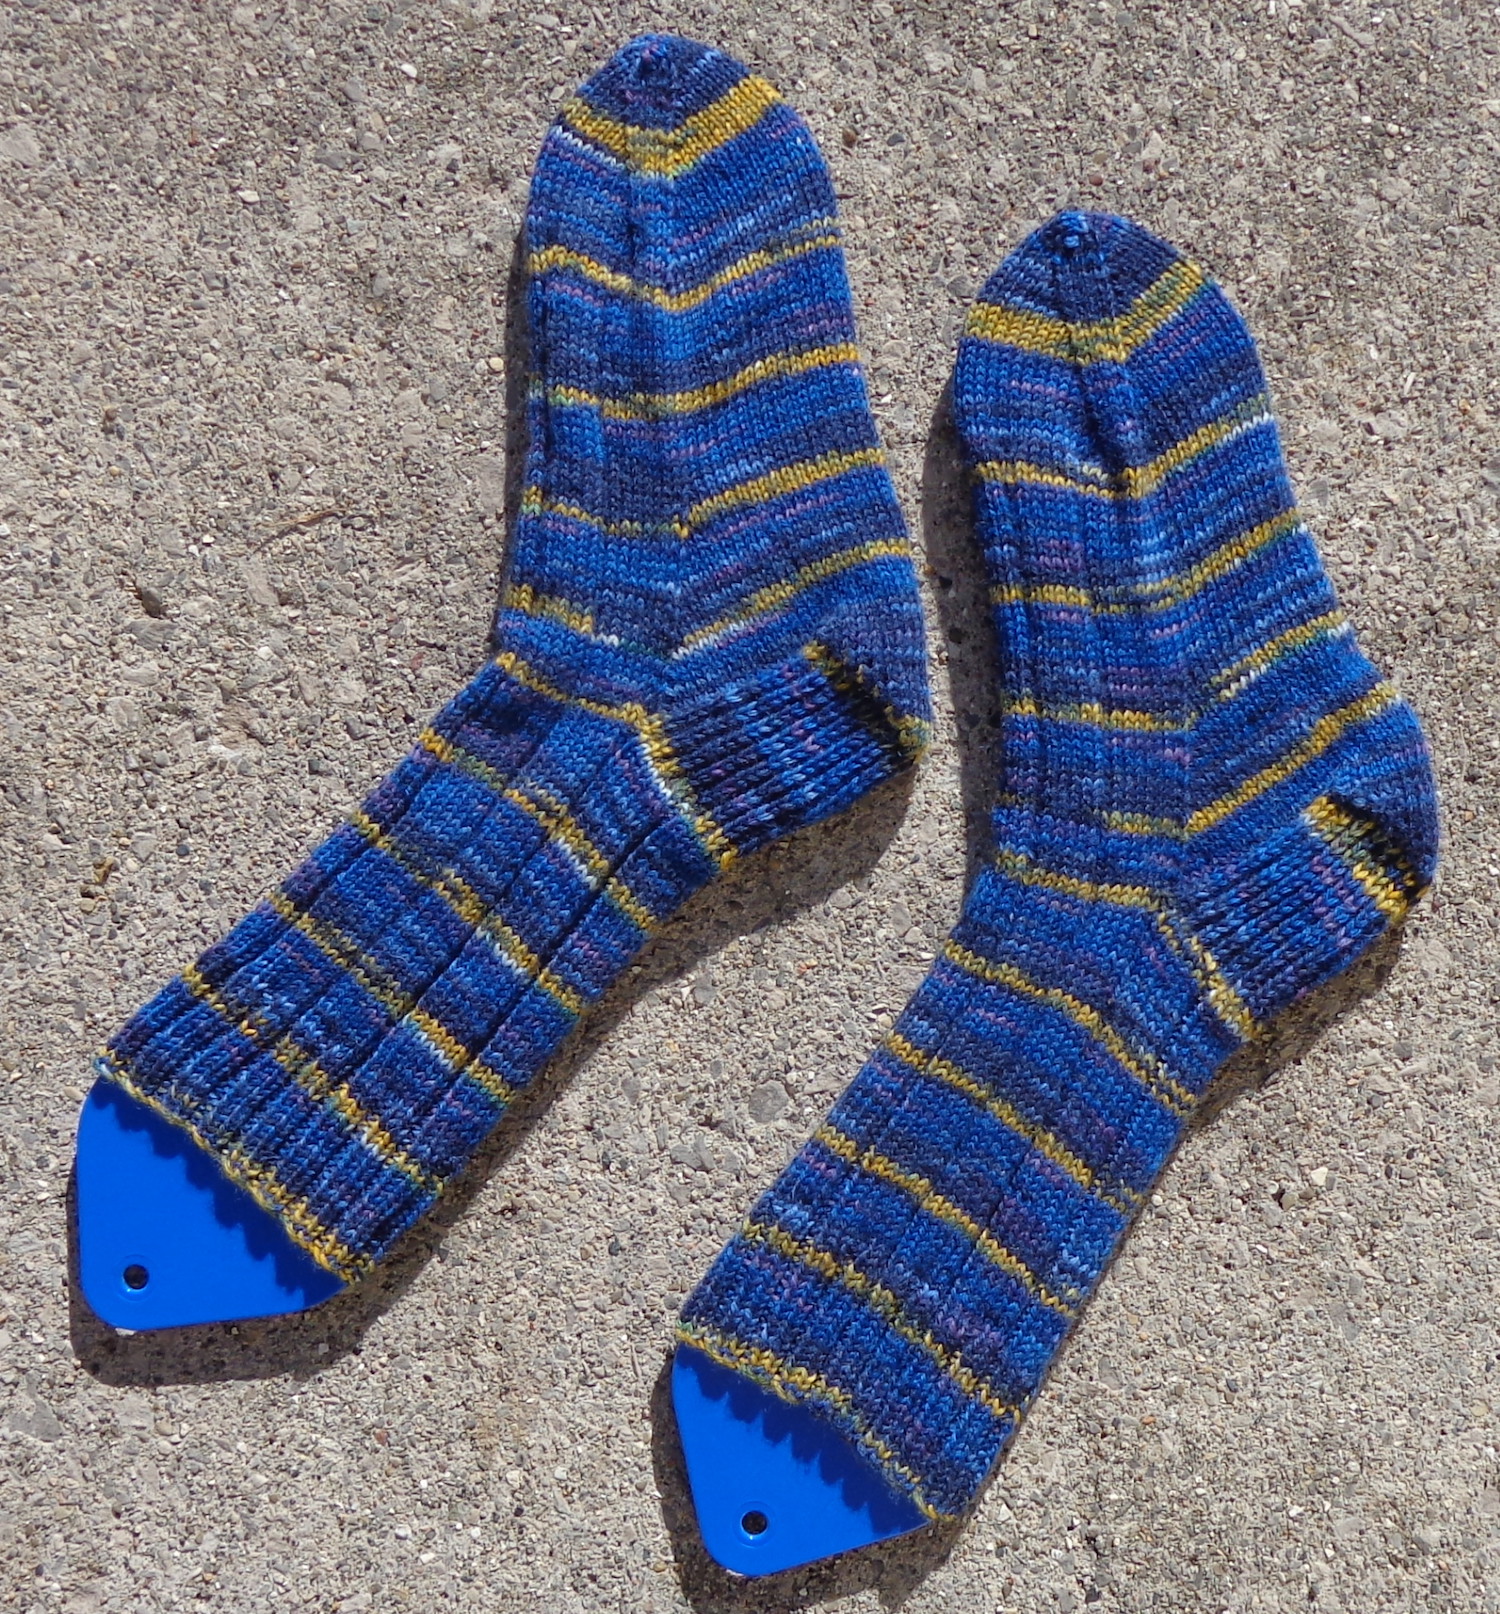
Most of my socks are wearing out, so I’ve been knitting new ones for myself for the fall. Here’s my latest pair.
I really like this colourway. I used a little bit more than two balls, and needed to join from a third ball for the toes. I ran out with each ball after about 3/4″ of the turquoise band that begins the toe. You can see that I added more turquoise when knitting the right one, which means less purple on the toe. I’ll survive that. 🙂 Fortunately, I’d found that third ball in the mill ends at Spinrite, so it only cost $1. I have a lot of it left for my sock afghan or maybe another knitted dress for Barbie.
And yes, I already have another pair of socks on my needles….