I seem to be on a bit of a bag-sewing binge lately. Here’s a bag I made from a fun dragon print.
The pattern is a free download from kokka-fabric.com. It’s in Japanese, but there are illustrations of the assembly and measurements to cut the pieces. You can find their free downloadable patterns here, and this bag pattern here.
I chose to cut the pocket from the accent fabric, because the dragons were big enough that it would look silly if they didn’t match up. I then sewed a strip of dragon fabric along the top edge of the pocket to finish it, and also sewed in a ribbon loop with a clasp and a charm. The ribbon is long enough that I can put my keys on the clasp, then tuck them inside the pocket. Lots of reflections on that shiny pleather pocket in the picture! In real life, the charm really snaps against it.
One thing I liked about this design was that the two strap pieces are cut in slighlty different widths. It doesn’t specify on the pattern, but clearly the wider one should be of the contrast fabric so there’s a little peek of it around the outside edge of each strap as a contrast. It’s tough to see in black on black, but the pleather is shiny.
Using black faux-leather as the contrast was a challenging choice. Not just black on black, but it’s slippery and you can’t really iron it. Pressing down seam allowances isn’t an option because it will melt. I cut fusible knit interfacing to the finished width of the straps and applied it to the pleather using a pressing cloth. That worked brilliantly to help me fold the fabric in the right place and also made for a nice finished strap.
I used heavy quilting cotton both for the outside and the lining, but the bag is a little more flimsy than I’d prefer. (It might specify a heavier weight of fabric in the Japanese instructions.) I’m going to make another in a different quilting cotton and interface the entire outside of the bag. I’ll show you that when it’s done.
I usually clean my desk when I finish a book, but last week, things went a bit further. I published a book that had fought me from start to finish (inevitably, this means that I love the result) and so I did a long-overdue spring clean on my office. I also have my sewing table in there and a bunch of yarn stash, so this was a huge sort, clean and reorganization process. I found many projects in the works that I’d forgotten about, and now that everything is shiny and clean, I’m determined to finish some of them up.
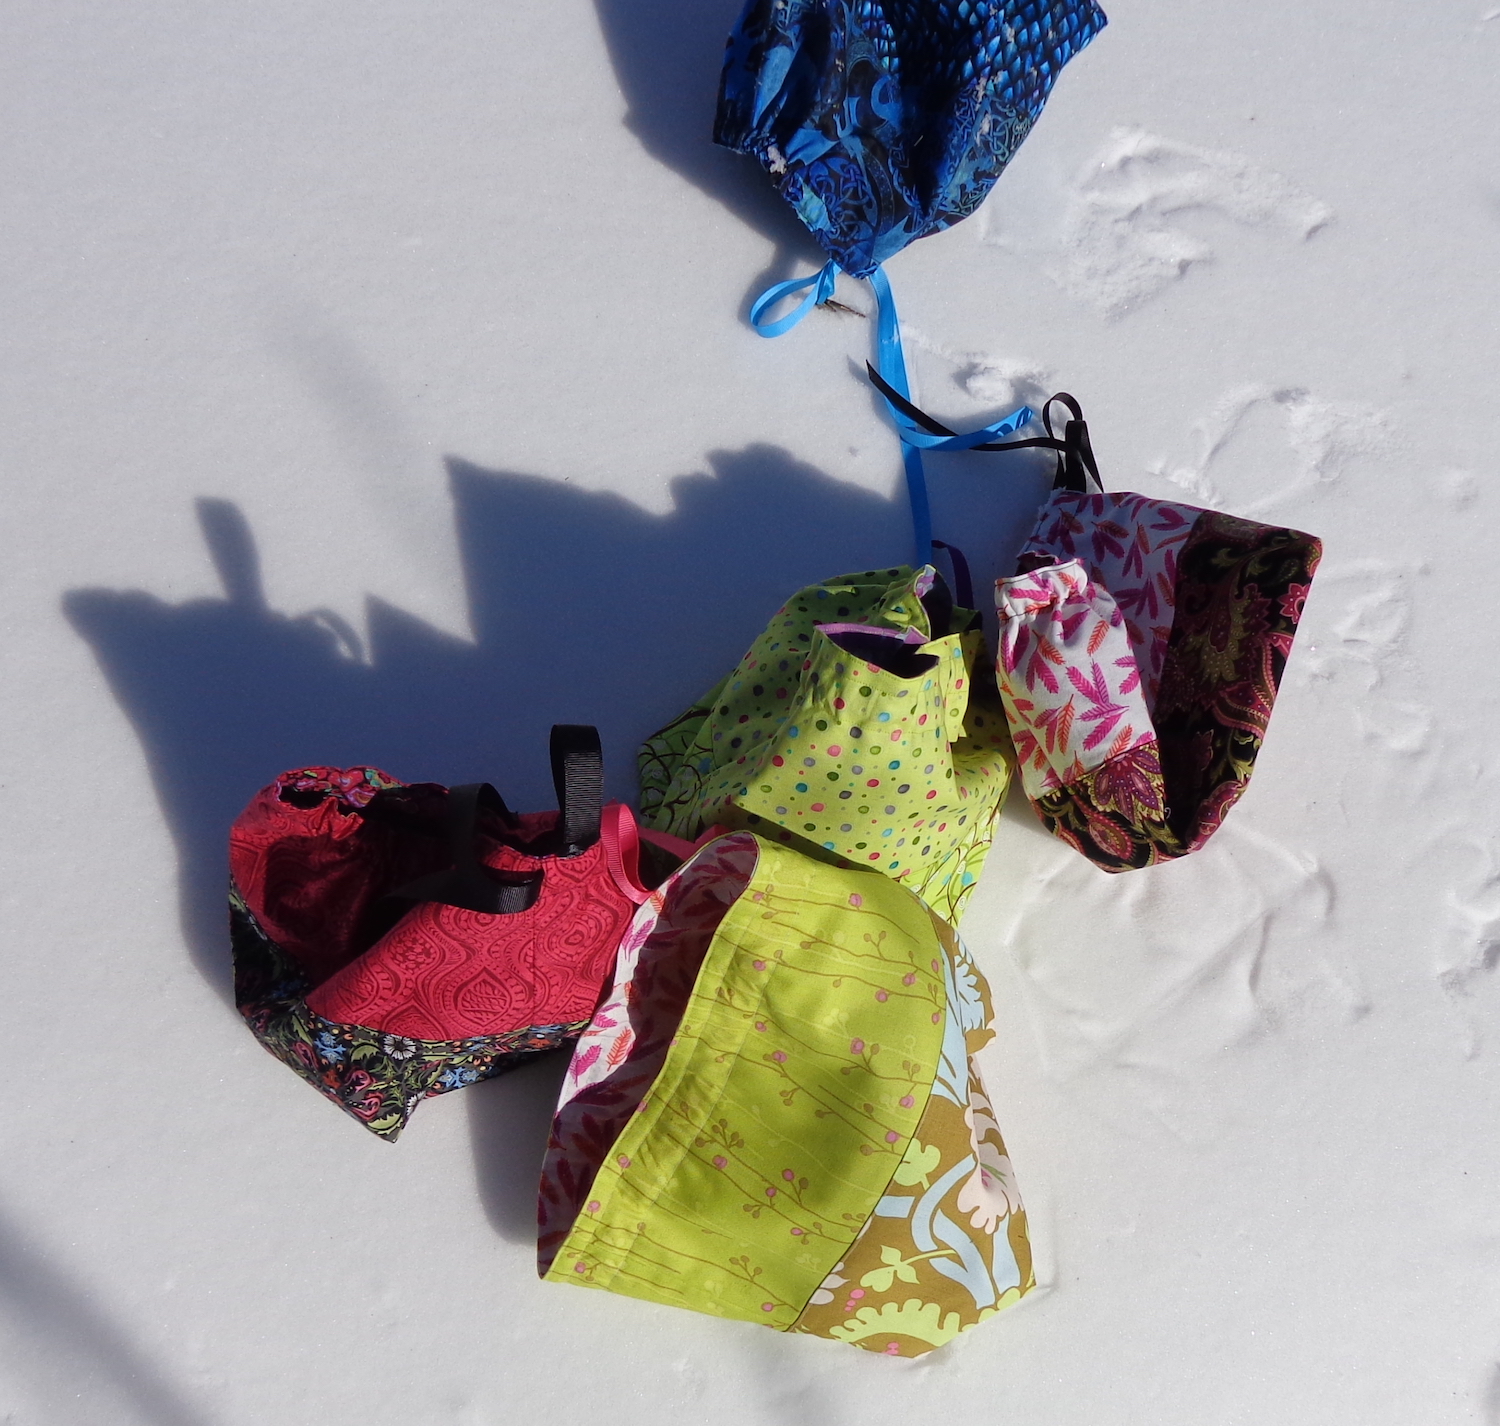
First up, I completed some knitting project bags. I had made some a few years ago (here’s that blog post) and at that time, I’d cut out some more. Last week, I pulled out the pieces. There were some combinations that didn’t sing for me, so I ended up cutting more pieces 🙂 plus I found the remnants from my dragon quilt and put them to work. In the end, I have eight new project bags. I don’t need them all, but they’re not taking up space in my to-be-sewn pile anymore.
(This was a bit of a challenging photo-shoot, btw. We had a blizzard over the weekend and while it’s sunny today, the wind is wild. That blue bag was in the snow indent below the black and pink one when I went to take the picture.)
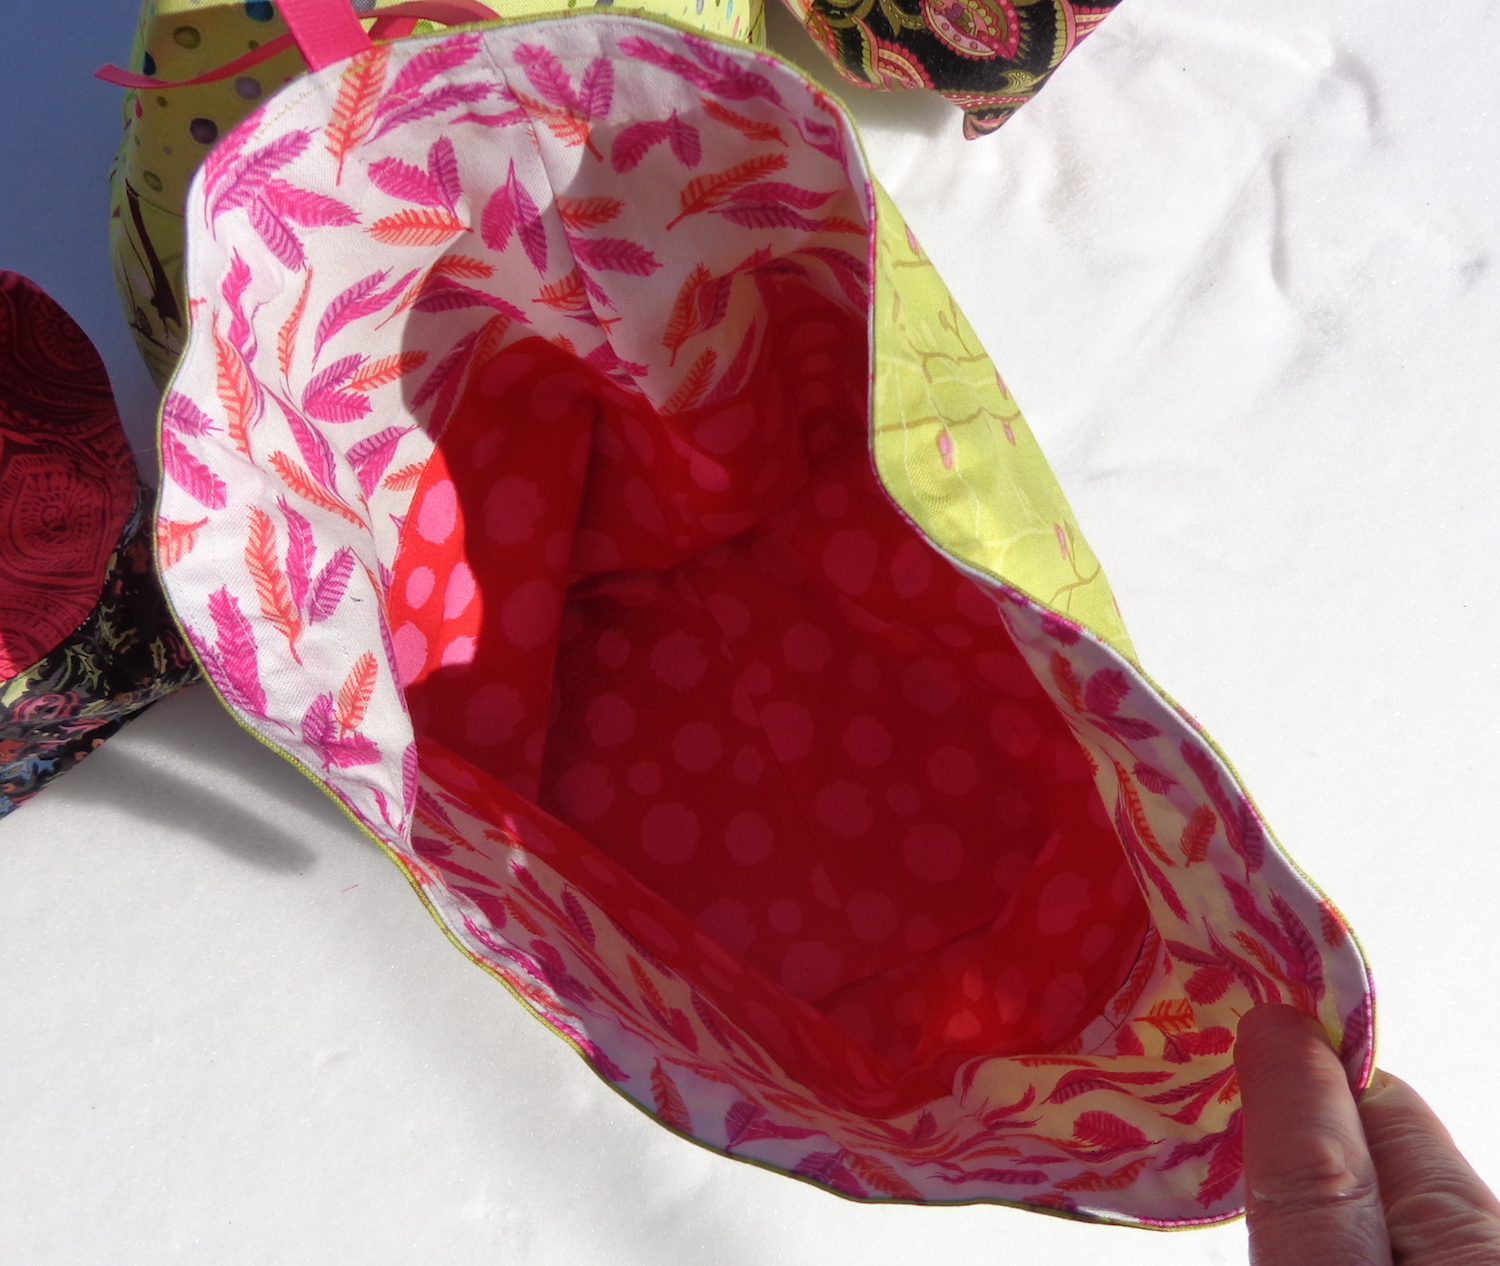
I’m still using the free pattern mentioned in that blog post, but I’ve finalized some more changes. Each of these new bags has a zippered interior pocket – the zipper is in the seam between the two parts. Once the zipper is sewn in, I sewed a square of matching fabric behind it to make the pocket. I often take a small pair of scissors with my knitting and don’t want them to cut the yarn. A zippered pocket is also a good way to keep track of a darning needle.
None of these new bags are interfaced, because the additional layer of the pocket gives them enough structure, I think. I added a loop of grossgrain ribbon as a handle at the top, and also another loop of ribbon with a clip and a charm, just for fun. Each zipper has a pull of the same ribbon used for the charm and clasp.
This one reminds me of a pink grapefruit. It’s the green one at the middle bottom in the picture above.
Here’s the dragon one. I’ll definitely keep this one myself!
Things have been quiet here on the blog. I had a bit of a crazy January – I was (as usual) racing toward deadline on a new book but got sick with a mild case of Covid-19. It still pretty much flattened me, which makes me glad we’re vaccinated. I’ve been working like mad on that book ever since and now need to catch up on everything else.
Of course, I’ve been knitting, too, just not documenting it all. Today, we start to fix that.
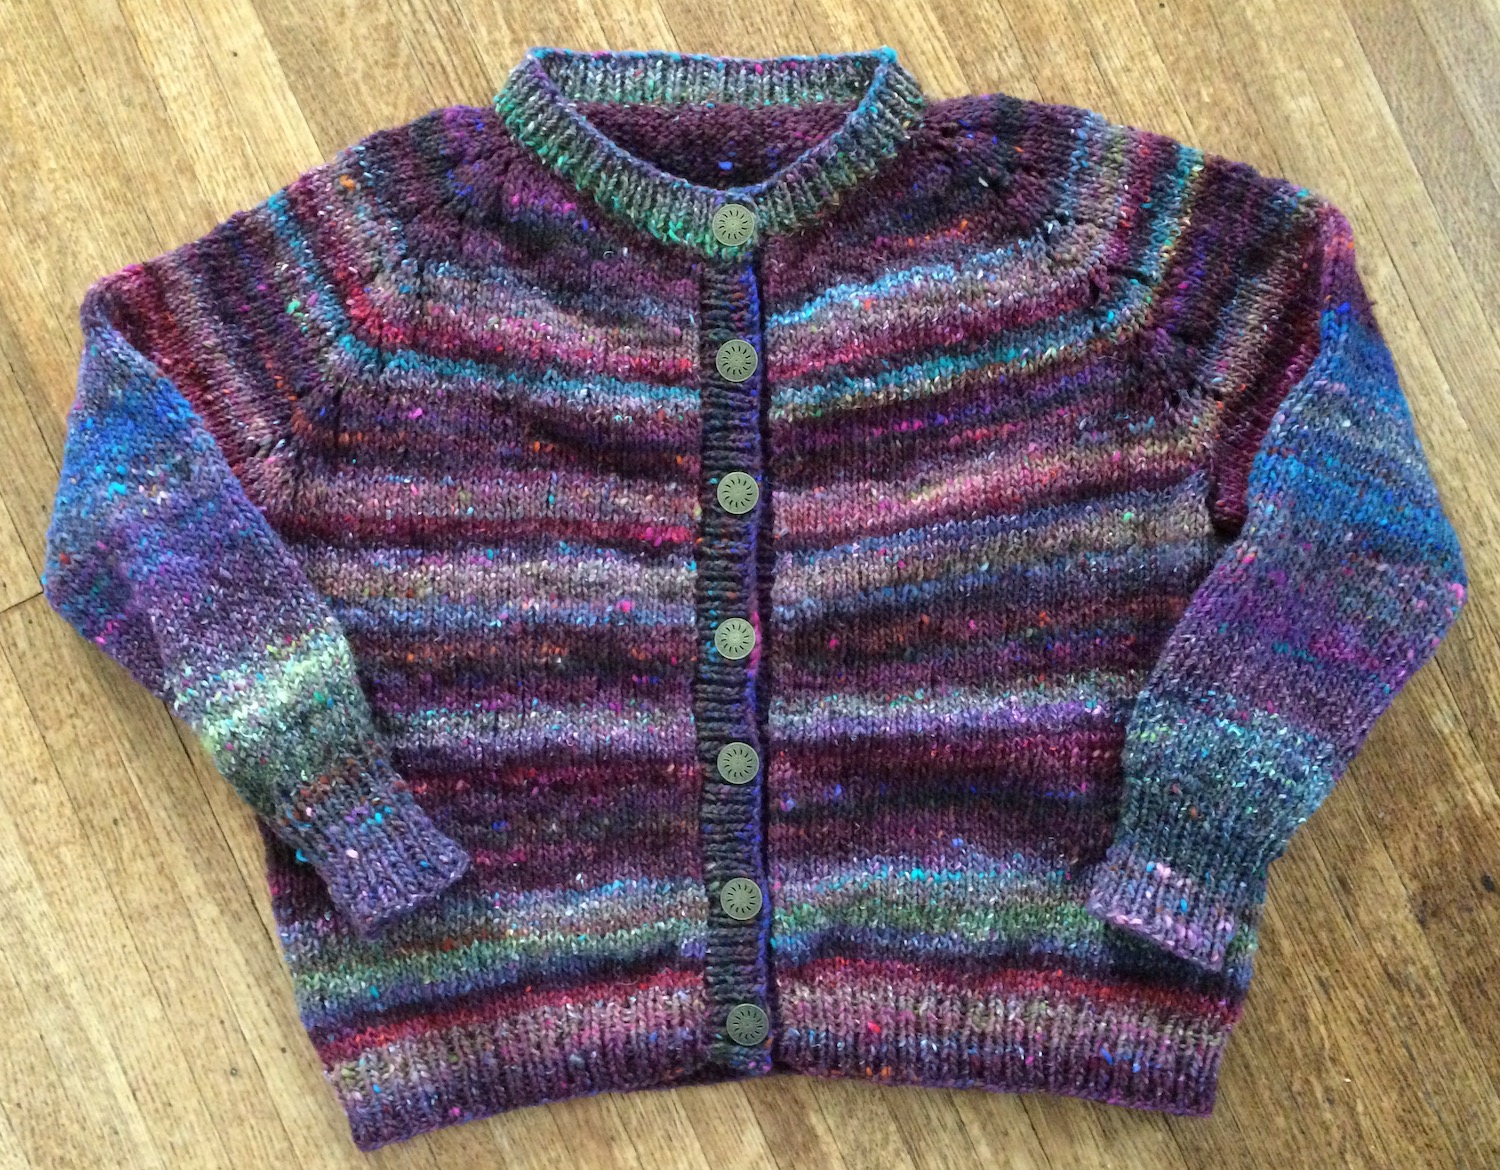
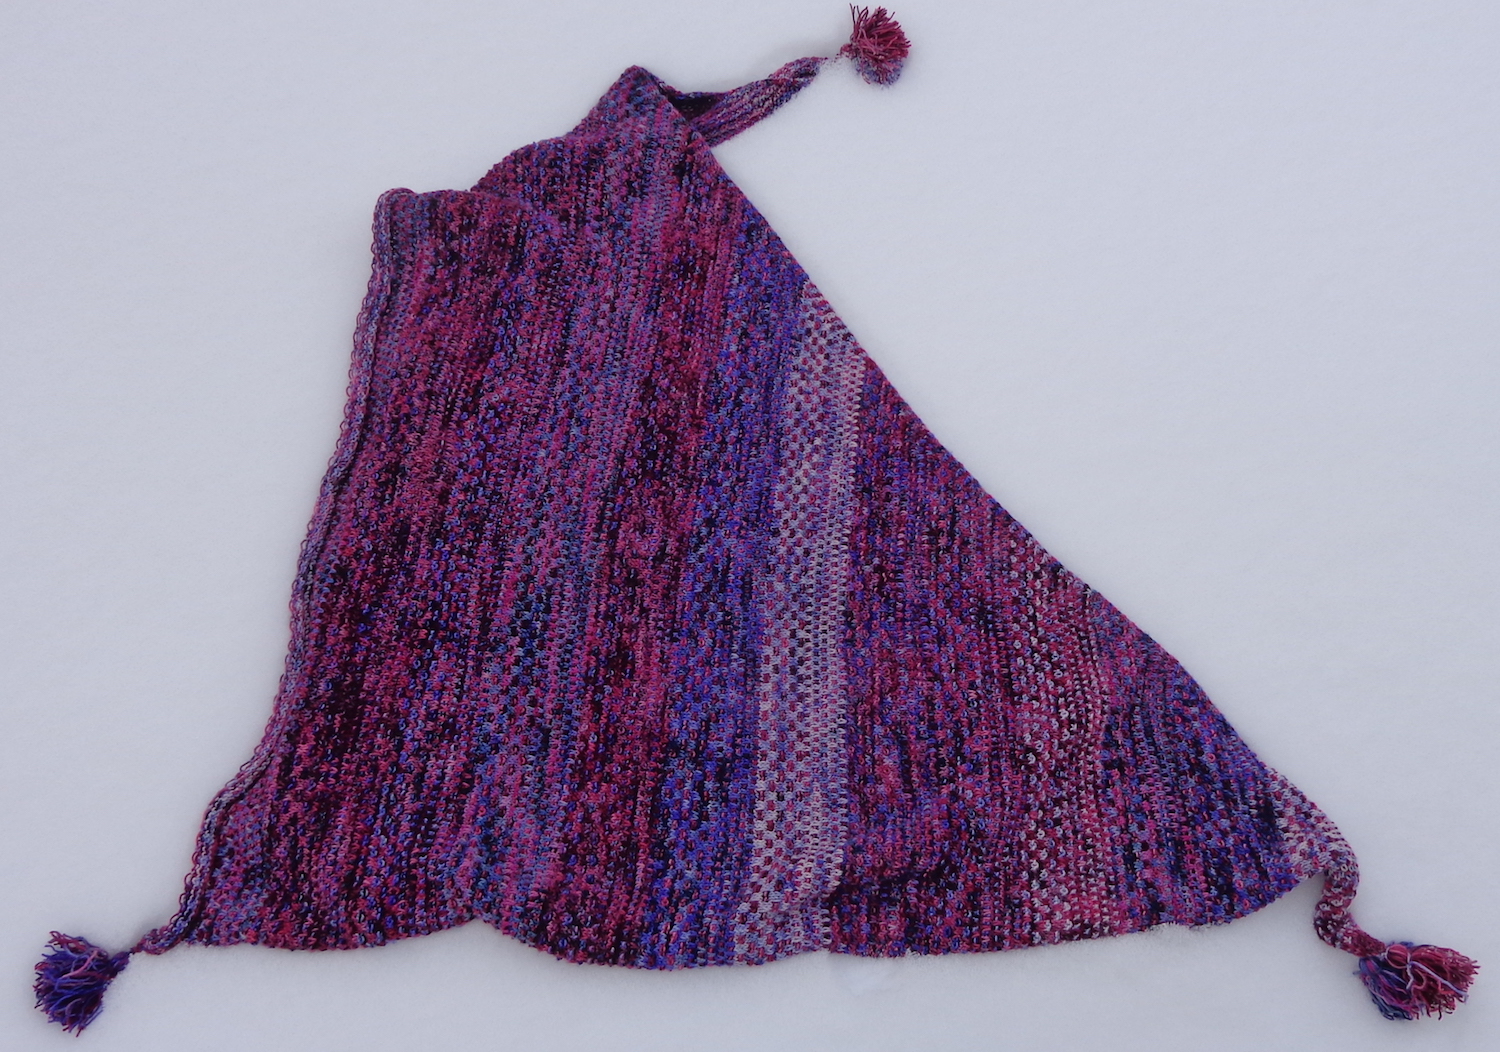
This pattern is called Mummers. I was so excited to discover that they have mummers in Newfoundland – yet another reason to visit one of these days. How amazingly blue the light is here right now. I took these pictures at midday but in the shade since the snow was so bright.
I knit mine in yarn from my stash. One of the recommended yarns is Briggs & Little Regal – that’s the B&L website. You can order directly from them. I have some of that, but I also had Harrisville Designs Highland left over from Mr. Math’s sweater and I like the colours together and thought it similar. This is an interesting yarn because it’s put up in two different ways – washed and skeined which is the link above, or unwashed on cones which you’ll find on this link. It’s cheaper on the cone if you need a lot and I like seeing it full when the finished garment is washed.
On the left is Mr. Math’s sweater in the same yarn – the pattern is called Balkan by Brandon Mably (that’s a Ravelry link) and here’s the link to my Ravelry project page. I made a yarn substitution – it’s supposed to be knit in Rowan Colourspun (Ravelry link) which is a yarn I like a lot and is now discontinued. The mister thought it was too soft plus he wanted a more graphic color combination. Done and done. (Hmm. Did I blog about this project? Yes! I did! Balkan sweater for Mr. Math.)
I made the medium size and chose which colour to use as I went. It was a good pattern and a nice knit.
I like the colours of it but don’t love wearing the hat. (I hate hats, really.) It fits around but is the wrong height – not enough to slouch, so it just makes my head look bigger. (My head is bigger than this foam one.) Mr. Math will adopt it, I’m sure. He loves all the hats in Felted Tweed.
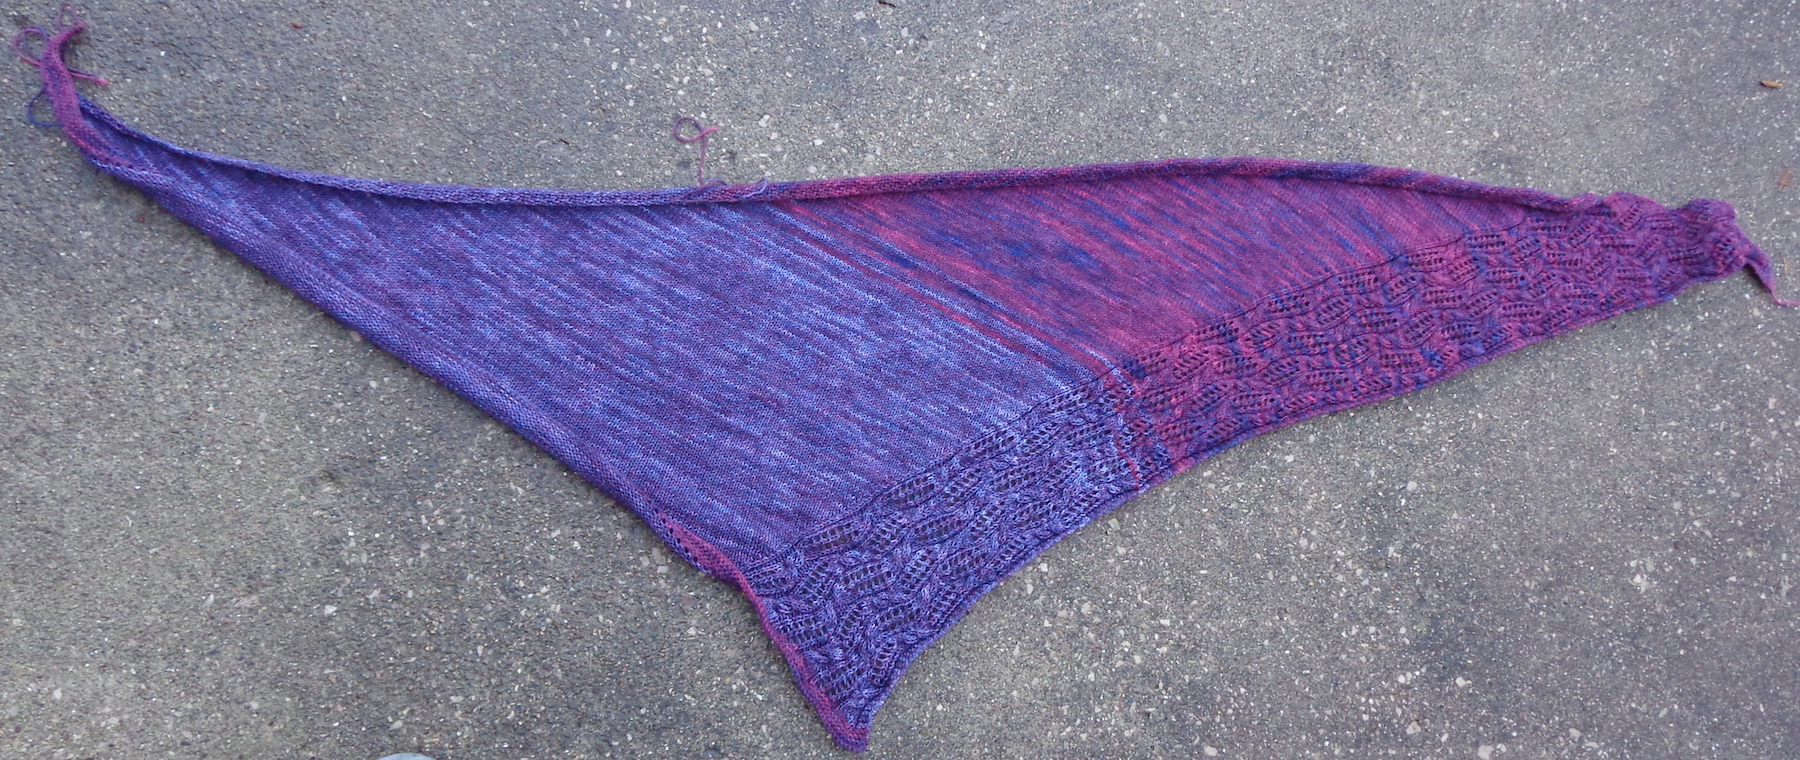
Meanwhile, I’m still knitting on the Rowan shawl/stole and have used half the wool in five repeats of the pattern. It’s about 30″ long now, so will be a good length when done. It’s a lovely knit, a bit too complicated to memorize the pattern, but the yarn is giving a nice definition to the stitches. I’ll show you that one when it’s done.
A while back, I told you about the Rolife miniature room kits I’d ordered. I’ve made good progress on one of them, along with a bunch of changes, and thought I’d share an update with you today.
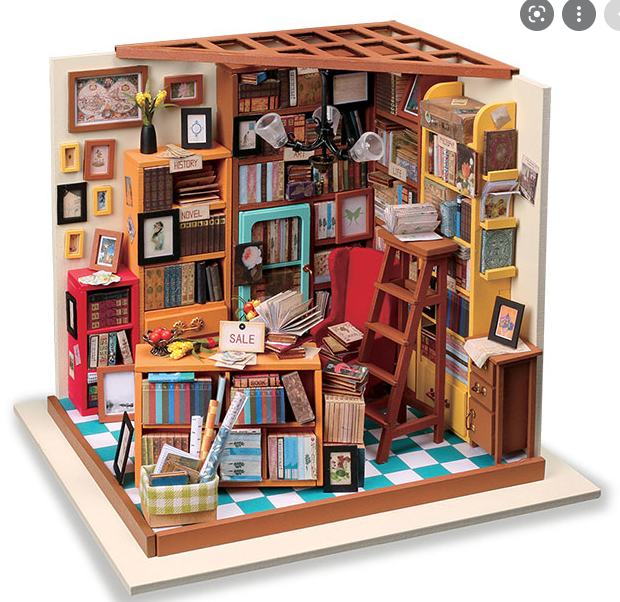
Here’s the manufacturer’s picture of Sam’s Study. (That link will take you to the Rolife website, but you can buy these kits at many places, including Amazon and Walmart.)
Rolife Sam’s Study
This is one jam-packed little room! It also has a lot of orange, which didn’t thrill me.
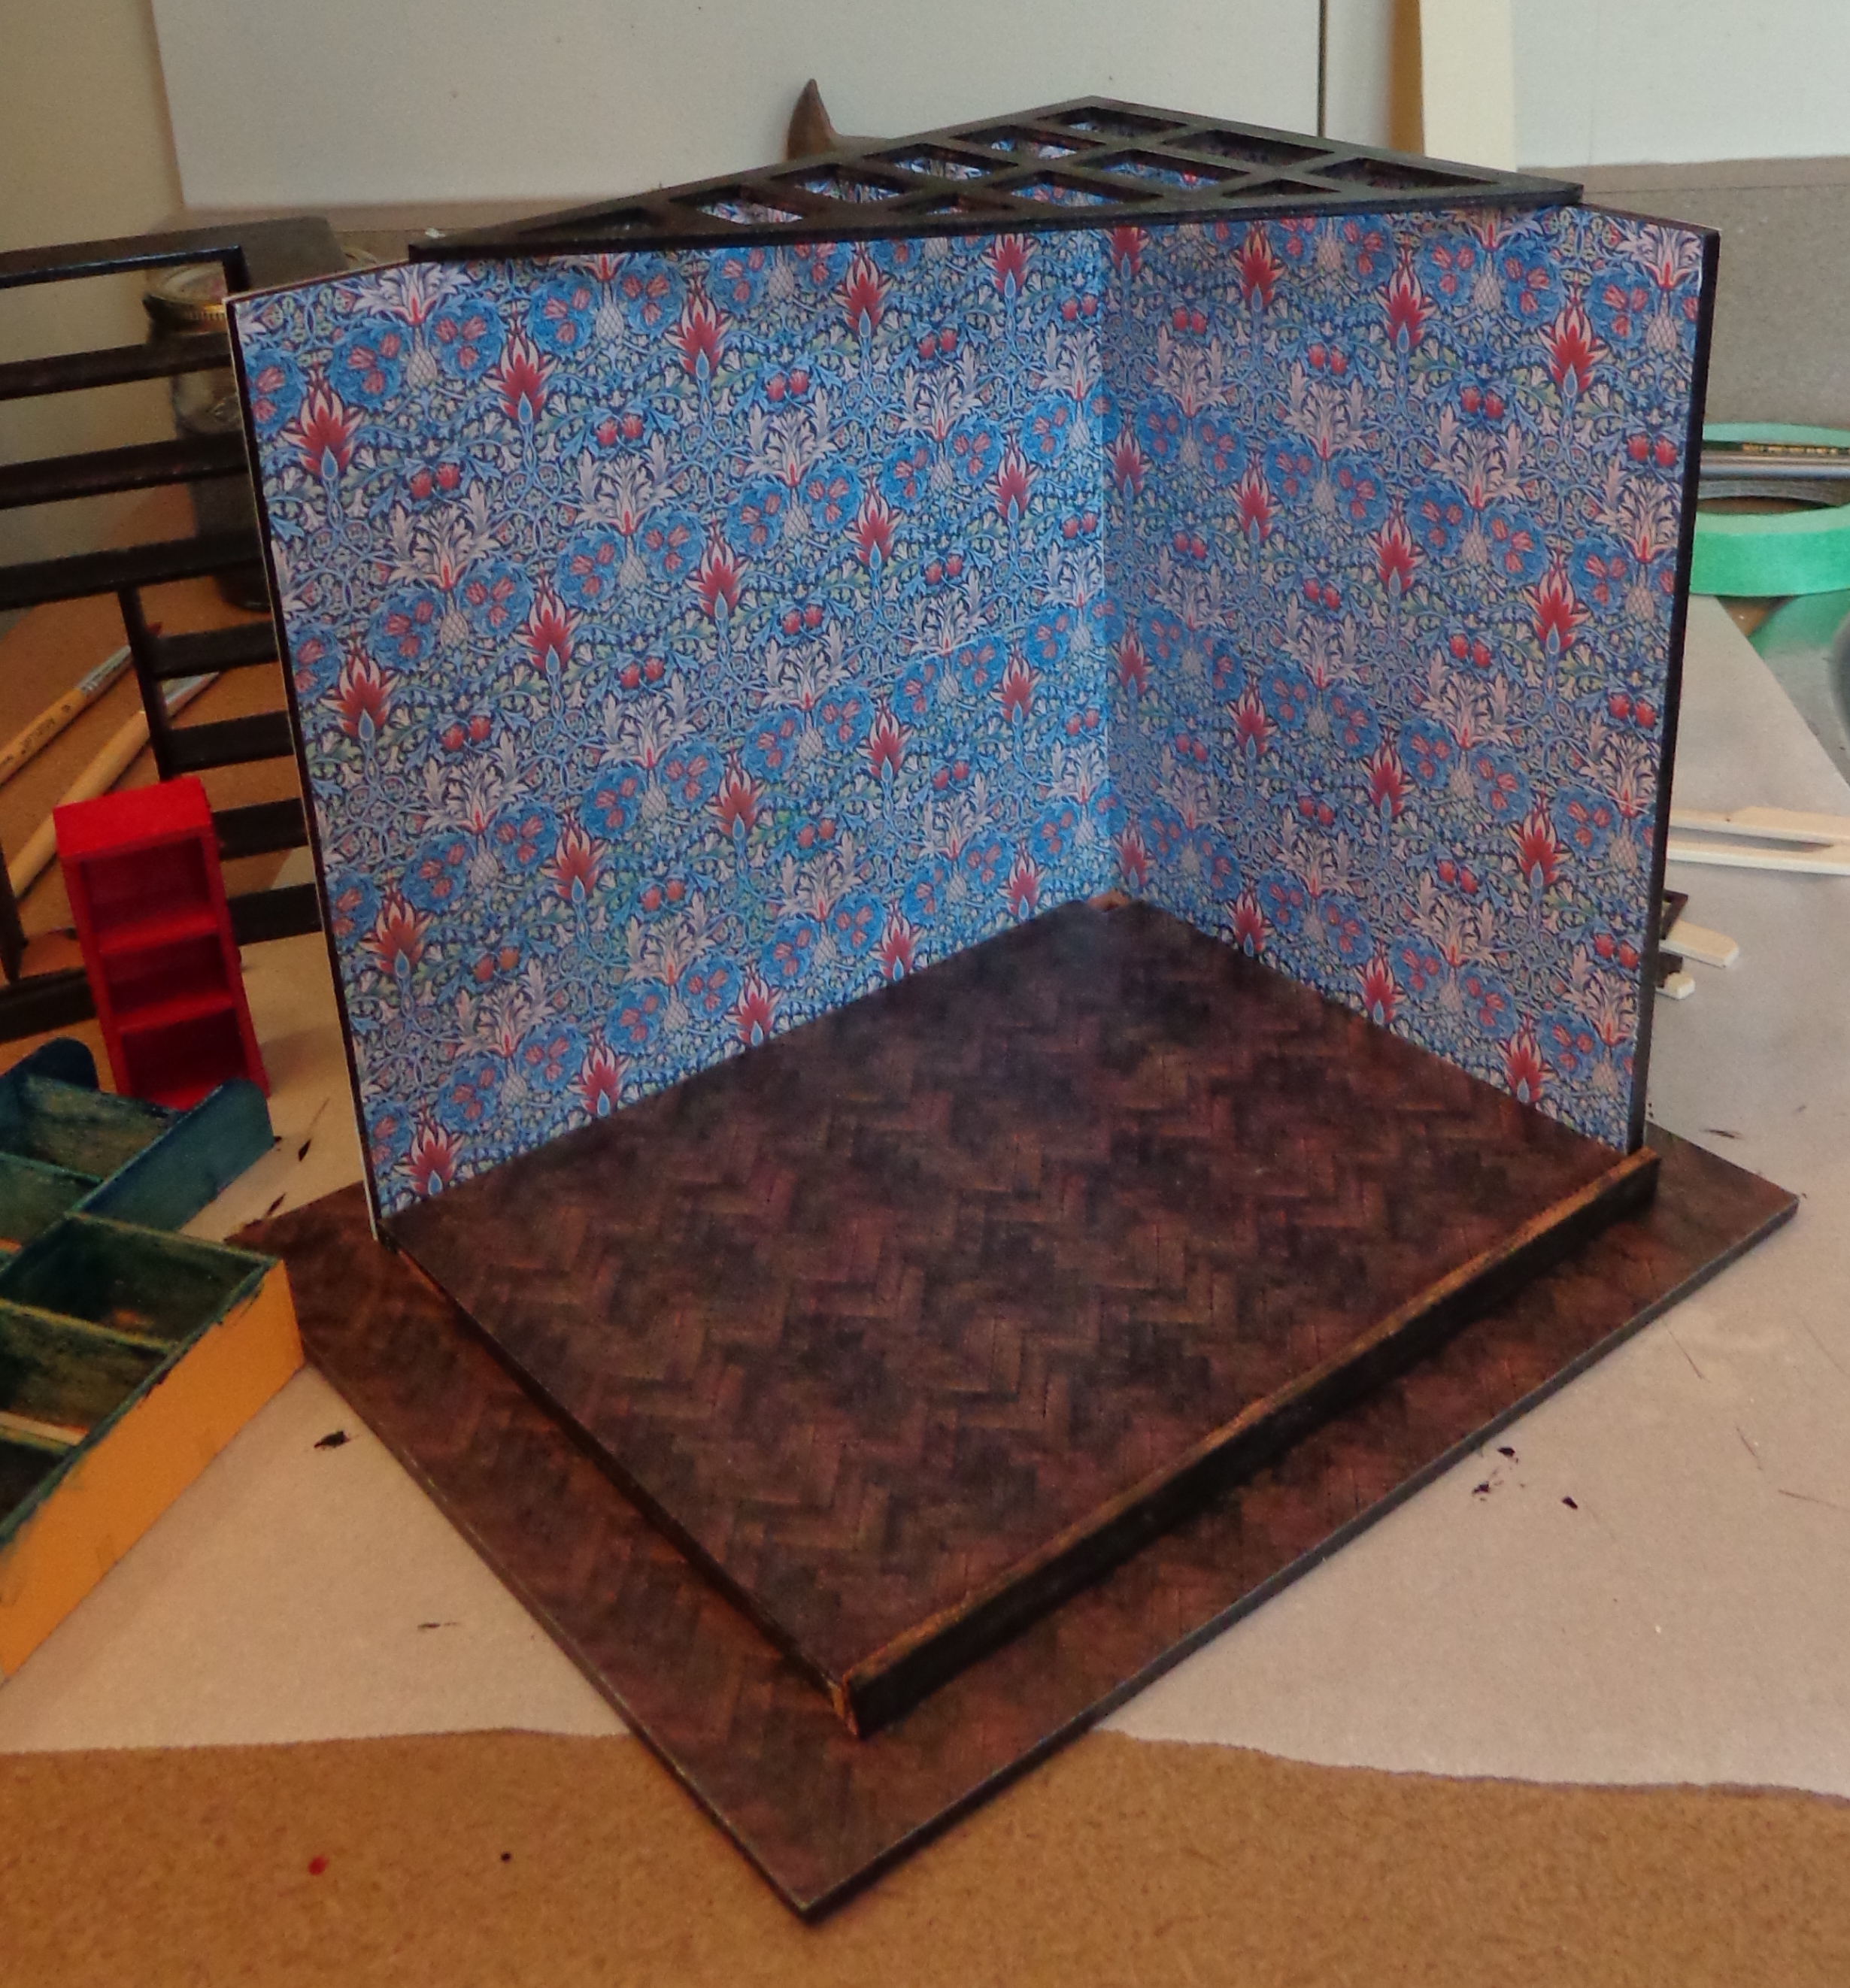
Here’s my study, which is still in progress. You can already see that I’ve made changes.
The printed floor included in my kit has dark green squares instead of turquoise ones. Either way, it had to go. I bought a downloadable printable PDF on Etsy for hardwood floors, printed out the one I liked and laminated it with matte transparent contact paper. I then cut it to fit the raised floor and the surround, and glued it in place. It’s much darker than the brown stain on the included wood pieces, so I painted the two that edge the floor black. (In this picture, they need a second coat.) I also painted the ceiling lattice pieces black.
I “papered” the walls of my study with a William Morris wallpaper design, also a downloadable and printable PDF from Etsy. I changed the size of it to make it look right, printing it at 25%, then matched the pattern on the walls. I also papered around the outside of the box, as if there’s a hall and foyer beyond it. I’m moving some of the pictures out there.
I tried a few kinds of glue and had the best success with Aleene’s Original Tacky Glue. It’s a white glue that dries clear. It’s great for the paper and the wood pieces. For metal and beads, I used E-6000 which also dries clear (but smells a lot worse).
There are a couple of frustrating things about these kits, although overall I’m enjoying them. The scale is a little bit arbitrary (I talked about that last time) and seems to fluctuate between 1:12 and 1:24 scale, depending on the item in question. That’s probably part of what makes the room look so crowded. Also, the included materials tend to warp so it’s hard to get crisp square corners. Everything is a bit tippity, but maybe that’s part of the charm.
All of the book and picture elements are pre-printed on a very thin paper. This works really well for folding pages of a book interior, but is a lot less effective for a suitcase or a book box. (Many of the volumes on the shelves aren’t individual books – they’re five-sided boxes, printed with spines and pages, that you assemble and fit into the shelf in a block.) After I mucked up the suitcase (mine has been around the world a few times and is a bit battered as a result) I made a change to the book boxes: I glued them to a sheet of bristol board to give them more structural integrity then cut them out and built them. This worked really well.
That’s a book box at the front left, and my study with the chandelier installed. It looks really cool when it’s turned on, but the LED lights are really bright – they fake out the camera. I”ll have to get around that to show you the finished room. I hung the map so it’ll be centered over that left bookcase, which will be centered between the other bookcase end and the corner. The little red bookcase is going in the hall.
The chandelier was the toughest part IMO. I was a bit concerned the electrical work, but it was just holding all those pieces together that was complicated. I checked the lights constantly and they worked until the chandelier was installed. Now the one on the bottom doesn’t light up, but I’m not taking it apart. My chandelier also hangs a bit low, but that’s where it’s staying. 🙂 You can see that I need to use a marker on the floor line, too, something that isn’t evident IRL but the camera picks up.
Here’s what it looks like around the back:
This is my foyer and hall “wallpaper”. It’s an Italian paper that I bought when I took a bookmaking class. It came from 32 Degrees North, but they no longer have this one in stock. (They have a lot of other beauties – that link will take you to their Italian Papers page.)
Now I have bookcases to finish painting and book boxes to build. I’ll show you the miniature again when the room is done.
I compile year-in-review posts on my writing blogs, so thought it would be fun to do one here, too.
Finished Projects
I typically start a lot of projects and tend not to finish them quickly. Instead of looking at what hopped onto my needles this year, let’s have a peek at what was finished.
Felix in Noro CyochinNightshift in Koigu KPPPMStarling Wrap in Rowan Fine ArtFirst Snow in Noro CyochinSocks in Online SupersockeNavelli in MadTosh Merino LightJuicy Gloss in Koigu KPPPMBunny in Louet BonniePapillon in Noro Silk Garden SockSocks in Fleece Artist Trail SocksAlaska mittens in Sirdar Tweedie ChunkyAlaska mittens in Sirdar Tweedie ChunkySocks in Rowan Fine ArtTarragonFelix in Loving Path yarnsCrystal TwistStripes in Sugar Bush Motley
For Barbie
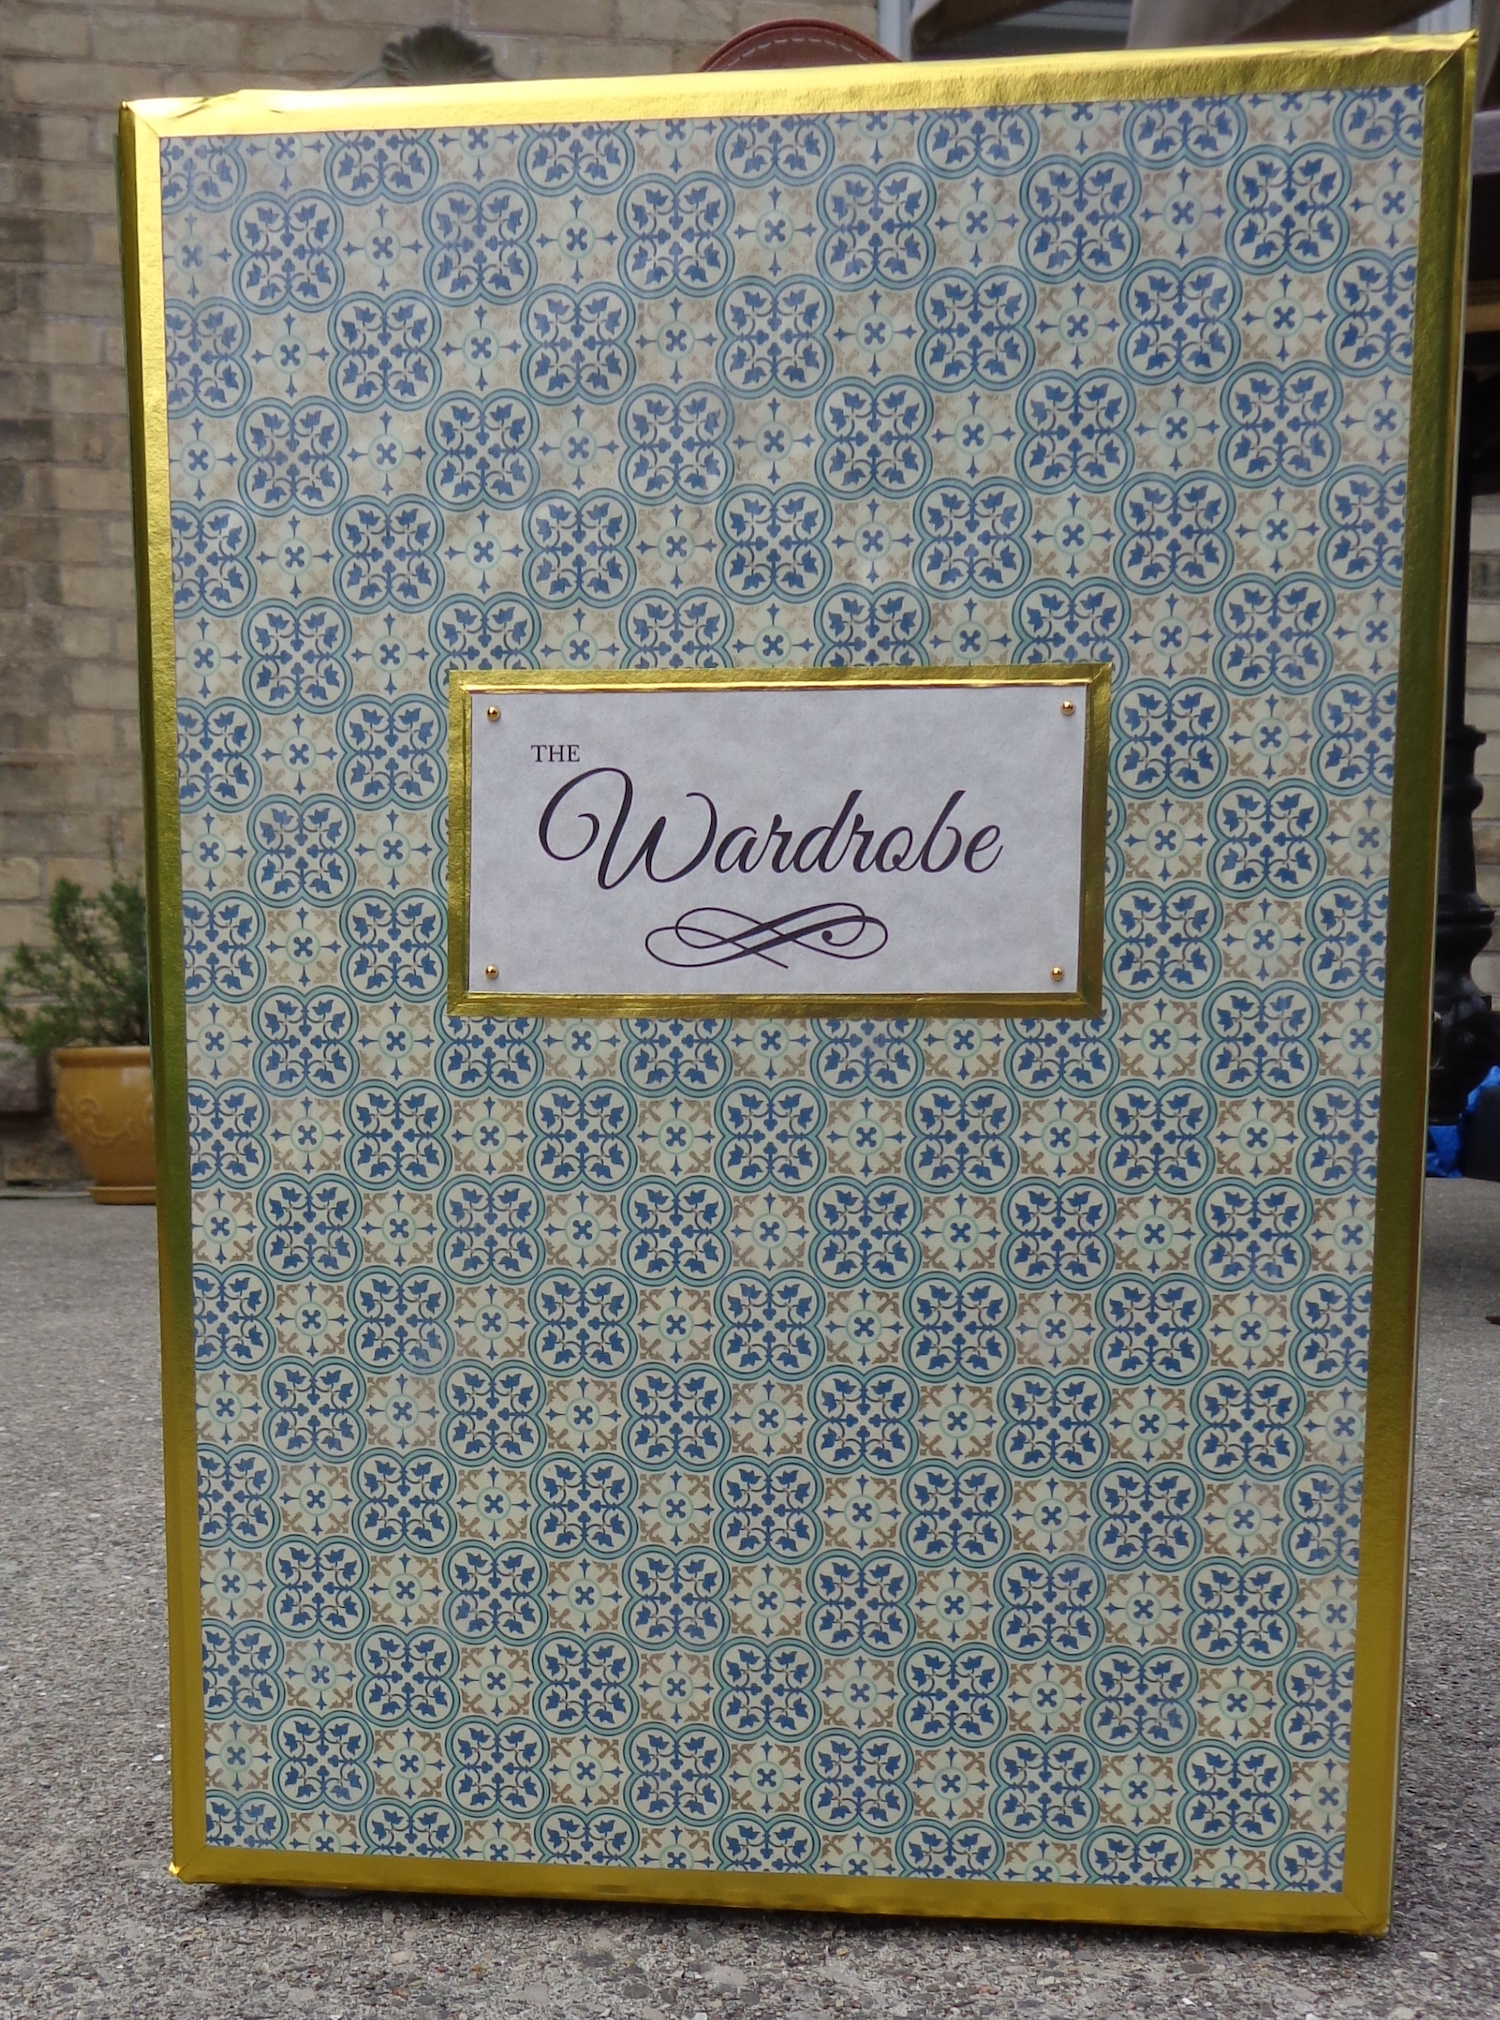
This year, I also started to knit and sew for Barbie and other (roughly) 1:6 dolls. This is fiddly and fussy, but kind of interesting. The last link is for a carrying case and wardrobe that I made out of a pretty box for my dolls.
Making the Wardrobe for Barbie got me thinking about miniatures. I have a shop for Barbie on the go and have also bought some miniature room kits. I’ll show you the first one of those (still in progress) tomorrow. Miniatures are definitely interesting so there will be more of them in my future!
2022 Plans
I didn’t have much success with sewing for myself in 2021 but I learned a lot so 2022 will be better. 🙂
And my quilting was pretty much ignored the past year. I’d like to finish piecing my my Moonglow and send it out to be quilted. It’s so pretty. The Escher quilt needs to be quilted and so does the Dragon quilt. I’ll get back to them all this year.
This is my second make from Kate Mitsubachi’s book, Stylebook of Doll’s Dress for Barbie. It’s called Soirée & Cape.
I love how glamourous and retro the fashions are in this book, and how lovingly they’re photographed. If you want to sew vintage for Barbie, this book is definitely worth a look.
Here’s the image of the dress from the photoshoot part of the book:
And here are the pattern instructions, just so you can see the mix. The instructions are all written in Japanese, but there are a lot of illustrations – if you know how to sew, it’s pretty easy to work out what to do.
That said, I’m finding that with each pattern, I have to make one to see where there need to be modifications. (This is actually true of all Barbie patterns so far. Every one of them seems to need a tweak. Part of that is the variation between different body sculpts, but the other part is construction choices.) This pattern shows a similar choice as that of other dress patterns for the girl – the bodice is lined, but the bodice and lining are sewn together at first, then treated as one piece after that. That leaves the raw edges of the big dart exposed on the inside of the bodice, and the seam allowance from the waist exposed, too. I don’t really see the point of lining the bodice if you’re not going to tuck all those seam allowances inside. (The point is that it’s easier to do it that way but the result still doesn’t give me joy.)
The first version of this dress I made in red crepe back satin. (Possibly a bad choice as that stuff is slippery!) It took me ages to figure out that pleat across the front, but now it seems so obvious. I then pleated the bodice lining, in reverse. I sewed the darts in the skirt at the waist, then pressed the pleats for that cluster of pleats. This was pretty easy – I laid the fabric on top of the pattern piece and folded it, one pleat at a time, then pressed the crease for that pleat before moving to the next one. This made it much simpler to gather those pleats together – because they radiate, they’re not all on the grainline. I sewed the bodice to the skirt waist, then sewed the bodice facing to the bodice. I hand-stitched the waist on the bodice facing, then added the “buttons” on the outside.
The tricky bit in my version is that the skirt waist extends beyond the CB of the bodice which leaves raw edge bits at the waist beyond the bodice. I finished the edge on those tabs, along with the CB edges of the skirt, then pressed the waist edge down. After sewing the CB seam, I top-stitched those waist edges and along the back opening of the skirt. I don’t love the back. 😦
I decided to hem the dress with self-bias, so cut 1″ wide bias from the fabric. I trimmed 1/4″ off the hem so the dress would finish to the same length as intended, then bound that edge. A pair of snaps on the back and it was done.
I’m only going to show you the front because the back still vexes me.
This is polyester crepe back satin, and those are seed beads on the bodice. I made the capelet of cotton velveteen lined with rayon Bemberg and used a small fancy button as a clasp. The gloves are made of that super-thin shiny knit from Fabricland that I mentioned previously—wow, does my sewing machine hate this stuff!—and she has another clasp purse from that McCalls pattern. It turns out I don’t love my hem solution. Mr. Math thinks the gloves make her look like she’s handling hazardous materials. I think the outfit looks Christmas-y.
The back remains vexing because 1/ those edges; 2/ the facing is bulky with the darts which means 3/ the fit is snug on vintage B—so skinnier Silkstone B wins this one. Here she is again with a “fur” cape that I knit for her:
Our model is Best in Black Silkstone B, (that’s an Amazon link since Mattel has taken the unavailable dolls off their site) who was divested of her crunchy black dress upon arrival. I took out the ponytail and just combed the hair over. I like her hair better loose although it is a bit wild.
The floor and wall are for my shop diorama but aren’t installed yet. I just propped them up on my sewing table to set the scene.
I had a think about the back of the ballgown and decided to try an alternate version with a simpler bodice facing. After pleating the bodice, I traced it on a piece of paper to make a pattern piece for the bodice lining. It’s a curve cut on the bias with no darts, and I cut it from Bemberg lining. I sewed the top seam of the bodice, attaching the lining, pressed the seam allowances toward the lining, then understitched that edge. It worked beautifully to make a nice edge at the top of the bodice. I sewed on two of the beads on the front to hold the pleat before sewing the bodice to the skirt, and also pressed up the waist edge of the lining. I also finished the CB seam allowances on the skirt.
After sewing the bodice to the skirt, I sewed the center back seams on the bodice. When piecing, I matched the cluster of pleats with the bottom of that front dart—that meant that one edge was even with the back of the bodice and the other extended 3/8″. The flush one was turned in 1/4″ and pressed, then top-stitched. I fused some knit interfacing to to the other edge to stabilize it at the waist, turned it in 1/8″ and top stitched across the extension at the waist, then down the CB seam. When I sewed the CB seam of the skirt, there was overlap in the skirt, instead of the dreaded butt opening – and all the edges are finished.
This makes me happy.
In fact, this version of the bodice gave me buckets of joy. It was simpler to constuct and the back is much neater. It also fits better – making this one a bit of a nipple-flasher for Silkstone B (if she had nipples, that is.)
This version is cut of black “Chinese brocade”, which is a very heavy polyester damask. Often these are multi-coloured but this one is just black. Our model is Dusk to Dawn Silkstone, a recent addition to my girls, and that’s another Amazon link. Her cape is knitted from a faux-fur yarn, closed with a hook-and-eye that has a sparkly.
Because of the thickness of the brocade, I knew I’d never manage a turned hem that was only 1/4″ wide in total. Instead, I fused knit interfacing to the wrong side to stabilize the edge, turned the hem 1/4″ and machine stitched it in place. Because it wanted to flip, even after pressing, I trimmed the seam allowance close to the stitching line.
I’m quite pleased with these and might manage to complete a few more in time for New Year’s Eve. Another completed mission in my Kate & Me challenge!
Next week, we’ll talk about stoles and capes, and making gloves.
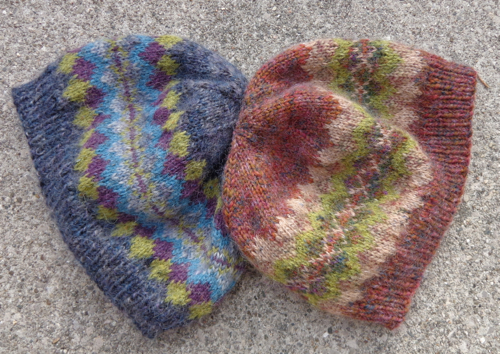
I spotted this free pattern last week – Fulay Little of LittleKnits shared it on Facebook – and since I have a bunch of Rowan Felted Tweed in my stash, I thought I’d give it a try. I’m always looking for the perfect hat. Most are too small for me, but this one has directions for three sizes.
Here’s the Olof hat pattern on Knitty. (BTW, I chose the option to print just essentials and it included all the pix, which isn’t the way that usually works.)
Here’s my first attempt:
I chose the Camel (the beige) to offer some contrast to the Bilberry (purple) and the Watery light teal), but the hat is too beige – even though that star band which is half done will have a green background. You’ll notice it’s off the needles, which is a portent of doom – or in this case, frogging. I’m going to switch some colours around.
On the upside, I enjoyed the corrugated ribbing, which was a new thing for me. The hat also fits well, though I might make another in the biggest size just to have one that’s a bit droopy. Rowan Felted Tweed really is wonderful for fair isle work. It’s such a nice soft yarn and I like how the stitches smush together a bit. (That’s a technical term. LOL) Here are several other projects I’ve knit in Rowan Felted Tweed:
Fair Isle Hat from Vogue KnittingBute by Lisa Richardson
Hmm. I’m looking at that grey hat on the left. It’s using two shades of Rowan Colourspun, plus three of Felted Tweed – those three were a subscribers’ gift from Rowan. The pattern was a scarf that I didn’t much want to knit and I’d forgotten all about it. It was the Garter Slip Stitch Scarf by Lisa Richardson. Here’s a Ravelry link with a project pic. They look quite good together, don’t they? I decided to frog right back to the purple ribbing and switch out the camel for the avocado.
This started as a quest for a string of pearls, but kept on going. Be warned – making these is like eating potato chips. You can’t stop with just one.
I made these necklaces on .5mm jelly elastic – knotted and secured with glue – and either 6/0 beads or plastic “pearls”:
You need to use a glue that remains flexible to secure the knot in the jelly, then you can cut the ends shorter. I used E6000.
Then I started to think about focal pendants (as one does). These butterflies were charms from Michaels, which I matched with other 6/0 beads.
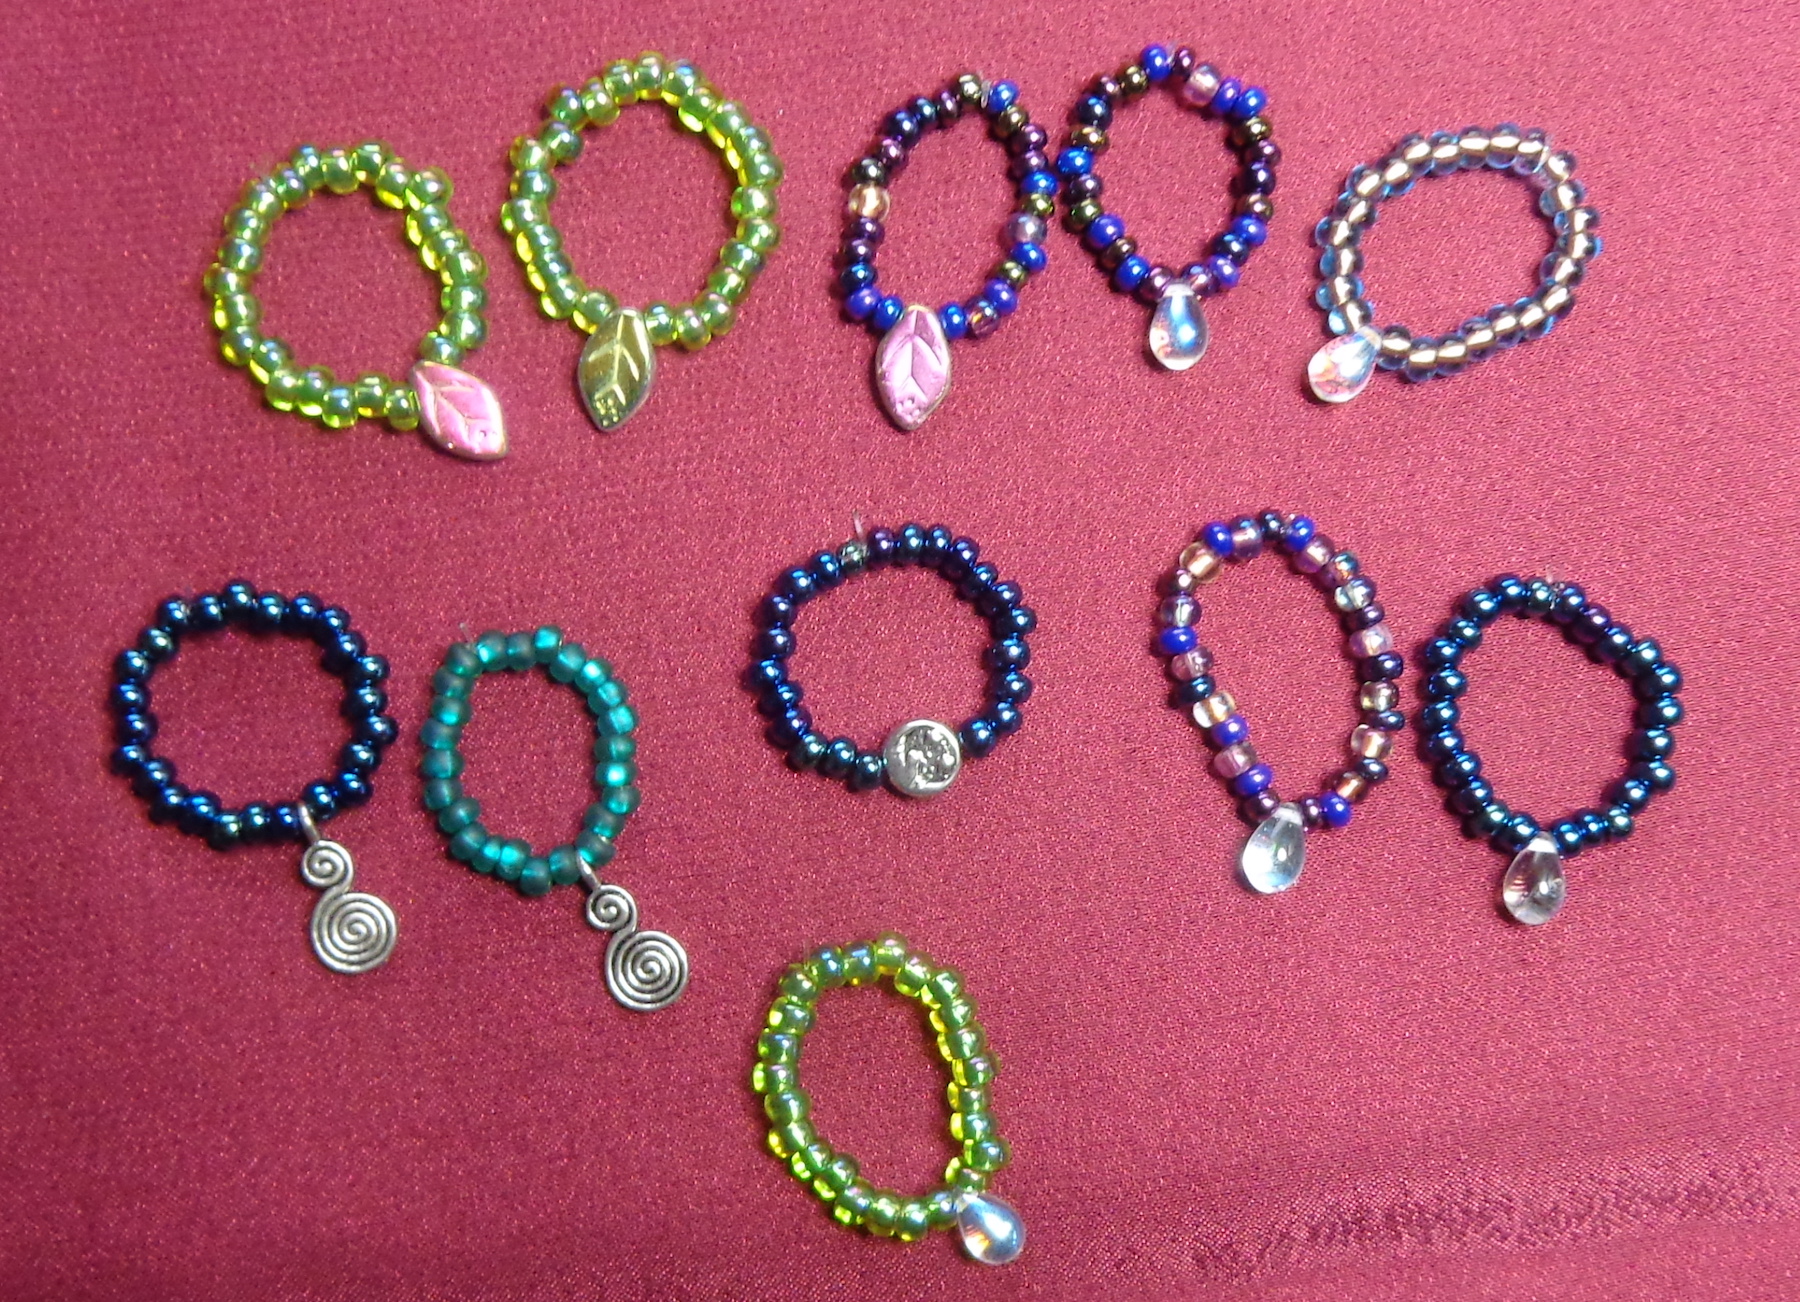
Next up, I had a look through the other charms in my stash and tried these:
There are smooth teardrops with an A/B coating, little leaves with A/B coating, spiral charms and the one in the middle has the moon on one side and the sun on the other. I also realized that the jelly is stretchier than I’d originally thought, so I made some shorter necklaces.
These ones have faceted glass teardrops that are 9mm long. These were the smallest I could find and come on a string of mixed coloured drops. (I did find some quartz ones that are 7mm long, but they’re a lot more expensive.) Some of these are strung with 6/0 beads while others are with faceted glass 2mm beads.
Of course, you can go on and on with the variations. I’m thinking of necklaces with two or even three strands. Mixing the beads. Alernating beads. Beads of graduated sizes. (etc. etc.) Do my girls need dozens of necklace choices? No, but…potato chips!
We’ll see these in action when the girls model their ballgowns…
Here’s another project that’s been hanging around for too long, without a very good reason to do so. This sweater was stuck on Sleeve Island because I was too lazy to cake up another skein of yarn for the second sleeve. The cakes I had didn’t start at the right point in the stripe sequence to match.
Finally, I got out my swift, caked the yarn and got back to knitting.
Here’s the finished sweater:
The pattern is Andrea Mowry’s STRIPES!, (that’s a Ravelry link, although you can buy it directly from her website, too.) Instead of knitting it in a multitude of colours and creating stripes, I knit mine in a self-striping yarn. The yarn is Sugar Bush Motley in Peppered Teal. (That’s a Ravelry link, too – here’s one for Yarnspirations.) Of course, a self-striping yarn has a fixed repeat, which means that as the number of stitches in each row changes, so does the width of the stripes. I kind of like how this one came out anyway.
Of course, I had my usual panic moment of being convinced I didn’t have enough yarn, and raced back to get another skein in the same dye lot. There were only two left so I bought them both, and (you saw this one coming) I didn’t need either of them, so I have a lot leftover.
Motley is a soft yarn made of an alpaca and merino blend. It runs thick and thin, which I always like better in the skein than when it’s knitted up. It’s a little bit itchy, so I’ll need to wear a t-shirt underneath.
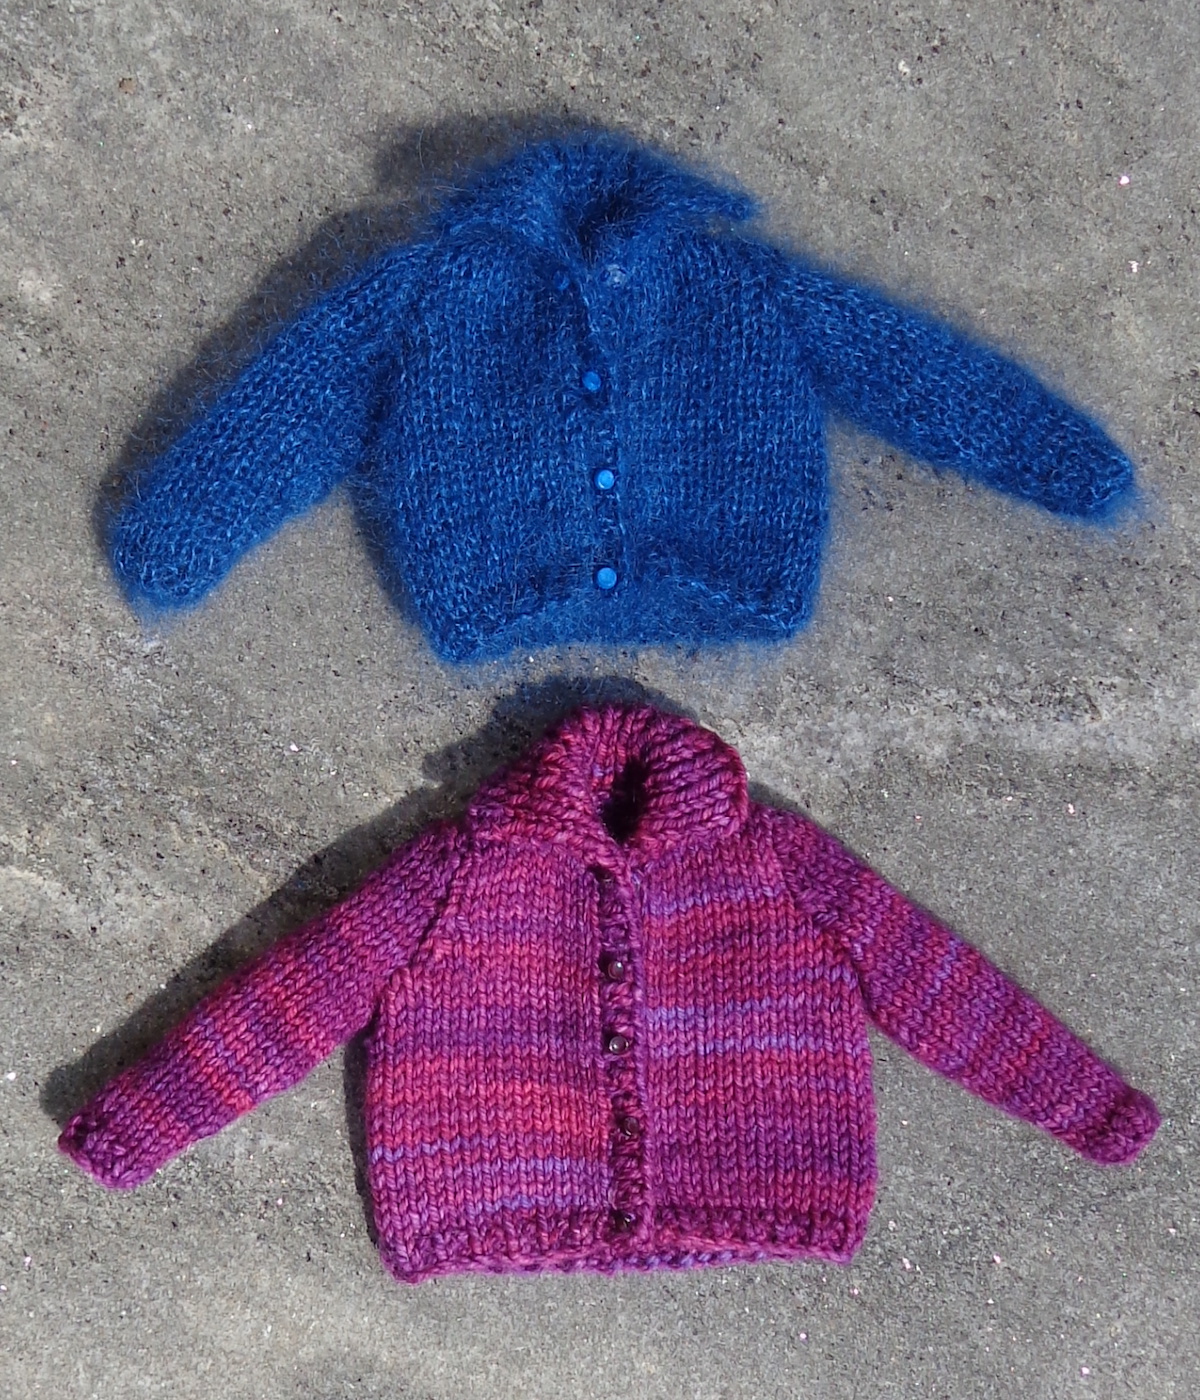
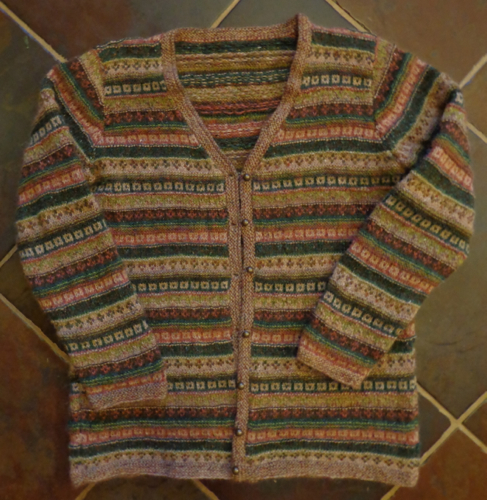
I have this sweater which I knit of Rowan Colourspun a few years ago, which is a bit big for me and looks dumpy as a result. I never do the waist shaping because it always ends up in the wrong place, but this sweater would have benefitted from a bit of that. I do like the long ribbing on the cuffs and the collar. The yarn is soft and has a lot of other colours in the grey, which is pretty.
I wanted this new one to fit a little more snugly and it does. Here they are, dancing together:
It’s good to compare them, because it shows other differences. I think the sleeves are a bit skinny on this new one – which happened with my Comfort Fade Cardigan from the same designer, too, so I should have kept that in mind – and it feels a bit short. Just an inch! My bind-off is a bit tight, so I may pick that back and add an inch of ribbing at the waist. maybe another inch on each sleeve, too. I don’t love the round yoke – it has a bit of a ripple in it still – but then, round yokes fit me so seldom. I really should concentrate on sweaters with set-in sleeves.
Another one off the needles!
Edited to Add – I picked out the hem last night and added another inch and a half. That extra length makes me much happier. 🙂