A Crocheted Camellia

A little while ago, I bought a hat. It’s knitted of wool at very fine gauge and is a pretty shade of blue. There’s a wire in the rim so it holds its shape. To me, it looks like a Miss Marple hat.

Which meant that the ruffled thingy on the side had to be replaced by a flower, preferably a camellia. I thought the flower should be knitted, maybe even felted. I spent some time looking at patterns for flowers and didn’t find anything I liked. So, I dug into my stash, and guessed.

Here’s the yarn I found in my stash. One is a variegated wool, quite likely Rowan Tapestry (although the ball band is gone). I wanted to liven it up a bit, so held a strand of Kidsilk Haze Stripe together with it. (The KSH Stripe was left over from my second Hebrides sweater.) I chose a remnant of that with both burgundy and navy in it.

I ended up crocheting the flower to get the shape I had in mind. Essentially, I made a long strip with scallops, then sewed it together in a spiral. I then sewed it onto the hat.

Here’s the result:Camellia crocheted by Deborah Cooke Camellia crocheted by Deborah Cooke

What do you think? I really like it and am going to make another couple of flowers the same way so I can pull together some more precise instructions to share.

I might need to make one with beads…

Turn-a-Square Hat

I completed a quick project this week. It’s a hat in Noro Silk Garden and Noro Silk Garden Solo (that’s the kind that doesn’t stripe but still has the same fibre content.) The pattern is free from Jared Flood, called Turn-a-Square. (Yup, that’s a Ravelry link.) I’m kind of amazed at how big this came out – even though Mr. Math really likes it. I used a 4 mm needle instead of the recommended 4.5mm, and knit the depth as specified, but he still has to turn up the rim. Maybe I’ll felt it a bit for him. I like the colours a lot – it’s funny but the black and first green stripes almost disappeared when I was knitting it, but now that it’s done, they’re quite evident.Turn a Square hat by Jared Flood knit in Noro Silk Garden by Deborah CookeThe Silk Garden is the same colourway that I’m using for the garter stripe scarf that’s still on my needles. I thought he needed a hat to match.

Here’s what it looks like from the top. I learned how to make a jogless seam with this pattern – that means that the stripes match up, even though it’s knit in the round. Without this nifty trick taught in the pattern, the stripes would be more like a spiral at one of the corners.  Turn a Square hat by Jared Flood knit in Noro Silk Garden by Deborah Cooke

What have you been knitting this week?

The Gates of Moria Mittens

With all the busyness of the holiday season and #XmasAudio this past month, I haven’t written any posts about knitting. Another contributing factor is that I haven’t finished anything – I’ve done that scattershot thing again of starting too many projects at once. That always happens when I’m working hard to finish a book. This time, it was The Crusader’s Kiss.

I still thought I’d show you some in-progress shots.

First up, I started a pair of fair isle mittens. The pattern is called The Gates of Moria, and it’s from the image Tolkien drew of those gates. If you remember that bit in The Lord of the Rings, the etching on these dwarf-made doors was visible only when they were touched by moonlight. The inscription is “Speak Friend and Enter”, which meant that the word to make the doors open was “friend”. (ha)The Gates of Moria by Natalia Moreva knit in Malabrigo Sock, Viola Sock and Rowan Kidsilk Haze by Deborah CookeI’m knitting mine with doubled yarn, holding a matching strand of Kidsilk Haze with each of the sock yarns I’m using. The result is wonderfully squishy, soft and warm – and I like that it obscures the pattern a little bit in some kinds of light. Here are the mitts before they got thumbs:The Gates of Moria by Natalia Moreva knit in Malabrigo Sock, Viola Sock and Rowan Kidsilk Haze by Deborah Cooke

Here they are in the snow, with thumbs:The Gates of Moria by Natalia Moreva knit in Malabrigo Sock, Viola Sock and Rowan Kidsilk Haze by Deborah CookeAnd here they are in different light, so you can see the pattern better:The Gates of Moria by Natalia Moreva knit in Malabrigo Sock, Viola Sock and Rowan Kidsilk Haze by Deborah CookeThere was an idea when I started these that I might give them away as a Christmas gift, but they didn’t get done in time – and I admit I stalled on that because I want to keep them myself. 🙂 The pattern is very straightforward and well-written, and it looks like I’ll have enough yarn left to knit a second pair.

Snow Angel Shawl

I started to work on a lace shawl in a yarn that’s gradation-dyed to change from one colour to another over its length. I bought this yarn originally to make a cowl, but didn’t like the lace stitch so switched out for this pattern. It’s called Snow Angel by BooKnits, a new designer for me, but I’ve admired her designs for a while. The shawl blocks out to a crescent with lace dripping from the outside edge. This pattern is very well-written, both written out and charted so there’s a choice of which kind of directions to follow.

Here’s a peek at the lace so far. It looks like a lump because it isn’t blocked yet, but I think it will be very pretty. It starts with the green and will end with pink. Of course, it has beads.Snow Angel by Boo Knits knit by Deborah Cooke in Freia Ombre Wool/Nylon Lace

Lining a Bag 2

Last week, I started to explain how I line my knitted and felted bags, and explained how to put bases into them and feet on them. This week, let’s start on the actual linings.

Entrelac Bag knit in Noro Hitsuji by Deborah Cooke
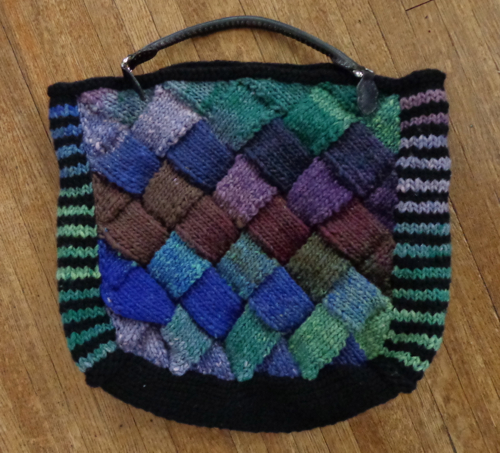
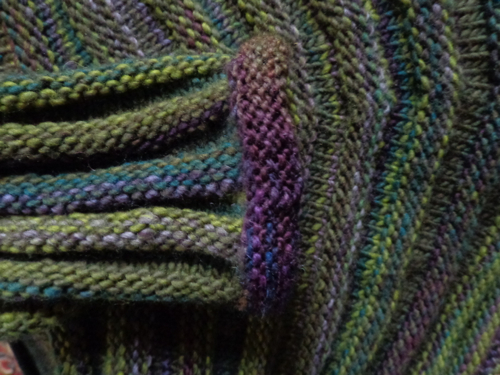
Sometimes the shape of the bag defines how it will be lined. I prefer bags to have a closed top – usually a zipper – but the top black edging on the Noro Hujitsu shrank more than the bag itself. (It’s knit of a different yarn.) It’ll be a bear to get a zippered top flap to look good, so it’s going to be an open-topped tote bag.

The simplest way to line a bag is with the fewest seams, IMO. I cut one big rectangle of the lining that will make the sides of the interior, then another smaller rectangle for the base. Since anything knitted square won’t necessarily be square after felting, we need to be a bit flexible in lining the bag.

The best place to measure the interior width (the long side of that big rectangle) is right inside the top edge of the felted bag. This is where the lining will join the bag, so it’s the one place that the measurement needs to be accurate. Take a measuring tape and, marking your starting point, measure around the interior of the bag top, ensuring that the felted wool is flat and so is the measuring tape. You’ll need to do it in increments. Write down the final number. To use 5/8″ seam allowances, add 1.25″ to that number and circle it. In my case, that’s 38″ + 1.25″ = 39.25″. This is the width of the big rectangle.

Now measure the height of your bag. It’s best to do this at the outside corners. Check all four because they might be different. On this Noro bag, for example, the depth ranged from 12″ to 13″. Not a square bag. 🙂 I prefer to have the lining pool in the bottom of the bag, rather than be tugged high, so I always take the larger number. 13″ + 1.25″ = 14.25″, which is the depth of my big rectangle.

The base is often a squishy number, as it might be bigger or smaller than the opening at the top of the bag. In this case, it’s a bit smaller. The seamed big rectangle will be 38″ around, so the size of the small rectangle (not counting the seam allowance) should be the same. I measured the insert and with a little wiggle, my small rectangle will finish at 12.5″ x 5.5″. That’ll make it 38″ around, not counting the seam allowance. I need to cut it including the seam allowance though – I’ll cut a rectangle (12.5″ + 1.25″) 13.75″ by (5.5″ + 1.25″) 6.75″. It’s important to cut these rectangles on the square of the grain. (The iron is your friend here.)

Sipalu Bag by Kerin Dimeler-Laurence knit in Patons SWS by Deborah Cooke
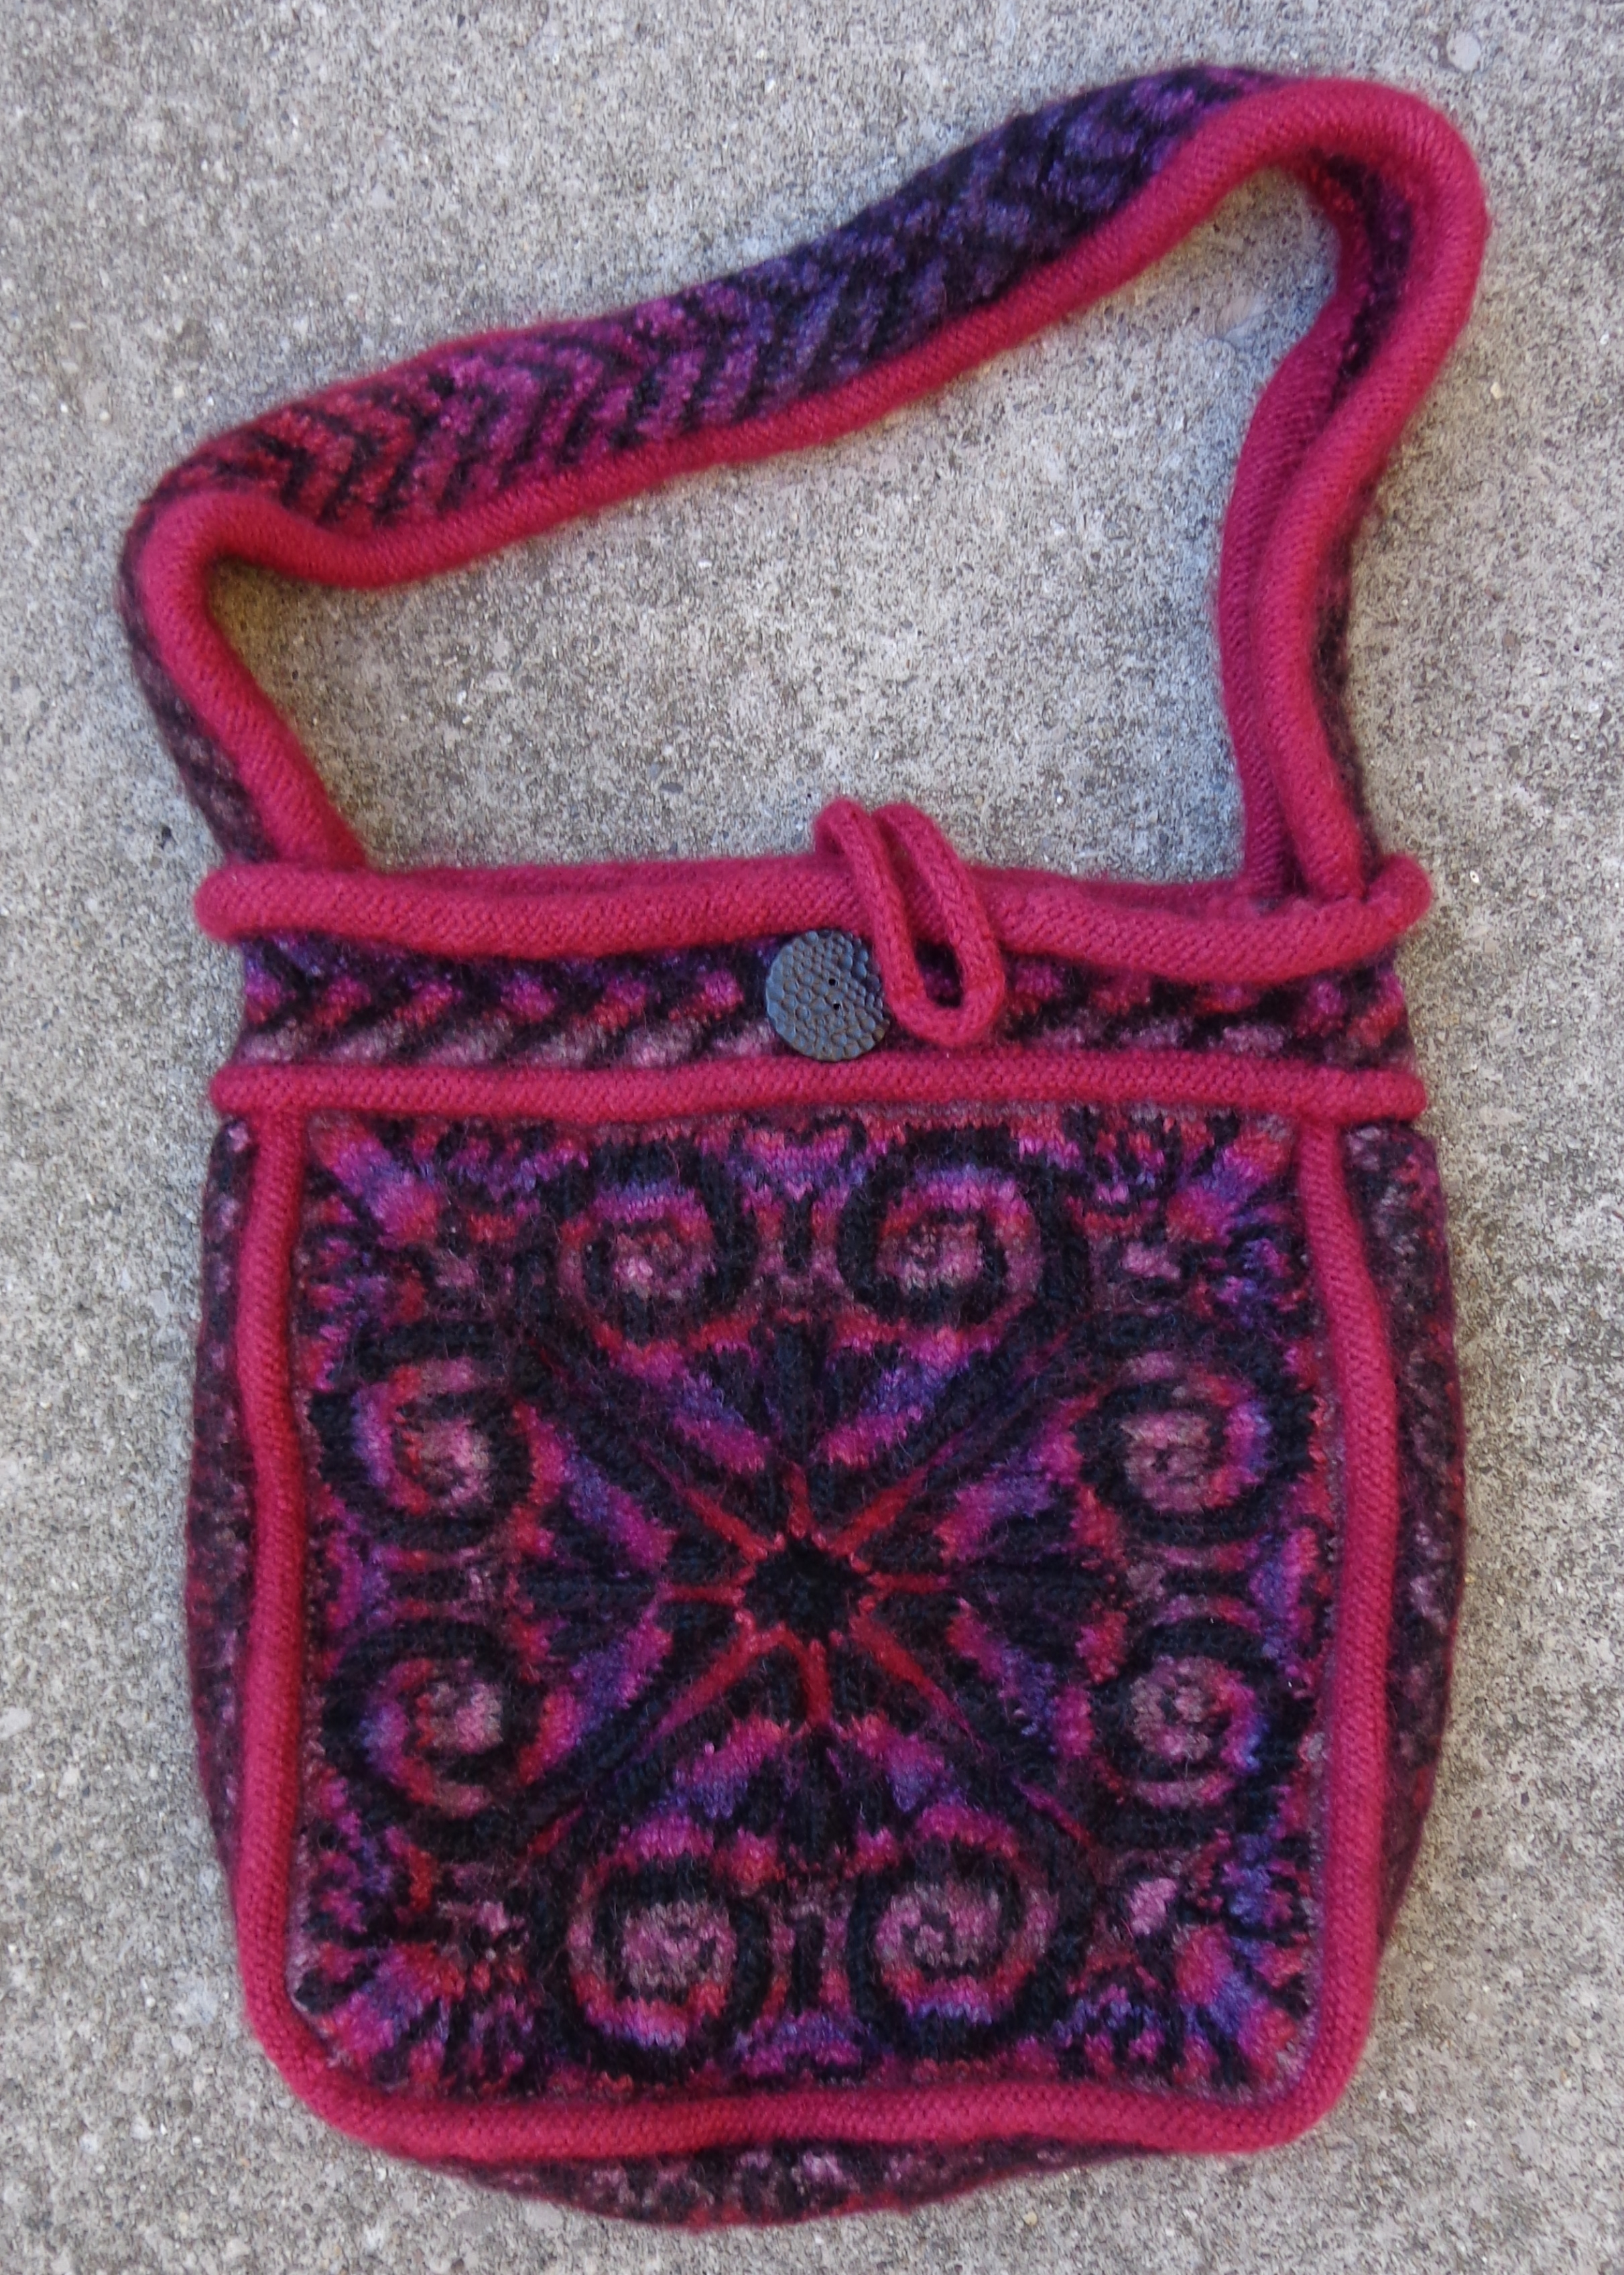
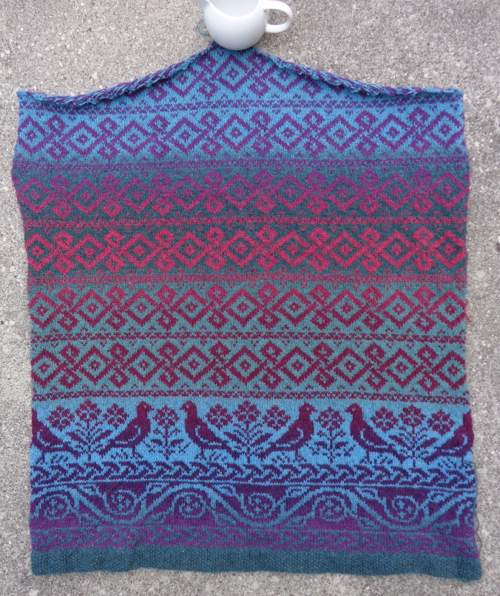
Now, I could just sew that vertical seam, insert the base rectangle, sew the upper edge to the bag and be done. I want more. I always want an interior pocket – for my keys, maybe, or my phone. The Sipalu bag is really deep and a bit narrow, so I definitely want more pockets. Things are going to disappear in the bottom of that bag and never be seen again, so I’ll plan ahead.

Sew in the pockets before finishing the lining.

The easiest pocket is a rectangle sewn to the inside of the lining. You know I’m not going to do this the very easiest way, though!

adding a phone pocket to a bag lining by Deborah CookeLet’s have a pocket with a bit of style.

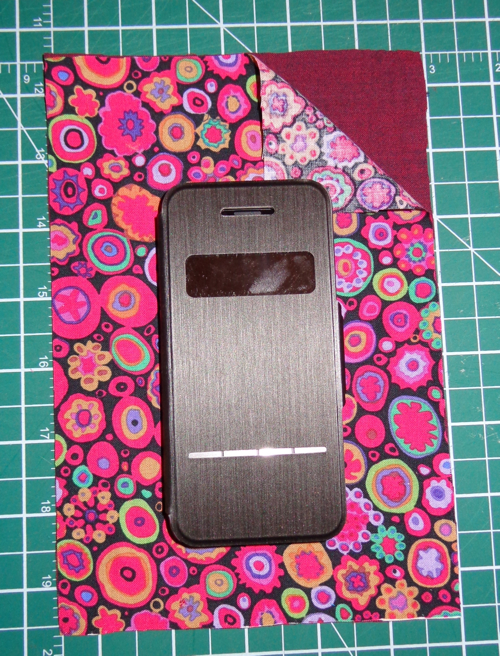
Here’s my phone and I’ve cut two pieces of fabric for the pocket to hold the phone, which are the same size. That’s because I’m going to line the pocket to make it more sturdy. The two fabrics have their wrong sides together.

Adding a phone pocket to a bag lining by Deborah Cooke
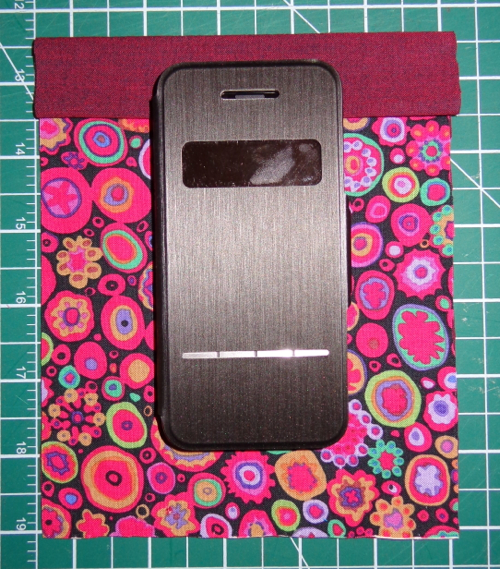
Here’s how that pocket will work out: keeping the two fabrics together, I turned down 1/” inch at the top, then turned down another inch – that seals the raw edges inside the top seam. Next, I’ll stitch that down along the lower edge.

Back to the iron again, to press down the outer edges on the other three sides of the pocket. Then I stitched it down to the bag lining – I chose a spot that will fall on the back edge of the bag, pretty close to the top so I can grab the phone easily.

adding a pocket for a phone in a bag lining by Deborah Cooke
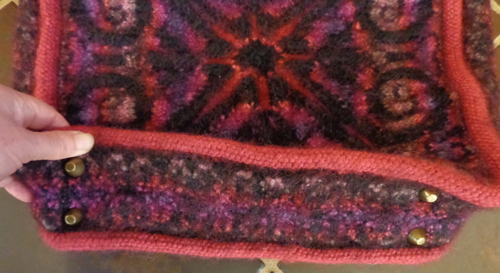
<<<<< The finished pocket looks like this.

Notice that I chose a fabric for the pocket that contrasts with the lining, and the band of fabric on the edge contrasts with both. I don’t playing matchy-matchy here because it’s dark inside a bag. I want to find the phone easily.

On the Noro tote, though, I’d like my pocket to be zippered – since the bag will be open on the top. I also want the pocket centered on one of the long sides. To find this location, put the big rectangle flat on the table. Place one ruler along the seam line. (There’s one on the right.) Put the another ruler at the edge of the long side – in this case, 12.5″ from the seam line. I could measure my pocket and do calculations, but I generally just eyeball it. Using a striped lining makes it easier to cut a pocket that will line up with the bag. In this case, I positioned the zipper in the middle of the space, then cut my pocket the width of the zipper.Adding a zippered pocket to the bag lining by Deborah Cooke
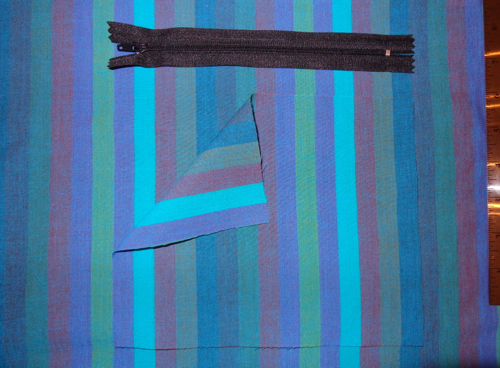
The easiest solution would be to cut another rectangle of the striped fabric for the top of the zipper, but I want a contrasting border on mine, so I can easily find the zipper in all those stripes. Again, this isn’t high accuracy. I cut two strips of contrasting fabric the same width as the pocket and about 3″ deep. I folded them in half lengthwise and pressed them. They’re on the right. Because this striped fabric is a little lighter (and less sturdy) I decided to fully line the pocket. So I cut a bigger rectangle of that contrast fabric. Adding a zippered pocket to the bag lining by Deborah CookeThis is where those two contrast strips will go – one on either side of the zipper. Adding a zippered pocket to the bag lining by Deborah Cooke
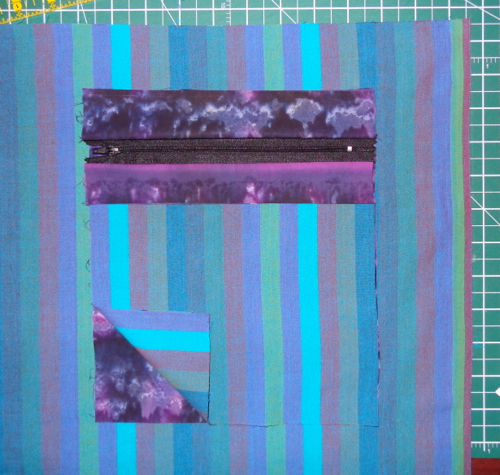
To ensure that there are no raw edges of fabric inside the pocket, I sewed the folded edge of both of those facing pieces to the zipper tab. For the lower one, the raw edges were turned to the inside and then sewn around the striped pocket. All the raw edges are sandwiched inside there.

At the top, the raw edges are still open. Adding a zippered pocket to the bag lining by Deborah Cooke
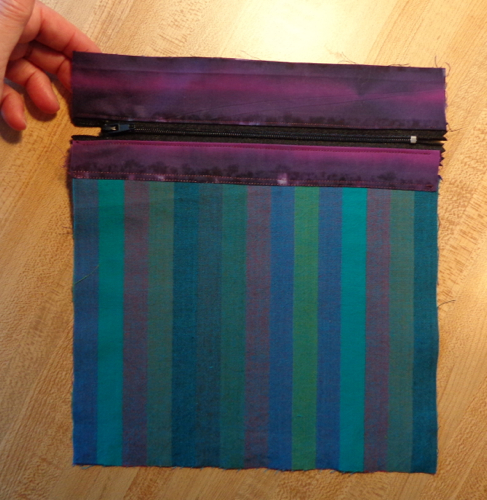
I lined up the zippered front of the pocket with the lining and trimmed the lining to match. Adding a zippered pocket to the bag lining by Deborah CookeThen I flipped the pocket over and pressed all the seam allowances to the back. Once that was done, I top-stitched the pocket in place on the bag lining. Adding a zippered pocket to the bag lining by Deborah Cooke
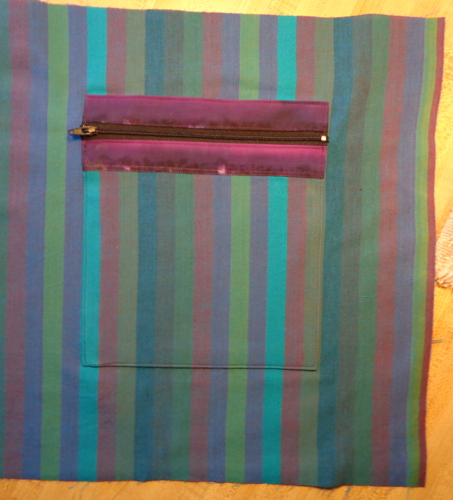
Inside, there are no raw edges and the pocket is a bit stiffer, because this batik is like Kevlar. You can see that the zipper tape is visible on the inside. I could have made facings and hidden it away, too, but this application is faster and zipper tapes don’t fray anyway. Adding a zippered pocket to the bag lining by Deborah Cooke
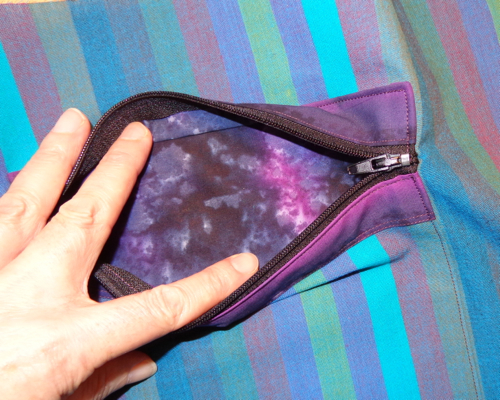
Next, assemble the lining, as we’ve discussed. Sew that vertical seam in the big rectangle, then fit the small rectangle into place in the base. The easiest way to pin it is to start with that seam. Pin one corner of the base into it. I usually put a pin on the diagonal, catching a little pinch at the pivot point of the corner through both layers. Now, fold the big rectangle in half to find the opposite corner of the bag. Pin that corner the same way. From there it’s easy to pin the perimeter and mark the other two corners.

I NEVER clip the main lining at the corners to ease the seam, because that just creates a place for the lining to fray. As a result, I sometimes get some gathering in the corners. This isn’t a huge deal IMO – the only thing that will see the corners of the lining in the bottom of my bag are those mints from restaurants that I toss into my bag and forget. Sew a second seam 1/8″ away from the first one (and in the seam allowance), just to reinforce it.

Ironing time. Give the lining a good press, because once it’s in the bag, you’ll never iron it again. Press down the top seam allowance. The raw edges will be in that magic space between the lining and the bag that no one will ever see.

I always sew in my bag linings by hand, because I don’t want the machine stitches to show on the outside of the felted bag. Pin the bag in place around the perimeter. Use a buttonhole twist thread – that’s the thick one – and sew it in. The stitches don’t have to be teeny, but they shouldn’t be huge either. You don’t want to do this again. You could also sew it in by machine. Your bag makes it your choice.

Next week, we’ll line the straps of the Sipalu messenger bag, and put a zipper flap in the top of it.

Lining a Bag 1

In my ongoing quest to become more organized, I’m trying to finish up a number of abandoned craft projects right now. One of these tasks is lining some knitted and felted bags. They’ve been waiting on me for a while! People seem to be uncertain how to line a bag, so I thought I’d share the process with you.

First up is this tote bag, which was knitted of Noro Hitsuji left over from a sweater, and some black Patons Classic Wool Roving. They’re both bulky yarns, so this was a quick knit. That checkerboard pattern is called “entrelac” and it’s a particularly good way to show off the colour changes in a Noro yarn. I didn’t have a pattern for this, just knit the two sides, then added 2×2 stripes up the side and a black bottom. Then I felted it, and sewed on some black leather handles. You can read my project notes on Ravelry or check out my post here on the blog. This is the bag before it was felted.Entrelac Bag knit in Noro Hitsuji by Deborah CookeSecond on the list is this messenger bag, knit following a KnitPicks pattern called Sipalu. They used to sell this as a kit, but used a fine yarn and didn’t felt it. I thought the results looked droopy and not very sturdy, so I bought the pattern on its own, then knitted it out of Patons SWS, which is a soy-wool blend that felts like mad. It’s heavier, an aran weight. Instead of using a number of colours as the kit did, I just used a solid black and the self-striping red as the contrast colour. Then it was felted, too. The button is a lovely porcelain one handmade by a local artisan. You can read my project notes on Ravelry or check out the post here on the blog.Sipalu Bag by Kerin Dimeler-Laurence knit in Patons SWS by Deborah CookeBag number three is a humungous messenger bag, also knit of SWS and felted. It presents some challenges because of its size. I thought it would shrink more when it felted, but was wrong. It’s felted as far as it can go and still be useful, but still huge. It got the second of those handmade porcelain buttons – here it is, although it’s waiting on a solution. You’ll see why in a minute. Here are the Ravelry project notes on this one and here’s my blog post about it.Kauni Damask Understated Bag by Karen Stelzer knit in Patons SWS by Deborah CookeThe first thing I like to do with a bag is give the base more structure than just felted wool. I found plastic cutting boards at Ikea which are perfect. They’re heavy plastic. You can cut them to size with an X-acto or Olfa knife. I cut mine to be the size of the base of the bag, and round the corners a bit. The colours aren’t important because they won’t show. Once the board is cut to size, I secure it to the base of the bag with bag feet. You can buy these from Ghee’s online – probably other places, too – but I also found the ones with the price sticker at my local fabric store.bag feet from GheesTo do this, work four holes into the board in the right positions with an awl or even the point of one blade of scissors. Put the board inside the bag, in position. With one hand on the outside and one on the inside, match up the pins on the foot with the hole and push it through the bag and the board. (The first one can be tricky. Sometimes I have to push a pin through the board from the inside to know where to aim.) Once the pins of the foot are on the inside, you spread them wide to secure the foot in place. Once all four are done, the board isn’t going anywhere.

Inside:inside of entrelac bag knit in Noro Hitsuji by Deborah CookeThose spikes might snag on things inside the bag, but I’m going to line the bag anyway. The bag’s interior will be protected

Outside:base of entrelac bag knit in Noro Hitsuji by Deborah CookeIt looks as if the plastic base is much wider than the bottom of the bag in this shot, but it’s partly the bulk of the felted wool and partly how I folded it for the photograph. There’s always a little bit of play, because a knitted wool square won’t felt to be perfectly square.

These feet are a bit small, I think, especially for the Noro tote. If the bag was going to sit on the ground a lot – like this one, which is really a suitcase – I’d use bigger ones.

Outside on #2:base of Sipalu bag knit in Patons SWS by Deborah CookeThis bag is narrower, so I couldn’t fold it like the one above. It is much more sturdy this way, though. The Sipalu bag also has another structural element. I had knit edges in solid red in reverse stockinette, thinking they’d roll, and they did. It was still a bit squishy. Before the felting, I sewed cord into those welts and stitched them closed, which made them into piping. Because the cord is cotton, I knew it would also shrink but at a different rate than the wool. I left the cord long and just knotted the ends. Once the bag was felted, I tugged the cords to be smooth along the edges, then trimmed and secured them. Here’s how they look inside. You won’t see any of this once it’s lined.piping on Sipalu bag knit in Patons SWS by Deborah CookeThe issue with the thistle bag is that the base is longer than the Ikea cutting boards – a lot longer! I’ll probably use 6 feet on it and maybe bigger ones, but first I need to find a good base.

Next week, cutting and assembling the lining.

Storm on Exmoor

I’ve been thinking about winter this past week. I’m not sure why, as it hasn’t been that cold, but I’ve been making plans for staying warm. I bought a new hat, for example, and it has ear flaps. I also knit this cape-cowl, out of Kidsilk Haze Trio from the stash:Storm on Exmoor by Sara's Texture Crafts knit in Kidsilk Haze Trio by Deborah CookeYou might remember that I made a sweater of this yarn a while back. This cowl was made from two of the leftover balls of wool. It’s light and warm, nestles over my shoulders and rises in squishy goodness to cuddle under my chin.

The pattern is called Storm on Exmoor and it’s free. (That’s a Rav link.) The designer suggests wearing the capelet as a topper outside a coat on a chilly day, but I wanted a big cowl to wear inside my coat, to keep my throat and chest warm. (This may be a Canadian vs. a UK perspective.) I modified the pattern a bit, working the body in stockinette stitch instead of garter, the hem in garter instead of ribbing, and continued the cowl until I ran out of yarn. I figured stockinette stitch will sit flatter inside my coat than garter stitch would and I wanted the neck as high as possible.

I just love how this came out, and how warm it is. I can knot a scarf over or under the neckline, or just wear it as it is. It’ll be just the thing this winter.

Plus the pattern is really nice, a quick and easy knit with room for variation. I may be making more of these for Christmas presents, in different yarns.

How do you plan to stay warm this winter?

Tangerine Rose from Knit, Swirl

Finally! I can’t really believe that this sweater is finished, because it’s been on my needles for so long. I finished it once before but the sleeves were too long and skinny, so I had to frog it back. This also required a mourning period, during which it sat in the knitting basket. Eventually, I picked it up again, reknit the sleeves and now I just love it. Tangerine Rose by Sandra McIver knit in Berroco Jasper by Deborah Cooke

The pattern is Tangerine Rose jacket from Knit, Swirl. I used the stitch counts from this particular jacket, but left out the eyelets and ribbon. I chose this one because my gauge matched the gauge in this pattern, and it looked as if I’d have the right amount of yarn to complete it. I made it, but just barely!

It’s knit in Berroco Jasper in a variegated green (Jasper has been discontinued so this link will show you the yarn but not the colours), with some variegated purple mohair (Mountain Colors Mountain Goat) along the outer edge. The green has purple in it and the purple has green in it, which works for me. Here’s a detail of the cuff on the sweater. Tangerine Rose by Sandra McIver

I also picked up stitches on the ends of the sleeves and knit a reverse stockinette cuff in the contrast yarn to match the hem, because the sleeves looked unfinished to me. When I was seaming it up, I decided to sew the contrast hems into tubes, as if the sweater has a piped edging. I really like how this looks.

The pattern includes a knitted rose corsage. I knit one following the directions and wasn’t sure I liked it. So, I knit a second, following the directions for a rose in another book. Here are the two roses:roses knit in Mountain Goat by Deborah CookeDo you think either looks like a rose? (I don’t.) Which one do you like better?

Bute Completed

This week, Fibre Friday feels particularly celebratory. I’ve finally finished a sweater that has been on my needles for three years – Bute, from Rowan magazine #52. This sweater is a fair isle cardigan, and I actually knitted it in the specified yarns and specified colours. ( I know. That never happens. Stop and take a breath. It’s going to be all right.)

Here’s a detail shot of the back in progress:Bute by Lisa Richardson knit in Rowan Colourspun and Felted Tweed by Deborah CookeLots of colour changes in this one, and LOTS of ends to sew in. I’m glad that I wove or sewed them in as I went.

It turned out to be a beast of a knit, because I didn’t realize the sizing was unisex – or at least, I didn’t understand the implications of that. I knit, frogged and reknit this sweater so many times that it still makes my teeth hurt. In the end, I (a person likes a 42″ width for a comfy cardigan) ended up knitting an extra-small.

Yes, you read that right. XS. And yes, I knit the back in the M width and frogged it, then I knit the back in the S width and frogged it, because my mind simply could not wrap around the notion of me being an XS, even when I read the finished size measurements. There you go. (What are all the teeny people doing with this pattern?)

In the end, though, I love it. I did shorten the sleeves, and it did get longer when it was blocked, but it’s a great cardigan and I know I’ll wear it a lot.

I’m also glad to get my needles back!

I did make one mistake on my final knit – I switched out one of the greens without meaning to do so. The green band with the beige squares should use the more olive green, but I used the solid dark green by mistake. Once I had started that way, though, I finished it that way. That means I have more of the olive one left over.

Here it is:Bute by Lisa Richardson knit in Rowan Colourspun and Felted Tweed by Deborah CookeThis cardigan is presented in two colourways, and I bought the yarn to knit the blue one for Mr. Math. It is, however, entirely possible that I will knit it for myself, now that I know what size to make.

Before it was blocked, this sweater wanted to be corrugated, because of the alternating bands of stockinette and reverse stockinette. I was amazed by how much that relaxed in the blocking, and how much longer the sweater became. It really has a lovely fit.

My Ravelry project page is here.

What do you think?

Back of Roan Completed

So, it’s been a while since I put this fair isle project aside, but I dug it out last week (after finishing my KSH Stripe cardigan) and have now finished the back. Here it is:Roan by Martin Storey knit in Kauni Effektgarn by Deborah CookeIt’s curling a bit because it hasn’t been blocked yet, but is really a big rectangle, decreased in to a point at the top in the middle. It’s supposed to be oversized and is big – the back is 26″ wide. I took this picture outside, and the colours appear a bit more zingy than they are in real life.

The pattern is called Roan from Rowan Magazine #56. (I posted about this project when I began it, right here.) The cardigan is like a kimono and is supposed to be knit in thicker yarn. I had this Kauni Effektgarn in my stash so recalculated and cast on in this instead. This is two colourways of the Kauni, and the yarn changes colour graduallly as you knit. (The original design uses a number of colours, and the knitter changes yarns as knitting.) Because the yarn is thinner, I had to do more repeats of the band with the diamonds to get the sweater to the right length – I decided to make it a bit shorter than the pattern, to ensure I wasn’t overwhelmed by the sweater.

The two fronts together are the same shape as the back, just split down the middle. Because I want the colours to change the same way on the front and the back, I’m going to knit the fronts as one piece, then cut them apart. This is called steeking. I’ve never done a steek before, and the prospect of cutting my knitting does freak me out a bit. I have a lot of knitting to do before it’s time for that, though.

Off to cast on the fronts!

What do you think?