A Cabled Cardigan for Tyler

Another post about the girls this week. I’m knitting for myself, too, but it takes a lot longer to finish up a project. Right now, I’m knitting the sleeves for a cardigan in black Kidsilk Haze, using the Hebrides pattern. I’ve knit it twice before, and it’s a gem. These little jewel-necked cardis aren’t terribly exciting, but I do get a lot of wear out of them. I’ve wanted a black one for a while, though this may be the last time for black Kidsilk Haze to jump onto my needles. I have the fronts and backs done, and will pick up the buttonbands in daylight on those 2.75mm needles.

I also finished the Storm at Sea quilt, which feels like a huge accomplishment. It’s been a finished top and unfinished quilt for so long. I’m working on the hand quilting for the Pineapple Star – just two corners to go, then I can bind it. It’s time to get all these unfinished tops done.

In the meantime, I finished a little top-down cabled cardigan for the girls and that’s what we’ll look at today. Here’s Tyler modelling it, along with the top from McCalls 3701 and pants from Tyler Wentworth 3522.

Cabled cardigan knit by Deborah Cooke for Tyler Wentworth

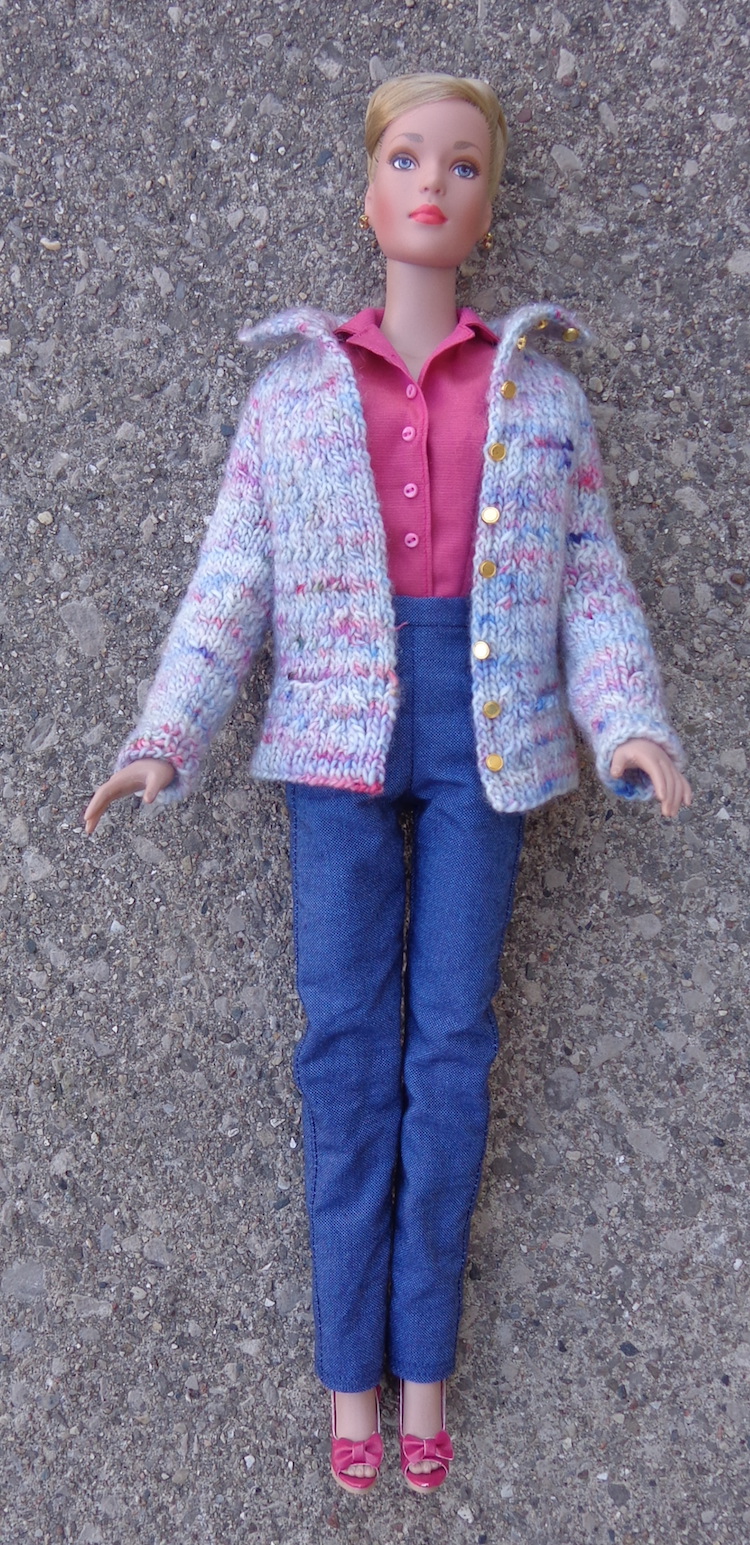
I didn’t have a pattern for this, just cast on with sock yarn and made it up as I went. I kept notes so I can do it again. I also kept the cables simple on this one – it’s a two-stitch cable with a purl stitch in between each one – so I could keep track of the counts better. Now that I’ve figured them out, the plan is to make another with more elaborate cables. Those are working buttons with buttonholes, though the small holes are tricky to find.

My favorite detail is the pockets in the fronts. You can just see the one on the left side (the doll’s right). I put the stitches on a holder where the pocket should go, then cast on the same number in the next row. That gave me a slit. I continued to the hem and finished the body of the sweater, then went back to those held stitches. I knit down to make a square, then sewed its edges to the inside of the sweater. Pockets!

Cabled cardigan knit by Deborah Cooke for Tyler Wentworth

You can see the cables better on the back of the sweater, as well as the single stitch on the raglan lines. I worked purl-knit-purl on each raglan line, and increased before and after it. As soon as I had two stitches for a new cable, I started one. The cables are turned in opposite directions on the left and right, then the center back cable is four stitches on each side of the central purl stitch.

The wool is some leftover sock yarn and I worked on 2mm needles. The only change I’ll make when I knit it again is to add a few rows to the collar – it wants to curl up – and I’ll play with the cable patterns, too.

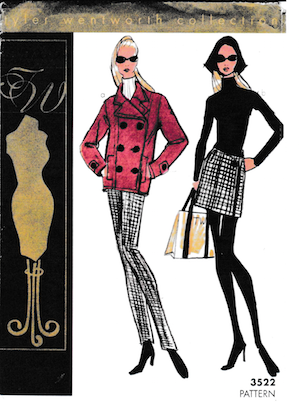
These are the patterns for the sewn garments.

McCalls 3701
McCalls 3701 for 16″ dolls
Tyler Wentworth sewing pattern 3522 Weekend Wardrobe
Tyler Wentworth 3522

The pink shirt is made of French shirting cotton, which is really lovely and fine. The weft is a slightly different colour, so it changes in the light. (Yes, I made a shirt for myself of this fabric once upon a time.) It’s actually a bodysuit but made of woven instead of knit. It was a little tricky to turn those collar points but a nice little project. Those buttons don’t work – there are snaps behind them to close the fronts.

The pants from 3522 are the ones I’ve made multiple times in pleather for the girls. This pair look a bit like jeans thanks to the fabric choice, but I’ll need to add pockets to the back of the next pair to complete that illusion. They are quick basic pants to sew.

McCalls 3845 for Tyler & Friends

McCalls Craft 3845 sewing pattern for Tyler Wentworth

Remember this sewing pattern for Tyler Wentworth dolls, McCalls 3845? Well, I didn’t just make the purse from it. 🙂

The outfit on the left is a sleeveless dress with a jacket – they show the jacket with fur or feather trim. I used velveteen on mine.

Here’s the finished dinner suit. Red crepe, lined with black polyester with red polka dots. The collar and cuffs are black velveteen and I used two black rose beads on the fronts. I like a black purse with this one.

McCalls 3845 for Tyler Wentworth dolls sewn by Deborah Cooke

There were issues with this little suit. The first jacket I made was too small—the sleeves were too short and the fronts didn’t meet. I redrafted the pattern with longer sleeves and bigger front pieces so that they met up at the center-front. Since the pattern was a digital download, it’s possible that I didn’t print the pattern at the right % size originally. This is a tricky bit with digital downloads that don’t have any scale on them. I printed the pattern at 100% but that wasn’t right. At any rate, it’s mostly right now. (The sleeves are a bit too wide in this version.)

The red crepe wasn’t the best choice of fabric, since it’s pretty thick. That’s why the bolero doesn’t close when she has the dress on. It’s just bulky. (Without the dress, the jacket closes, but it’s a bit of a bold look.) The fabric was also stretchy in the crosswise direction, which made accuracy a challenge. I thought the fabric was the reason why the bodice didn’t fit as well as I would have liked. It’s just too wide at the top.

Bodice top from McCalls 3845 for Tyler Wentworth dolls sewn by Deborah Cooke

But no. I realized that there is a teensy mistake in the pattern.

Bodice correction for McCalls 3845 for Tyler Wentworth dolls sewn by Deborah Cooke

This is the center piece for the bodice front. Usually, the printing on the pattern indicates the top and bottom by its direction – here, it looks like the larger edge should be the top. But the bodice doesn’t fit well into the top of the skirt this way, and the top gapes open on the final dress as you can see on the red dress above. On a whim, I turned it upside down for my second version of the dress and voilà! It’s PERFECT. So, the label on the pattern piece is upside down. Now, it has my handwritten labels on it. 🙂

Here’s the variation of the dress made by flaring the skirt, with the middle bodice piece the other way around. I cut it of the polka-dot polyester, lined with solid black. The plan was to give our girl an easy change of look with the jacket when she’s travelling. (You know how keen dolls are about globetrotting…)

Here’s the finished dress.

McCalls 3845 for Tyler Wentworth dolls with modified skirt sewn by Deborah Cooke

It fits MUCH better at the top front. The ruffle at the hem of the flared skirt is actually lingerie elastic trim, so it stretches, but it’s the perfect scale and it won’t be able to stretch now.

Of course, she needs a different purse for this outfit and I like the red one. 🙂

I also added a zipper to the back instead of the dress closing with snaps, which was bulky in the red version. There were a few tweaks to making that change – because the original closure with the snaps overlaps in the back, while the zipper means the back pieces just meet but don’t overlap. We’ll talk about that in a minute.

I ordered doll-sized invisible zippers online. The zipper has to be long enough to open over the widest point of the doll’s body – that’s her bum. 🙂 For a strapless dress for Tyler, I use a 10cm zipper. If the zipper went all the way to the nape, I’d use a 12cm one. Doll zippers tend to not have stops at the top – or maybe it’s just the ones I have – so it’s easy to zip them up with enthusiasm and end up with three pieces that won’t go back together. The first thing I do now before using a doll zipper is overcast a few stitches at the top of the teeth on each tape.

Because the pieces overlap in the original design, the seam allowances need to be reduced for the zipper. If the center back was marked on the pattern, this would be easy—you’d just make a new seam allowance from that. But the CB isn’t marked on this pattern and I didn’t want to guess since tiny increments can make a big difference with doll clothes. There’s a kind of a tab on the right back so I removed that, making both backs the same (mirror images of each other).

For the zippered back, I also changed the order of construction. The pattern instructions are to sew together all of the bodice pieces, then all of the skirt pieces, then sew them together at the waist and end up having only the center back seam open. Instead, I sewed all the front bodice pieces, then the front skirt, then sewed them together to complete the front. I sewed both back bodice pieces to their respective back skirt pieces, then inserted the zipper. It’s an invisible zipper, so it’s easier to set in when the back is flat. Once the zipper was in, I basted the side seams and tried the dress on the doll. I had to take a little bit extra out of the back to make it fit properly (that would be the seam allowance that I hadn’t already reduced), so I took it out of the side seams.

Here are the backs of the two dresses:

Dress backs of McCalls 3845 for Tyler Wentworth doll , one as pattern and one modified for a zipper, sewn by Deborah Cooke

And yes, the red one should lap the other way. I realized I’d done it backwards after I’d wrestled the base of the slit into place (to minimize the gap). In fact, this exercise is what pushed me to trying the zipper – getting the overlap in place was frustrating and I don’t love the result. If the doll bends at the waist, the back gapes open, and there’s a lot of bulk at the center back with all those layers. The metal zipper stop on the black dress is still visible, a sign that I need to refine my invisible zipper installation technique.

As far as using the jacket with the flared dress, I ended up with a small problem – the red purse is an orange-red and the jacket is a cherry red. They don’t go together. (Fortunately, I had shoes in the right shade of red to match the purse!) I’ll cut out another jacket to go with the second dress. I finally found some fake fur that has a short enough nap for the dolls, so I’ll use that in black for the collar and cuffs, but am waffling about the fabric. Should it be solid black lined with polka dots, or polka dots lined with black? The polka dot polyester just feels a bit light for a jacket to me. Hmm.