Purple Knee Socks

I’ve been making a lot lately for my girls instead of for myself, so my count of finished projects for myself is pretty low this year. I lost a bit of my making mojo this year, thanks to a lot of projects that made me say “hmmm”. The girls have helped me to recover a bit of that, so over the next few posts, we’ll have a look at a few of those stalled projects. Coming back to them with a fresh eye has given me some ideas.

First up, the knee socks.

I’m not sure why knee socks intrigue me so much. They’re a lot (a LOT) of knitting and I seldom wear them once they’re done. All the same, I can’t resist them. It’s inexplicable.

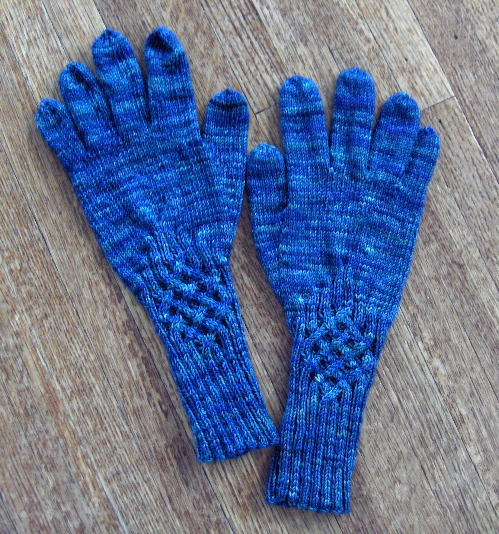
For example, I made these in 2009 and have never worn them. Not even once. I take them out of the drawer and look at them sometimes, though. I do like that they exist.

Striped Noro Knee Socks knit by Deborah Cooke
Rowan Fine Art Collection

The current choice of knee socks is Quail, designed by Martin Storey to be knit in Rowan Fine Art. Those are Ravelry links, as the yarn is (naturally) discontinued. I’ve been eyeballing these since I bought the book when it was first released in 2013.

The pattern is in this book for Rowan Fine Art: Fine Art Collection. It should be available for sale individually, but Rowan’s buy links from Ravelry are a trainwreck since they updated their website (and didn’t update the links.)

Here’s Rowan’s pic of the socks from the book. Of course, it’s a lovely photograph as is always the case with Rowan, but one that doesn’t let you see the detail in the socks very well.

Quail knee socks knit in Rowan Fine Art, in photograph from Rowan's Fine Art Collection

It turns out that they have bobbles, which I’m leaving out since I hate bobbles. I hate knitting them and I hate that they look like warts when they’re done. No bobbles for me.

This should mean that I need less yarn and I hope that’s true. The pattern calls for three skeins of Fine Art, which has 400m per skein. That’s a lot of yardage for socks, even for knee socks – usually you need 350 – 400m for socks and double that for knee socks, with lots leftover for knitting for the girls – even with a light fingering like this one. I have two skeins of Fine Art in a plummy colour, so right from my cast-on, I’m playing yarn chicken.

The colourway is called Rowan. (That’s a Ravelry stash link, because I think it’s fun to see pictures of a specific yarn in a whole bunch of knitters’ stashes.)

I’m knitting them in the round on 2.0mm needles. Here’s where I stalled:

Quail socks designed by Martin Storey and knit in Rowan Fine Art by Deborah Cooke

The top looks huge, which is always the way with knee socks. What made me go “hmmm” was the pooling. On the cuff, it made a nice little stripe, but once the stitches were added for the cables, it made a big moving pool. I’ve started the decreases and you can see that the width of the pool is decreasing. It’ll spiral down to a narrow stripe again by the ankle. I’d rather have stripes or cables, but not both at the same time.

I made another pair of socks in this yarn, in another colourway, and they did a similar striping, just in short plain socks. Here they are:

socks knit in Rowan Fine Art by Deborah Cooke

I’m not wildly in love with this pooling, but I can live with it since the socks are just in plain rib.

Here’s the shawl I made in this same yarn, which also pooled:

Starling Wrap designed by Marie Wallin knit in Rowan Fine Art by Deborah Cooke

The thing is that I like the pattern of the pooling in the shawl, even with the lace stitch. I think it’s because it falls into a regular stripe that doesn’t vary over the length of the shawl. It’s the changing width of the stripes that I find distracting in the socks.

So, these socks are going to Frog Pond, and the yarn is returning to the stash. I’ll use it on a shawl, I guess, or another project that has the same number of stitches per row.

Maybe one pair of knee socks to admire is enough. 🙂

Alaska Mittens

I knit some mittens this past week—even though it was a zillion degrees outside. This pattern was free and it looked intriguing. I had some yarn in my stash so away I went.

The pattern is called Alaska Mittens by Anna Zhuravleva—here’s a Ravelry link—and it’s still free as I write this. It calls for aran weight yarn, and I had some Sirdar Tweedie Chunky in my stash—that’s a Ravelry link, too—it’s discontinued so I’d found it on sale once upon a time and just liked it. I have three colourways but used the dark green, which is #285.

Here are the mittens, knit in the M size:

Alaska Mittens knitted in Sirdar Tweedie Chunky by Deborah Cooke

I found this pattern a bit confusing and ended up writing all over my chart while knitting the first one. The second one went more smoothly as a result. You work Row 2 fifteen times, and since the next row is labelled R3, I missed that the first time – I changed it to be R17 and renumbered the rest of the chart. I also added a G on the rows that I was to add a gusset stitch and drew a line across the chart where the palm changes from ribbing to stockinette. I think there is one mistake in R13 of the original labelling of the chart – the two knit stitches should be purls.

The chart for the fingertips really confused me, so I drew it out again. I wanted the decreases to be one stitch in from the edges, so there are two stitches that run up to the top of the mitten. The chart shows it that way, but if there are two knit stitches, you can’t K1, SSK without taking up the third stitch. I also had to work two additional rows in the middle before doing the middle twist, as it occurs every 4 rows, not every 2.

I also found the thumb a bit too wide for me at 16 stitches and took it down to 12. I had added four extra rows of ribbing to make a longer cuff on this pair. These mittens weigh 73g and I have 76g left of the green. I’m hoping I can knit another pair with just the specified cuff length.

I cast on another pair in another colourway of the Tweedie Chunky and am working it along with a strand of Kidsilk Haze. The result is very squishy and soft:

Alaska Mittens knitted in Sirdar Tweedie Chunky by Deborah Cooke

This one has the cuff in the specified length. I also started the gusset increases four rows later, so I’ll have two less stitches for the thumb—instead of having to decrease twice, I’ll just have to decrease once to get the thumb the right width.

You have to pay a bit of attention with this pattern, but the mittens are really nice. I particularly like that the cables mirror each other on the left and right mittens. They fit well, too.

More Hats & New Patterns

No post last week because I was publishing a book. My knitting always falls behind in those last few days to launch. This week, though, I have two new hats to show you. I love them both! It doesn’t hurt that I found the yarn at the thrift store, either.

Both use the Vulgar Knitter’s First Snow hat pattern, which I really like and have used many times before. (That’s a Ravelry link.) Here’s a post featuring some other hats I’ve knit with this pattern: First Snow Hats.

The first of the two new ones was knit in Cascade Yarns Jewel Hand-dyed, a discontinued yarn in a beautiful red colour. (That’s a Ravelry link.) The colour is 9969. It still needs a pompom but I’ve ordered a black one.

Hat of Cascade Jewel in First Snow pattern knit by Deborah Cooke

The second hat is knit of Malabrigo Worsted – this skein had no label at the thrift store but I recognized it all the same. I think the colourway might be Forest. I knit this one a bit longer, with 10 extra rows of ribbing and an extra repeat of the 7-row braid.

Hat of Malabrigo Worsted in First Snow pattern knit by Deborah Cooke
Noro Magazine #17, Fall/Winter 2020

I’ve picked up two new pattern books this past month that I also wanted to share with you. I’m fascinated by the sweater on the cover of each one. First there’s a new Noro magazine. This one is Fall/Winter 2020 and #17.

Look at that fascinating cardigan on the cover! The design is really clever.

You can see a carousel preview of the magazine’s patterns on the Noro Magazine site right here or on Ravelry right here. I think it’s a really great issue.

Pompom Quarterly issue 35 Winter 2020

Secondly, I ordered a copy of PomPom Quarterly issue 35, Winter 2020, which was edited by Stephen West.

Again, it’s the sweater on the cover that caught my eye – this one is knit with mini-skeins of graduating colours. It’s also available in a cardigan version, which is just as gorgeous.

You can check out the included patterns on the PomPom website, right here, or on Ravelry, right here.

Incredibly (!) given my stash, I don’t have the yarn to cast on either of these sweaters, so I’m thinking about yarn choices. Which would you knit first?

Knitting Audrey

My big plan was to finish up the projects that are already on my needles this year, and I am making progress on that. I’m in the midst of knitting the last square for the ugliest afghan in the world, for example, which will then just need to be sewn together (ugh. The sewing is about half done) and have the border knit onto it. The border is about 1/3 done. It is, though, the ugliest afghan in the world, and not a project that fosters a lot of enthusiasm. It might be warm when it’s done. It’s destined to go in the car to keep the dog claws off the upholstery, which again, isn’t very inspiring.

So, I needed another project to keep me from losing hope completely. The winner was Audrey, a lace and cables cardigan knit in Rowan Angora Haze and included in the Rowan Angora Haze pattern book. This yarn was discontinued and replaced by Rowan Mohair Haze, so I bought two sweater lots of AH when it was discounted to clear. It was time to get one fuzzy sweater on the needles. Here, btw, is the Ravelry link for Audrey, and also the one for Angora Haze. It’s still out there in discount bins all over the world.

The yarn is really soft and fuzzy. It does shed a bit but not as much as I expected. It’ll be interesting to see whether it sheds more or less once the garment is completed. My nose does tickle a bit after I’ve been knitting on it, but again, it’s not too bad. I did try a suggestion I saw on a Ravelry forum – I put a white linen tea towel on my lap when knitting this sweater. It gives nice contrast for those dark stitches and also catches any shedding hairs. I wrap the knitting in the tea towel when I’m not working on it.

Of course, my yarn is deep purple. 🙂 Here’s the left front so far:Audrey by Martin Storey knit in Rowan Angora Haze by Deborah Cooke

This shot was taken with the flash – the colour isn’t as rich as it is in real life, but you can see the cables better.

The cable pattern is actually easy to memorize, which surprised me. It’s certainly not a television knit, but it’s not that complicated. I knit the left front first, because I’ve had sizing issues lately with Rowan patterns. A lot of them turn out big, and I didn’t want to knit these cables over and over again. I knit a size smaller than I thought I should, and it’s coming out perfectly. The fabric is a little bit stretchy, and I guess it’s acting like a rib. Although the left front laid flat is 10″ wide, as it should be, I can easily smooth it to be 12″ wide. I’m glad I didn’t knit a bigger size, as it might get sloppy in the wearing. I doubt this yarn has a lot of elasticity – it’s just too soft for that.

I’ve made the front 2″ longer because I don’t want it to be as cropped. Also, I’ve eliminated the increases between waist and bust, and just knit it straight. That means I had to modify the decreases for the armscye (since I had fewer stitches overall) but that wasn’t a big deal. I won’t make the rolled collar but just a regular one with a buttonhole, and it seems to me that the sleeves are a bit too wide. I’ll double check those counts and measurements before knitting them.

Naturally, knitting one of the fronts first has left me with a dilemma. I’m going to have to put it aside unfinished and knit the back before I can continue. Rowan patterns often have an instruction like the one in the pattern “knit the front until it is 26 rows shorter than the finished back”. Aha. (I have another sweater on the needles that’s in time-out because of this. I have knit the back on that one, but since I substituted a different yarn, my row gauge is off. I need to figure out whether the specified number of rows will make the collar too deep or not. Knitting math tends not to get done, so that sweater front has been waiting patiently in my basket since November.) This weekend, the left front of Audrey is going onto a stitch holder and I’ll cast on the back.

What do you think?

In the Mood for Gloves…

On the flights to and from Seattle, I knit my first glove. The pattern is called Knotty Gloves, and is a free Ravelry download right now.

I used Malabrigo Sock, because it seemed too soft to me to make good tough socks. It was so pretty that I had to buy it anyway. The colour is called Solis.

I finally finished the second one and sewed in all the ends. Here they are:Knotty Gloves by Julia Mueller knit in Malabrigo Sock by Deborah Cooke

Once again, we have the photography challenge. With the flash, the colour comes out more true (it’s teal) but the cable detail is lost. This shot was taken without the flash, so you can see the cables, but the colour isn’t even close. This colourway is all greens and teals – not blue as it appears here. You wanted to see the cables, though, right?

My Ravelry project page is here.

They came out quite nicely, nicely enough that I might try another pair in another yarn. (They look better on my hands than on the floor, but it’s tough to take a picture of your own hands.) The pattern is terrific – very clear and error-free. If you’re like me and had never knit gloves, these might be a good start. I wanted them to have long cuffs so knit an extra dozen rows of ribbing before starting the pattern. They probably would have been long enough, if I’d just followed the directions, but there you go.

This project, unfortunately, did very little to diminish my stash – it used only half the ball of Malabrigo Sock, so now I need to knit something with the other half. Hmmmm….

Cabled Denim Bag 1

Rowan sent a kit to me with my subscription to their magazine last year. It’s a kit for a denim bag called Charlie, which includes the pattern and six balls of Rowan Denim. The Charlie bag in the kit pattern is a plain stockinette shoulder bag with a flap. Very nice, but the pattern didn’t excite me, so the package had been chucked aside. I like the yarn, though, so I cruised the ‘net and my pattern stash for ideas.

I found Tasha on Knitty, a bag pattern that uses (hey!) Rowan Denim. The cable on the bag is very neat, but I didn’t like that it had an open top. Big zipper fan, that’s me. I’m good enough at losing things that I need all the help I can get. Also I found a pattern in Rowan #35 by Martin Storey, for a bag very similar to Charlie but with cables on the flap. I liked that MS lined his bag and saw zipper potential under that flap, esp with the lining. Hmm.

The thing that all of these patterns have in common is that you knit all the pieces, wash/block them, then sew it all together. Blech. Plain stockinette is boring enough without knitting plain stockinette rectangles that have to be sewn together later. One thing I really liked about Tasha was that cable, but not that it only ran along the strap. So, I began to ponder…

What if the strap was one continuous loop, knit with that cable pattern, and made the bottom and sides of the bag as well?

What if I picked up the stitches from the base, then knit the bag in the round to the top opening? That would eliminate the seaming. Hmm.

Let the calculations begin!

I started with the bottom and made a strip of the cable pattern. The cable pattern is 14 stitches wide (5 x 2 st stockinette cables plus 4 purl stitches in between), so I cast on 24 stitches. For each right side row, I slipped the first stitch, P4, work the cable pattern, P5. For each wrong side row, I slipped the first stitch, K4, work the WS of the cable pattern, K5. (If you’re looking at the Tasha pattern, the designer has 3 stitches on either side of the cable. The first stitch is slipped on each row, but that’s not listed in the pattern directions, just the P2 or K2 at either end.) I worked for about 10 inches in length, ending with a WS row.

Then I switched to two circular needles. One side of the bag and one end would be on each needle. This is much easier (I learned) than working on 4 dpns – the long sides want to jump off the needle – or one circular – the curve is too tight.

Here’s what it looks like now, so you can visualize what’s going on:

Cable Bag knit in Rowan Denim by Deborah CookeYou could technically join the bag into a complete circle and work it in the round, but I left one seam open and am working it back and forth – it’s easier for me to keep track of the cable pattern that way and I don’t mind sewing one seam.

So, I worked the next row of the cable pattern across the end of the bag base, then picked up all those slipped stitch loops on the left end of the cable needle. I worked down that long side, knitting one stitch into the first loop and two into the next one – for every two loops, I picked up three stitches. This might be a bit full, and I’m thinking now that four stitches for every three loops might have worked better. We’ll see.

To make one stitch in the loop, you simply knit the loop. To make two stitches in a loop, you knit into the front of the loop, then without removing the loop from the left needle, knit into the back of the loop. Then you remove it from the left needle.

I switched to the second circular and picked up 22 stitches from my cast-on, purling above the purl and knitting above the knit stitches. (I initially cast on 24, but the other two stitches – one at each end – became the slipped stitches which were picked up for the long sides. Each end is now 22 stitches, with four reverse stockinette stitches on either side of the cable.) Then I picked up the other long side, the same way I’d picked up the first one.

When I’d gotten all the way around the bag, I turned the work and worked back on the WS. The front and back of the bag are in stockinette, so I purled all those stitches I’d made, then kept the ends in the cable pattern bordered with reverse stockinette.

At the beginning of the next row, I made one stitch at the beginning of the cable panel. This is the seam stitch – I’m knitting it on the RS and purling it on the WS. When I sew that seam, it will disappear into the back of the bag. There are some holes along the bottom where I picked up all those stitches, but I’m going to border the bag with I-cord so the holes will be covered up.

The picture is the bottom of the bag. The opening, which will be the seam, is at the top left corner. The stitches on the left side and across the bottom are on one circular needle. The stitches on the right side and across the top are on the second circular needle.

I have a feeling that the cable pattern stitch on the side of the strap that came from the picking up the cast-on is upside down or backwards or something. I’m just knitting to make it look right and not following the directions anymore, so if you try this, keep an eye out on that side.

Back and forth I’ll go, until the bag looks deep enough – probably about ten or twelve inches, guesstimating from the other pattern instructions. Then I’ll cast off one long side and divide the straps from the other long side. The remaining long side will become the flap and the straps will continue to make that big loop. I think I’ll knit the strap on one side and graft the strap at the top of the bag on the opposite side. And I suspect that the flap will need a cable, maybe one that starts on the back side. I’ll have to have a peek at some cable designs.

For the moment, I’m happily keeping track of that braided cable – you can see at the top right that I crossed one the wrong way. I picked that back and fixed it. Then, after I’d worked about two inches from the base, I was able to put it all on one circular needle and just work back and forth.