Last week, I discovered these older knitting patterns for 11.5″ fashion dolls available as PDFs from Mary Maxim. They were also on sale at the time, so I snapped them up. They include quite a number of garments each.
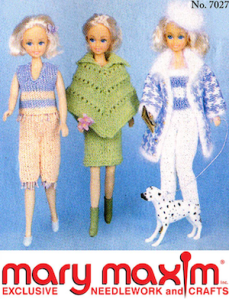
The first one is called Fashion Doll Wardrobe – you can find it on the Mary Maxim site right here.
It includes a (blue/white) houndstooth coat with pants, top and hat; a (green) poncho and dress; and a (peache/blue) capri set with top and short pants.
Apparently, the top and capris both have a beaded fringe at the hem, although it’s tough to see in the picture. The whole thing looks like an old photocopy. 🙂

The second one is also called Fashion Doll Wardrobe – the pattern samples are all knit in red and white.
It includes a “skating outfit” with sweater, skirt and headband; an “aran outfit” with sweater and skirt; a “casual outfit” with sweater and pants (I think that’s the top middle one); an “office outfit” of dress and short jacket; and an “evening outfit” of a long skirt and sleeveless top.
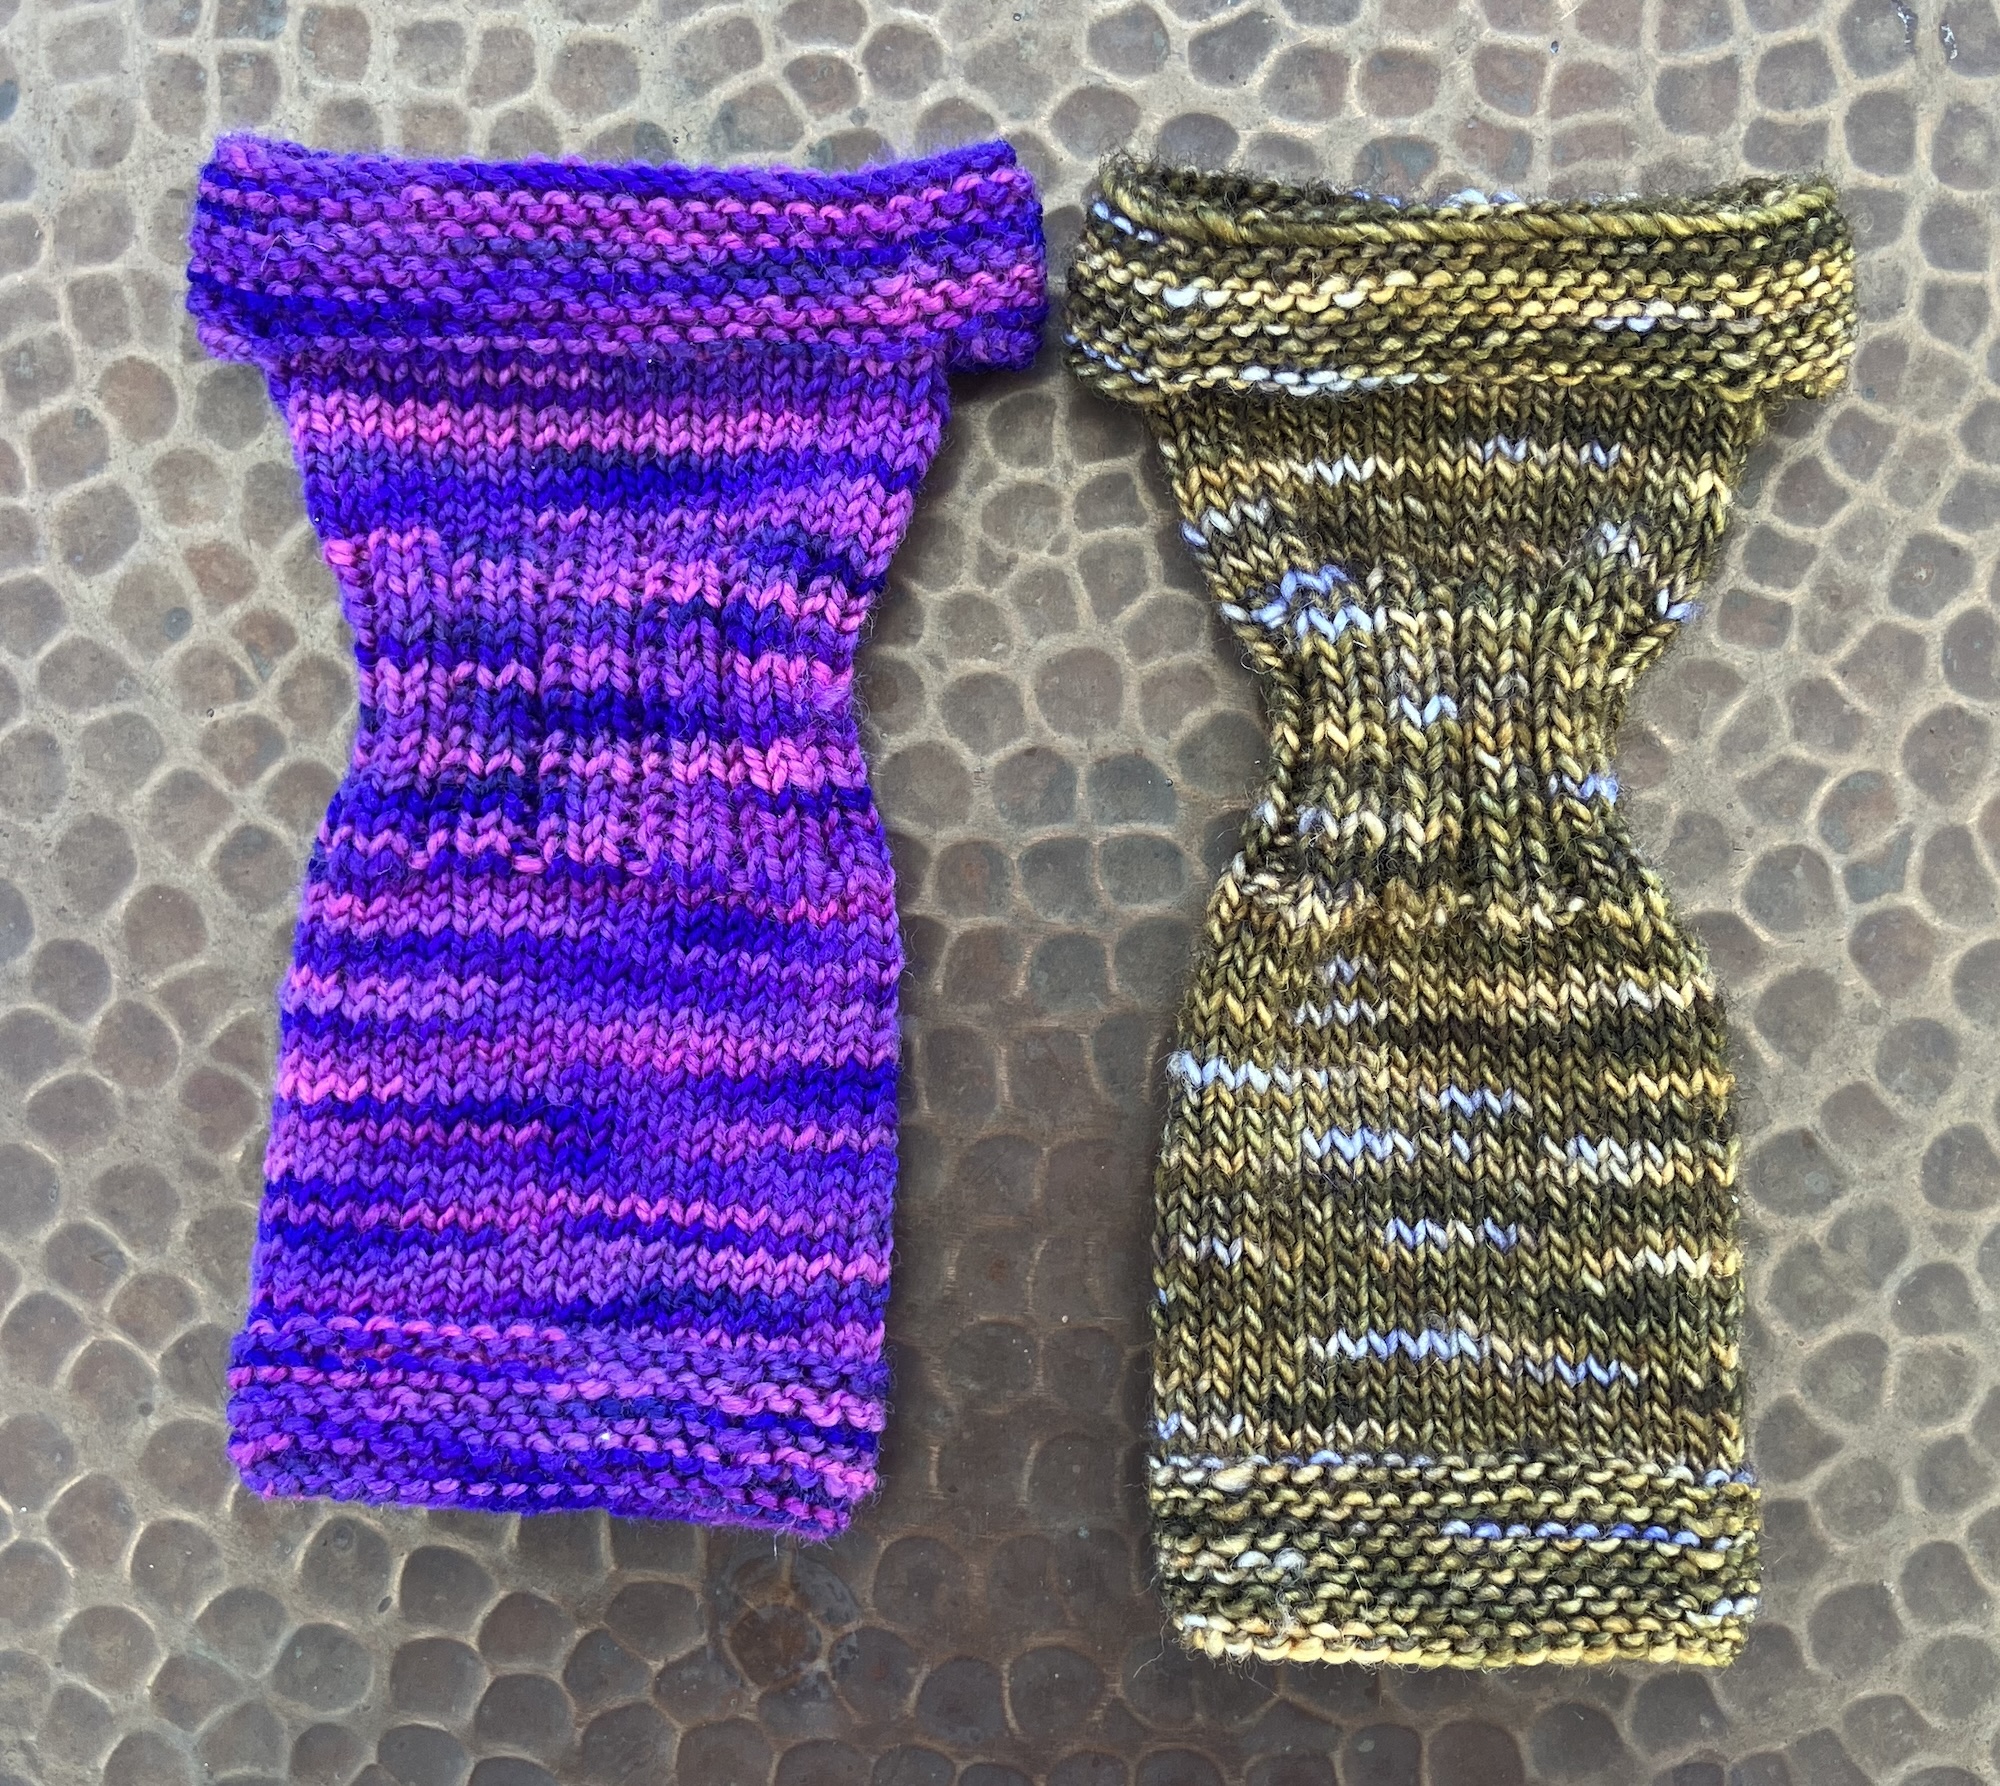
Again, the PDF pattern looks like a photocopy, but there’s a chart for the top sweater. It has a contrast star on the back.
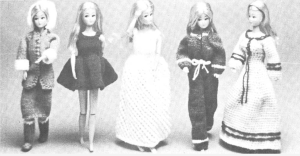
The third pattern has a black and white product image, which is very fuzzy. This one is called Teen Doll Pattern.
From left, the pattern includes a coat and boots, worn with a straight skirt; a skating dress with panties; a long dress with an eyelet pattern on the skirt; a jacket, pants and tank top; and finally, a crocheted long dress.

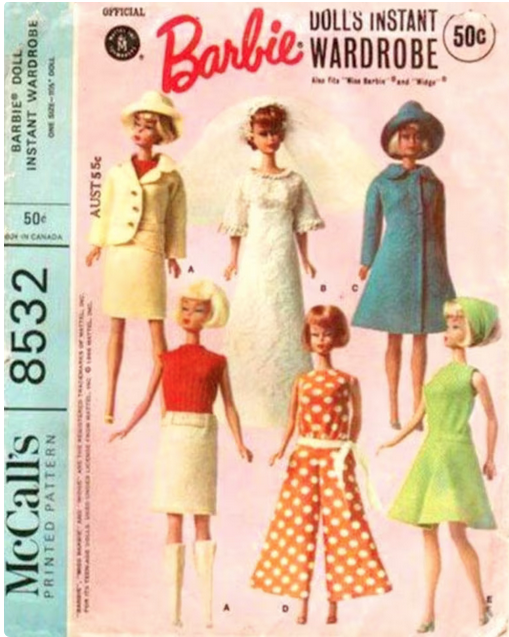
Finally, there’s a very vintage pattern, Teen Age Doll Pattern Book. The description says it includes 8 outfits. Ravelry lists the original publication date of this book as 1950 but that can’t be right. The doll on the right is Midge, who was introduced in 1963.
There is the 3-piece suit for B shown on the cover, and the 3-piece outfit for K shown on the cover. There are two dresses for B: one “off-shoulder” and one v-neck. Both have a hat and purse. There’s a v-neck sweater and hat for both B and K – these look like polo shirts to me. There’s a Bermuda shorts set for both B and K, including shorts, sweater, knee socks and hat. There’s a sweater, skirt and hat for B with Rudolph on the sweater front. (That’s what it says. I don’t see it, but maybe it will be more clear in real life.) There’s a coat, hat and purse for B with fur trim which is very pretty. Then there are “ski outfits” for both B and K, with sweater, pants, mittens, socks and hat – knit in a variegated yarn, they look a bit like pjs. 🙂 I count more than 8 outfits in total, so there’s a lot of knitting in this little book.
All of the knits call for either fingering weight yarn on 2.75mm needles, or DK/sport yarn on 3mm needles. Sounds big to me, but I’ll check it out.

Ravelry shows a book (Mary Maxim, Teen Age Dolls, Vol 2: Mary Maxim Exclusive Knitted Sportswear for 9″ to 11½” Teen Age Dolls, Vol 2) which has classic Mary Maxim sweaters for Barbie, Ken and Skipper. Those would be fun to knit.
I found a print copy of this one on Etsy and have ordered it. I figured I’d print it out since the sweaters are charted, so a print copy made sense. I’ll tell you more about that one once I dig in.