
I’ve been making a lot of book covers lately. Although I initially learned how to make them from a blog post (one with many video ads. Ugh.) I’ve figured out a few tips and tricks. Having this post here is as much for you as for me, as I keep having to figure them out all over again. 🙂
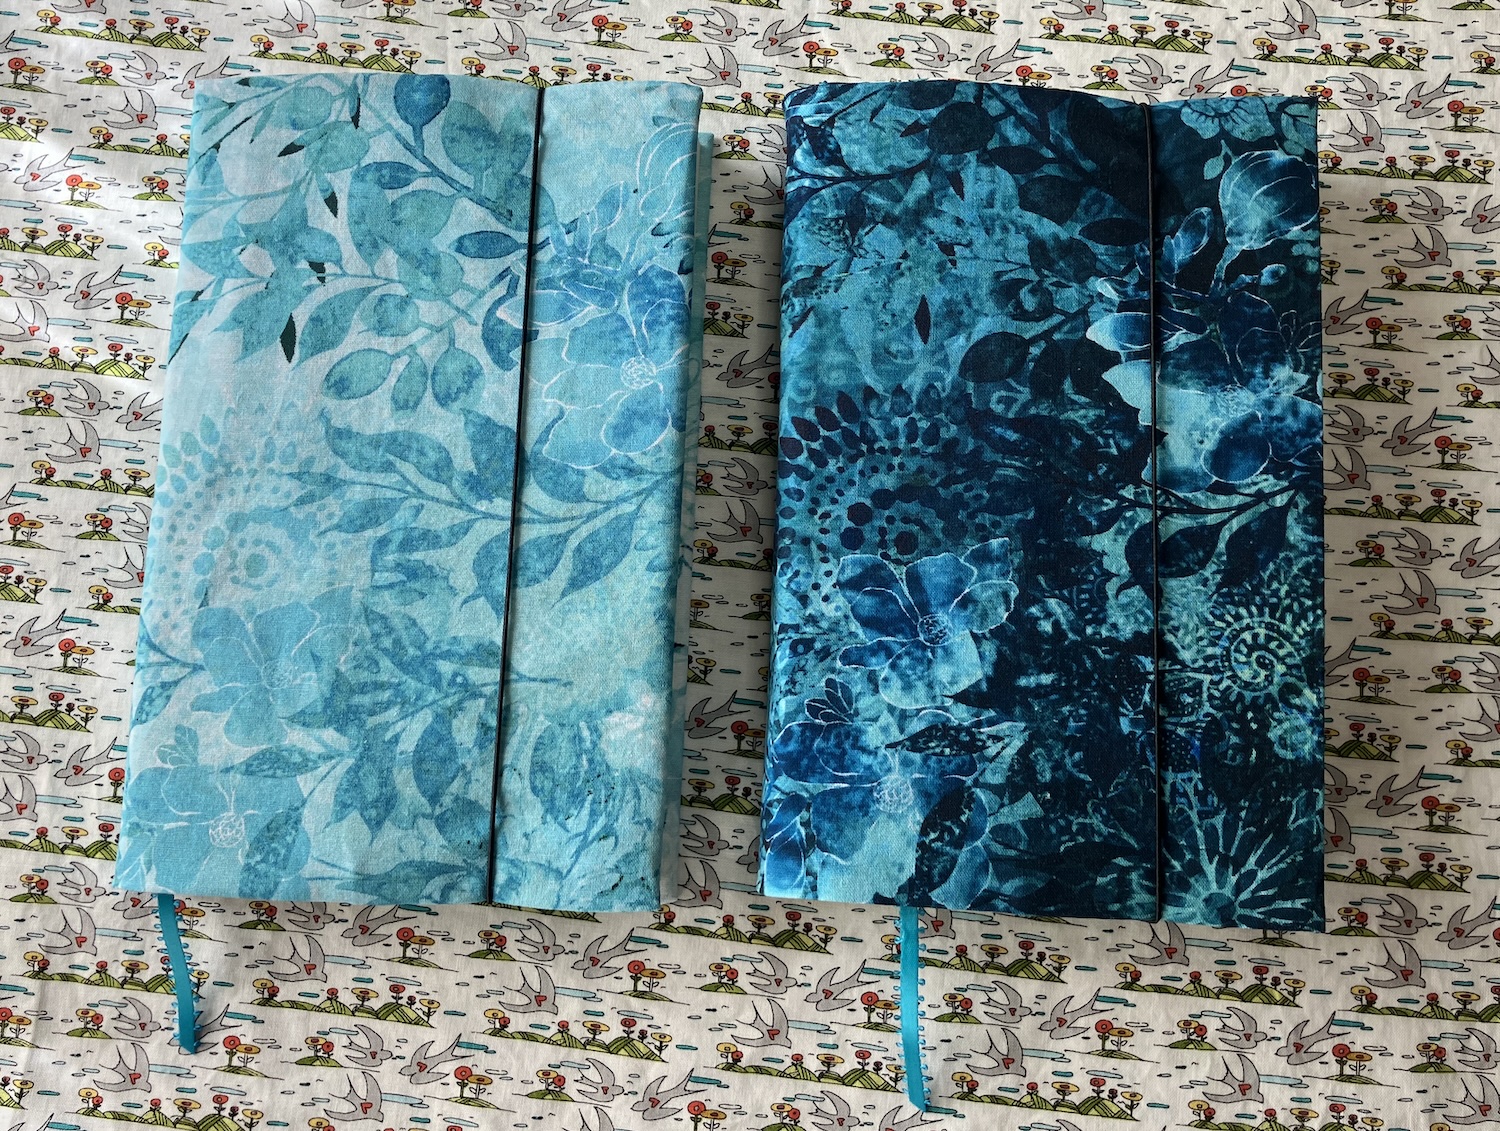
Here are the book covers I just made for a giveaway of my books at a reader conference:
And the one in the pictures below is for a reward tier in my most recent Kickstarter campaign.
First, assemble your materials. You’ll need two (cotton) fabrics that match or contrast, along with a length of ribbon and a length of elastic.
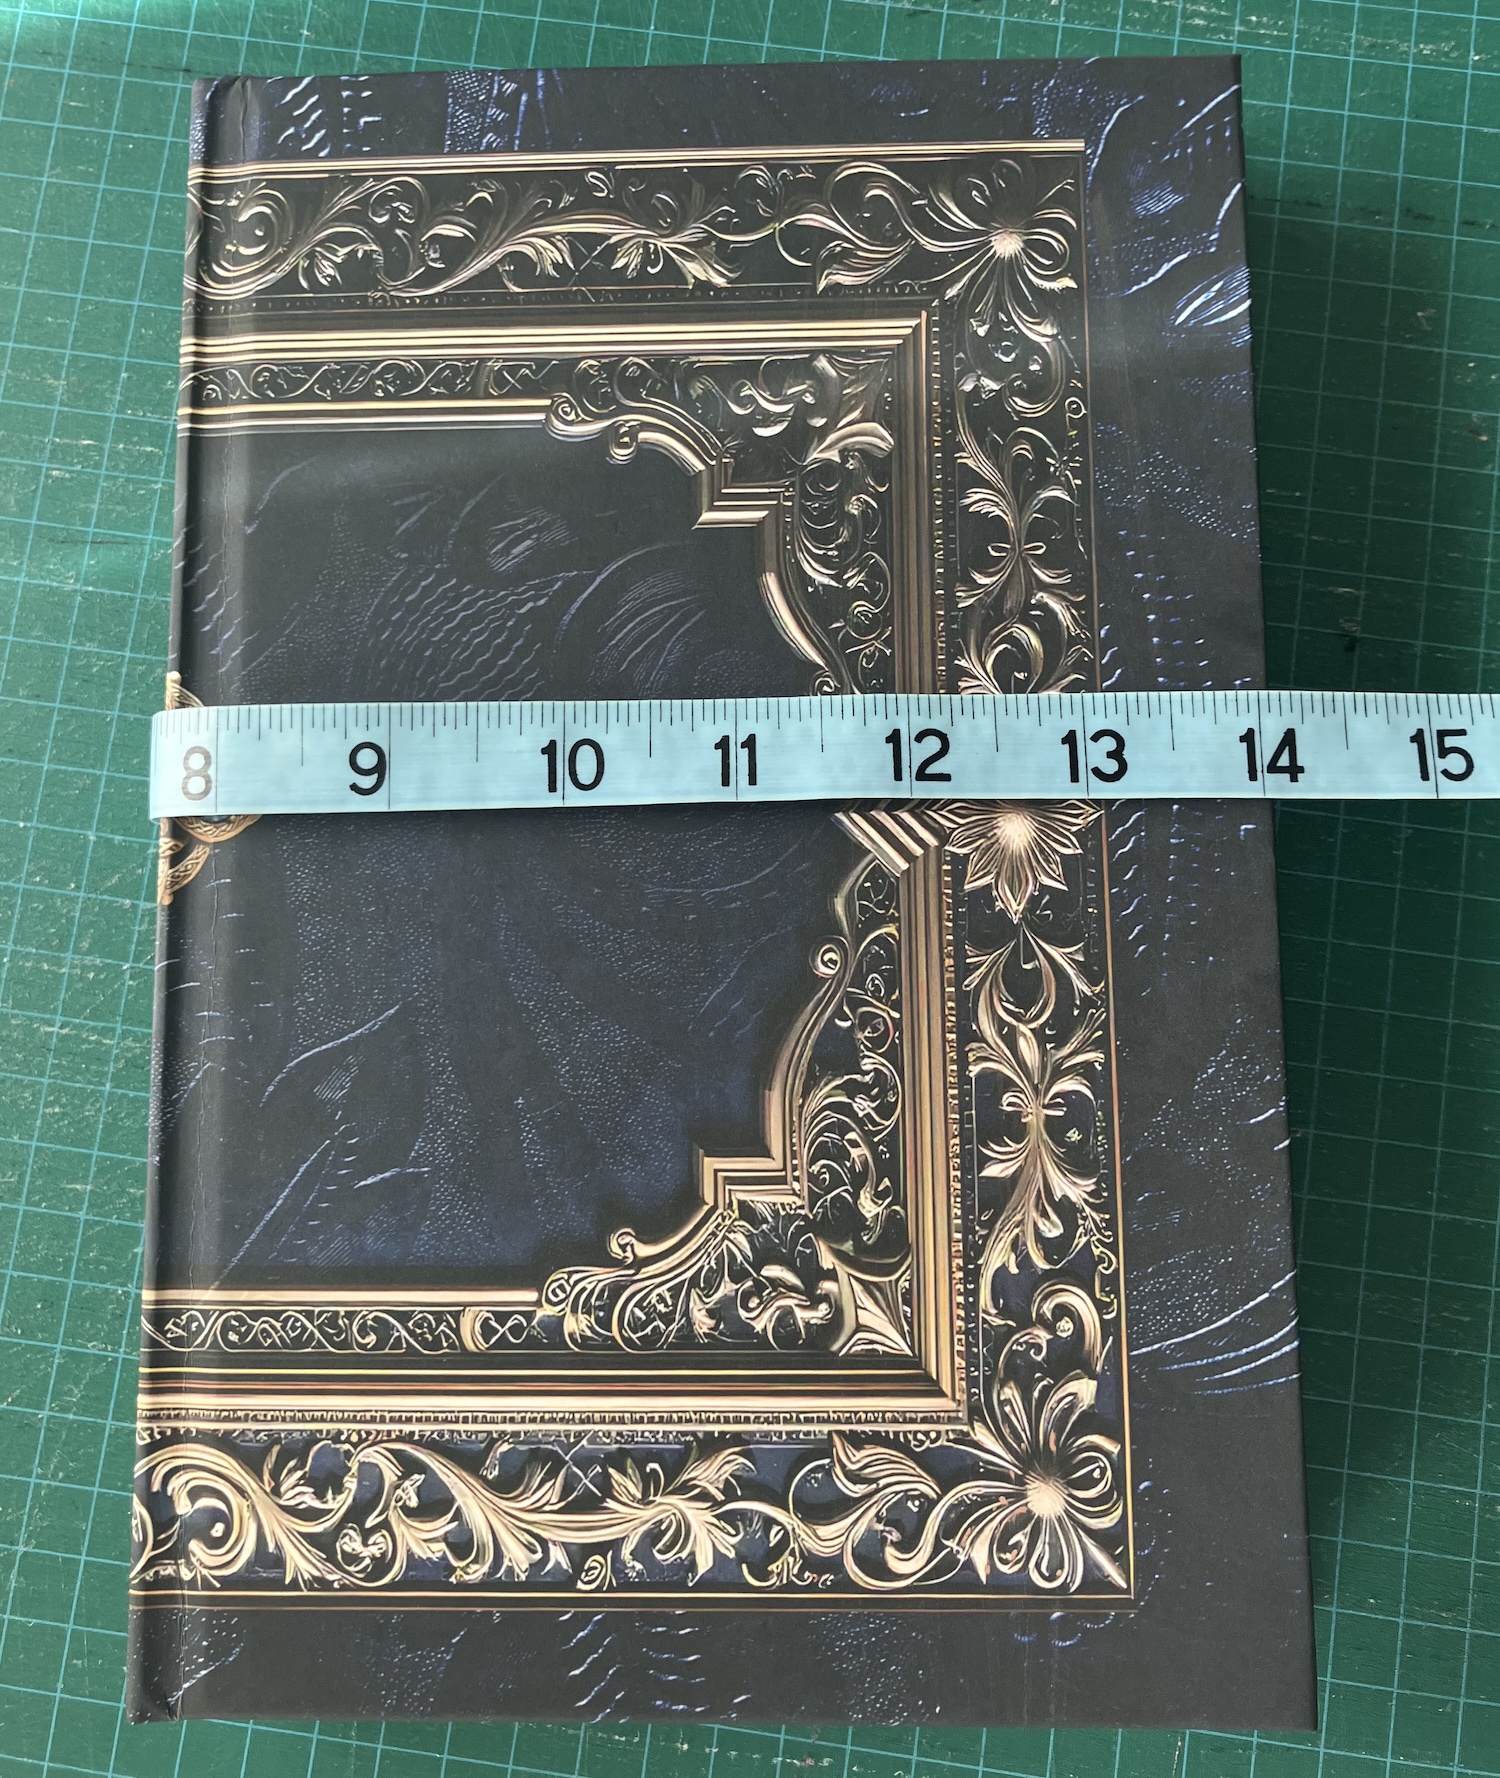
Then, measure your book. The height of the book is the actual height. The width is the width of the entire cover, from the front edge, across the spine, and around to the back edge.
In this case, the book is 9.5″ and the width is 14″.
For the height to cut, we need to add a seam allowance top and bottom. I use 3/8″ inch seam allowances on these, which is 10cm. Two of them (2 x 3/8″) is 3/4″. We also need to add .25 to .5″ for ease – since this is a hardcover and a bit thicker, we’ll add .5″ So, our cut height will be 9.5 + .75 + .5″ or 10.75″.
For the width, we need to add a 3″ flap at each end plus the two seam allowances. We’ll also add that half inch for ease. So, the cut width will be 14″ + 6″ + .75″ + .5″ which will be 21.25″
Since the chosen fabric is 45″ wide, I can cut two from the width – each length of 11″ will give me two sides for a book cover. To make six book covers, I’ll need 33″ or so of two different 45″ wide fabrics.
I can also cut the elastic – each cover will need a 12″ piece – and the ribbon bookmark – each cover will need a 15″ piece.
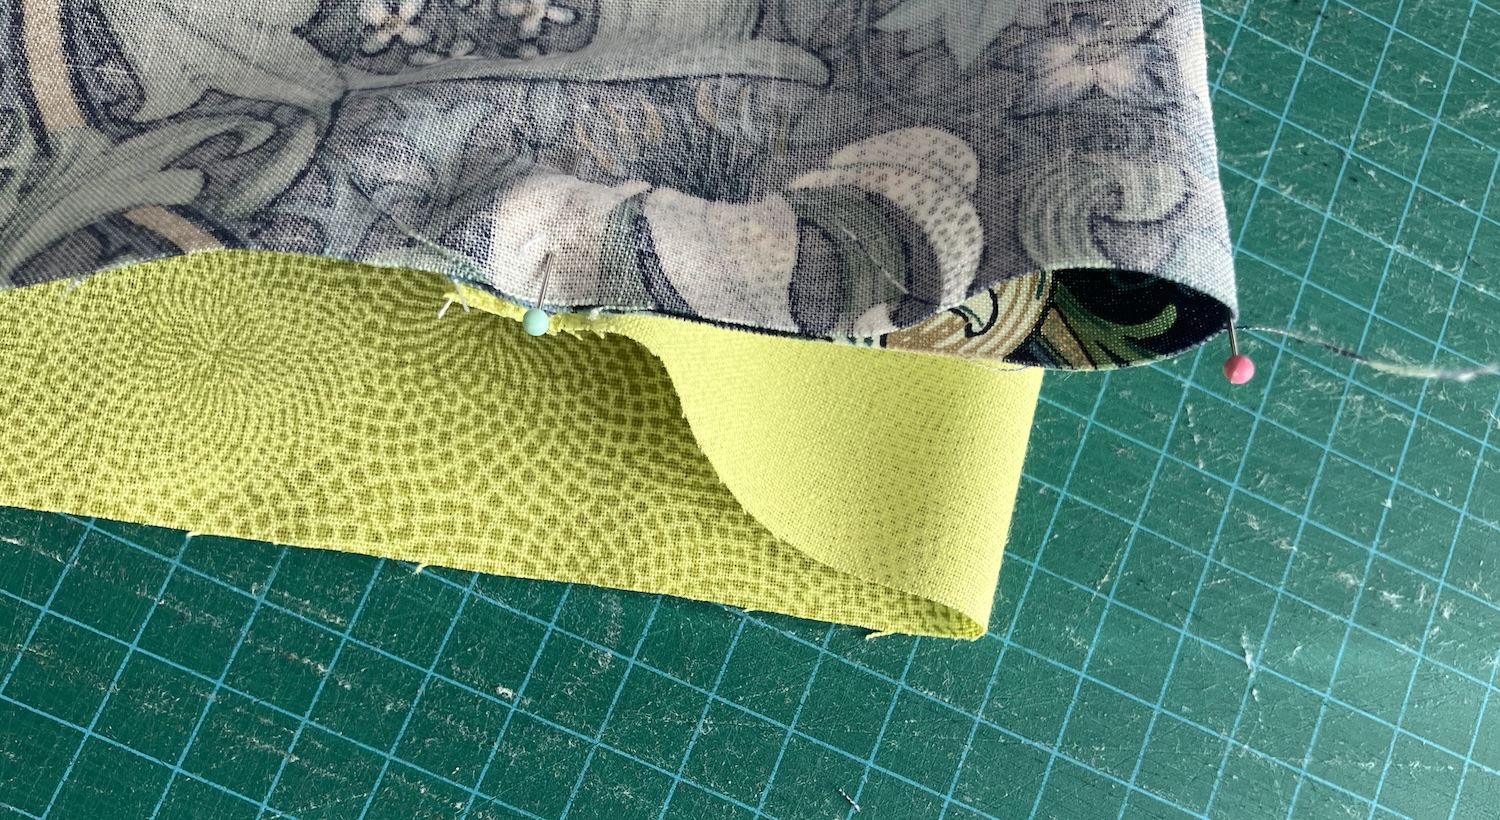
The first seams to sew are the ends of the flaps. For the front edge, sew the entire seam. For the back, leave a gap in the middle for turning.
If it matters to you which way is up, then sew the front flap seam first. It’s the complete one so once it’s done, it becomes a reference. In this case, I wanted those pale tulips to grow upward, so I pinned and sewed the front flap seam with them properly oriented. The seam will be on the right and the pin is at the top.

Turn and press, then topstitch where you’ve sewn (leaving the back gap open.) I placed the rotary cutter to show the open back seam. Look closely to see that I’ve only topstitched part of that back flap edge.

The top and bottom are sewn next, but I find it easier to position the elastic and ribbon first. With the right side facing, mark the 3″ for each book flap with a pin on the top edge of the top fabric. Pin the ribbon at the top edge near the middle. If your elastic is round and hard to pin, put a bit of tape on each end so you can pin it in place. Pin it to the top fabric 2″ inside the pin for the back flap. Mark the flaps with pins on the bottom edge of the top fabric, then pin the elastic in place, as well.

Remember that the pins are only in the top (blue) fabric.
Turn the book cover so it is right sides together. This is the tricky bit. The flaps are folded in like an accordian, but it all comes out right in the end. At one end, pinch the fabric right sides together at the pin marking the flap. Pin the seam allowance in place, folding it inside the book cover, then fold the lining so that it aligns with the pin at the edge.
Repeat for the other three corners.
This is inside the front flap with the edges pinned in place. The seam ripper is just holding the flap open so you can see the accordion fold. On the back flap, there’s an opening in the seam so you can turn the book cover right-side out.

Sew right across the top, then right across the bottom.
Reach through the gap in the back flap and turn the book cover right side out. Since the cover is reversible, you can choose which fabric is on the outside. (Invariably, I get the fabric planned for the lining on the outside and have to think about it for a minute.) Push out those corners so that they’re nice crisp points.
Pin the opening of the back flap shut and top stitch it closed.


Press, press, press.
Insert the book, place the bookmark in the book, and wrap the elastic around the outside to hold the book closed. You can trim the ribbon bookmark or even add a charm to it, if you choose.
And there you go!
