Fairy Fingers

This is a pattern from Fleece Artist to make fingerless gloves called Fairy Fingers. Fairy fingers is also an old term for foxglove flowers. As seems to be happening a lot lately, I made my first pair from Koigu KPPPM. (They were done last week, but a gift, so I couldn’t show you before the recipient saw them!)

Here they are:

Fairy Fingers knit by Deborah Cooke in Koigu KPPPM

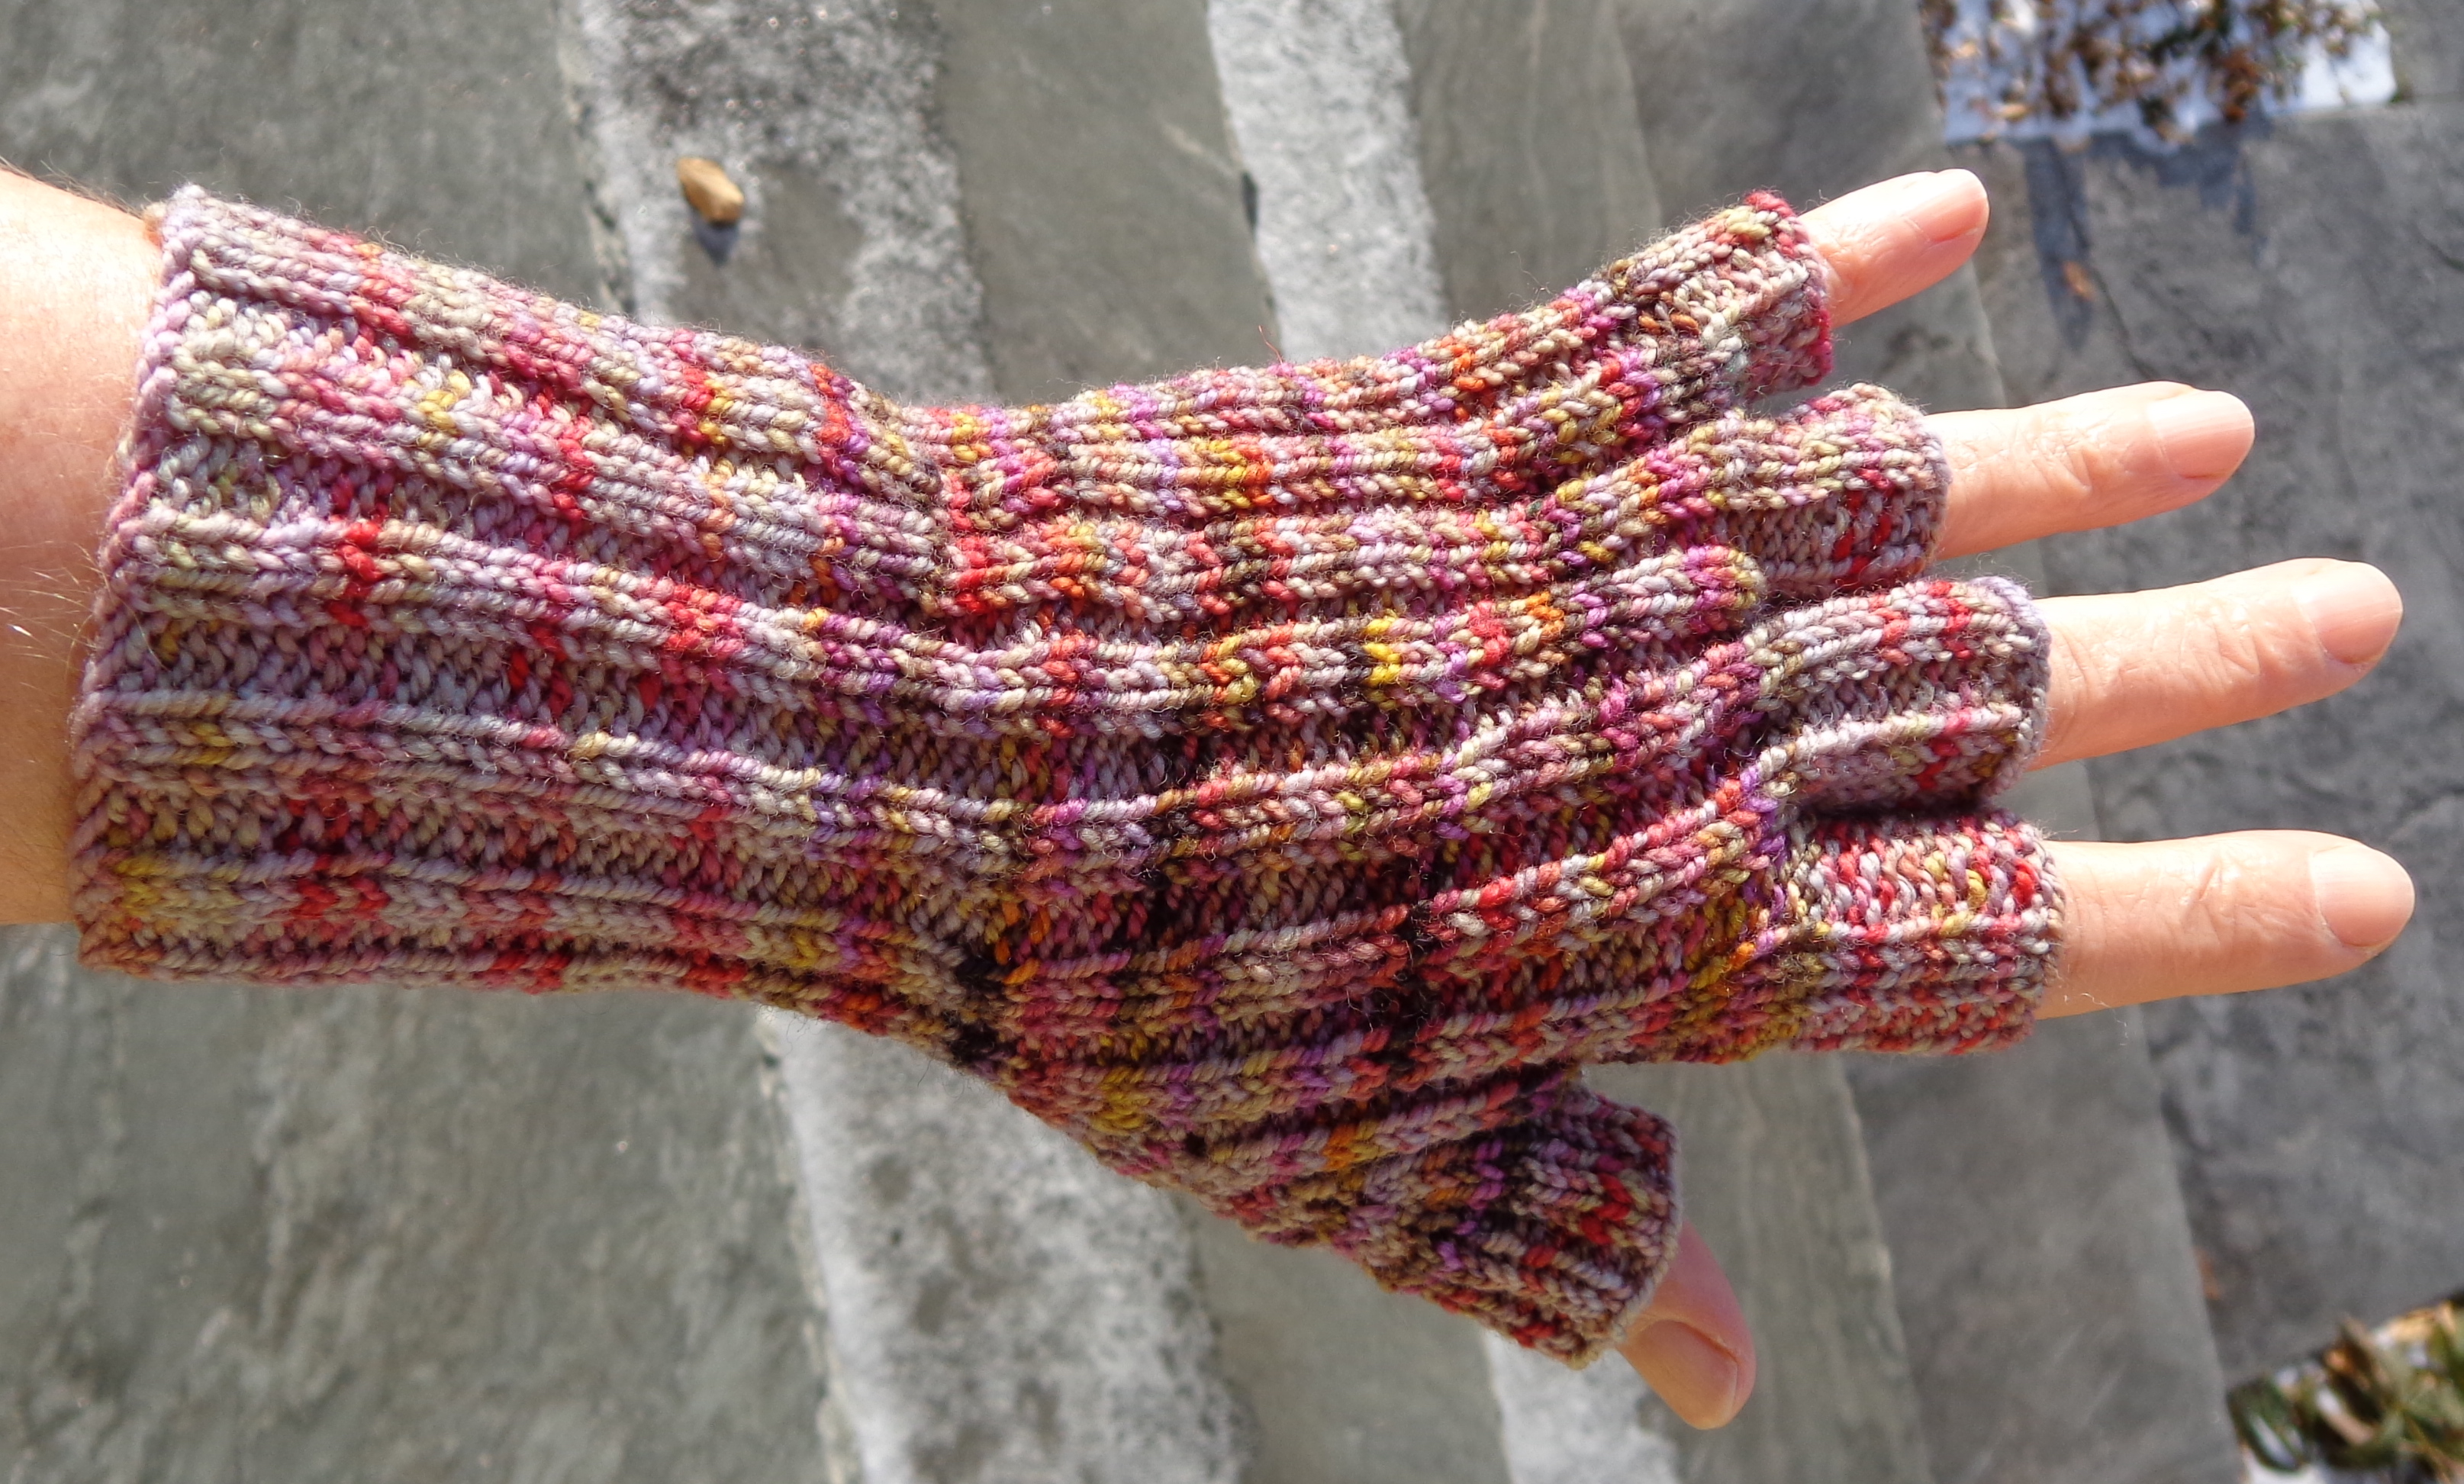
This is the colourway that made a swirl in my teal Navelli so was frogged and returned to the stash as a result. I wasn’t sure what it would do in these gloves and was pleasantly surprised by the result. The colourway is P528. Here’s the other side of them:

Fairy Fingers knit by Deborah Cooke in Koigu KPPPM

I did only 12 repeats of the pattern on the cuff instead of the 15 specified.

The pattern calls for 2.75mm needles but I thought the cuff looked too loose, so I went down to 2.5mm needles. I really like the fabric that resulted, but this might make the gloves too small for some people. They fit me perfectly 🙂 which is inevitable since they were a gift.

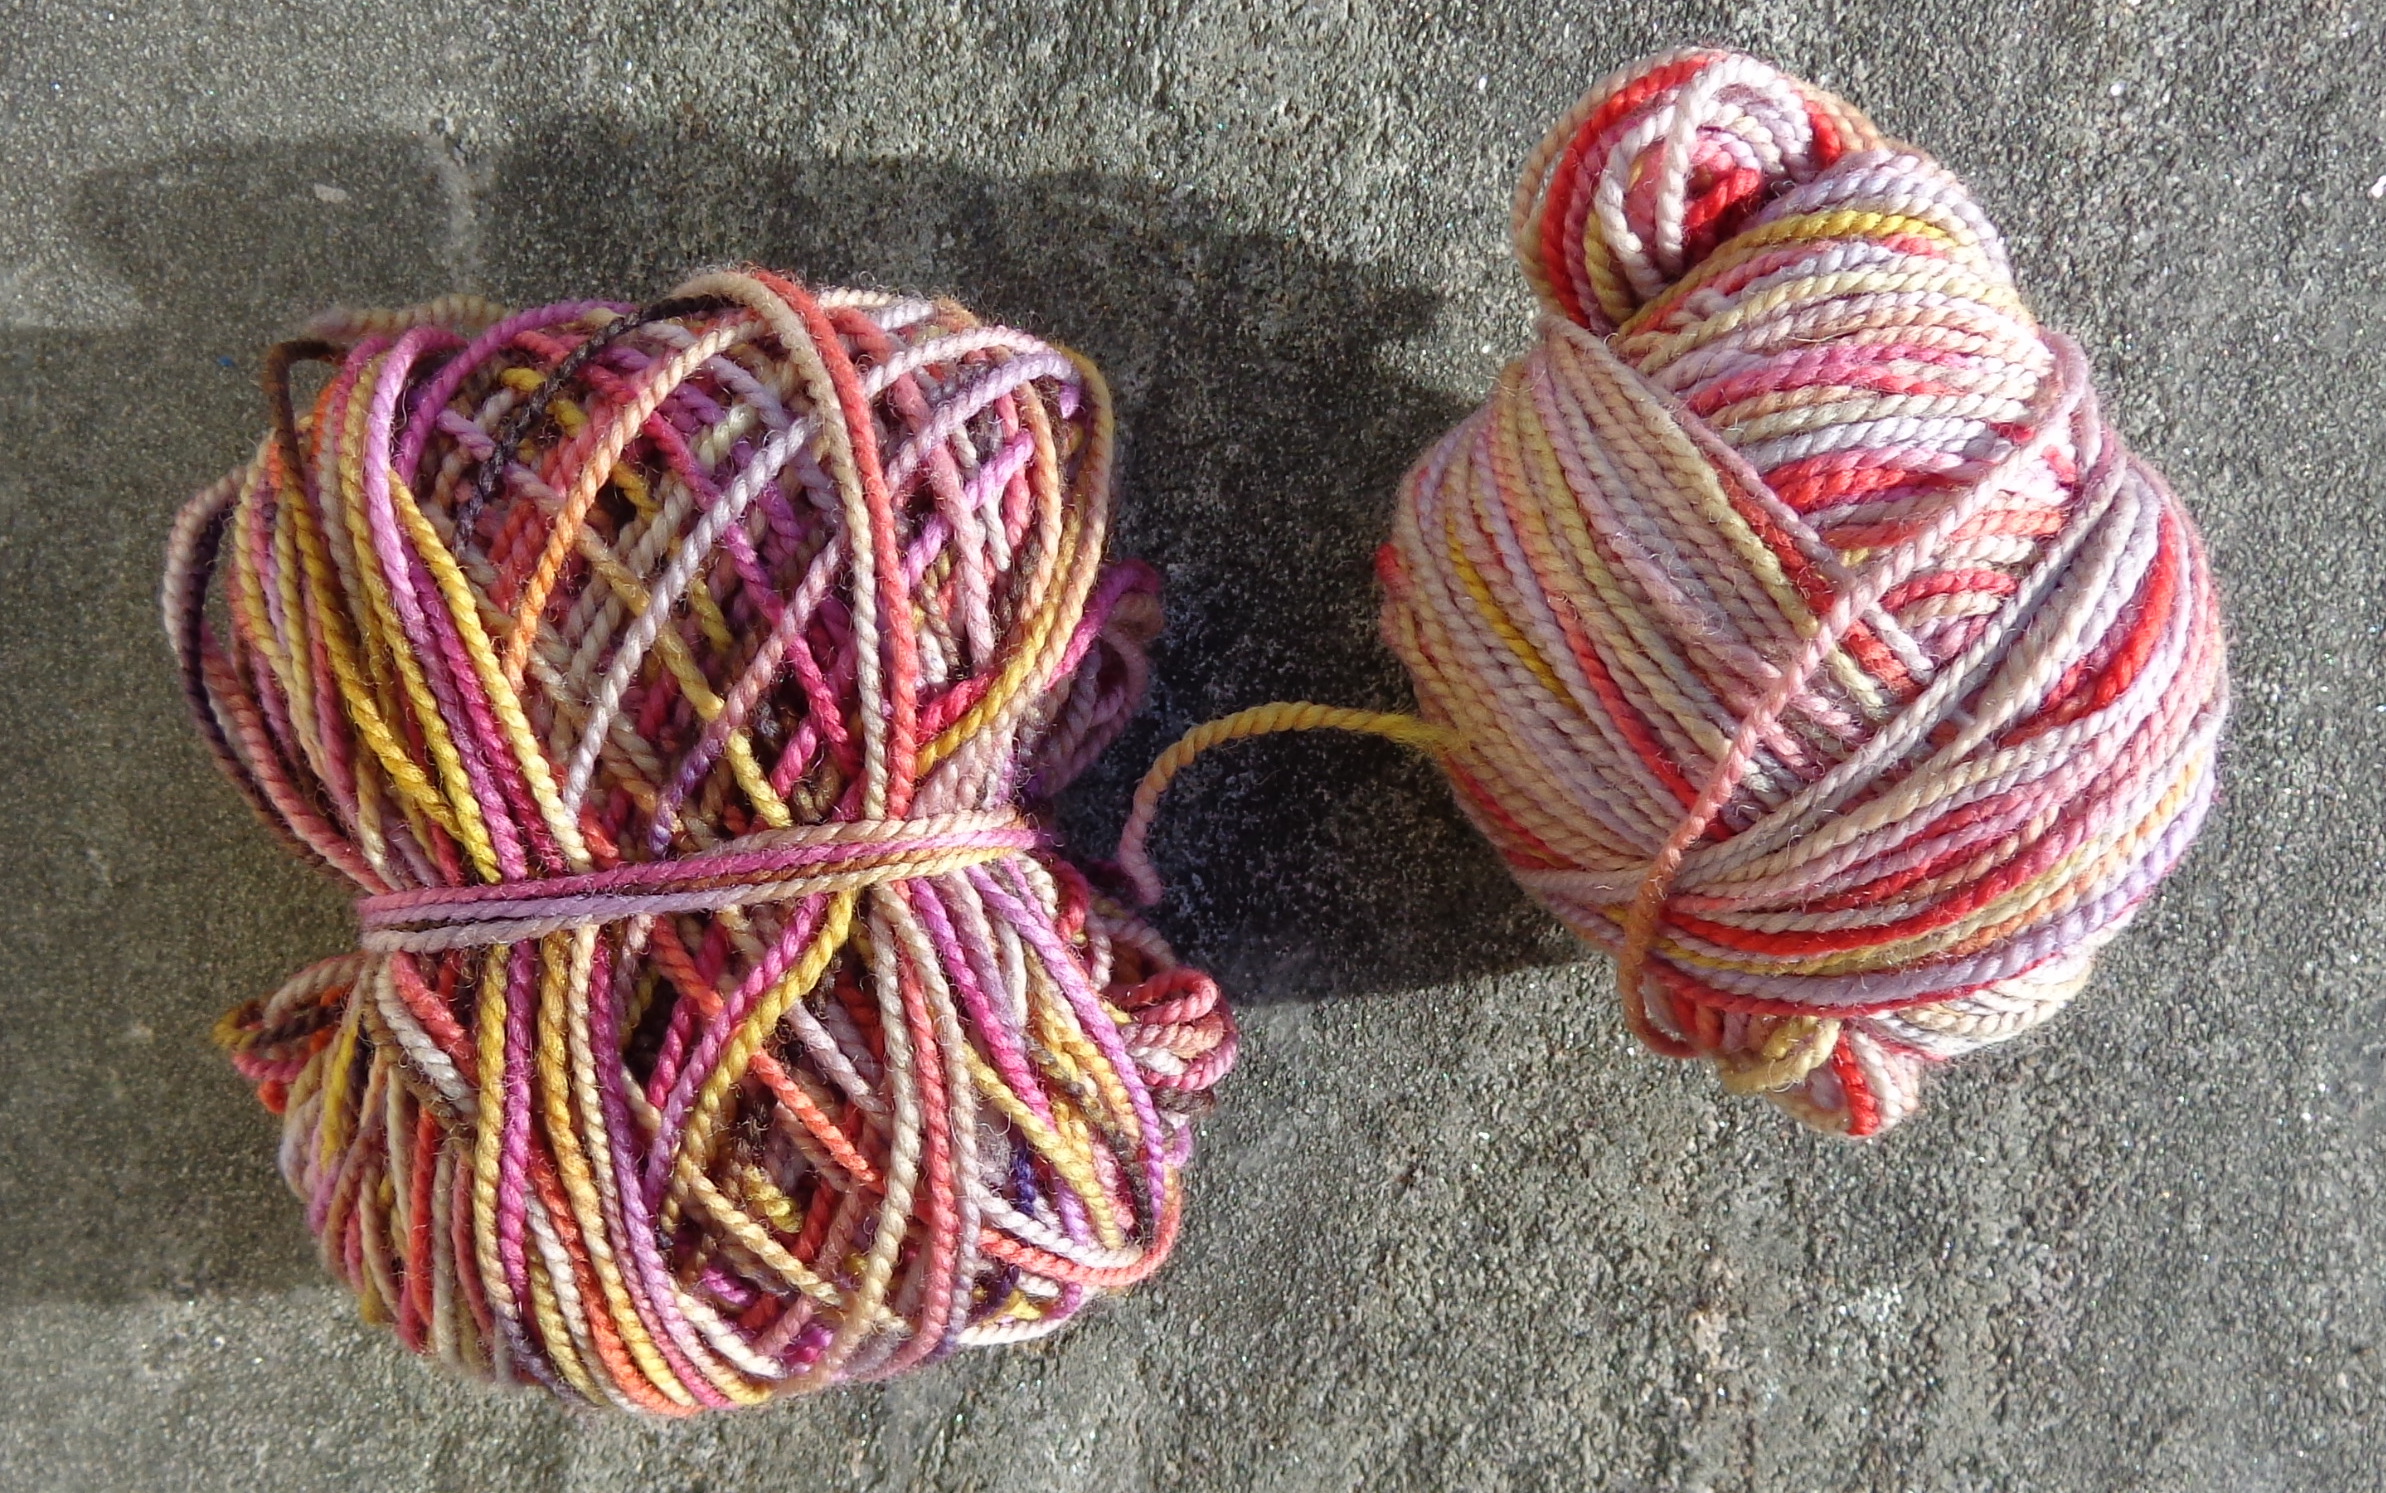
I did end up with a pair for myself, though. When I cast on the second glove from a different skein of Koigu, it didn’t look like it would match the first one. I knit one with 15 repeats in the cuff then and made a second pair, which I kept. You can see that glove in the middle here – doesn’t it look a bit lighter than the outside two?

Fairy Fingers knit by Deborah Cooke in Koigu KPPPM

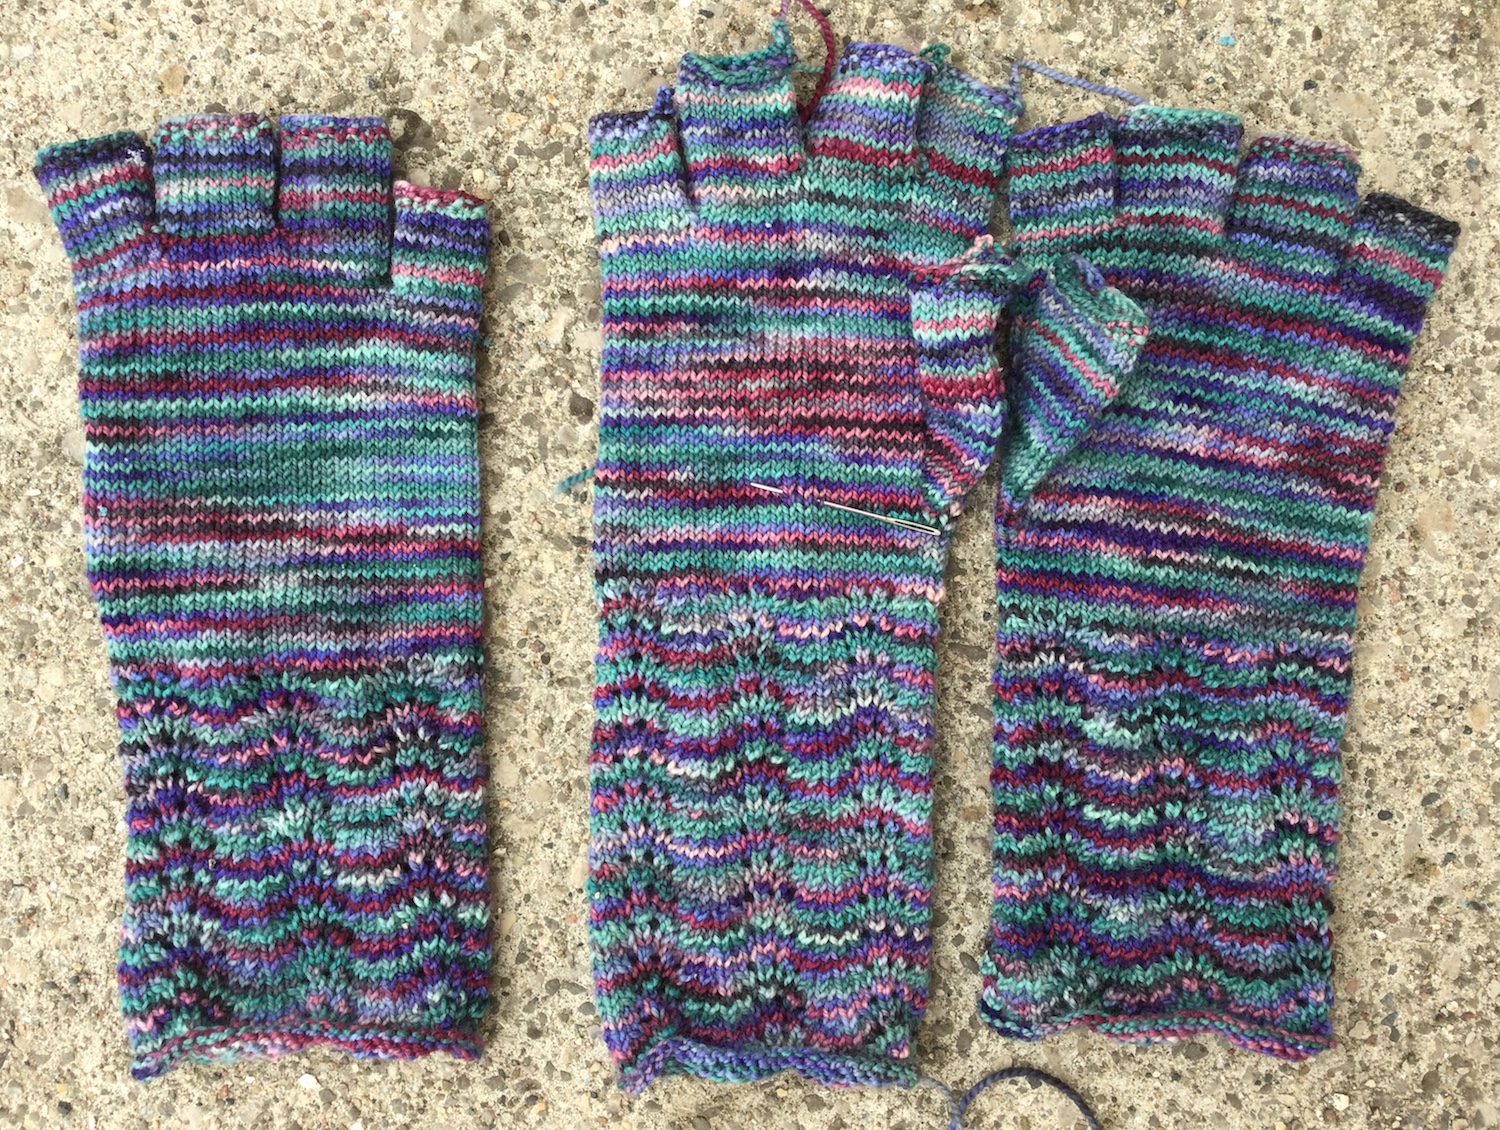
Instead of using a second skein, I went back and cast on the second of the shorter gloves from the leftovers of the first skein, to make sure it matched. Koigu comes in skeins of 50g and the first short glove used 28g. For the second glove, I got all of it out of the remainder of the skein except the fingers – if there’s a colour difference, you can’t see it.

This pattern also launched me on a hunt for Fleece Artist yarn. I love their colourways. There’s some new Fleece Artist yarn on its way to me, which I’ll show you once it’s knitted up.

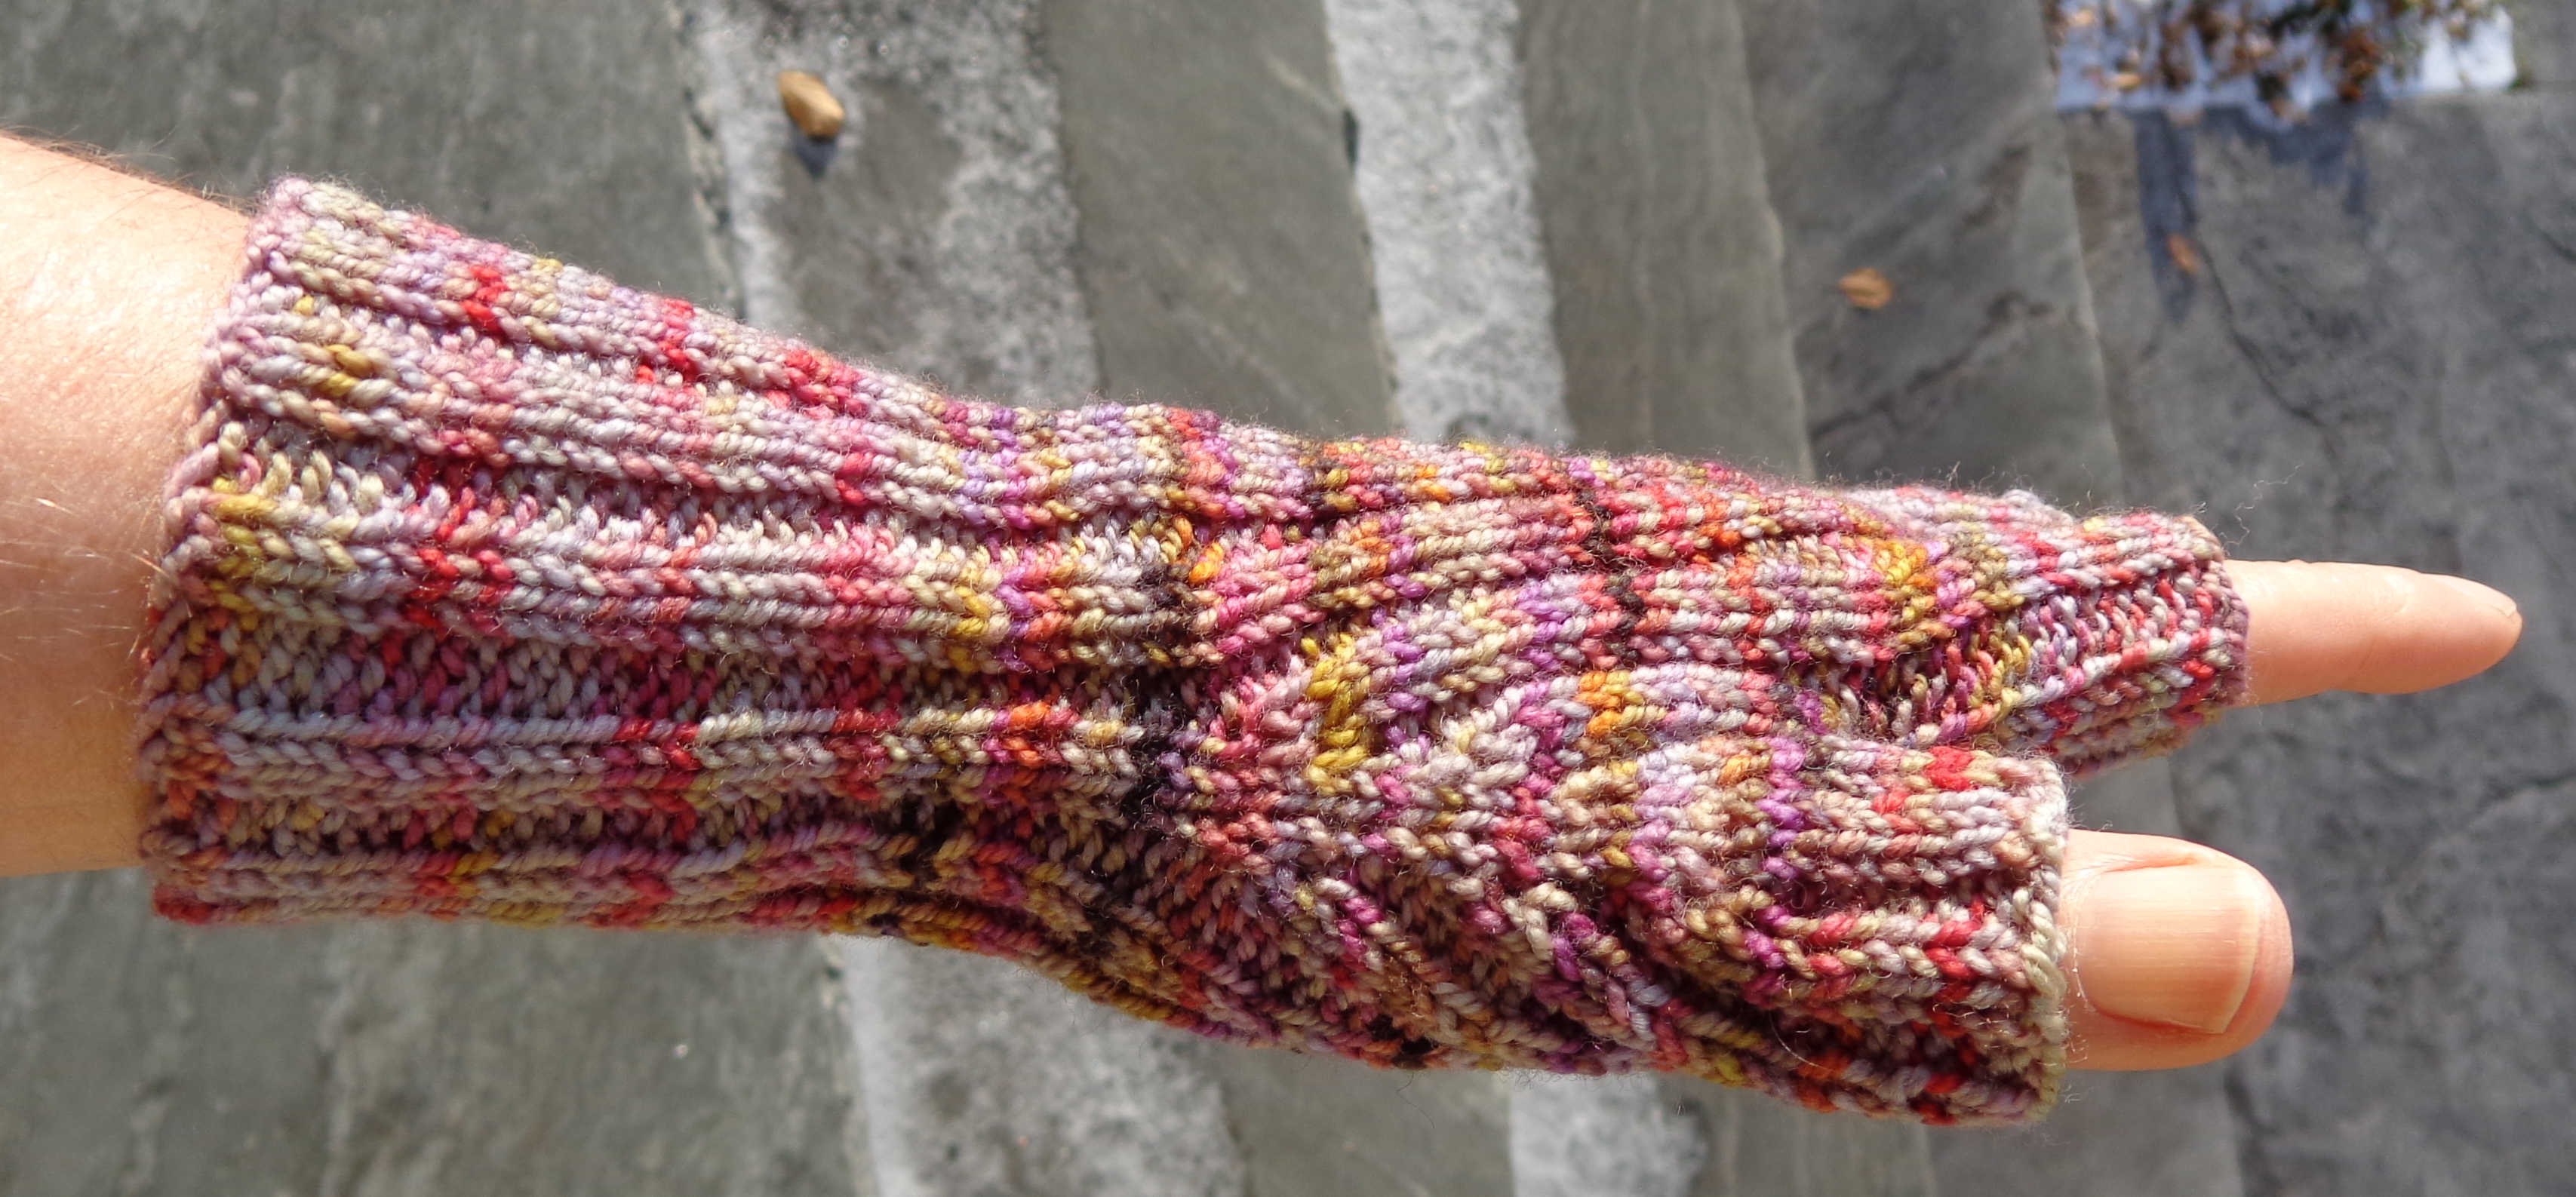
Just editing this to show the other pair, the longer ones that are for me.

Fairy Fingers knit by Deborah Cooke in Koigu KPPPM

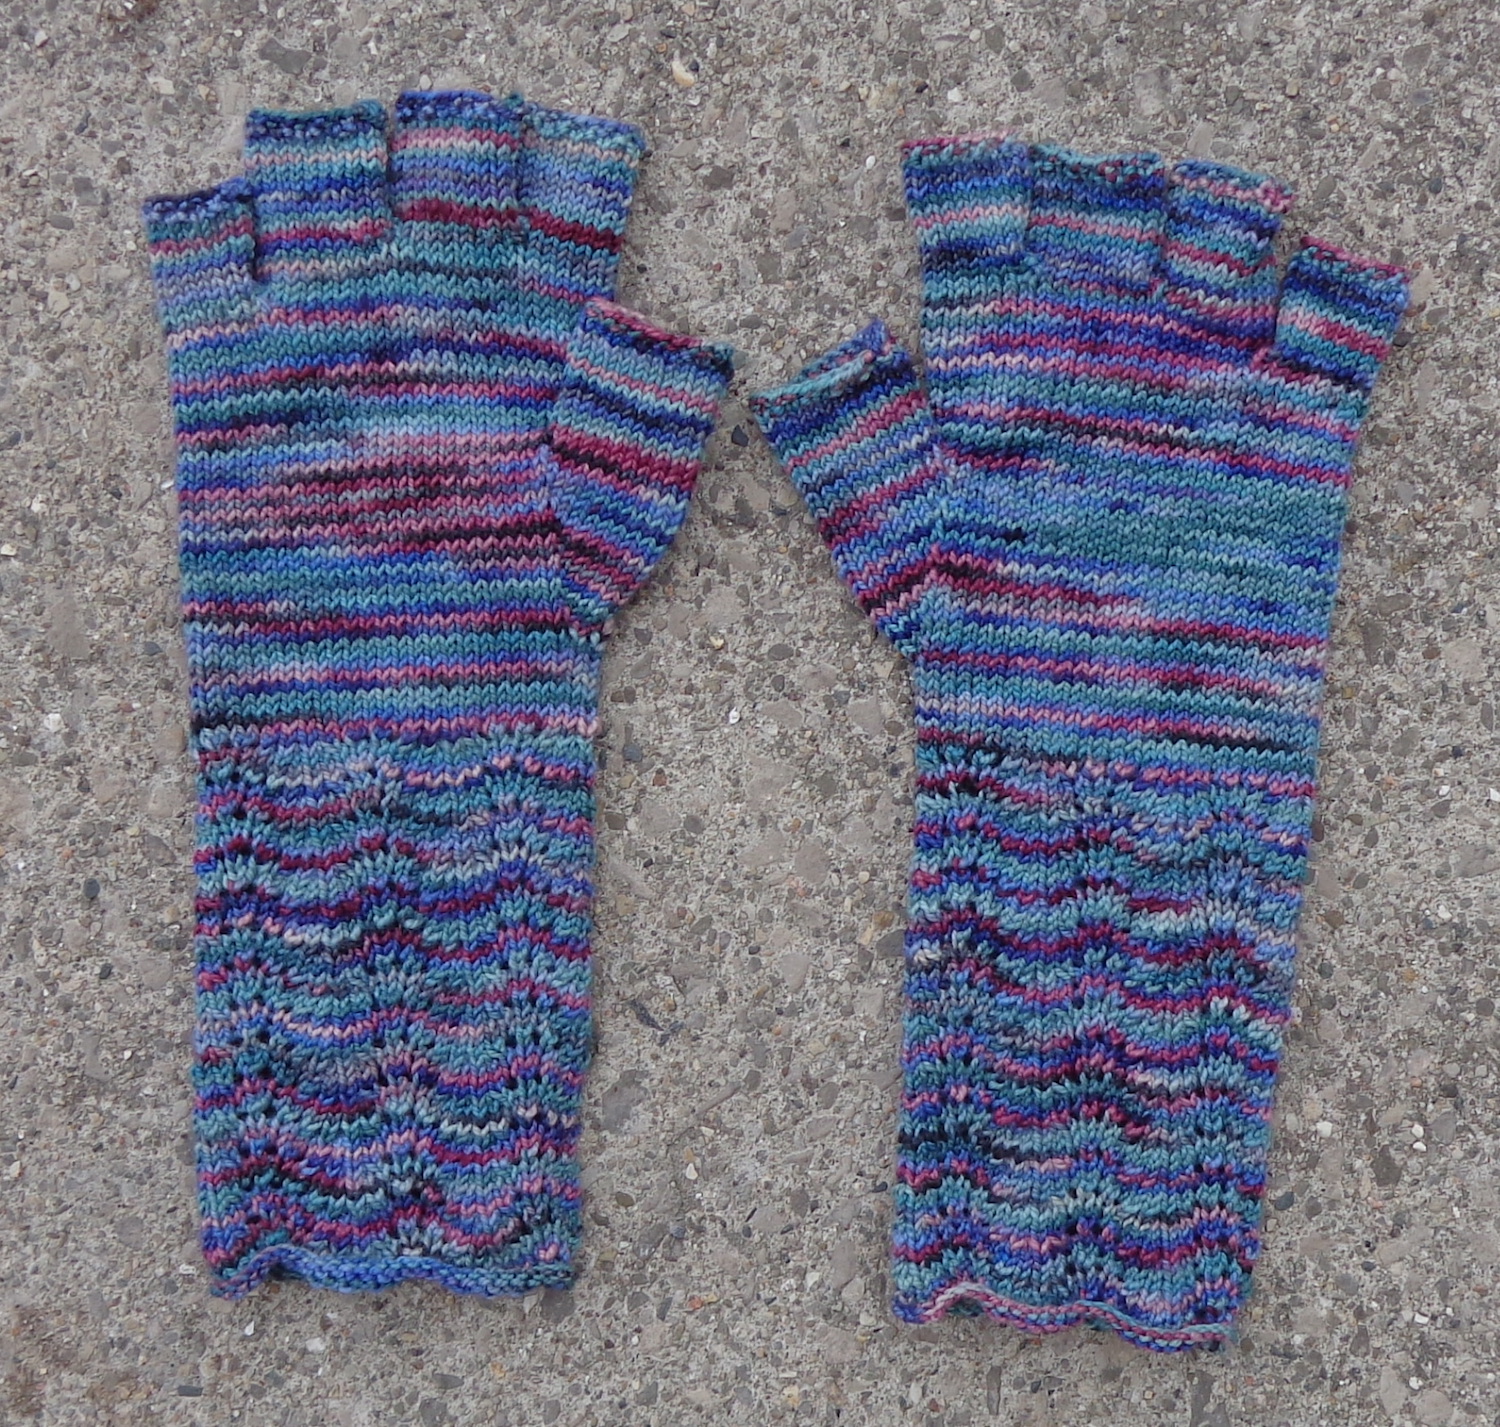
I’m also noticing the pooling on the hand with this pair – the other pair has it, too, but I’m taking a better look now. 🙂 If I flip one over, you can see that it worked out the same way on both, just it ends upon on the back of one and the palm of the other.

Fairy Fingers knit by Deborah Cooke in Koigu KPPPM

I did do the fussy-knitting thing of casting on at the same point in the colour gradation – I usually do this with a self-striping yarn by choosing a point (like where the burgundy changes to the turquoise) and making my cast-on knot there for both mitts (or socks). That way, the striping will unfurl the same way on both. A second fussy-knitting fix would have been to knit an extra half row on the hand before starting the thumb gusset, moving it to the other side so that the two palms would be the same (and the two backs). They wouldn’t mirror but they’d match.

Maybe next time. 🙂

Fingerless Gloves in Sock Yarn Free Pattern

I work in Mr. Math’s office when I format book interiors and upload content to the retail portals. It’s colder in there than in my office, and my hands get chilled. Recently, I decided to solve that. I dove into the stash and found two colours of Koigu, then knit myself a pair of fingerless gloves.Fingerless Gloves by Deborah Cooke knit in Koigu KPPPM by Deborah Cooke

The two colourways coordinate so well that it’s hard to see that there are two colours. The second one had that darker aubergine in it and a brighter chartreuse.

I knit the cuff in the first colour, striped them through the hand, then did the fingers in the first colour again. This is a pattern that I just made up as I went. The directions are below, mostly in case I need them again to knit another pair. 🙂

I do like the thumb gusset.Fingerless Gloves by Deborah Cooke knit in Koigu KPPPM by Deborah Cooke

• Wool: 55g of sock yarn in one colour, or 30g colour A and 25g colour B for stripes
• 2.75mm needles. (I used DPN’s but a pair of short circulars would also work)
• markers
• stitch holders

• Cast on 60 stitches in A and join in round. PM at beginning of round.
• Work 2/2 rib for 24 rows.
This is the cuff.
• For the hand, if making stripes, work 6 rows of B, 2 rows of A, 6 rows B. If not making stripes, work 14 rows.

Begin thumb gusset, continuing in stripe pattern:
• work to first knit ridge. M1 before the knit ridge, PM, K2, M1, then finish the round. Work 1 round, knitting the new stitches.
You now have a 4-stitch knit ridge. The outside stitches (which you just made) will be the outer boundary of the gusset and new stitches will be made on either side of that same central knit ridge. The marker will stay before the two central knit stitches and indicates the place for the first increase.

• Next row,  work to the 4-stitch knit ridge. K1, M1, keep marker here, K2, M1, K1, continue to end of round. Work one row, knitting the new stitches.

• On R13, work to the 6-stitch knit ridge. K1, M1, K1, keep marker here, K2, M1, K2, continue to end of round. Work one row, purling the new stitches.

• Continue, increasing 1 stitch before and 1 stitch after the central 2 knit stitches to 84 stitches. You will have increased twelve times for a total of 24 new stitches, and the 2/2 rib will be complete all the way around.

• Keep the 26 stitches of the thumb gusset on your needles and place the stitches for the rest of the hand on a stitch holder. Work once around in A in 2/2 rib, making two new stitches in the gap that will be the base of the thumb. On the second row, purl these stitches. Work 3 more rows and cast off thumb.

• Put the remaining stitches back on your needles. Work 1 round, picking up two stitches at the base of the thumb from those two cast-on stitches. They’ll be knit stitches on the next round. Work 6 more rounds in B, finishing the last stripe, and break B.

• For index finger, put 16 stitches on your needles (8 on either side of the thumb), make two stitches on the side opposite the thumb, join in round and work 8R in A, then cast off.

• For middle finger, put the next 8 stitches from the back of the glove on the needles, using A, pick up two stitches from the two created on the side of the index finger, knit the next 8 stitches from the front of the glove, make two more stitches in the space that will be between the middle and the ring finger, join in round. Work 8 rows, then cast off.

• For the ring finger, repeat, picking up 8 stitches from the front and back, and two on each side.

• For the small finger, work on the remaining 12 stitches, picking up two between the small finger and ring finger. You might want to only knit 6 rows before casting off.

Sew in the ends and be warm!

Fightin’ Words

These were too much fun – I love knitting them and I’m hoping the recipient loves wearing them. In fact, I’ve cast on another pair.

The pattern for these fingerless gloves is Fightin’ Words (that’s a Ravelry link) and I knit them in Knitpicks Palette. (Every time I look at this yarn on the KP site, I’m tempted by their Palette Sampler, which includes one ball each of 150 different colours. What fun!) The pattern was available at a special price for December as part of an indie-designer knit-a-long.Fightin' Words by Annie Watts knit in KnitPicks Palette by Deborah CookeWhat do you think?