
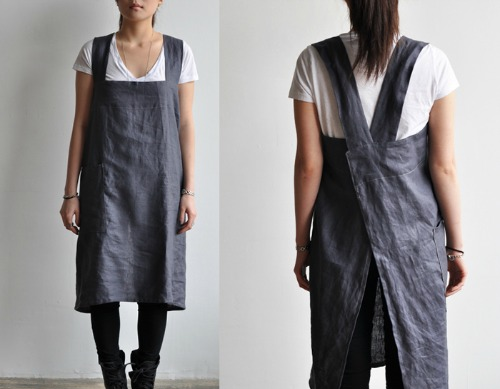
Everyone’s linen apron journey seems to start in the same place, with this image:
It’s a picture from Pinterest of a Japanese-inspired linen apron, once for sale but no longer available. It looks so simple! It looks so easy to make.
But, um, no.
In my quest to make one of these aprons, I found this post on the Daily Sew blog, with videos. This is an excellent resource and you should definitely check it out. I followed this plan for my first apron. I used a piece of linen I’d bought as a remnant. It was one of those online purchases that left me feeling meh – the colour was called Watermelon, but really, the watermelon is striped with oatmeal and the overall effect is Puce. (Although that wouldn’t have sold as well.)
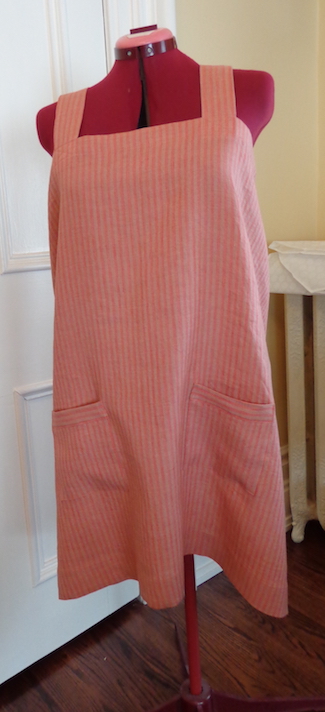
The plan was to cut my piece 120cm (20cm wider than my bust) and 90cm long, because I like really deep hems on linen. (Like old tablecloths.) At each end, I did a narrow hem, at the top, I turned down 1″ twice, and at the hem I turned up 2″ twice. The straps are 55cm long but I cut them wide (almost 8″) so that there are four layers of cloth in each strap. (Fold both long ends to the center, then fold the strap in half and topstitch.) I added a contrast cuff on the top of the pockets because I thought after cutting them that they could be bigger. I learned this tricky and tidy pocket construction making my Butterick 5537 bathrobe.
I loved working with the linen.
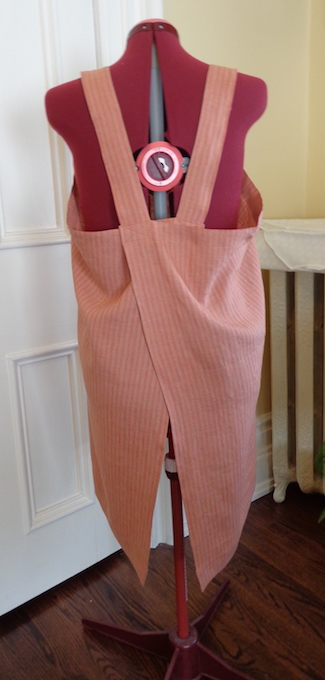
(Oops, Nellie looks a little drunk in the first picture!)
In the end, though, this is not a flattering garment – and it looks better on Nellie than it does on me, because our measurements have diverged of late. There’s a LOT of extra fabric around the bust which makes it feel frumpy. I’m a pear, so I don’t need extra fabric there or pooling around my waist. Hmm.
Then I recalled a conversation with my friend Terri the tailor. When I first was intrigued by this design, she was skeptical. She said something to the effect that square pieces of fabric on grain don’t drape well on curved bodies. *BING* I decided to try another version with the body of the apron cut on the bias.
I LOVE this version.
Version #2 is cut from a linen and cotton blend (55/45) that was on sale for $4/m at Fabricland because it’s from a previous season. I liked the colour and it’s perfect for this experiment. Because it’s 135cm wide, I couldn’t get the entire 120cm by 90cm on the bias in one piece. I cut for the length of 85cm (sacrificing my fat hem, boo) but only ended up with a width of 105cm. I cut another 20cm by 85cm panel on the bias, and decided to put it down the center front to make a vertical line. I cut the straps and pockets on the straight of grain.
Here’s my second finished apron:

Those two seams down the front are felled and actually they make a nice line for the inside edge of the straps and the pockets. These straps are a little closer together than on the first version, which also improves the fit. I didn’t have a green thread in exactly the same colour so I used one that was a bit more lime, and I like how that looks, too.
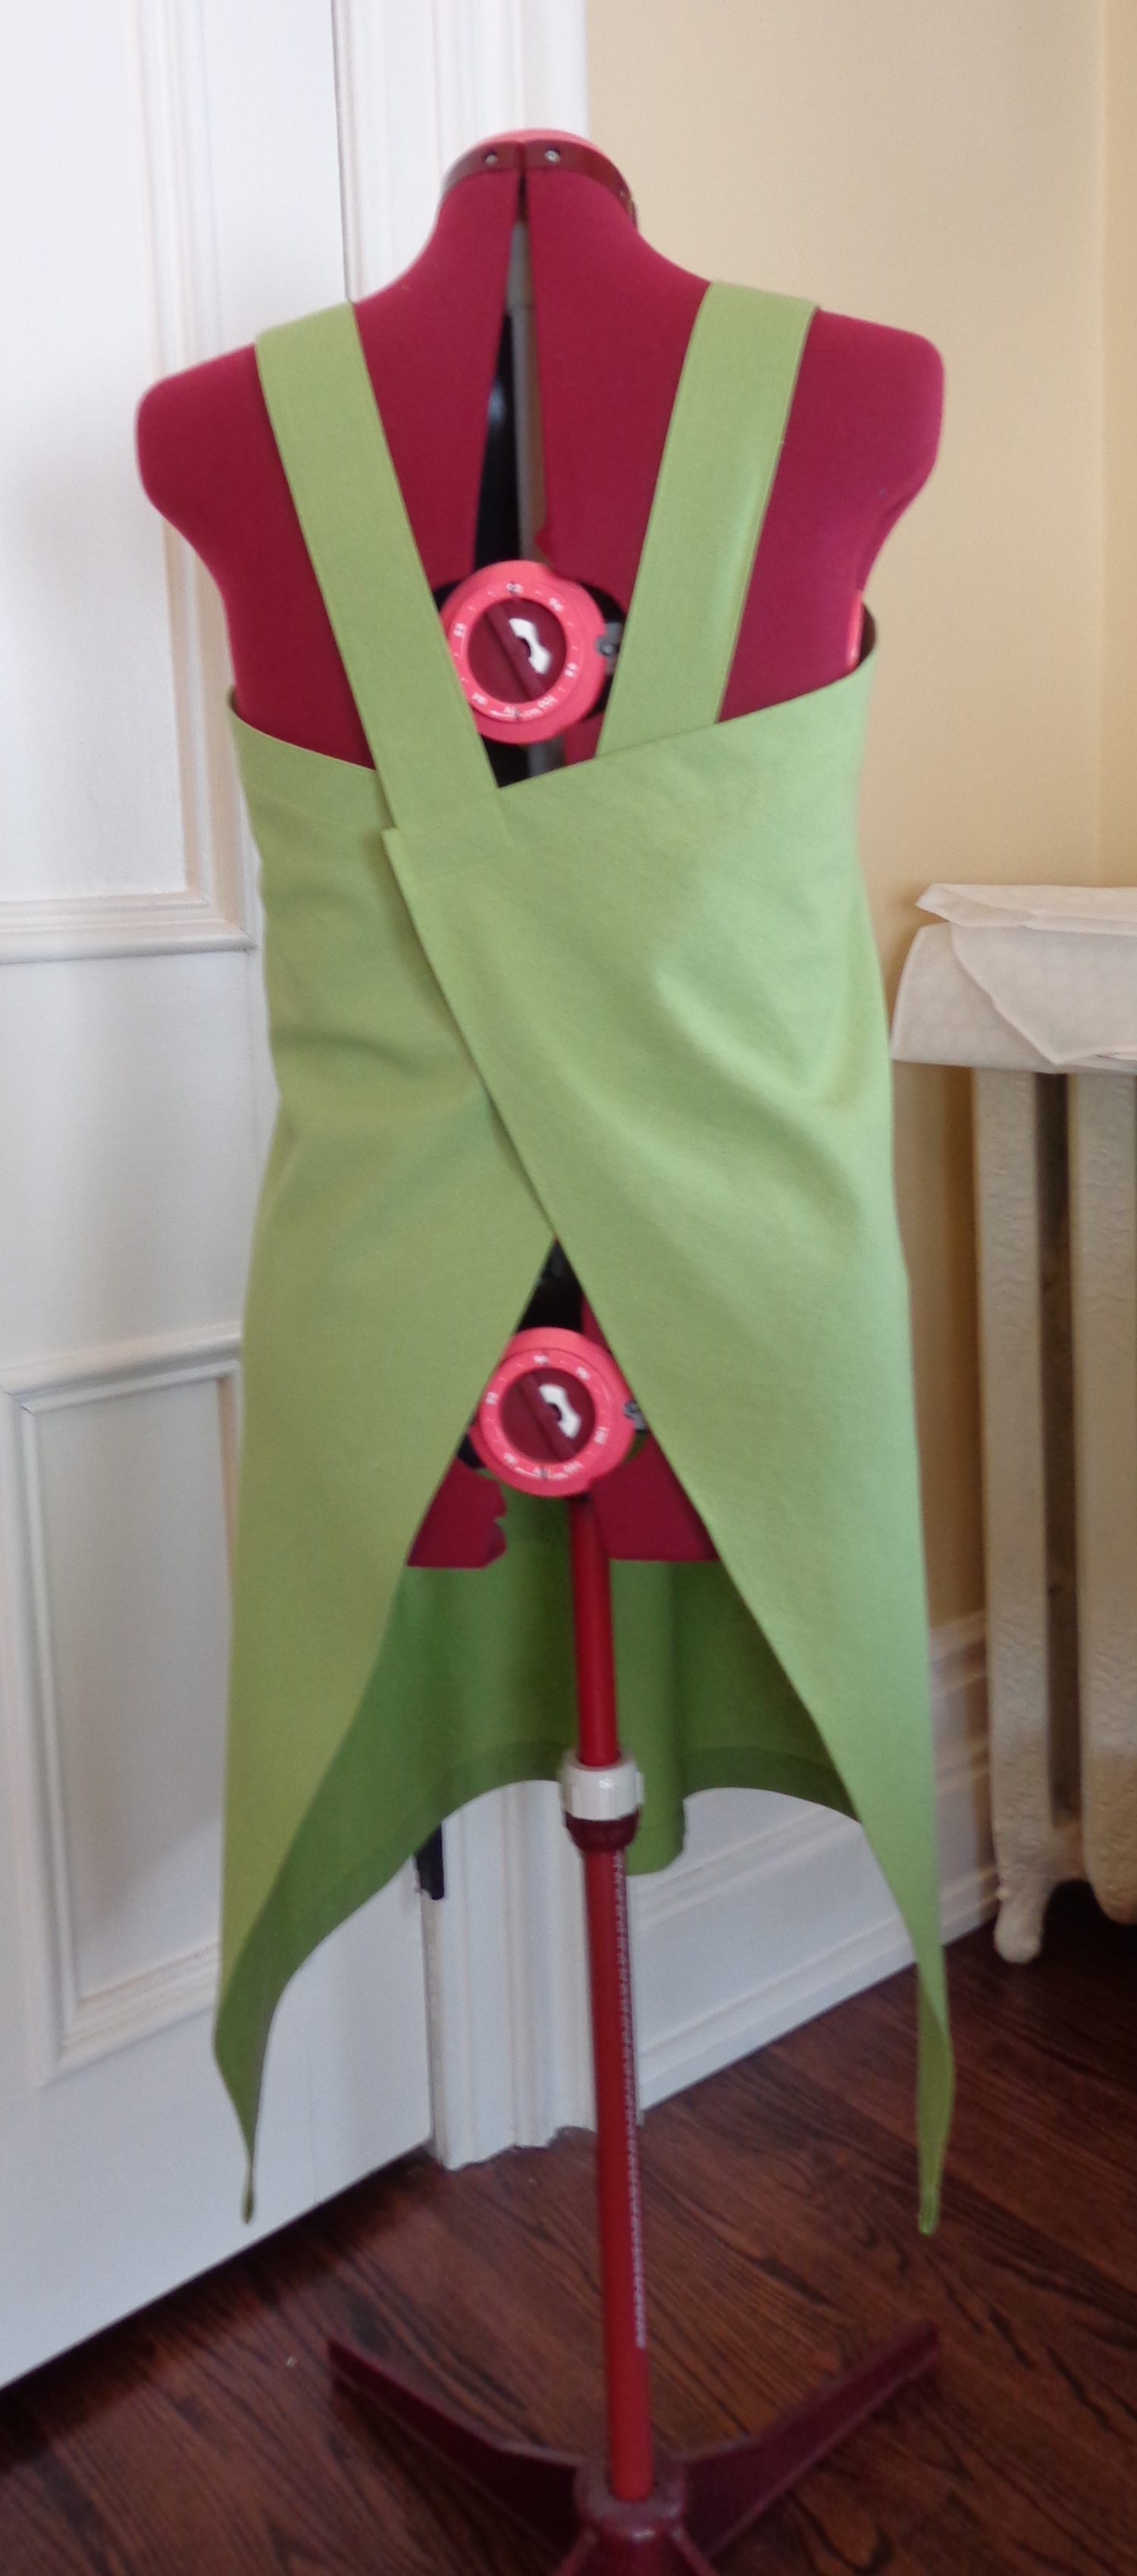
You can see that it hangs in a more flattering way on Nelie than the other one. It also looks better on me. (Bonus!)
But wait. Why is it smaller in the back than the first one?
I did some measuring and realized I made a mistake with the first apron. I pulled a thread to get the straight crosswise grain and cut a piece the right length but the entire width of the cloth. That’s 135cm. I forgot to trim that edge. (Now I remember that I was going to use that strip for the straps, but it wasn’t wide enough, so I cut them out of the rest of the fabric and forgot to trim the piece down.
That’s why there’s so much fabric in the first one – it’s a bigger piece of fabric. (Duh.) But, the bias cut version does hang a lot better.
I played around with the first one because I know I won’t wear it the way it is and figured out a solution. I pinned the back in place so that the width around the bust was about a few inches bigger than my own measurement and tried it on. I fiddled with the pins until it was easy to get the apron on and off even with the back fixed in place, then I sewed it down.
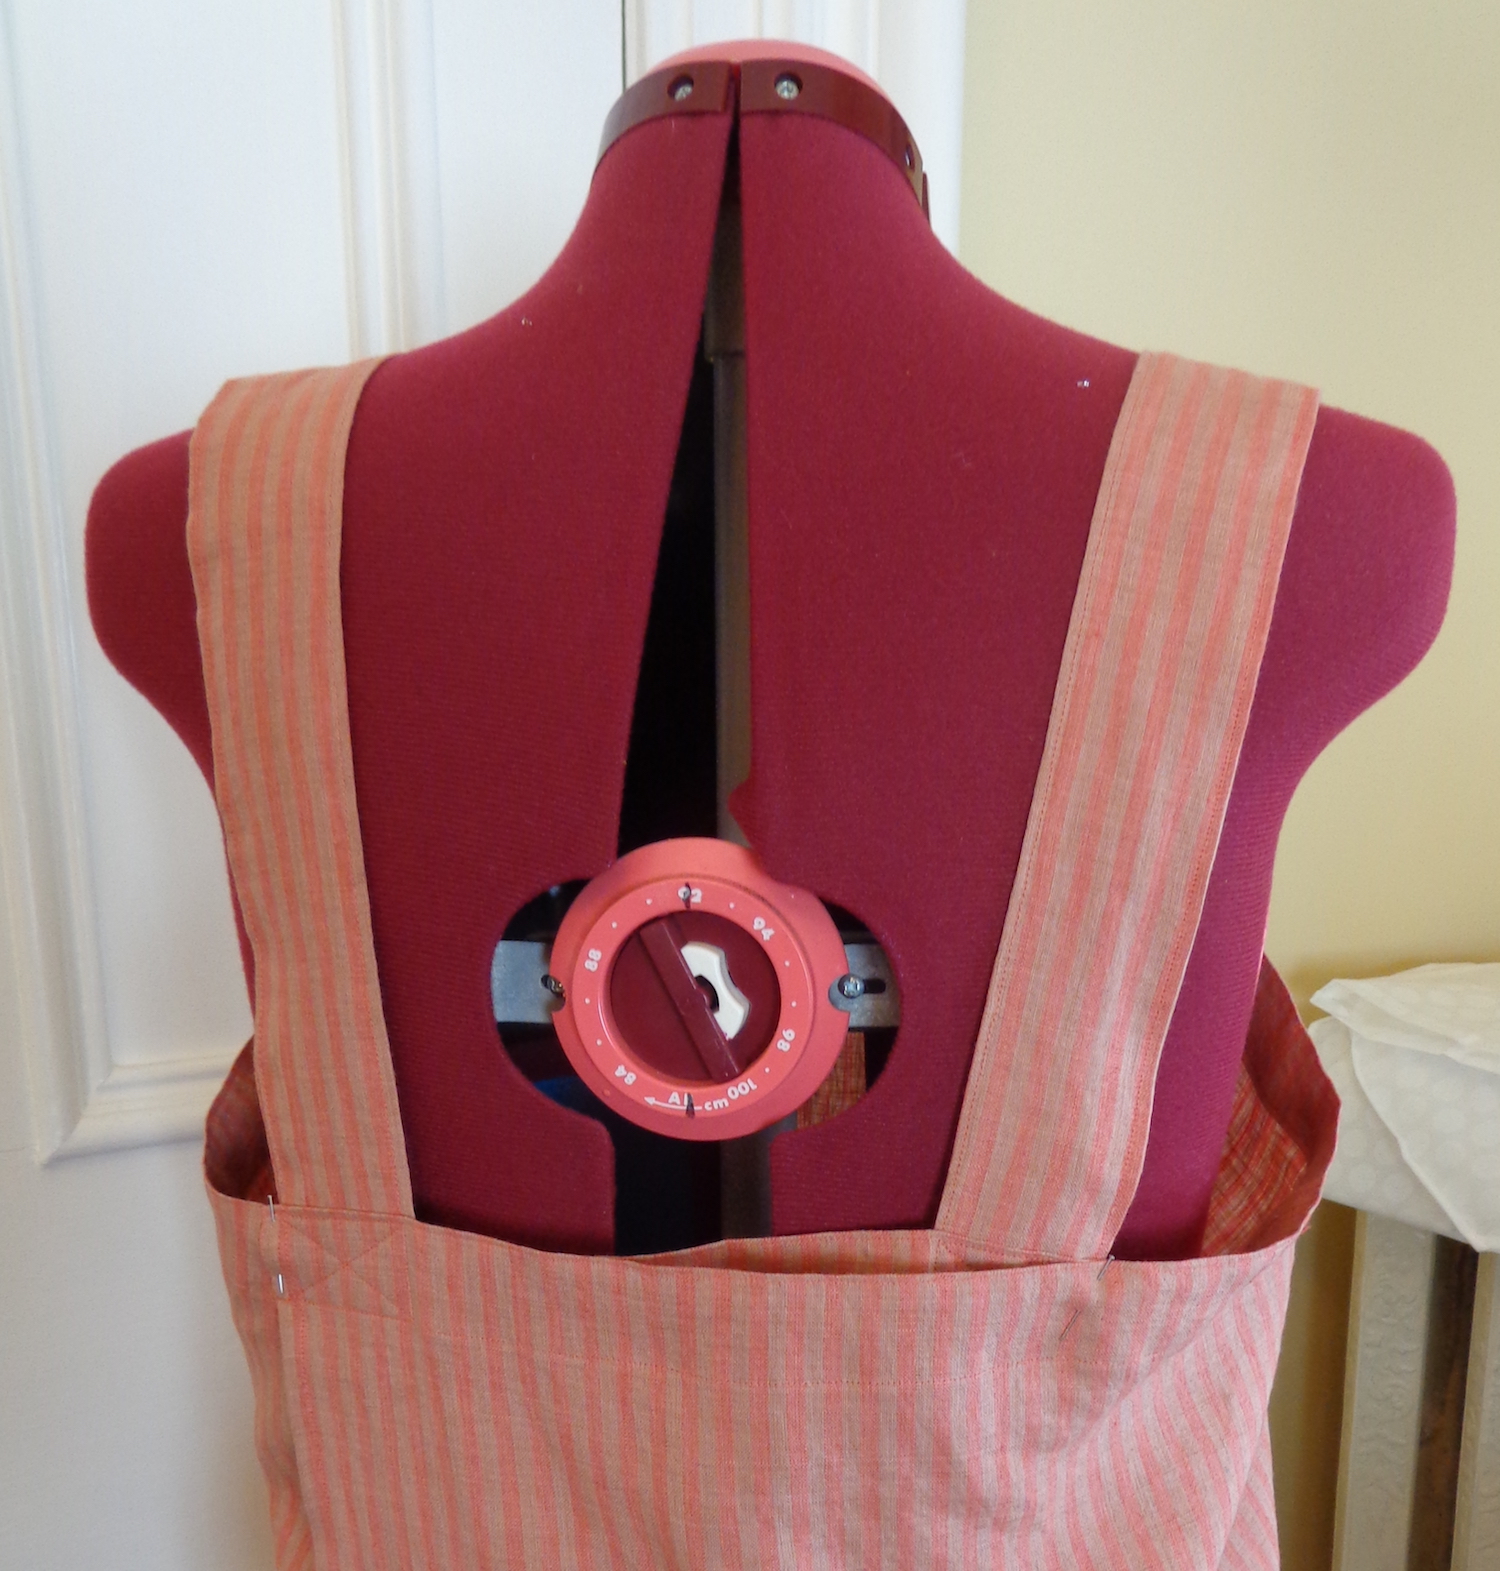

It kind of defeats the point of the whole design, but it’s more comfortable (my bum stays covered!) and I like how it looks. I’ll actually wear it this way. I just used a basting stitch right over the topstitching line from the outside of one strap to the outside of the other, so it’ll be easy to pull out if I change my mind.
Here’s (drunk) Nellie to show you that it hangs better with the back like this.
I’m going to try another free apron pattern next and will show you that when it’s done.
