Things have been quiet here because I’ve been busily knitting away. The sad fact is that I know too many people right now who are battling cancer. I’ve been trying to knit a bit of comfort.
Here’s one project, now complete, for a friend. The pattern is Charlotte’s Web and it’s knit in Koigu KPPPM. The recipient asked for something red and I had four skeins of this colourway. This shawl is usually knit in multiple colours, but I quite like how it came out in just one:
Bonus! You get to see the left toe of my kitchen clogs. 🙂 It’s a crappy day for pictures – we’re having wet snow and rain, and the skies are overcast – but I need to get this on its way. I took this quickly so the shawl wouldn’t get wet, thus my left toe. The colour isn’t quite right despite the dull skies – the shawl is more red than pink.
You can see that the last skein was a bit darker. Even though all four skeins were the same colourway and dye lot, I sorted them from light to dark as there was obviously some variation. This way, the changes are subtle. I only did a graduated change for the transition from the third skein to the fourth.
Here’s a detail shot:
I love how airy this lace pattern is, plus it’s pretty easy to memorize. The pictures really don’t do justice to this yarn, which has so many flicks and gradations, as well as rich saturated colour. I hope Koigu has their tent sale this year, as I’m due to stock up on more pretty yarn.
I had thought the shawl might end up too small with just the four skeins, but it’s 70″ across the long edge and 35″ deep. That’s plenty big enough!
Here’s the first shawl I knit of this pattern, also in Koigu KPPPM:
This one was knit in five different colourways, as the pattern specifies. I shaded them from light to dark. This photo was taken in the snow on a dull day.
Here’s a detail of the lace on that first version – it shows up better against the snow:
It seems more open on the purple one. Maybe I used a larger needle, or maybe I blocked it harder. Hmm.
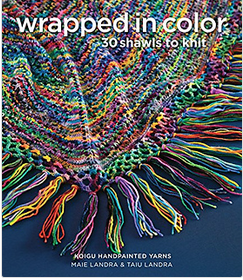
Now for some links. I have the book, Wrapped in Colour, which includes the pattern for Charlotte’s Web. (Those are Ravelry links. This pattern has also appeared in some other publications.) As designed, it takes five skeins of Koigu KPPPM and has a fringe. I’m not much for fringes, which means I can knit it bigger.
Here’s my project page for the red one on Ravelry, here’s my blog post about the purple one, and here’s the Koigu website in case you need some of this yarn.
Now I need to work out these chemo caps. I’m deeply unhappy with the pattern and yarn combinations I’ve tried so far, but am hoping to sort it out soon. I’ll show you when I do.
I’ve been sewing more garments for myself lately, but with mixed success. There are a few reasons for this: I’m picky, I’ve changed shape since my glory days (when I always cut a size Vogue 8 and it always fit), and I’m learning new tricks. Previously, I’ve mostly sewn woven fabrics but have been learning to sew knits. There are new techniques to learn and new tricks, and also some old habits that are hard to leave behind. I’ve also been experimenting with patterns from indie designers instead of just shopping from the Big4. These designers don’t always come to patterns with the same assumptions, which is both exciting and (sometimes) vexing.
I love skirts and wear them a lot. It makes more sense for me to sew skirts than pants, and makes for an easier fit, too. One of the skirt patterns I go back to all the time is Vogue 7947. It’s a Five Easy Pieces pattern (they probably don’t make those anymore) including a jacket, shell, dress, skirt and pants. The pattern isn’t available anymore and the photographs are pretty dark on the envelope.
The skirt has a yoke and is slightly flared. The top edge sits just below the waist, which makes it really comfortable. The hem falls just below the knee. It has a side zipper, which is slightly less than ideal, but I’ve never taken the time and trouble to split the back yoke and move the zipper to the centre back. I’ve made this skirt a lot, from a wide variety of fabrics.
Here’s the schematic from the back of the pattern envelope:
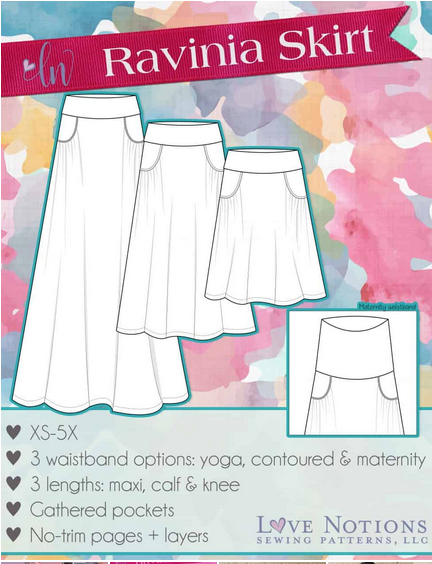
So, when I saw the Ravinia Skirt from Love Notions, I thought “aha! this is the knit version of my fave skirt.” Well, it didn’t quite work out that way, but that’s okay—sewing fails are disheartening, but I always learn something from them. One big takeaway here is that I want to sew knits the way I sew wovens, and that’s not always the best strategy.
Love Notions is an indie pattern company probably best known for their Laundry Day Tee, which is a free pattern download for an a-line t-shirt and a pretty easy knit. I downloaded that pattern, then indulged in a few more because they were having a sale. The patterns are sold as PDF downloads, which you then print and tape together (ugh) or take to a shop to have them printed on a single sheet. All of the sizes are on the same page, the way Burda patterns have always been. Unlike Burda patterns, though, the seam allowances are included. Unlike Big4 patterns, the seam allowances vary in width between companies and even within a design itself. I’m so used to that 5/8″ standard from the Big4. Now I go through the instructions in advance and circle or highlight the seam allowance so I don’t mess up. Love Notions patterns tend not to have notches to match pieces – they have little bars that you need to transfer to the fabric. (I now cut notches instead since I’ve never liked transferring markings.)
The RaviniaSkirt can be cut in multiple lengths, has a full swingy skirt, a contour waistband that sits below the waist (a fave style of mine) and – pockets!
I wanted to love this skirt so much. I made it twice and in the end, I’m just not a fan. It’s comfortable to wear, but I don’t think it’s that flattering. What’s the difference between it and my standard skirt? Gathered pockets, and that is my issue. In the end, I liked having pockets but not how they looked.
I also found this a confusing pattern, and so I did a lot of stitch ripping. I had to read the directions multiple times to figure out what I was supposed to do—since I’ve sewn a lot of skirts together.
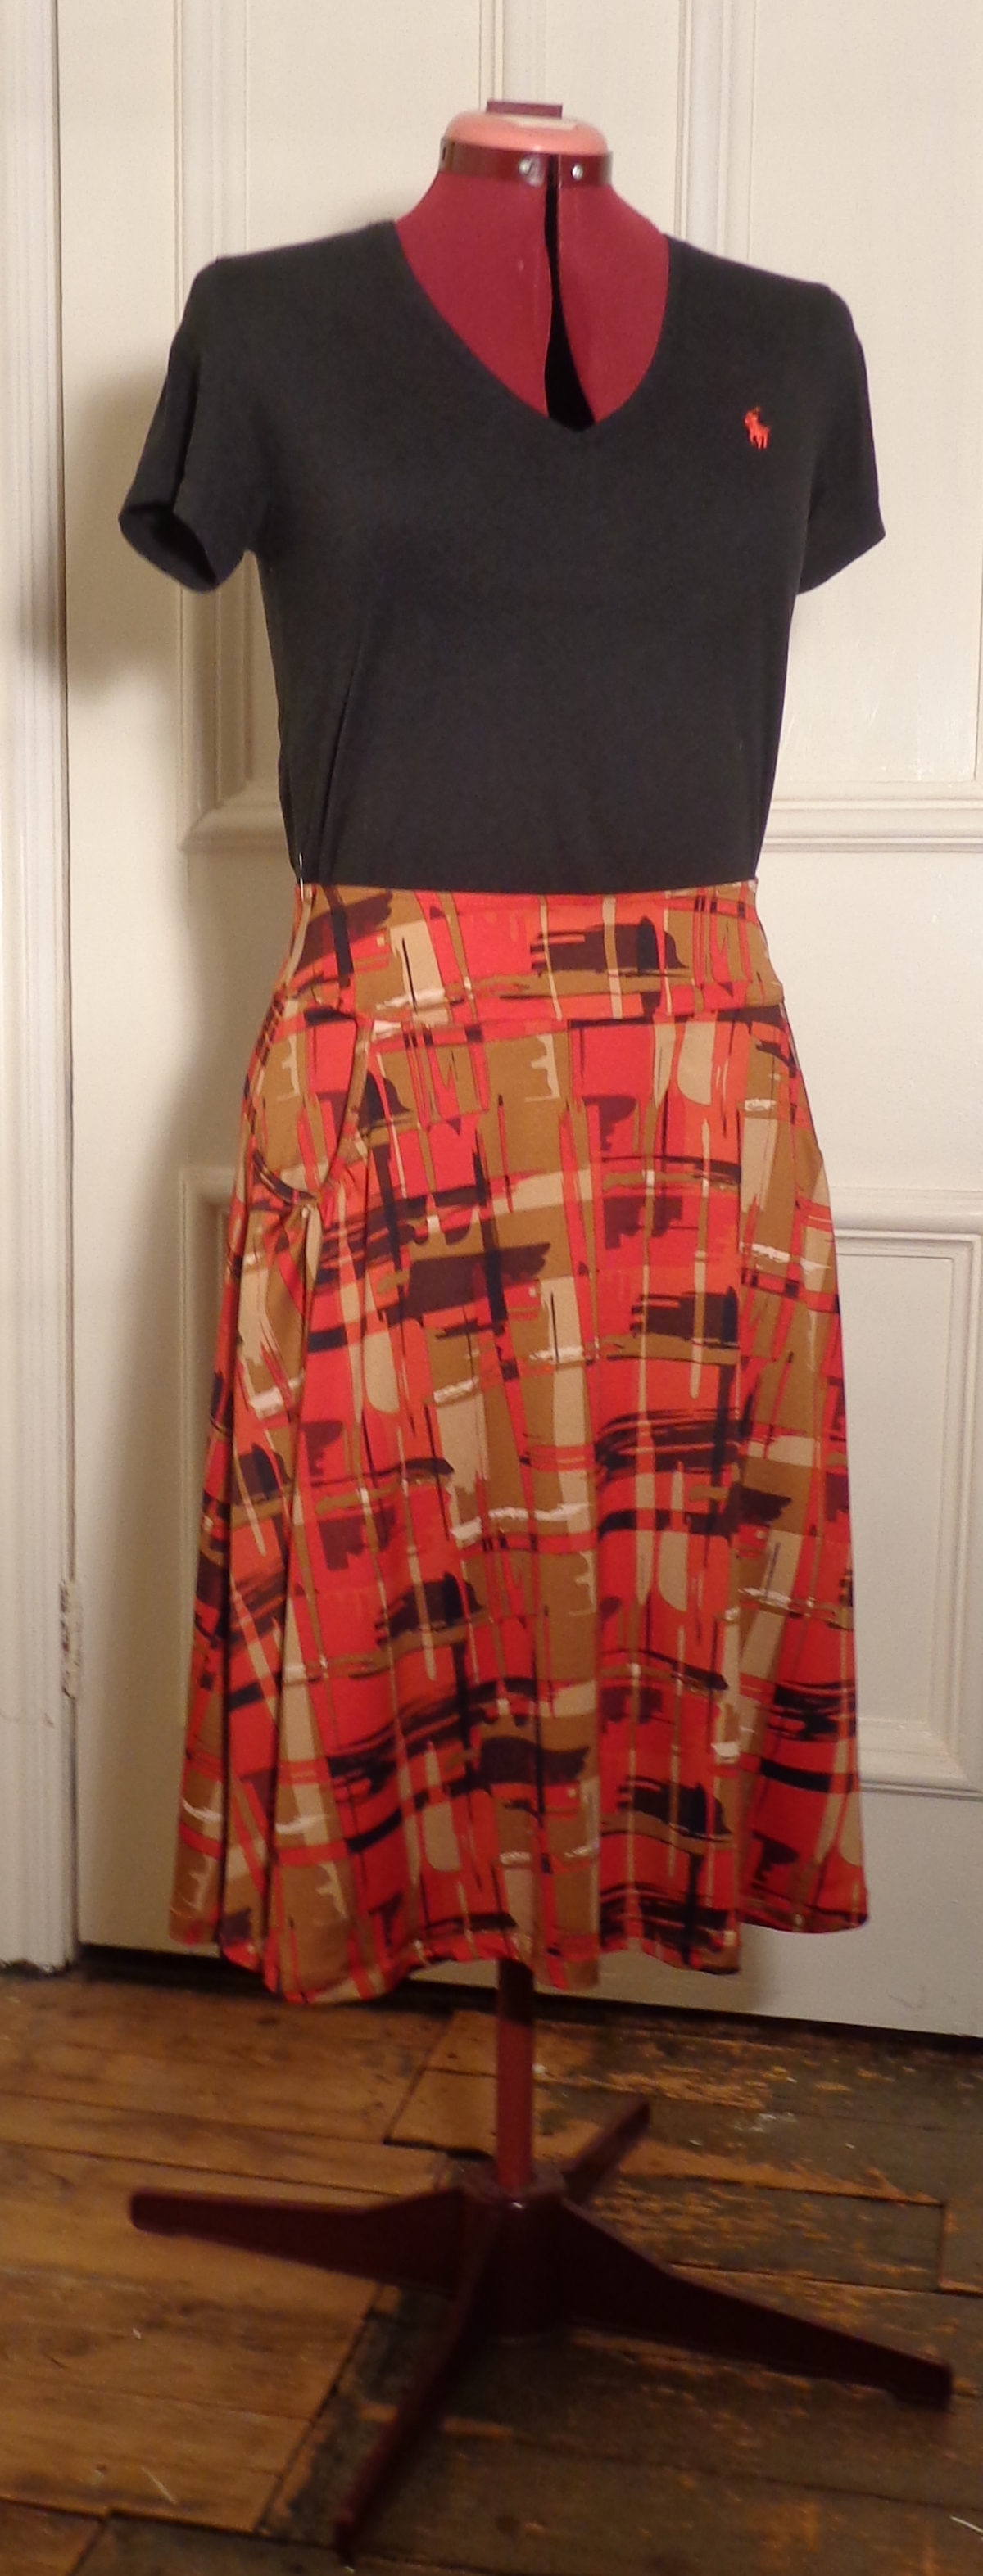
The first version I sewed was in a knit remnant with a red graphic design. I thought I had enough for the shortest version—I’m glad I checked the length before cutting, though. I prefer skirts to be just below the knee and the shortest (“knee length”) would have been above my knees. I’m 5’5″ so it’s not because I’m tall. I added four inches to the skirt length and the finished skirt is just below my knees. I put one pocket piece in backwards by mistake—the wrong side is showing instead of the right, but it’s the pocket facing against the skirt front, so no biggie. I followed the directions to zigzag a length of elastic around the top of the waistband and really disliked how it looked and fit. I ripped it out. As a result, the skirt fits but the waistband is really loose – if I lose 5 lbs, it’ll fall right off. This one isn’t a keeper, but it was a test sew.
You can see that part of the issue is body shape. Nell is rocking this skirt much better than I do, but then my tummy is a little more fluffy since lockdown. (Nell remains as svelte as ever and I had to pin it at the back for her.) So, it’s possible I’ll like this more after I lose those pounds – but I’ll have to redo the waistband.
On this one, I used the option of binding the pockets with a self-facing, the way you’d bind the neckline of a t-shirt. This looks nice, but it’s really thick and stiff, which doesn’t keep those pockets from bulging. There are six layers of fabric under the top stitching: the skirt, the pocket lining, the edging and seam allowance on the back, plus the edging and seam allowance on the front. To be fair, this is my issue – the pattern instructs you to top-stitch the binding in place without turning under the seam allowance on the inside of the pocket, then to trim away the excess. This would leave a raw edge on the inside of the pocket, which I thought might fray with wear. I also thought it might be visible.
Here on my pocket, you can see the wrong side of the fabric on the facing, which was my mistake. You can also see that it’s a puffy little gathered pocket and that the weight of it pulls the side seam toward the skirt front. It reminds me of a medieval purse. 🙂
I cut a second skirt in the calf-length variation out of a really soft drapey knit which is black with flowers. Of course, the fabric weights more and there’s more of it, so I tried the option of adding power mesh into the back of the waistband in an effort to defy gravity. This very effectively tightened the waistband—too much. I couldn’t wear it. I didn’t want to rip out all the stitching, so I just cut off the waistband, making the skirt 1/2″ shorter. I cut a new contour waistband, trying it on before attaching it to the skirt and shortening it to a snug fit before attaching the skirt. it’s comfortable now and I have more confidence in it staying up than the red one, but I’m still not smitten.
Nell, however, looks great in it. (Even if the picture is on a bit of an angle.)
On this one, I piped the edges of the pocket. I did not use cotton cord as suggested by the pattern, because this skirt will be machine washed and when it is, the cotton would shrink. I used a black polyester cord from my stash instead. I think this is a better finish than the top-stitched version, but it’s still bulky. There are six layers of the knit in the seam allowance – the skirt and seam allowance, the pocket facing and seam allowance, and the two seam allowances from fabric covering the piping – but it’s all in the gathers. This leaves the edging less bulky and stiff than the first option, but doesn’t keep that pocket from being puffy. In this softer knit, it really pulls the side seam forward.
And in the end, I just don’t love the skirt. This project doesn’t feel like a win, but I did learn a bit about edging pockets. The funny thing is that I discovered that I have a linen skirt that I don’t love so little that I’d forgotten I had it. It’s a Vogue pattern, too, but I don’t know which one. I love the fabric and it has my fave a-line shape—but it has front slash pockets. They’re not gathered, but they still change the look and hang of the skirt. At least I’m consistent.
I’m going to give the black skirt a try this winter. I’m going to make a long-sleeved t-shirt of the same black print and hem it to fall just at the base of the contour waistband. That might work as I like having a top and skirt that go together to look like a dress.
I may also try to modify it to have flatter pockets. If I give that a try, I’ll let you know. In the meantime, I cut another Vogue 7947.
I finally finished my second Navelli. Even though it’s not blocked yet and the ends need to be sewn in, I wanted to show it to you. I love it so much!
The yarn is MadTosh Merino Light in Cardinal and Spicewood. The black is some Malabrigo Sock I had in my stash. This one fits more closely than my first Navelli, which is very boxy.
For contrast, I put them side by side – here they are:
The neck is a little higher on the red one so I must have done something differently. (?)
I don’t wear the teal Navelli, even though I love the colours. I thought it was too wide, but actually, it’s too short. I kind of like how loose and boxy it is. So, my current plan is to pick up the stitches all the way around just below the underarms, on two needles, take out a row to split the garment, knit two inches of teal, then graft it to the top of the sweater. I think I’ll wear the teal one then, and I won’t have to frog the sleeves and top.
If I make a third one of these (!!) I think I’d knit it between the two sizes. That would make for an odd number of repeats on the border pattern, which might be weird. I have to think about that.
In the meantime, I’ll make the teal one longer.
In other sad knitting news, I had to frog a top-down pullover. I’d knit eight inches of body, took it off the needles to check the fit (for the third time) and discovered it was way too big. Just a teeny bit off guage, but it added up. Off to frog pond.
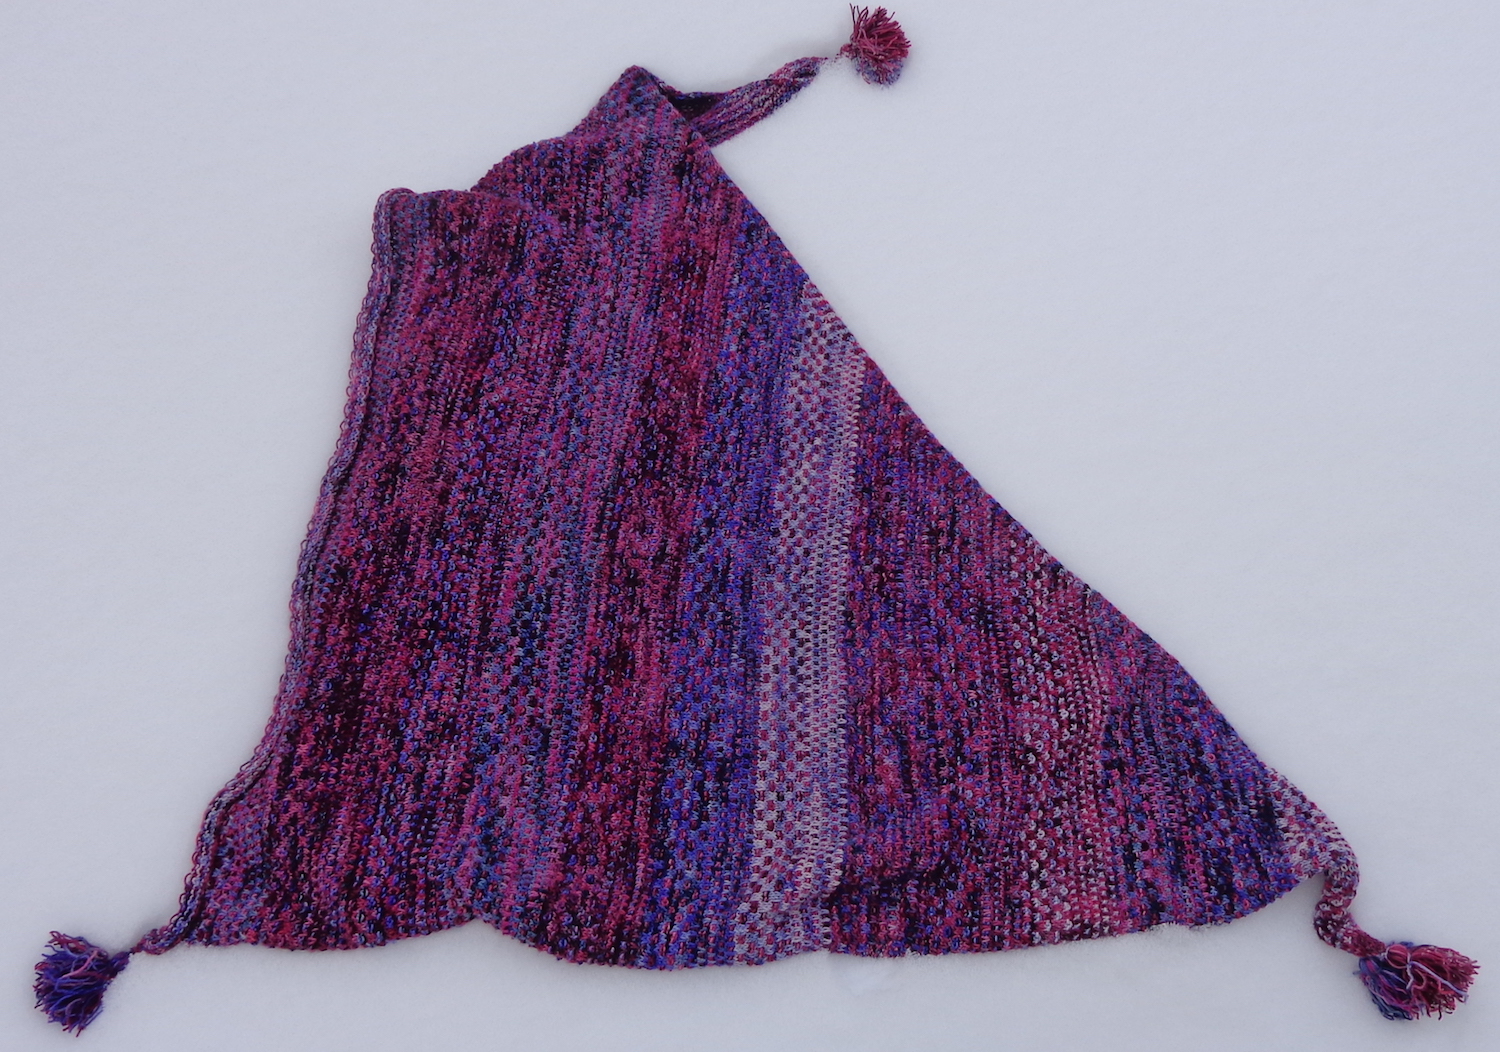
This was a project that I feared would never be done. It’s Nightshift, a pattern by Andrea Mowry, (that’s a Ravelry link) but I knit it in Koigu KPPPM – a fingering weight yarn – instead of the aran weight yarn specified. It took a while, but it’s finally finished – and here it is!
And here’s a detail of that left corner:
Yes, I threw it in the snow for the picture. I haven’t blocked it and the cast-off edge (on the left) is rolling a bit. It’s pretty big and has fourteen repeats of the 40 row pattern.
I’ve blogged about this one a couple of times – here (August 2019) and here (September 2019) and here (June 2020). A year and a half. I’m so glad it’s done!
It’s knit in five colours of Koigu KPPPM and I used up all of the yarn – that’s why there are tassels. They used up the last bits.
No post last week because I was publishing a book. My knitting always falls behind in those last few days to launch. This week, though, I have two new hats to show you. I love them both! It doesn’t hurt that I found the yarn at the thrift store, either.
Both use the Vulgar Knitter’s First Snow hat pattern, which I really like and have used many times before. (That’s a Ravelry link.) Here’s a post featuring some other hats I’ve knit with this pattern: First Snow Hats.
The first of the two new ones was knit in Cascade Yarns Jewel Hand-dyed, a discontinued yarn in a beautiful red colour. (That’s a Ravelry link.) The colour is 9969. It still needs a pompom but I’ve ordered a black one.
The second hat is knit of Malabrigo Worsted – this skein had no label at the thrift store but I recognized it all the same. I think the colourway might be Forest. I knit this one a bit longer, with 10 extra rows of ribbing and an extra repeat of the 7-row braid.
I’ve picked up two new pattern books this past month that I also wanted to share with you. I’m fascinated by the sweater on the cover of each one. First there’s a new Noro magazine. This one is Fall/Winter 2020 and #17.
Look at that fascinating cardigan on the cover! The design is really clever.
You can see a carousel preview of the magazine’s patterns on the Noro Magazine site right here or on Ravelry right here. I think it’s a really great issue.
Secondly, I ordered a copy of PomPom Quarterly issue 35, Winter 2020, which was edited by Stephen West.
Again, it’s the sweater on the cover that caught my eye – this one is knit with mini-skeins of graduating colours. It’s also available in a cardigan version, which is just as gorgeous.
You can check out the included patterns on the PomPom website, right here, or on Ravelry, right here.
Incredibly (!) given my stash, I don’t have the yarn to cast on either of these sweaters, so I’m thinking about yarn choices. Which would you knit first?
When I finish a knitting project, I often think about using up all the leftover yarn, rather than returning it to the stash. I finished my Wilhelmina reindeer cardigan (that link goes to my blog post) in Rowan Colourspun (that link goes to Ravelry, since the yarn is discontinued) this fall and have quite a few balls of that yarn leftover. I also have some left from the mister’s Skye vest (blog post link), even after making my own Comfort Fade cardigan (blog post link). I’ve made a pullover out of Colourspun too and, while I don’t like the fit of the body so much, I love its big squishy collar. That made me think of cowls.
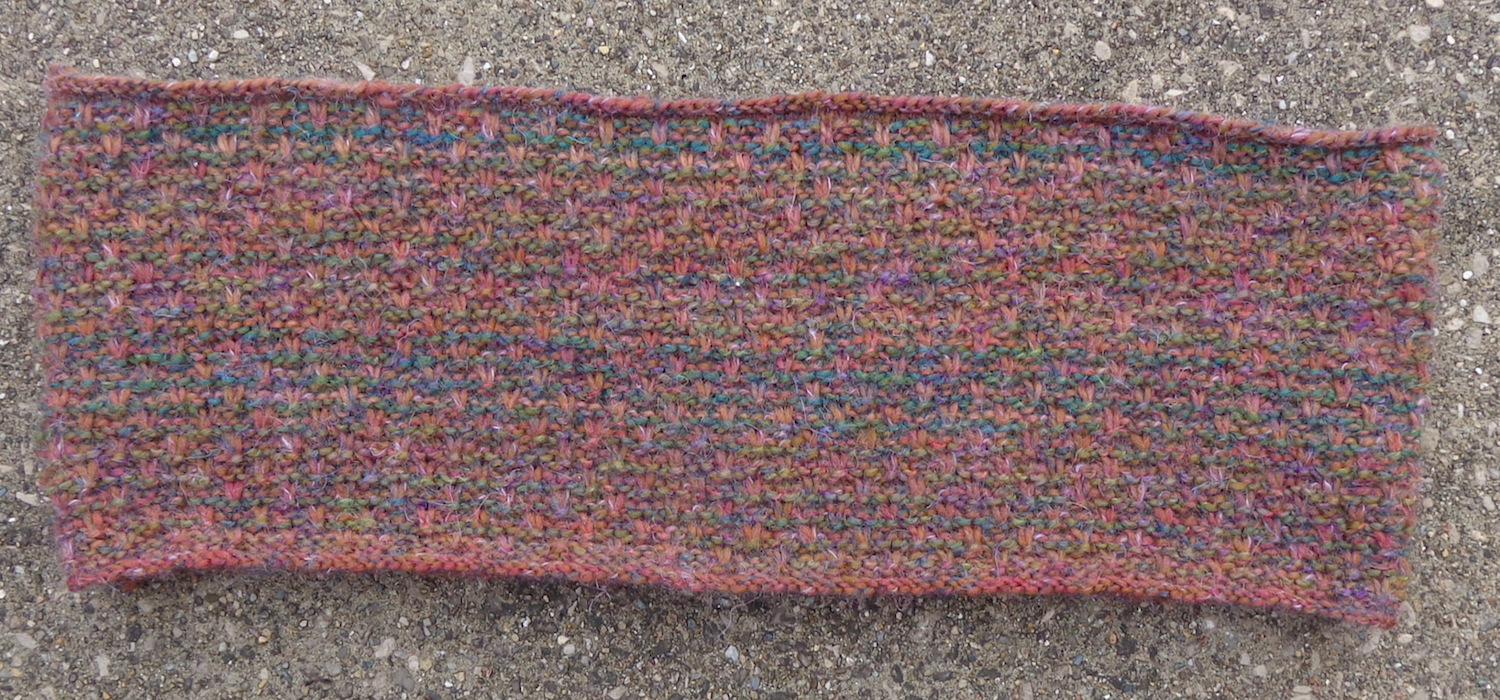
The Cupido Cowl pattern is free on Ravelry and that’s a Ravelry link. There are several thousand projects, so there’s a lot of eye candy to explore. (Four of them were worked in Colourspun, too.) Although it calls for aran weight yarn, it’s the kind of pattern that can be worked in any yarn. I liked the appearance of the pattern stitch, and the directions by another Raveller for making it in two colours (see my Ravelry project page for the link) so cast on. Because Rowan Colourspun is a DK weight yarn, my cowl will be smaller in diameter and I’ll have to work more repeats to get the depth of the cowl shown. How much shorter? How many more rows? There was only one way to find out.
I cast on with the red (Appletreewick) and used the green (Pen Y Ghent) as the contrast colour. I used 4.5mm needles as that’s one size up from the recommended size for this yarn. I figured that would make a more supple fabric. Colourspun has a slow variegation in each colourway and both of these colourways include similar accent colours. I knew this would blur the distinction between them. Here’s the glorious tweedy-looking result:
The colours do look brighter in the pictures than they appear in real life.
And here’s the finished cowl:
In the end, I worked 9 repeats of the pattern stitch instead of 8 and used about 60g of the red (just over one ball) and 50g of the green (1 ball). I could have made it deeper, but I ran out of Pen Y Ghent. The finished cowl is 7.5″ deep and 42″ around.
I can’t believe this sweater is finally done! This one has been on my needles for a long time. The scary thing about Ravelry is that your project pages will tell you exactly how long you’ve been working on something – I cast this one on in December 2016. As so often happens when I modify a pattern, I got myself into a corner (or two) and so it was put aside. And, as often happens when I lose interest in a project, when I finally pick it up again, what’s left to be done is no big deal. This sweater sat with one sleeve for the longest time, but I finished it up last week.
The yarn is Rowan Colourspun, a discontinued yarn that I really like. (I knit the mister a vest of this – Skye – and Ice Cable Mitts in it, too. ) The colourways are Jervaulx (the red), Winterburn (the light grey) and Semer Water (the dark grey). I used Felted Tweed for the bit of blue, but really should have hunted down the Colourspun blue.
Wilhelmina designed by Marie Wallin
Wilhelmina is in the Nordic Tweed pattern book from Rowan. (That’s a Ravelry link.) I modified the pattern, though, because it has dropped sleeves and an angled shoulder. The original design also has no fair isle pattern on the sleeves. So, I used the stitch counts and basic shape from Bute (that’s a link to the one I knit here on the blog) with the reindeer and snowflake pattern from Wilhelmina. (That’s a Ravelry link, too.) Bute is fitted through the shoulders, a style I prefer.
This seemed like a good idea at the time, but was more complicated than I expected. The first issue is that Bute is knit with Rowan Colourspun and Rowan Felted Tweed. Since I wanted to use Colourspun, I thought it would work well. It did, but Bute is mostly Felted Tweed, which is thinner, and this sweater is almost all Colourspun – so my Reindeer sweater is bigger than my Bute, even on the same needles with the same stitch count. (And no, I didn’t swatch.) That part is okay. It’s kind of a teddy bear sweater this way.
Wilhelmina also has plain sleeves and I decided to put the snowflake pattern on them – then I decided the pattern had to match at the shoulder. More complication, more work, and really, in this yarn, the fair isle snowflakes are kind of lost. I shouldn’t have bothered – and if I hadn’t, it would have been done a lot sooner. I do like it, though, and the red is nice. It’s incredibly warm, too.
Below is the back of my Wilhelmina.
You can see that the Colourspun self-stripes a bit. I suppose I could have been strategic and started the red where it was darker and the grey where it was lighter, but since there are more red stitches than blue ones, that contrast wouldn’t have lasted anyway. I think the softness of the fair isle is inescapable – and kind of dreamy. I do like it. I made sure my reindeer started with light feet so their legs would be more visible.
And below is the finished cardigan. You can see what I mean about it being a teddy bear sweater!
The weather is dingy here, so even taking the sweater outside for a picture didn’t really show the detail well. Here’s a close up of my reindeer:
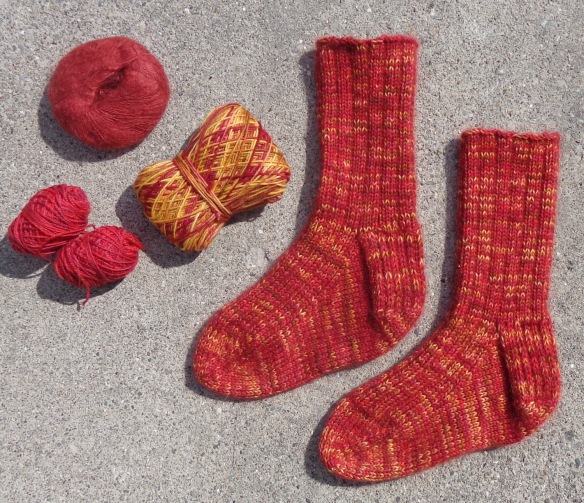
The red pair are knit with one strand of Kidsilk Haze in Blood, one strand of Zen Yarn Garden sock in Cherry Tart and 1 strand of a red sock yarn missing its labels. I think it might have been from Diamond yarns. You can see that I made one heel a little deeper by mistake, but they’re so squishy and warm that I don’t care.
The purple pair have a single strand of Kidsilk Haze in Nightly (navy) with a strand of Lorna’s Laces Shepherd Sock in Mixed Berries, plus another fingering weight sock yarn which has lost its label in the stash.
This is the Snowshoe Sock pattern by Emily Foden that I’ve knit before: I showed you a pair knit for the mister and a pair for me in the smaller size. I went with the medium this time and it’s a little loose but that’s better than them being snug.
I like them both, and have cast on one more pair as a gift.
I liked the Navelli pattern so well that I decided to knit a second one. This one is in MadTosh Merino Light.
The plan was to use up some of my stash. (Don’t laugh.) I chose both Spicewood and Red Phoenix, and put them with some leftover Malabrigo Sock in black. (I’d used it for my Gates of Moria mitts.) I like the Spicewood with the black for the fair isle, but I was less happy with the Red Phoenix. It looked a bit pink with the Spicewood. I visited a LYS (a new one for me) that stocks MadTosh Merino Light and it was obvious that the Cardinal was a much better choice.
This was also when the Simmer Pot jumped into my hands, insisting that I take it home. It goes with the Red Phoenix, and both of them have ended up in my Spector. I don’t mind the Spicewood and the Red Phoenix together in that one because they’re not right up against each other. The first blog post on that sweater was last week, and it’s right here. So, the skein of Spicewood came out of the stash, and the two skeins of Cardinal were added. One skein of Red Phoenix and the other of Spicewood came out of the stash for Spector, along with the skein of Saffron, but the Simmer Pot was added. That’s four skeins out of the stash and three added. Not exactly a win, is it?!
I think my teal Navelliis a bit too wide and too short, too, so I cast on a smaller size this time and I’m knitting an extra two inches before splitting for the arms. It’s possible that I’ll frog the first one and reknit it if I like the fit of this one better.
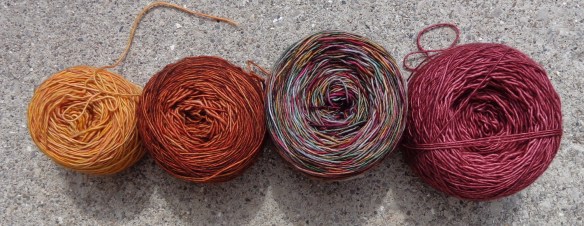
Spector is a pattern by Joji Locatelli, a top-down pullover with some stitch detail on the yoke. It also uses four different colours to create a gradient. The pattern is designed to use Madeline Tosh Merino Light and for once, I’m using the specified yarn.
Here are my choices for the gradient. The colourways, from right to left, are Spicewood, Saffron, Simmer Pot and Red Phoenix. That Simmer Pot is really something and the photograph doesn’t do it justice. I bought it on a whim. Here’s the page on Ravelry that shows it in stashes – because many Ravellers are much better photographers than I am. (I don’t see the colourway on the MadTosh website.)
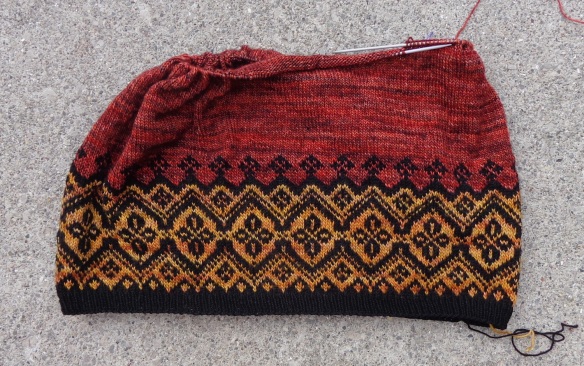
And here’s the beginning of my yoke. I’ve started the first gradient change and am supposed to split the yoke for the sleeves. I’ve put it on a thread to try it on first, which is the wonderful opportunity of knitting top-down sweaters.
It seems that this sweater is supposed to tug down, to make a scoop neck. When I tried it on at this point, it seems too soon to split for the sleeves as it’s challenging to tug it down enough for it to reach my underarms. My gauge is spot-on. On Ravelry, people have commented on how stretchy it is and how well it fits. Hmm. I’m small in the shoulders, so this should work. Hmm. I decided to knit a litte more before splitting for the underarms, since I prefer more of a round neck and I dislike tight sweaters. I ended up knitting another 3/4″.
I’d just started the change to the second colour in this picture and you can see a teeny bit of it at the bottom of the yoke. I did the first round of bud stitches incorrectly, just below the ribbing for the neck, but I did them consistently 🙂 so I’m not going to frog back.
When the yoke is split for the underarms, there’s a neat little trick to turn the work inside out, so the body is mostly knit instead of mostly purled. I’m not doing that, as I don’t mind purling and I think there might be a gauge difference.
I also did some recalculations for dividing the body and sleeves because the pattern warns that the rib stitch might not line up. Of course, I want it to so I made some changes. I’m making the L or the fourth size. Instead of beginning the division at the marker, I worked 2 stitches first (P2), then put 66 stitches on a holder instead of 68. I cast on 6 stitches, placed a marker, then cast on 6 more. (This is two repeats of the ribbing pattern. The instructions are to cast on 7 PM and co 7 more.) Then I worked 125 for the front instead of 122, put 66 on a holder, cast on 6 stitches, placed a marker, then cast on 6 more. I worked to the end of the row, then removed the end-of-row marker and worked to the middle of the underarm in pattern. That’s the new beginning of the round.
Because I was in the middle of a colour transition, I alternated between the two colours from the old marker to the new one, then continued in the specified transition.
Instead of 68-122-28-102, I ended up dividing my stitches 66-125-66-103 for the sleeve-front-sleeve-back. With 12 sts cast on at each underarm instead of 14, my total stitch count is still 252, as the pattern specifies. Ha.


 That Simmer Pot is really something and the photograph doesn’t do it justice. I bought it on a whim.
 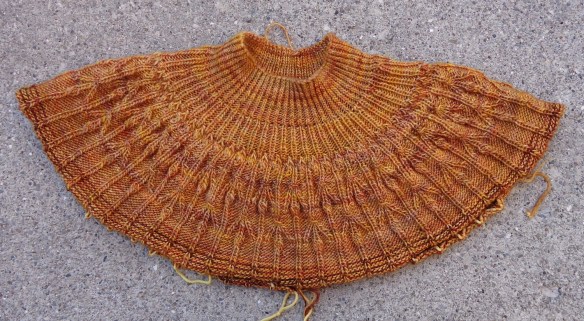 It seems that this sweater is supposed to tug down, to make a scoop neck. When I tried it on at this point, it seems too soon to split for the sleeves as it’s challenging to tug it down enough for it to reach my underarms. My gauge is spot-on. On Ravelry, people have commented on how stretchy it is and how well it fits. Hmm. I’m small in the shoulders, so this should work. Hmm. I decided to knit a litte more before splitting for the underarms, since I prefer more of a round neck and I dislike tight sweaters. I ended up knitting another 3/4″.