Last week, I explained how I knit a basic sock. Today, I’ll explain two variations: heavy socks and knee socks.
Heavy Socks
 Mr. Math likes thick socks in the winter – he wears them instead of slippers in the house. I use a Canadian yarn for these socks called Briggs & Little Tuffy. It’s wool with a bit of nylon and comes in heathered colors, as well as a marl or two. It’s yarn that remembers the barn, so expect some vegetable matter to be spun in. It’s a thicker yarn than the sock yarn mentioned last week.
You’ll need two skeins of Tuffy for a pair of socks, but will have a fair bit left over – not enough for another pair of socks, but plenty for contrasting toes and cuffs. (My neighbor says two skeins make three socks, so four skeins make three pairs, but I’m not sure about this.) I use 3.0mm needles for these socks and cast on 56 stitches, but otherwise, just follow the basic sock instructions. They knit up pretty fast compared to socks in regular sock yarn.
A side note here on washing hand-knit socks: I wash our hand-knit socks in the washing machine, but I wait until there’s a load of them and use the delicate cycle. They’re wool, after all, and I don’t want them to felt (and shrink). You can also wash them by hand, which will keep them looking their best. NEVER put them in the dryer, because then they will shrink. With socks knit in B&L Tuffy, I also use sock stretchers. This ensures that the socks don’t shrink as they dry, or if they have shrunk a bit in the wash, it stretches them back out again.
Knee Socks
I love the idea of knee socks. I’m not sure why, as I don’t wear them much and they take a long time to knit. (All that ribbing. Ugh. But the ribbing gives them a better chance of staying up.) Invariably, I have a pair on my needles – sometimes for quite a while.
Knee socks are (duh) longer than regular socks, but they also need to be wider at the top to accommodate your calf muscle. They take a lot of yarn as a result – buy twice as much yarn as you need for regular socks. You’ll have some left over, but not as much as you might expect.
If you’re using sock yarn, go with your usual 2.25mm or 2.5mm needles. Cast on 96 stitches, and work in 2×2 ribbing for 2 inches. Then knit in 6×2 ribbing for 30 rows. (You might be taller than me. Adjust this measurement so that you’ve knit to the widest part of the calf, with a two inch cuff.) Now you have to decrease down to 72 stitches to finish the sock. There are two options for this: hide the decreases or create a gusset.
Hide the Decreases:
 The second of this pair of socks is currently on my needles. It’s knit in another yarn from the Maritimes: Fleece Artist Trail Socks in the Hercules colorway. Because it’s a handpainted yarn, the repeat on the stripe sequence isn’t precise, as it tends to be on commercial yarns. The color increments are also much smaller, which makes swirls instead of bands.
You can hide the decreases by changing gradually from a 6×2 rib to a 4×2 rib.
Decrease round #1: *SSK, K4, P2, K4, P2, K4, P2, repeat from * to end of round.
Work 9 rows.
Decrease round #2: *K5, P2, SSK, K4, P2, K4, P2, repeat from * to end of round.
Work 9 rows.
Decrease round #3: *K5, P2, K5, P2, SSK, K4, P2, repeat from * to end of round.
Work 9 rows.
Decrease round #4: *K3, K2tog, P2, K5, P2, K5, P2, repeat from * to end of round.
Work 9 rows.
Decrease round #5: *K4, P2, K3, K2tog, P2, K5, P2, repeat from * to end of round.
Work 9 rows.
Decrease round #4: *K4, P2, K4, P2, K3, K2tog, P2, repeat from * to end of round.
Done! You have 72 stitches. Now, work in 4×2 ribbing for the rest of the sock, following the basic instructions.
Create a Gusset:
 This pair of socks are knit in Noro Sock yarn. Although this is a yarn from a big commercial mill, there’s a deliberate wabi-sabi attitude toward self-striping repeats in Noro yarns. Sometimes a color is missing from the sequence. Often the color segments are of different lengths. The repeat is less perfect and more organic, which I like a lot. These socks are knit from alternating balls – 2 rows from ball A, then 2 rows from ball B, then back to ball A for two more rows etc. This is one of my favorite ways to show off self-striping yarns.
You can see that I still had the matchy-matchy disease badly enough to start both colourways at the same point of the repeat. (There is no cure.) On the foot, I changed out one ball of Noro Sock for Briggs and Little Durasport, which is about the same weight but wears better. That’s the solid denimy-blue.
These socks were a bit skinnier than the pair I’m currently knitting. They were my first knee socks and I cast on 88 stitches. They’re a bit more snug and more likely to fall down. That’s why I now start with 96 stitches. In this picture, you can see one of two gussets on each sock. Essentially, one of the 6×2 rib repeats is decreased until it disappears into the next rib. The gussets are also centered over the heel – on this pair, there are three plain ribs between the gussets. There are two gussets in these socks, but if I cast on 96 stitches, there would need to be three. I’d eliminate the rib in the center back in addition to the two shown here – like this:
Work as above to the decrease row.
Decrease round #1: SSK, K4, P2, K6, P2, SSK, K4, P2, K6, P2, SSK, K4, P2, continue in 6/2 rib to end of round.
Work 3 rows.
Decrease round #2: SSK, K3, P2, K6, P2, SSK, K3, P2, K6, P2, SSK, K3, P2, continue in 6/2 rib to end of round.
Work 3 rows.
Decrease round #3: SSK, K2, P2, K6, P2, SSK, K2, P2, K6, P2, SSK, K2, P2, continue in 6/2 rib to end of round.
Work 3 rows.
Decrease round #4: SSK, K1, P2, K6, P2, SSK, K1, P2, K6, P2, SSK, K1, P2, continue in 6/2 rib to end of round.
Work 3 rows.
Decrease round #5: SSK, P2, K6, P2, SSK, P2, K6, P2, SSK, P2, continue in 6/2 rib to end of round.
Work 3 rows.
Decrease round #6: K1, P2 tog, K6, P2, K1, P2tog, K6, P2, K1, P2tog, continue in 6/2 rib to end of round.
Work 3 rows.
Decrease round #7: SSK, P1, K6, P2, SSK, P1, K6, P2, SSK, P1, continue in 6/2 rib to end of round.
Work 3 rows.
Decrease round #8: SSK, K5, P2, SSK, K5, P2, SSK, K5, P2, continue in 6/2 rib to end of round.
From here, just carry on with the basic sock instructions. Make sure when you set up your heel that the gussets are centered over it.

 When I finished my Iced in Noro Kochoran, there was a bit of wool left over. I decided to knit a vest for Mr. Math because it turns out that Noro Kochoran knits to the same tension as Rowan Colourscape Chunky. I have a book for Colourscape Chunky called Rowan Colourscape Folk. (That’s a Ravelry link.)
 There was a little bit of yarn left so I made a hat.
 This pattern is called First Snow and it’s one I use a lot. I was so busy concentrating on matching the colours that I forgot to do the increases after the ribbing: this one is a bit smaller than usual, but Mr. Math likes it better. It fits more like a watchcap. I had a pompom in dark grey, but he nixed that, so there it is.
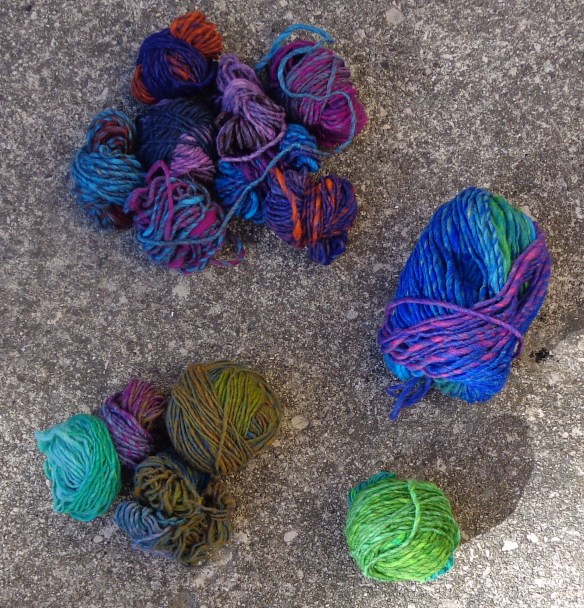
 #75 is third from the left. I also have #83 which is on the far right. It’s a really fuzzy yarn and was a bit of a splurge at the time. In the skein, it didn’t look so stripey, but (of course) it is. It shed a bit while I was knitting, but I hope it’s done with that.
 I used about 6 skeins of the Kochoran so there are 4 left. I realized that the yarn has exactly the same weight/yardage as Rowan Colourscape Chunky – woo hoo! – which gives me another pattern stash. I’ve made this vest for Mr. Math of the Rowan yarn – it’s called Sonny and was designed by Sarah Hatton – which took 490 yards, so I have enough of the Kochoran, maybe even to be matchy. (Fingers crossed.) I’ve now cast on this vest in the Kochoran.


 This is the edging from the pattern. It’s a nice shell stitch, which fits perfectly with the waves.


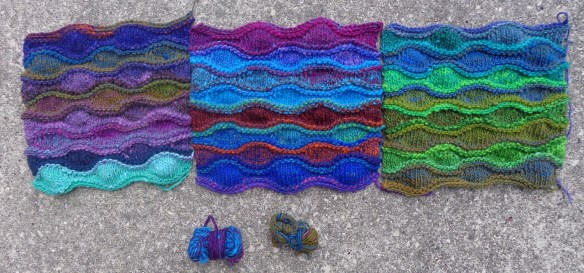 I’m surprised to only have 13g of yarn left, but several of the colourways were spun thicker than the original one. I have 8 complete blocks of the first colourway I used (the one from my stash – 254), plus it’s in two of the leftover blocks, and there’s still a bit of leftover. I had 7 skeins. In contrast, I bought 7 skeins of the last colourway (327) which was spun much thicker. I got 7 squares out of that, plus half of one of the last three, and the other bit of leftover.
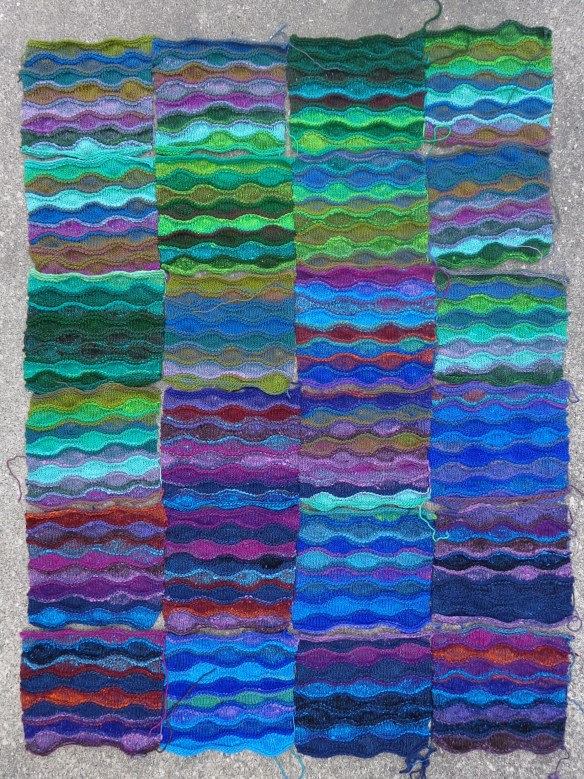 Now I have a lot of blocking and sewing to do.
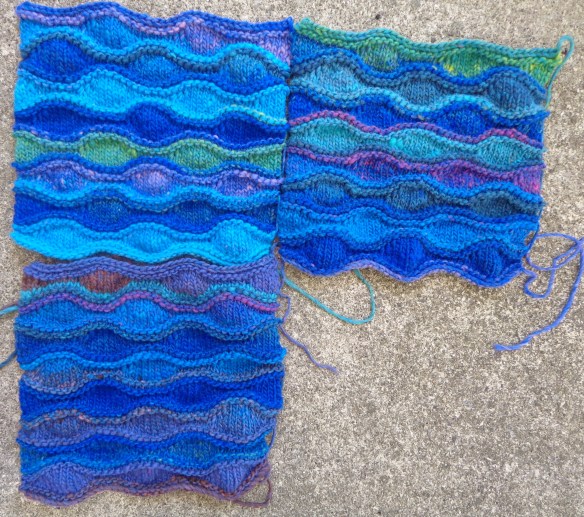
 I had an email earlier this week from my niece, who wanted to know how to knit socks. For some reason, she thought I might know. (Ha.) Since she lives far away, I can’t sit down and show her. I need to explain how to do it. I knit socks so often that I don’t pay a lot of attention to what I do (and don’t use a pattern anymore) so I got out my needles, cast on, and wrote down what I was doing as I went. The result is here, for my niece and anyone else who wants to knit socks.
 Pick your needles.
 Fussy Knitter Tip – If you’re knitting with self-striping yarn that comes in 50g balls and you have the matchy-matchy disease, be That Customer and go through the selection until you find two balls that start at the same place in the stripe sequence. Commercial yarns (like Kroy Socks) have a striping sequence that repeats at precise intervals. If the ball starts in the same place, you cast on each sock from the new ball, you’ll get socks that match. This can be a bit of a mind-melting exercise as mills wind self-striping yarn in either direction of the color sequence. So, you can be looking for balls that start with B-C-D of an A-B-C-D-E sequence, and will come across ones that are D-E-A as well as those that are B-A-E. Remember that puzzle-solving is good for avoiding dementia. If you have the matchy-matchy disease badly, choose a point to make the cast-on knot that’s easily repeatable – maybe the point where one color changes to the next.
 If you have a sock yarn that includes a spool of matching nylon thread (Lang Jawoll does this. The spool is buried in the middle of the 100g ball.) use it for this part. Just knit with it along with the sock yarn for the heel flap and the turning of the heel. It’ll help the socks to wear better.
 Fussy Knitter Tip: I like when ribbing lines up, no matter what I’m knitting. Since I’m knitting these socks in 6/2 rib, there are nine repetitions around the sock. I chose to have four knit bands descend into the heel. To make it symmetrical, I didn’t work the last two purl stitches in the last round of the sock leg. Instead, I moved them on to the next needle and worked them as the beginning of the heel flap. That gave me (8 x 4 +2) 34 stitches for my heel flap.


