I shared my first efforts in making sinamay hats for the girls last week, but have been modifying my strategy since. Here’s an update on my changes.
As much as I love those first hats, changes had to made.
• the crowns are a bit too tall. Depending on how the doll’s hair is styled, the hat might fall right over her eyes – which is not a winning look.
• the join in the bias binding isn’t as neat as I’d prefer.
• I needed a larger crown for the 16″ dolls.
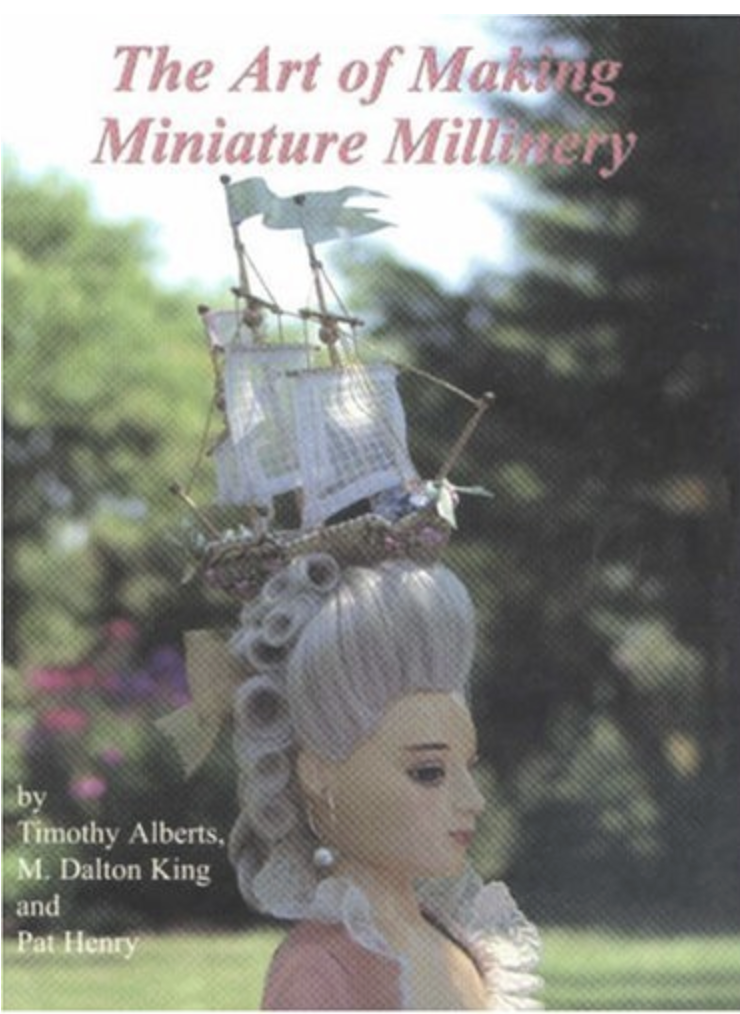
I also remembered another book on my shelf. The Art of Making Miniature Millinery is an older book that I found at a used bookstore. It documents the making of hats in many materials – but not sinamay. The authors use buckram for stiffer hat foundations, and they recommend placing a wire in the brim to help the hat keep its shape. I love their pillbox hats, which are reinforced this way.
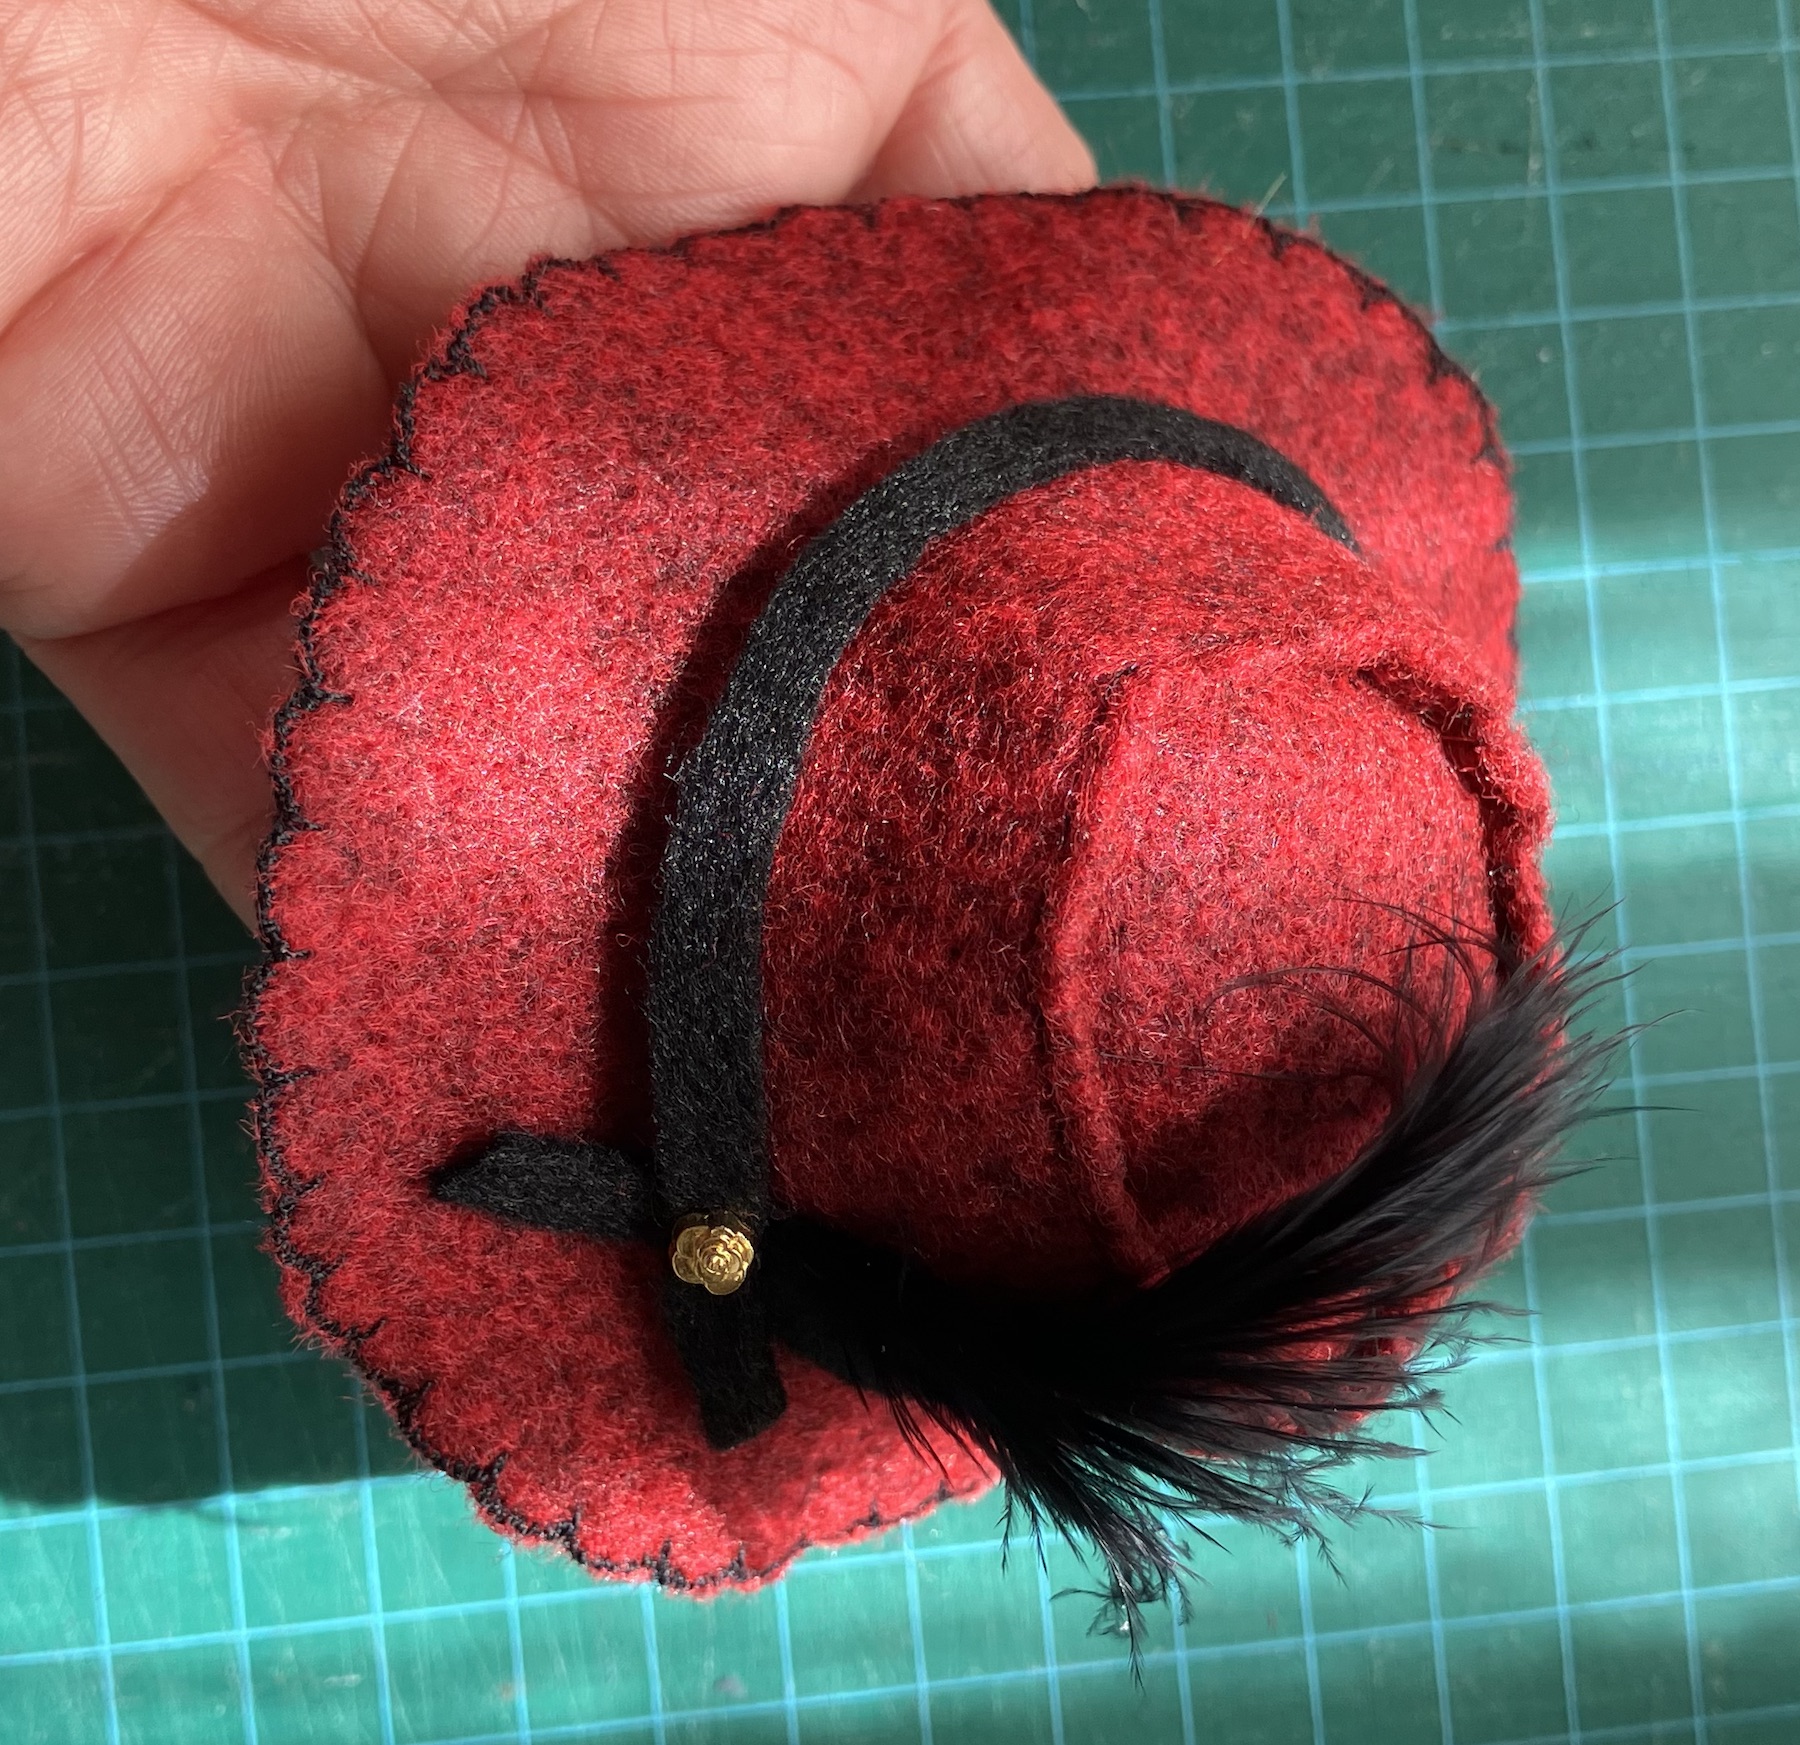
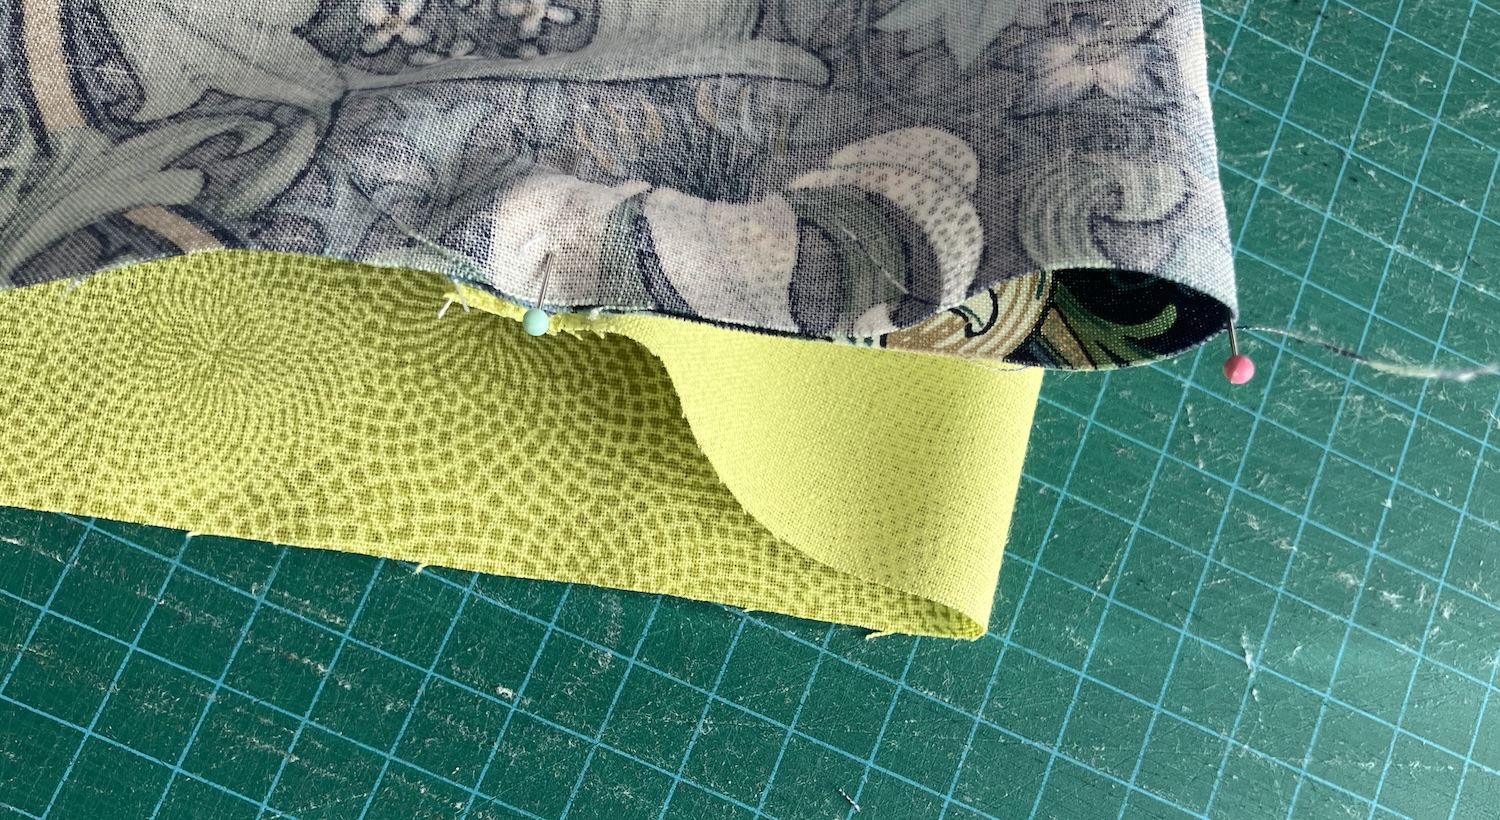
I put a wire in the brim of several of the hats in this round of hatmaking, sewing it under the bias trim on the outer edge. This is a 22 gauge wire, a fairly stiff one, which seems about right.
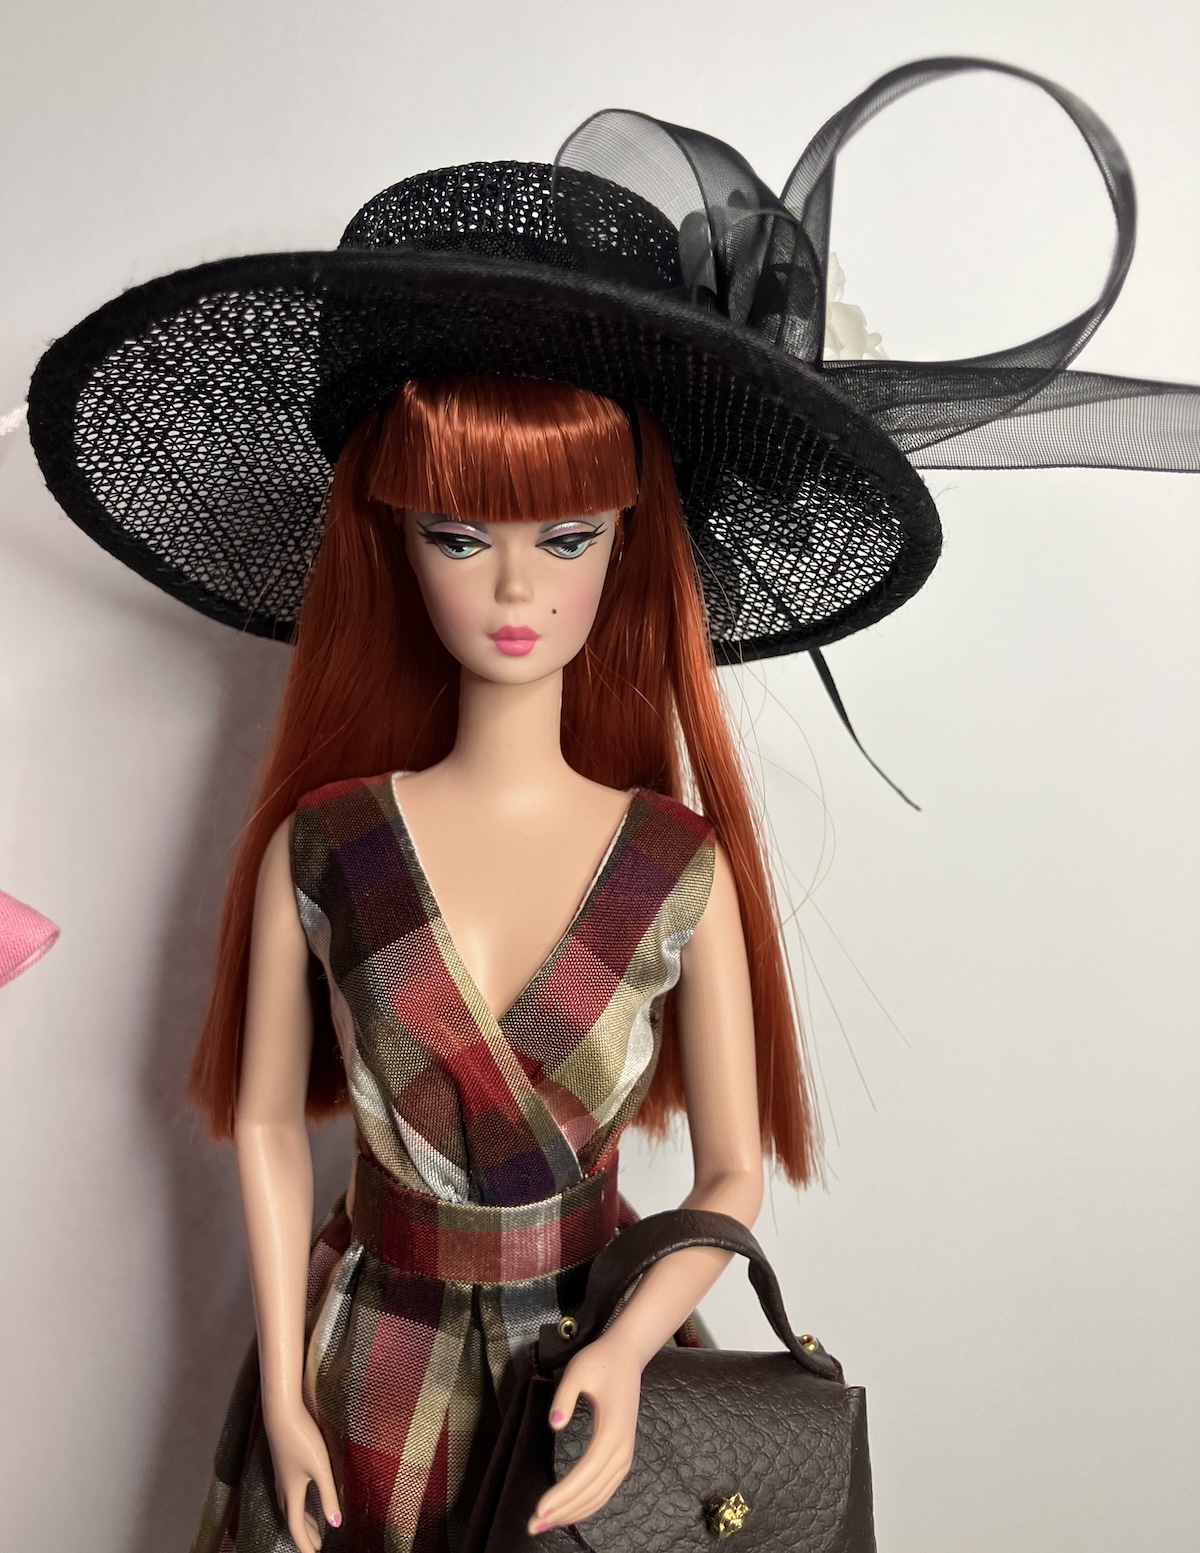
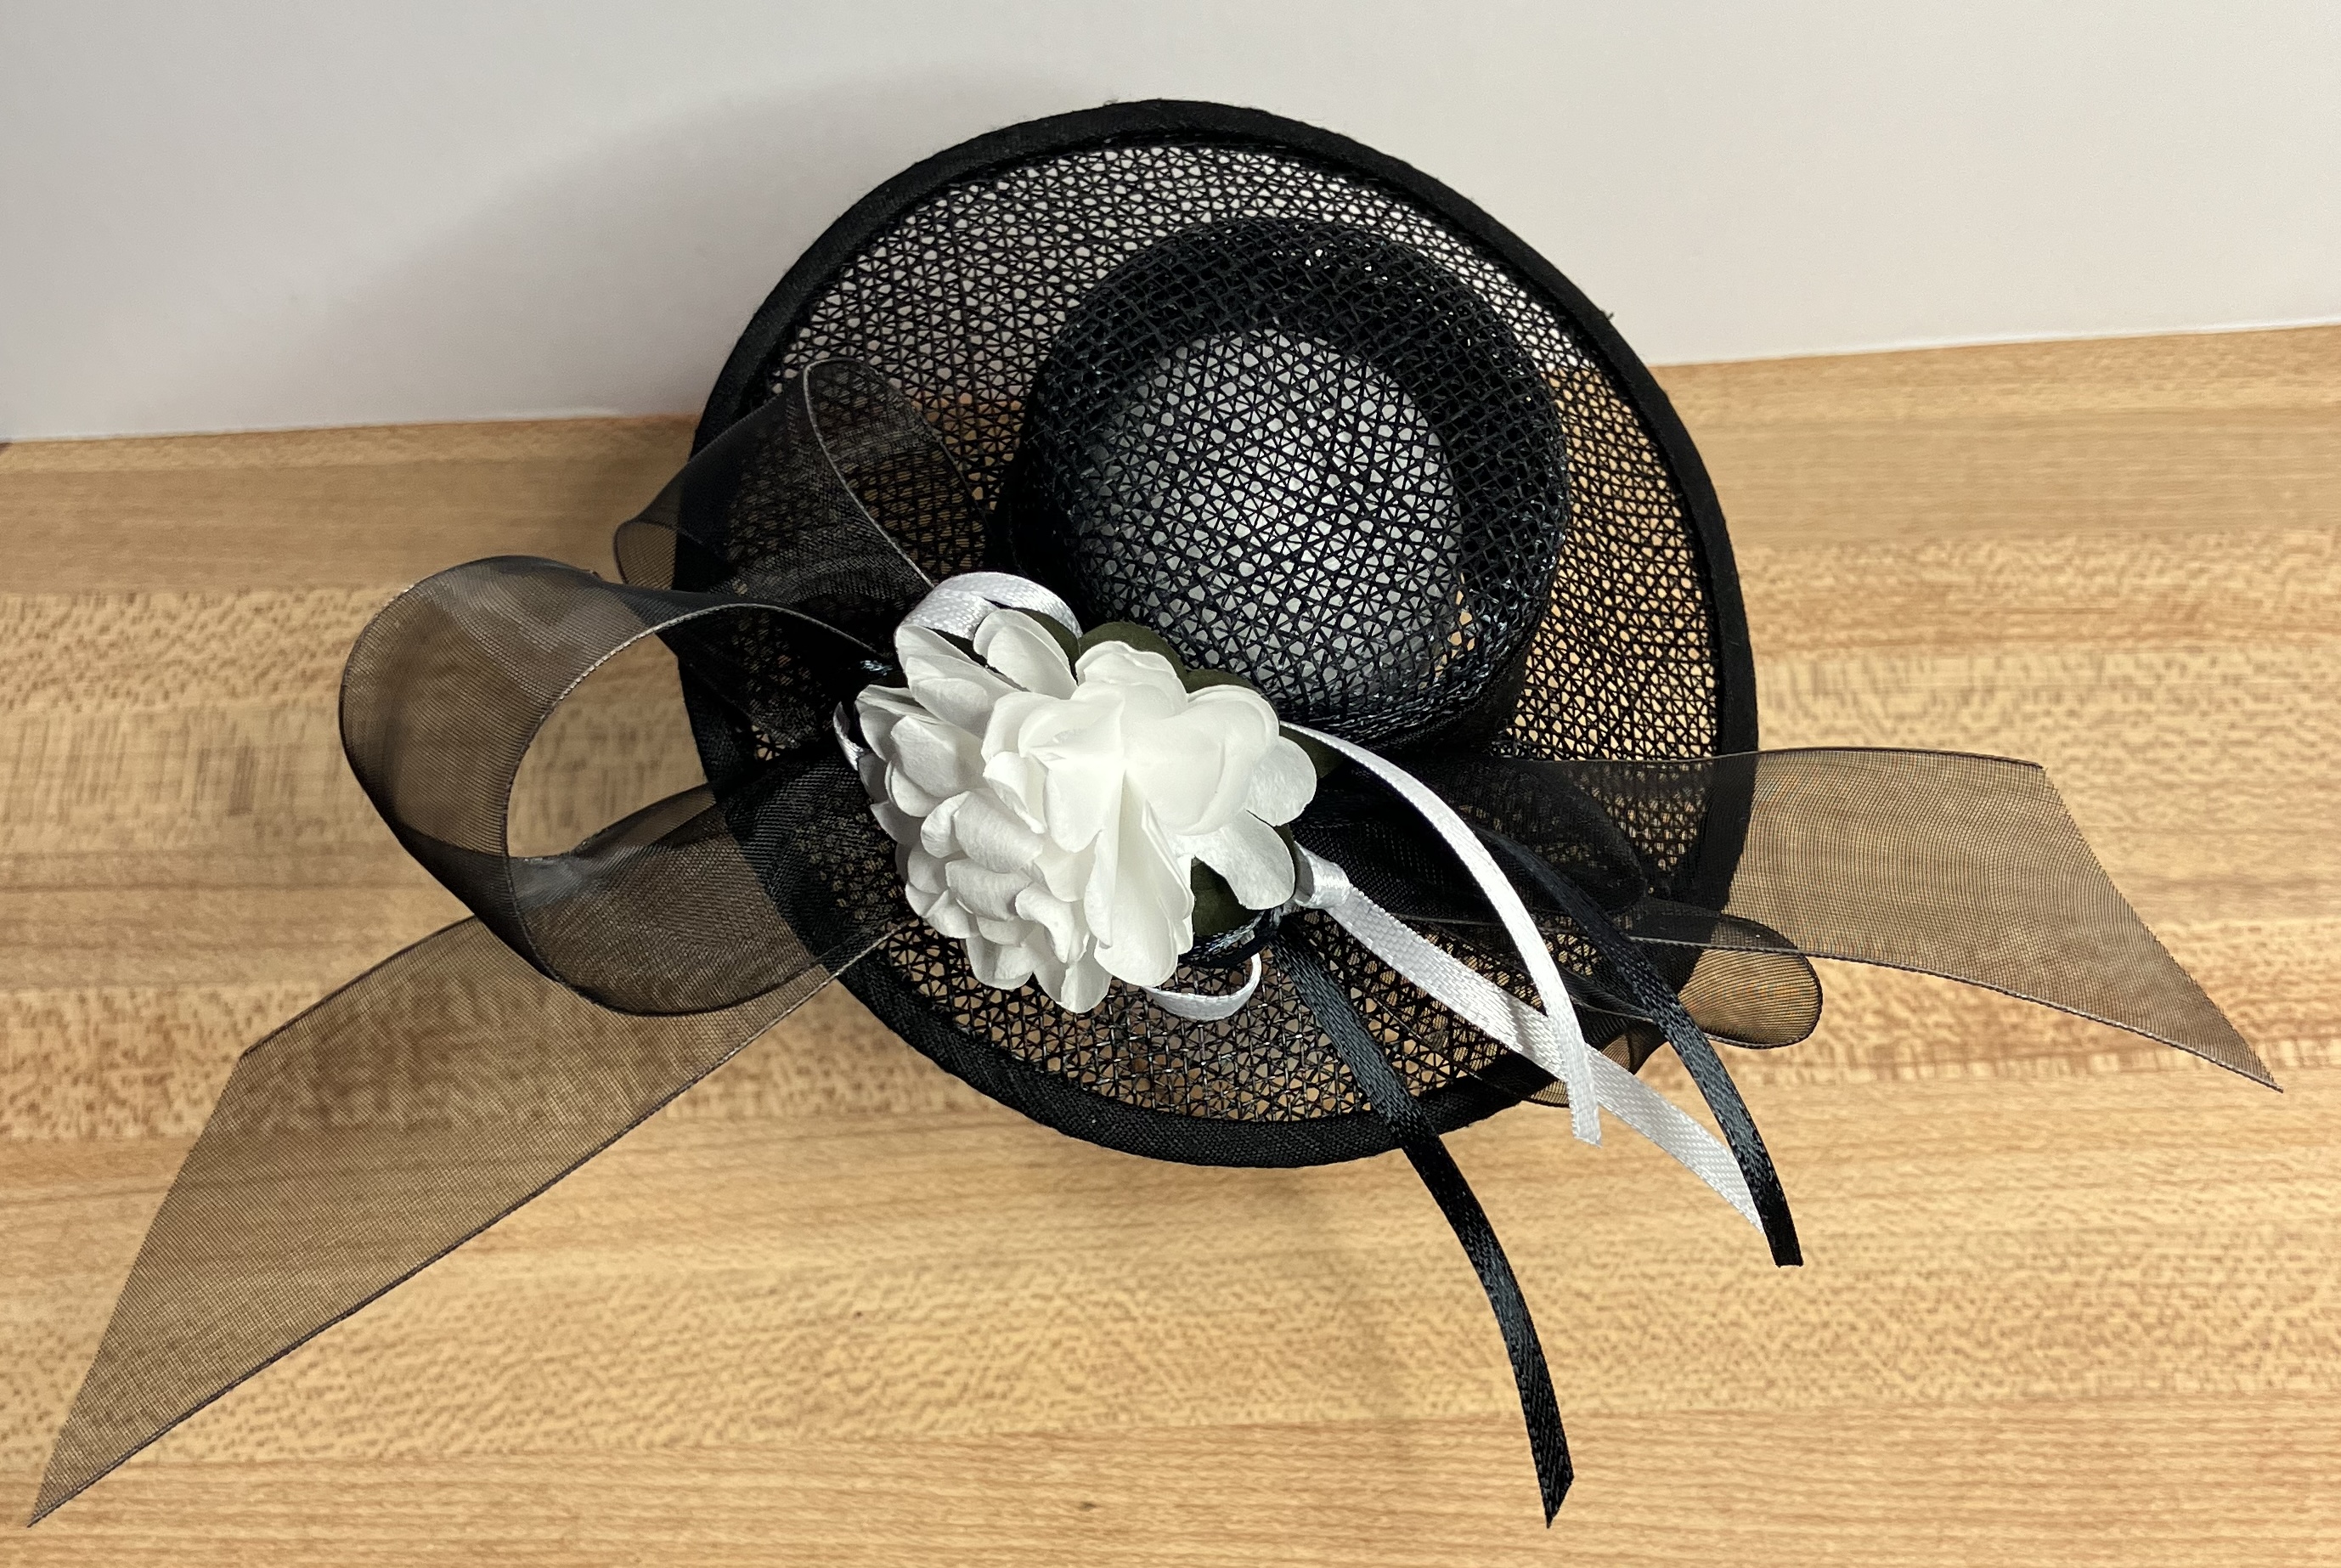
Here’s a pic of it being sewn into the brim of the black hat with the shorter crown for the 11.5″ girls. I just tucked it under the bias binding, which in this case is a plaid silk.
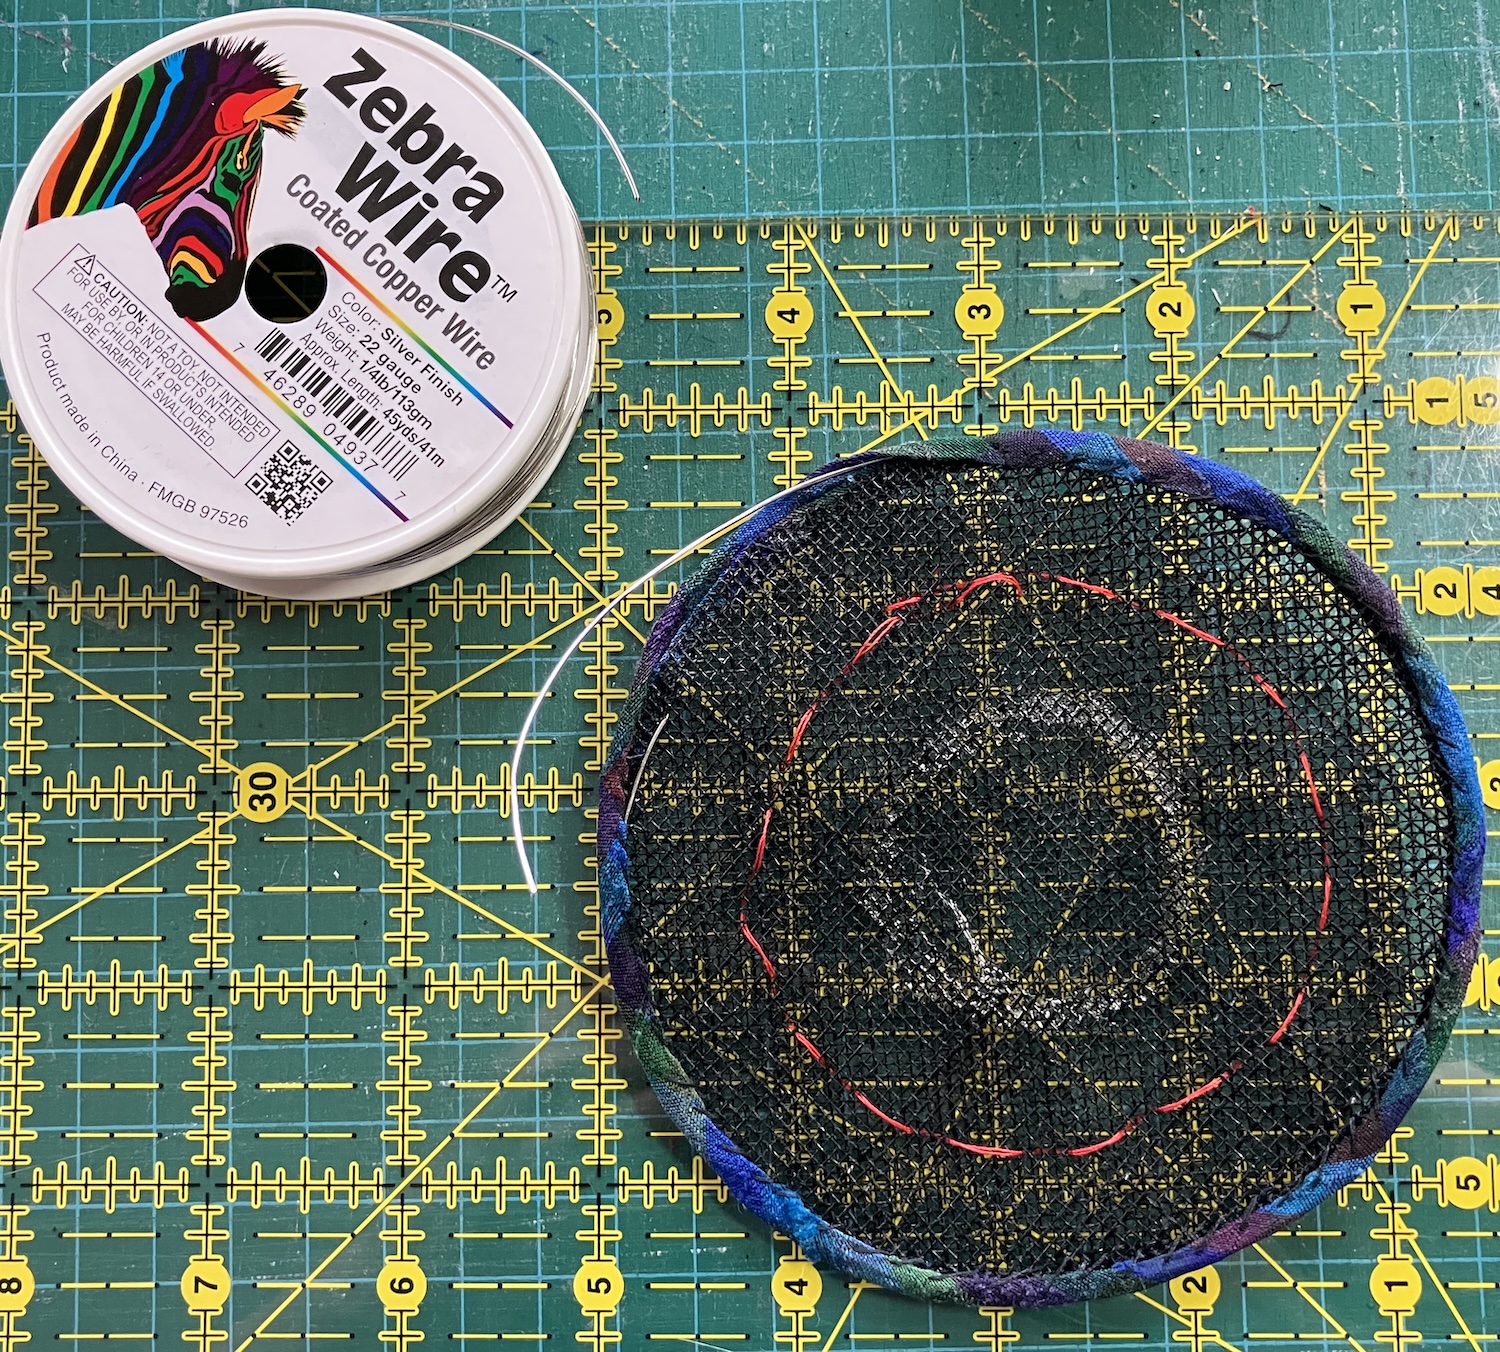
I also improved the join in the bias binding on this round of hats. On my first few hats, I sewed most of the binding onto the hat, then made the join. This is what I do with bias binding on people-sized items, but it was tough to get the angle right, given the scale. Instead, I figured out the length the binding had to be cut in order to make a circle of the right size once it was seamed. After it’s seamed, the seam can be pressed open and the binding can be sewn completely onto the hat in one go. The result is much neater – on some hats, I can’t even find the join. If you look at the hat brim above, the join is hard to locate.
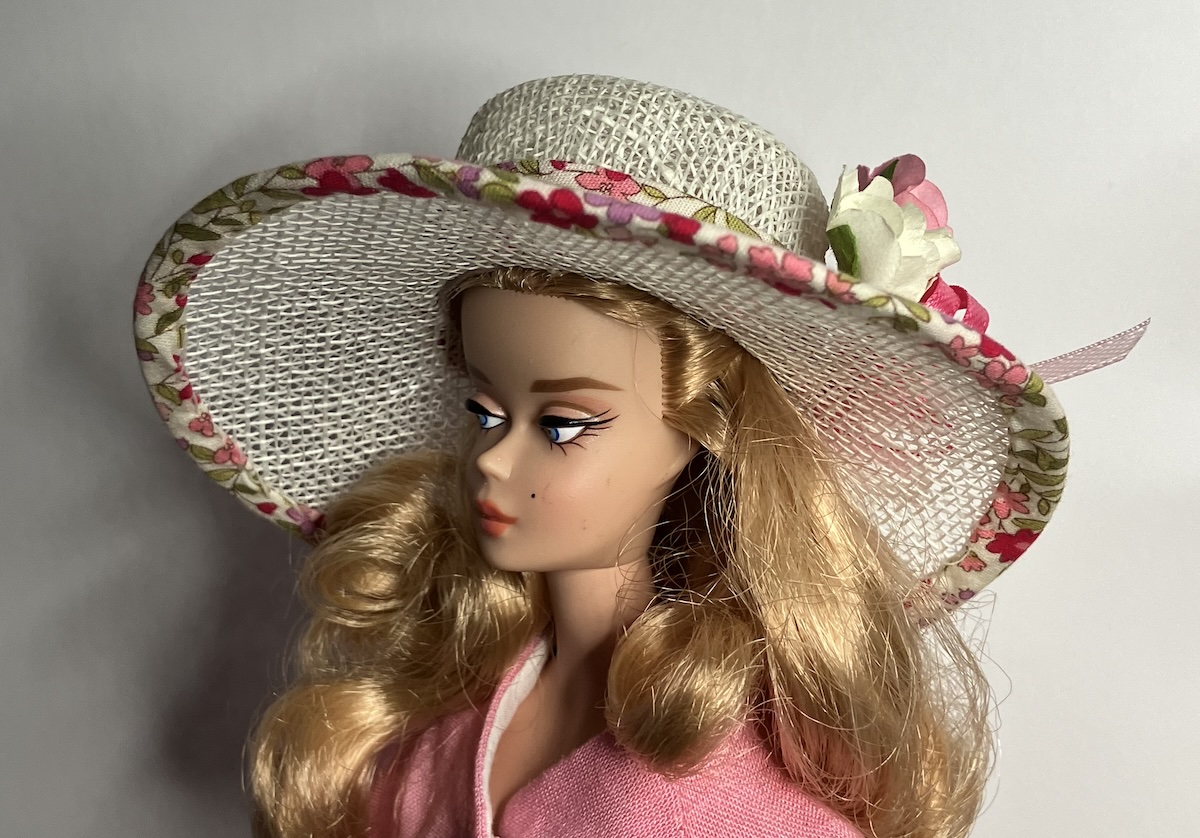
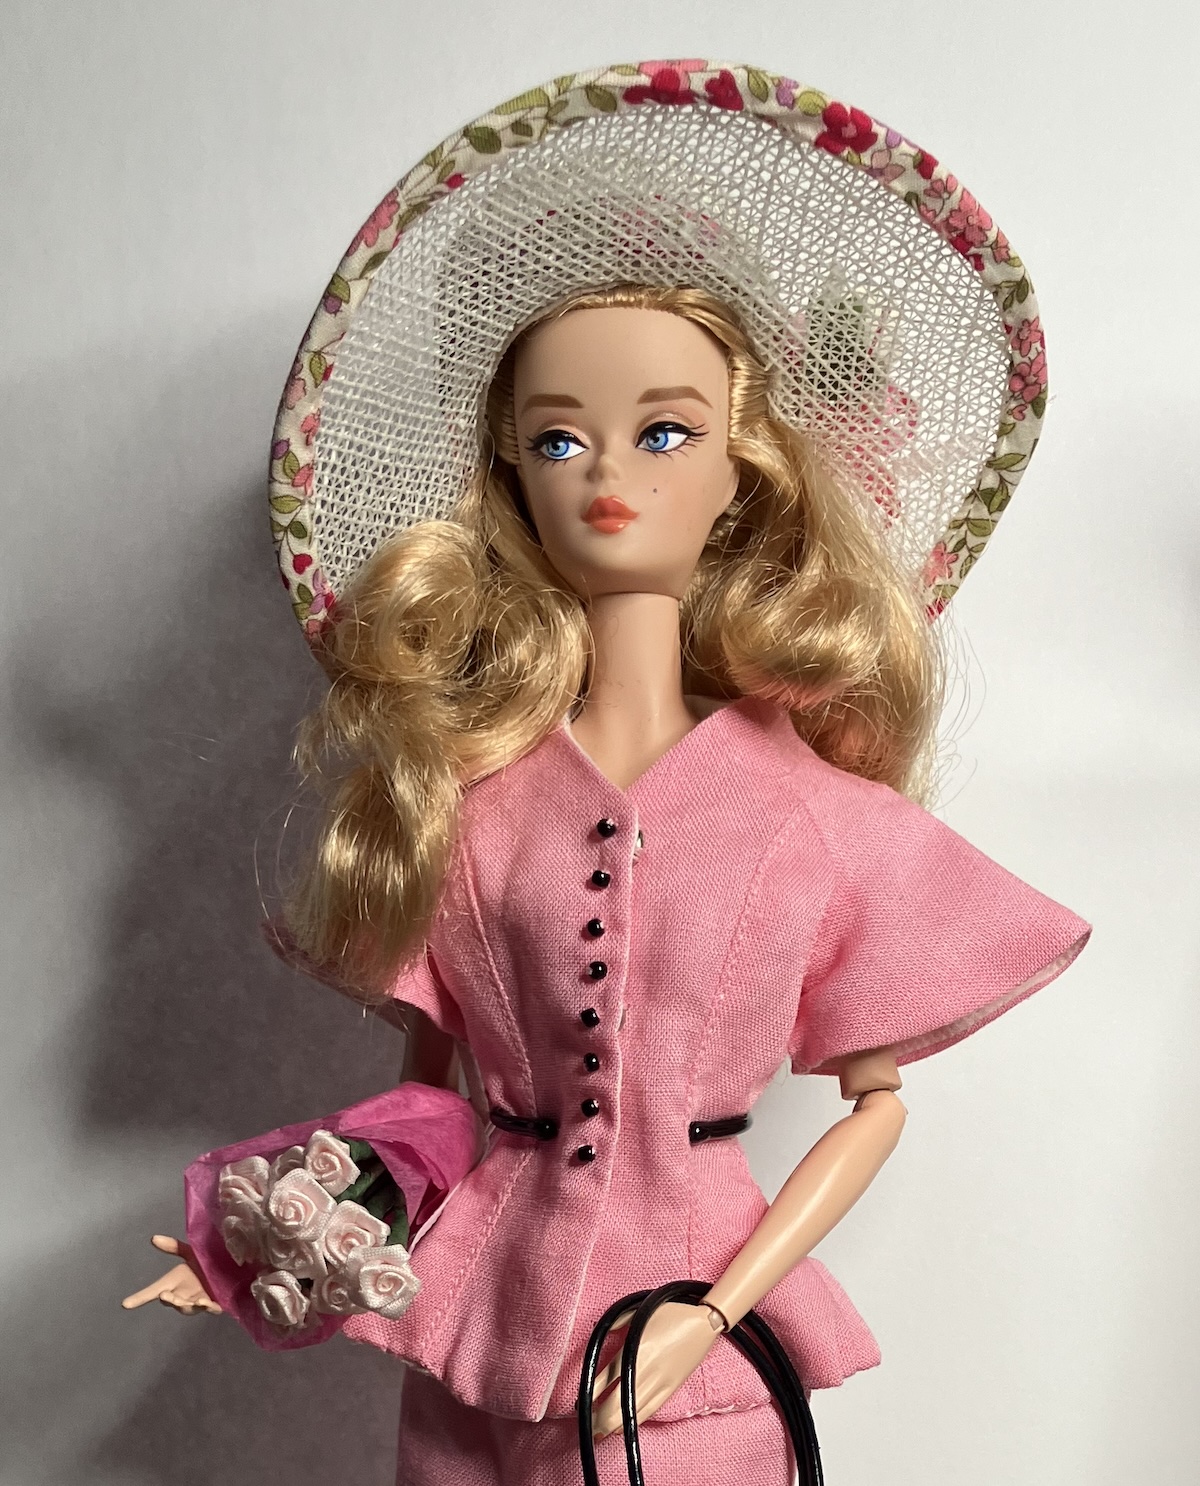
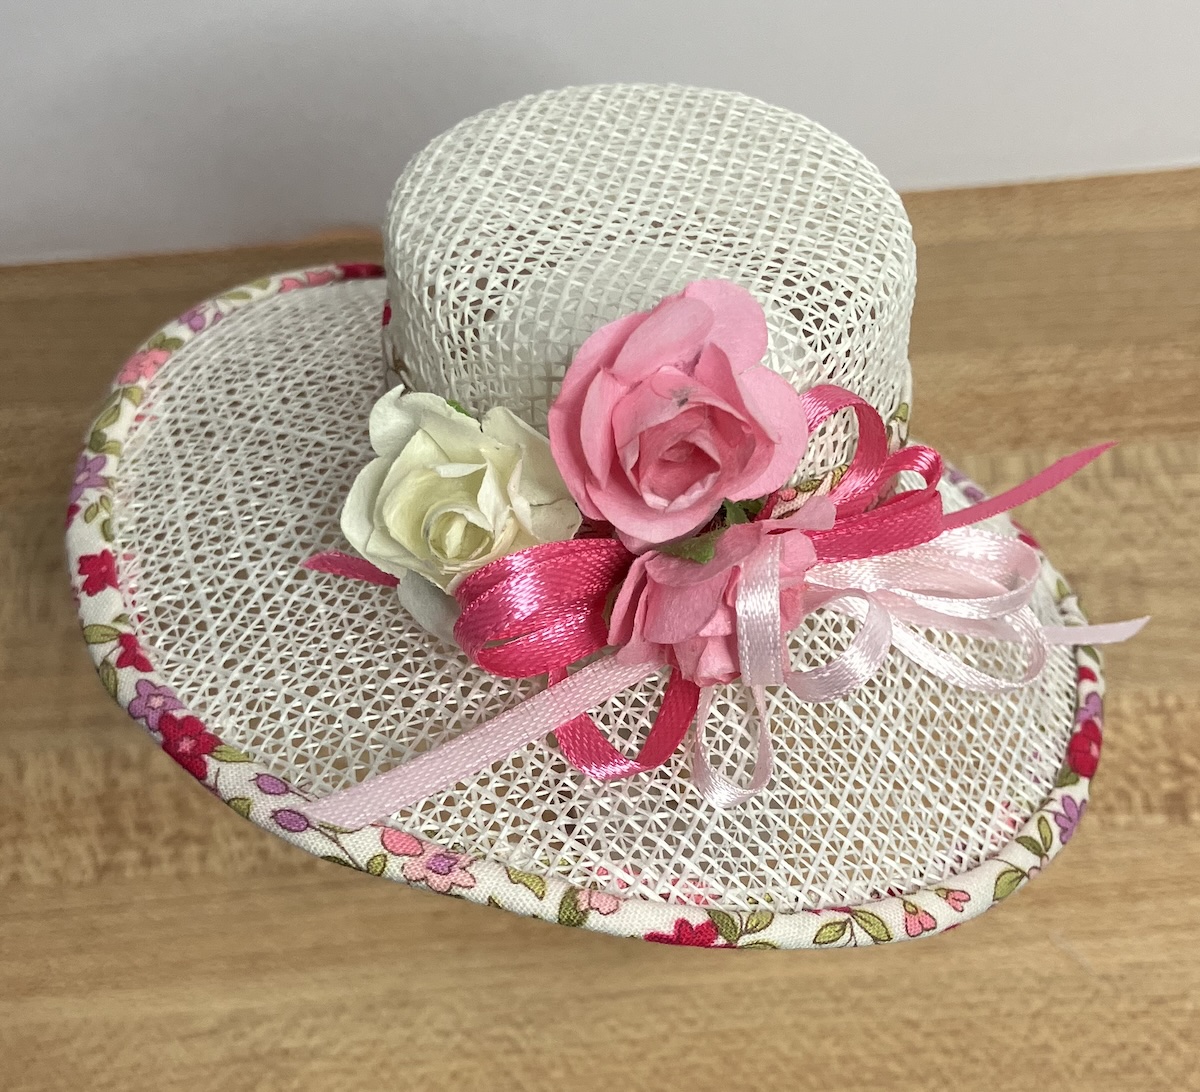
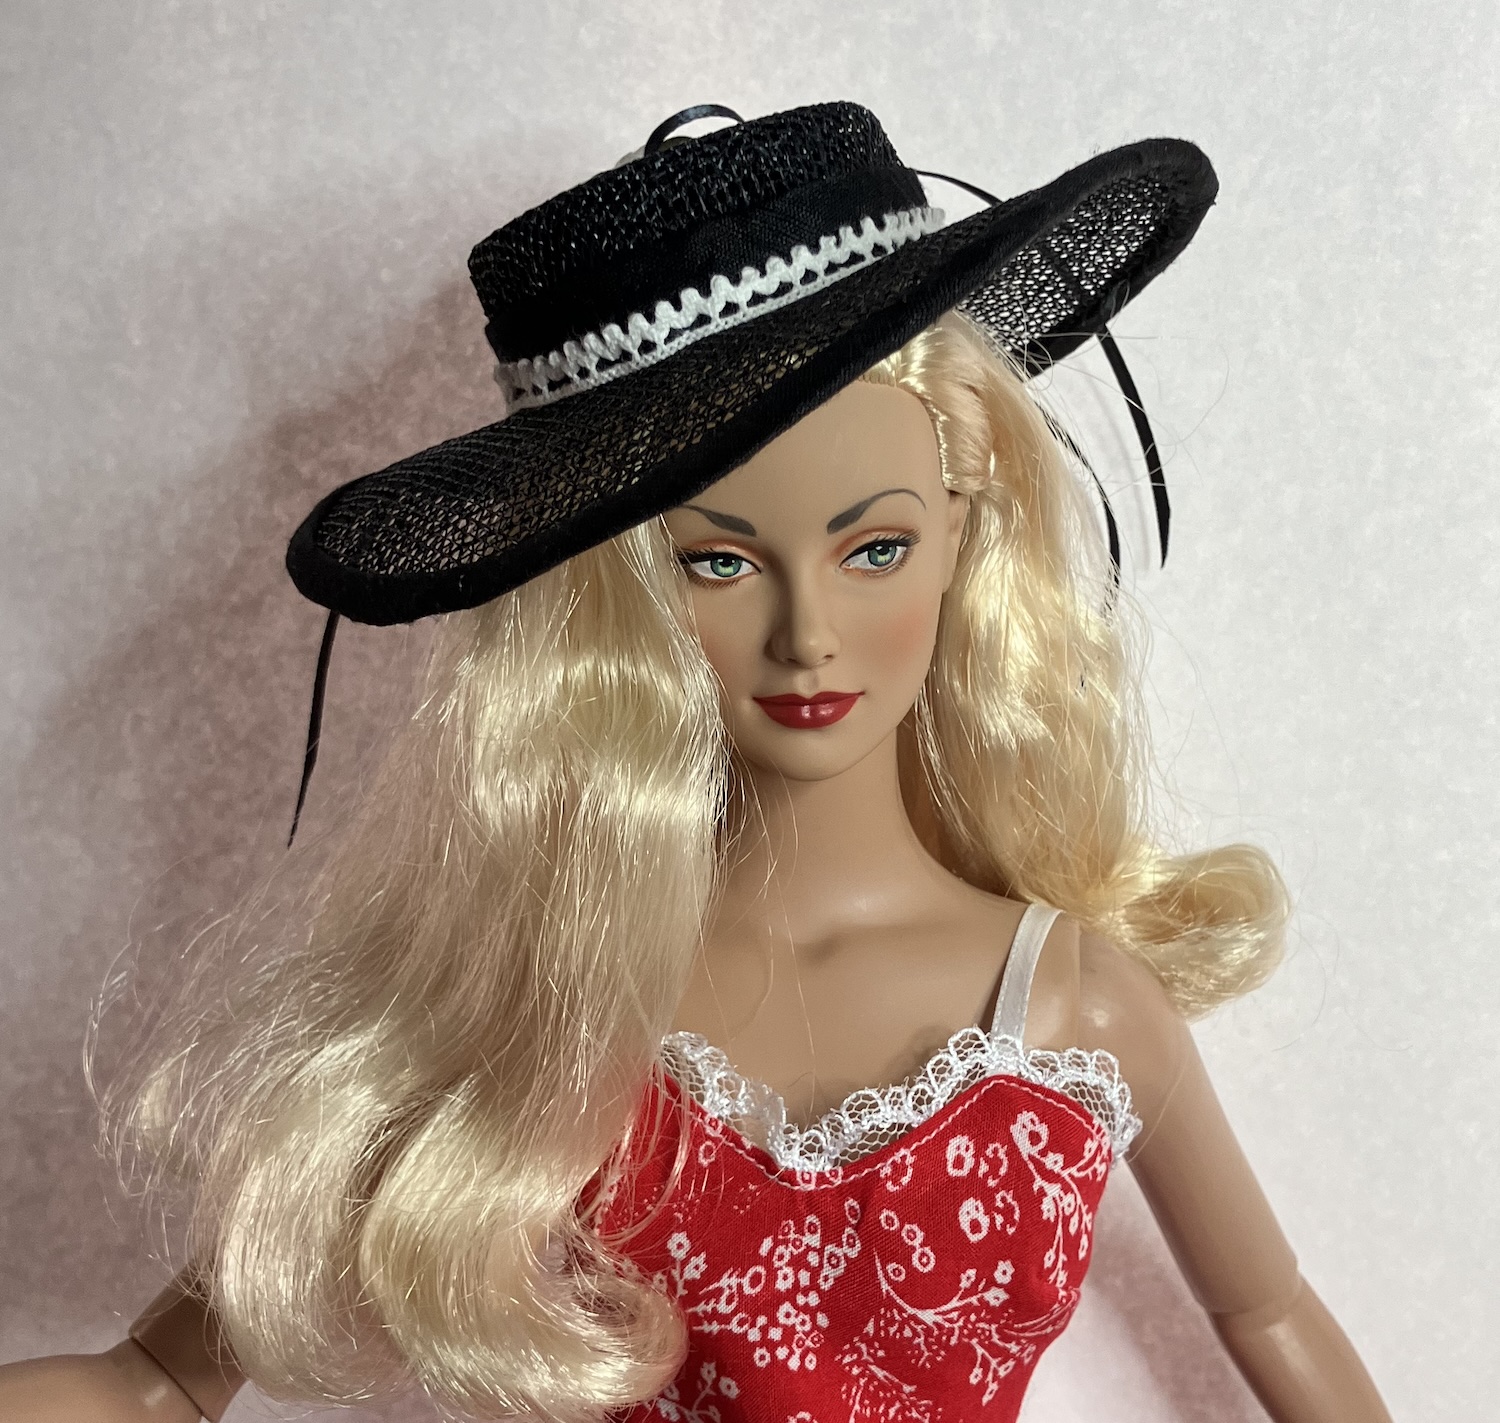
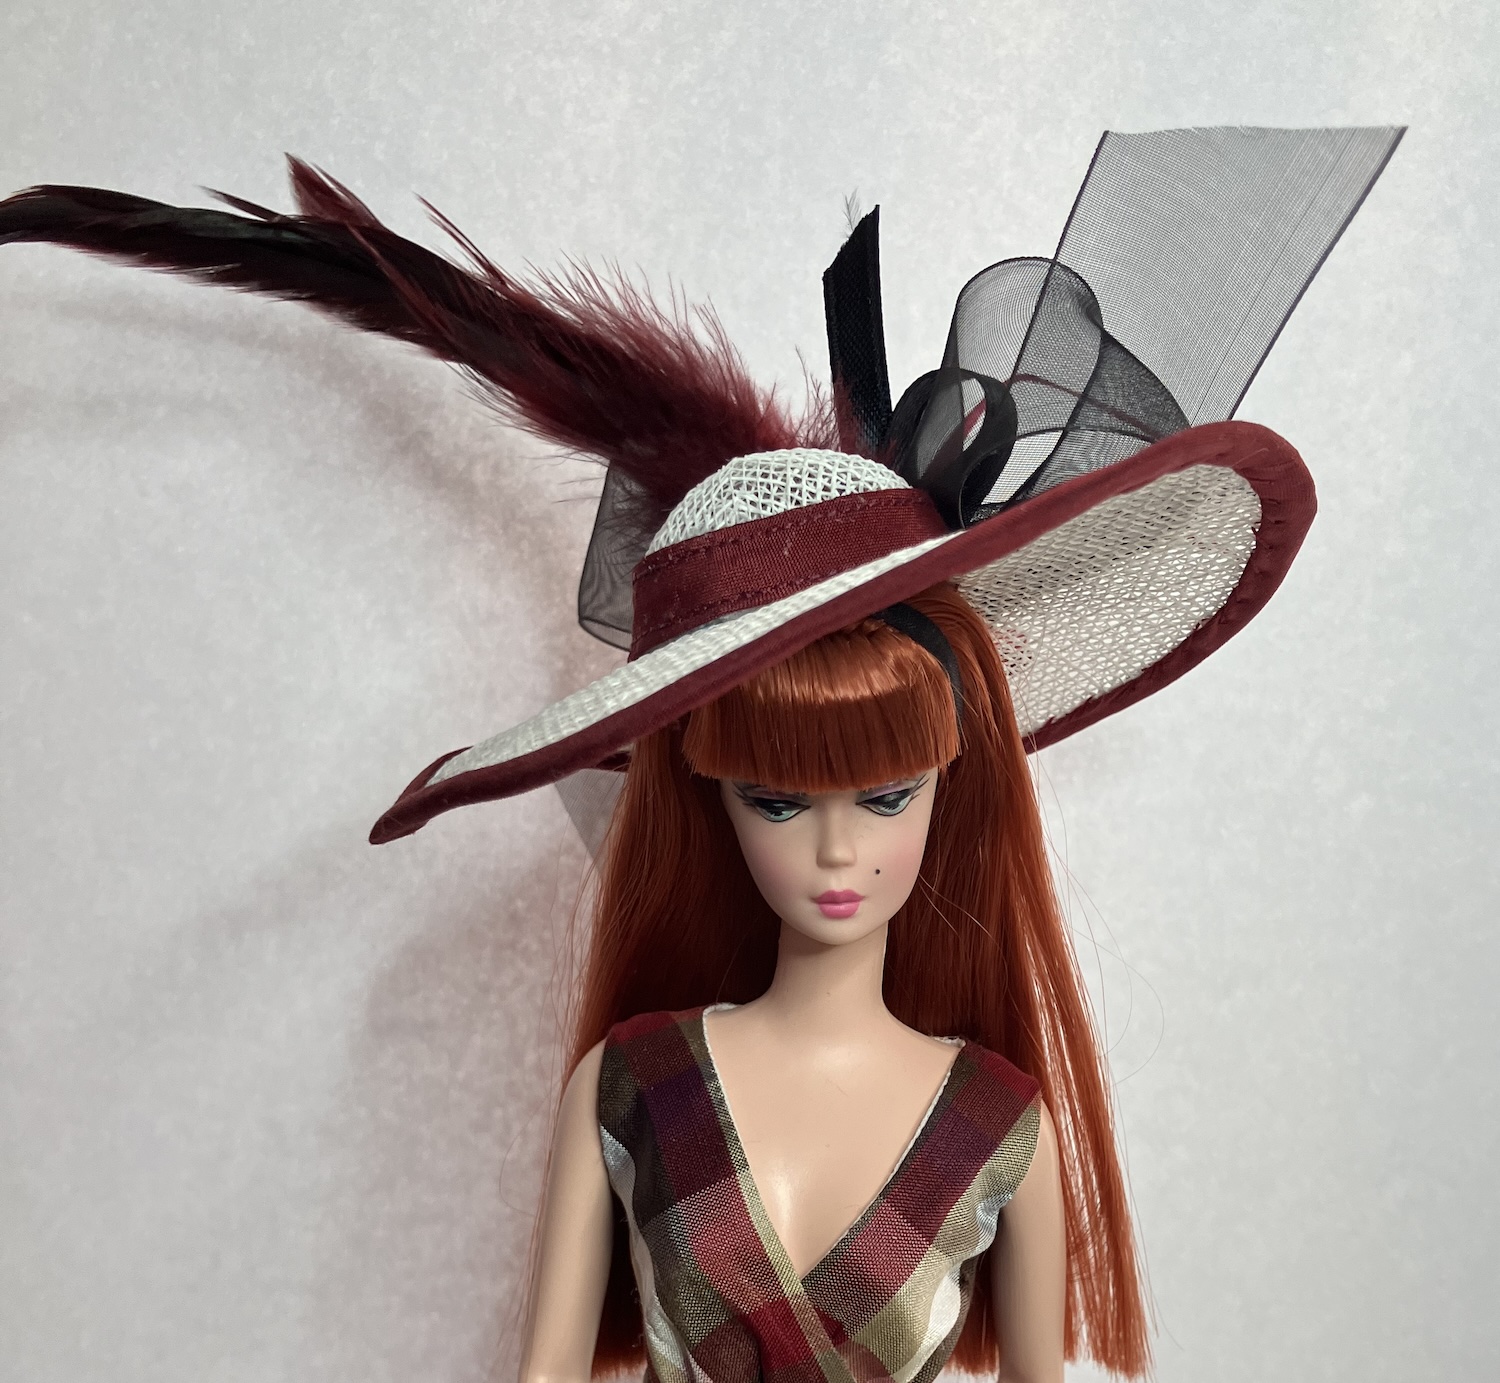
The shorter crown, about 1.5cm, is really good for the 11-12″ dolls. It maybe could be a little smaller in diameter for the Silkie girls, but again, that depends upon their hairstyle. This hat is never going to fall over their eyes, and the wire in the brim means it can be shaped.

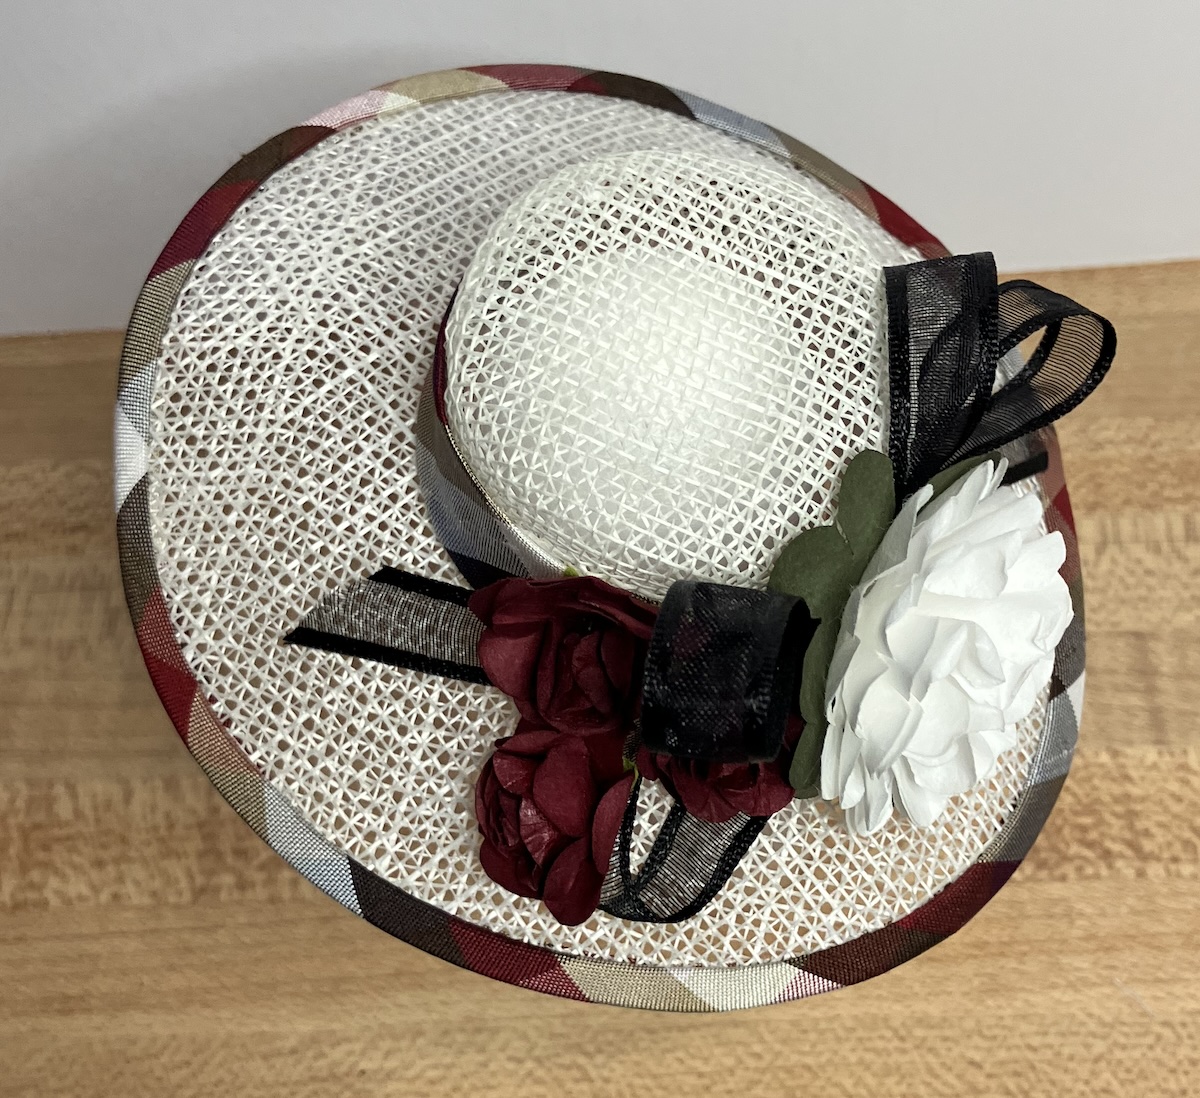
The shorter crown with the wider diameter, intended for the 16″ girls, didn’t work quite as well.

I added lace to the hatband of this one, but it’s still not a fave look for me. (It doesn’t help that the girls aren’t dressed to match. Lacey is in her altogether, while Daphne is still in her lingerie.)
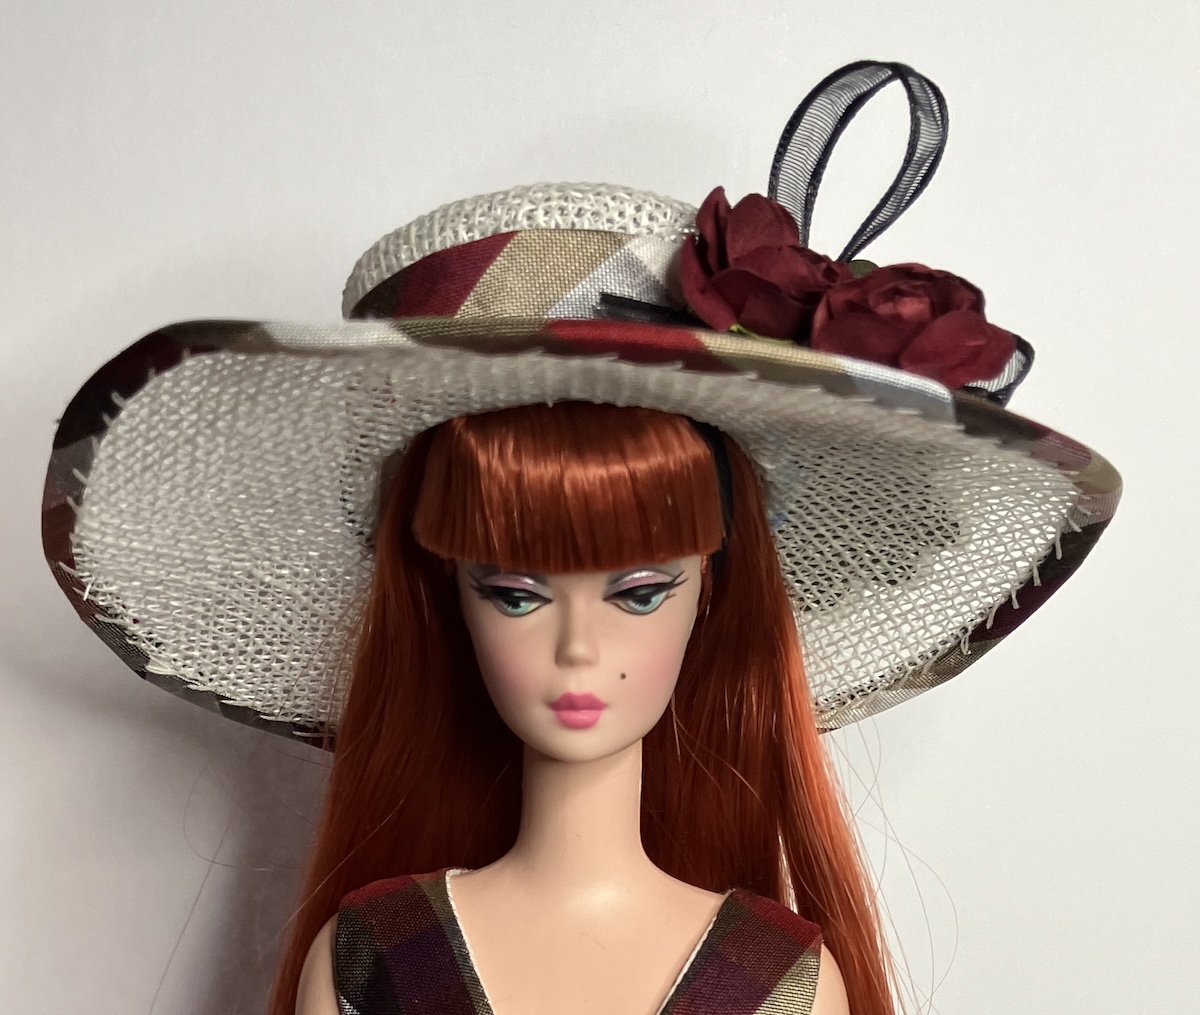
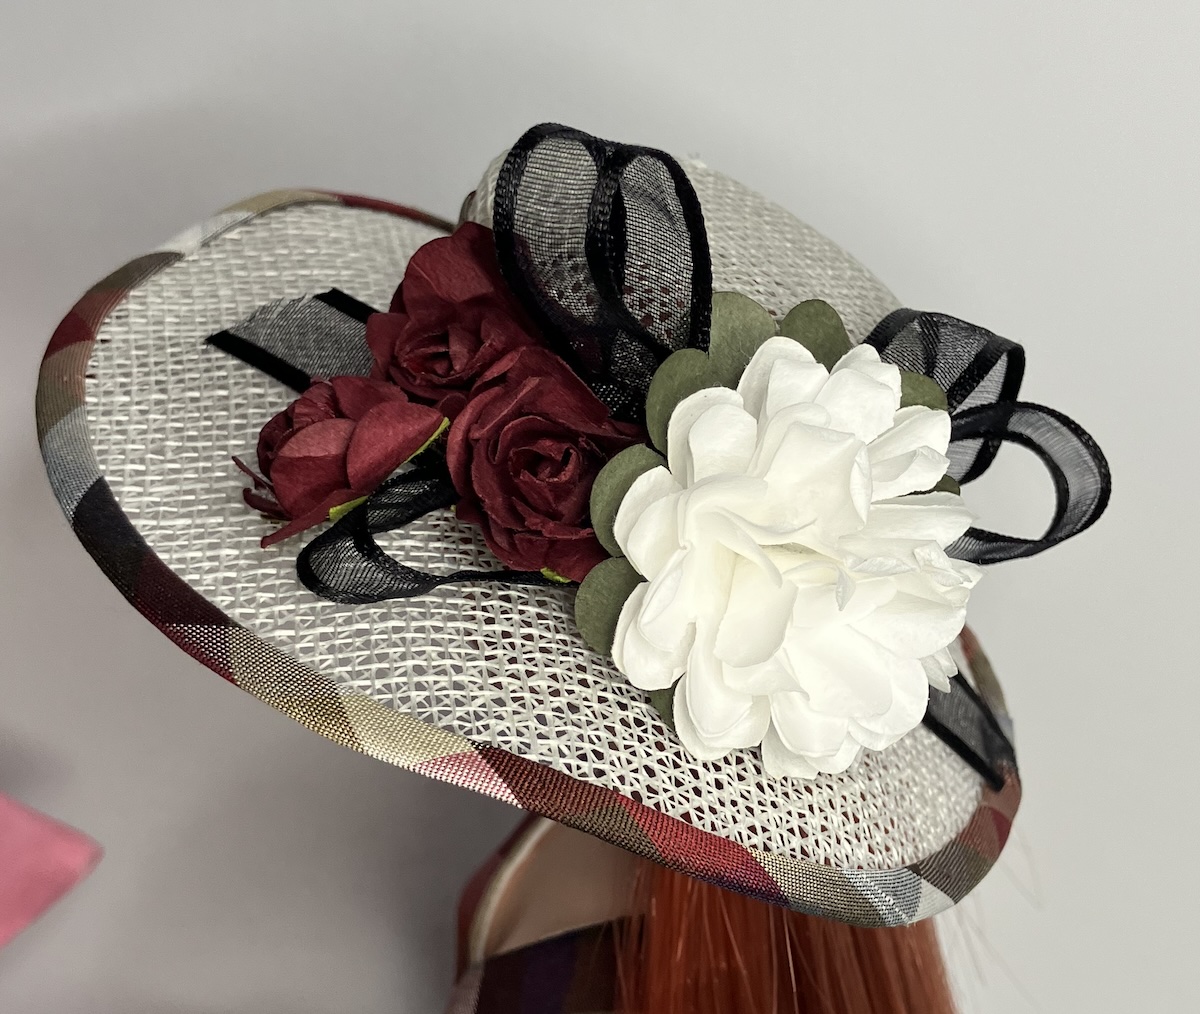
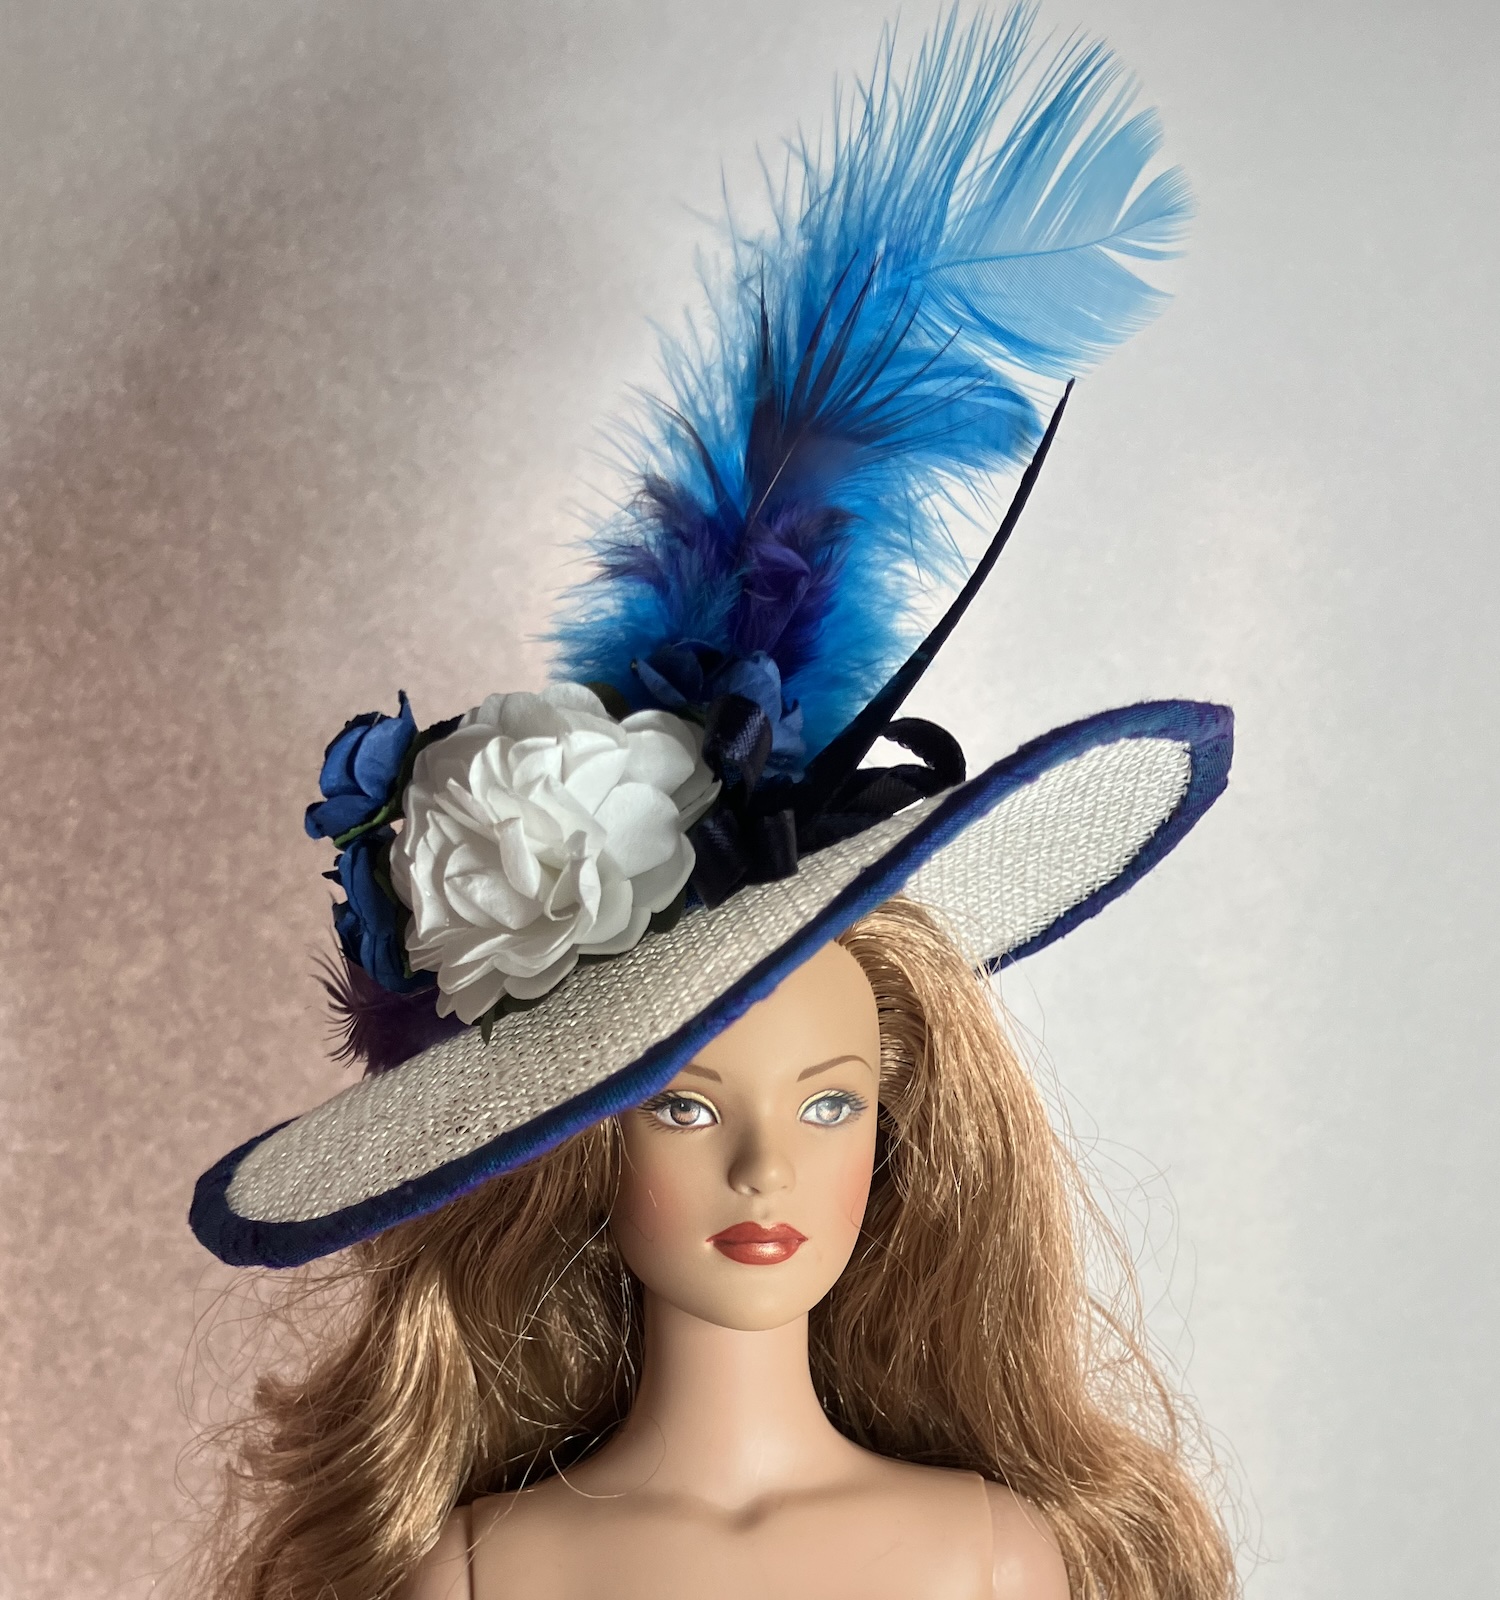
I made another with a deeper crown (2.5cm, like the earliest hats) and a 5″ brim instead of the 4″ brim I’ve been using all along. I also made the crown a little bit wider where it joins the brim. This worked out really well.
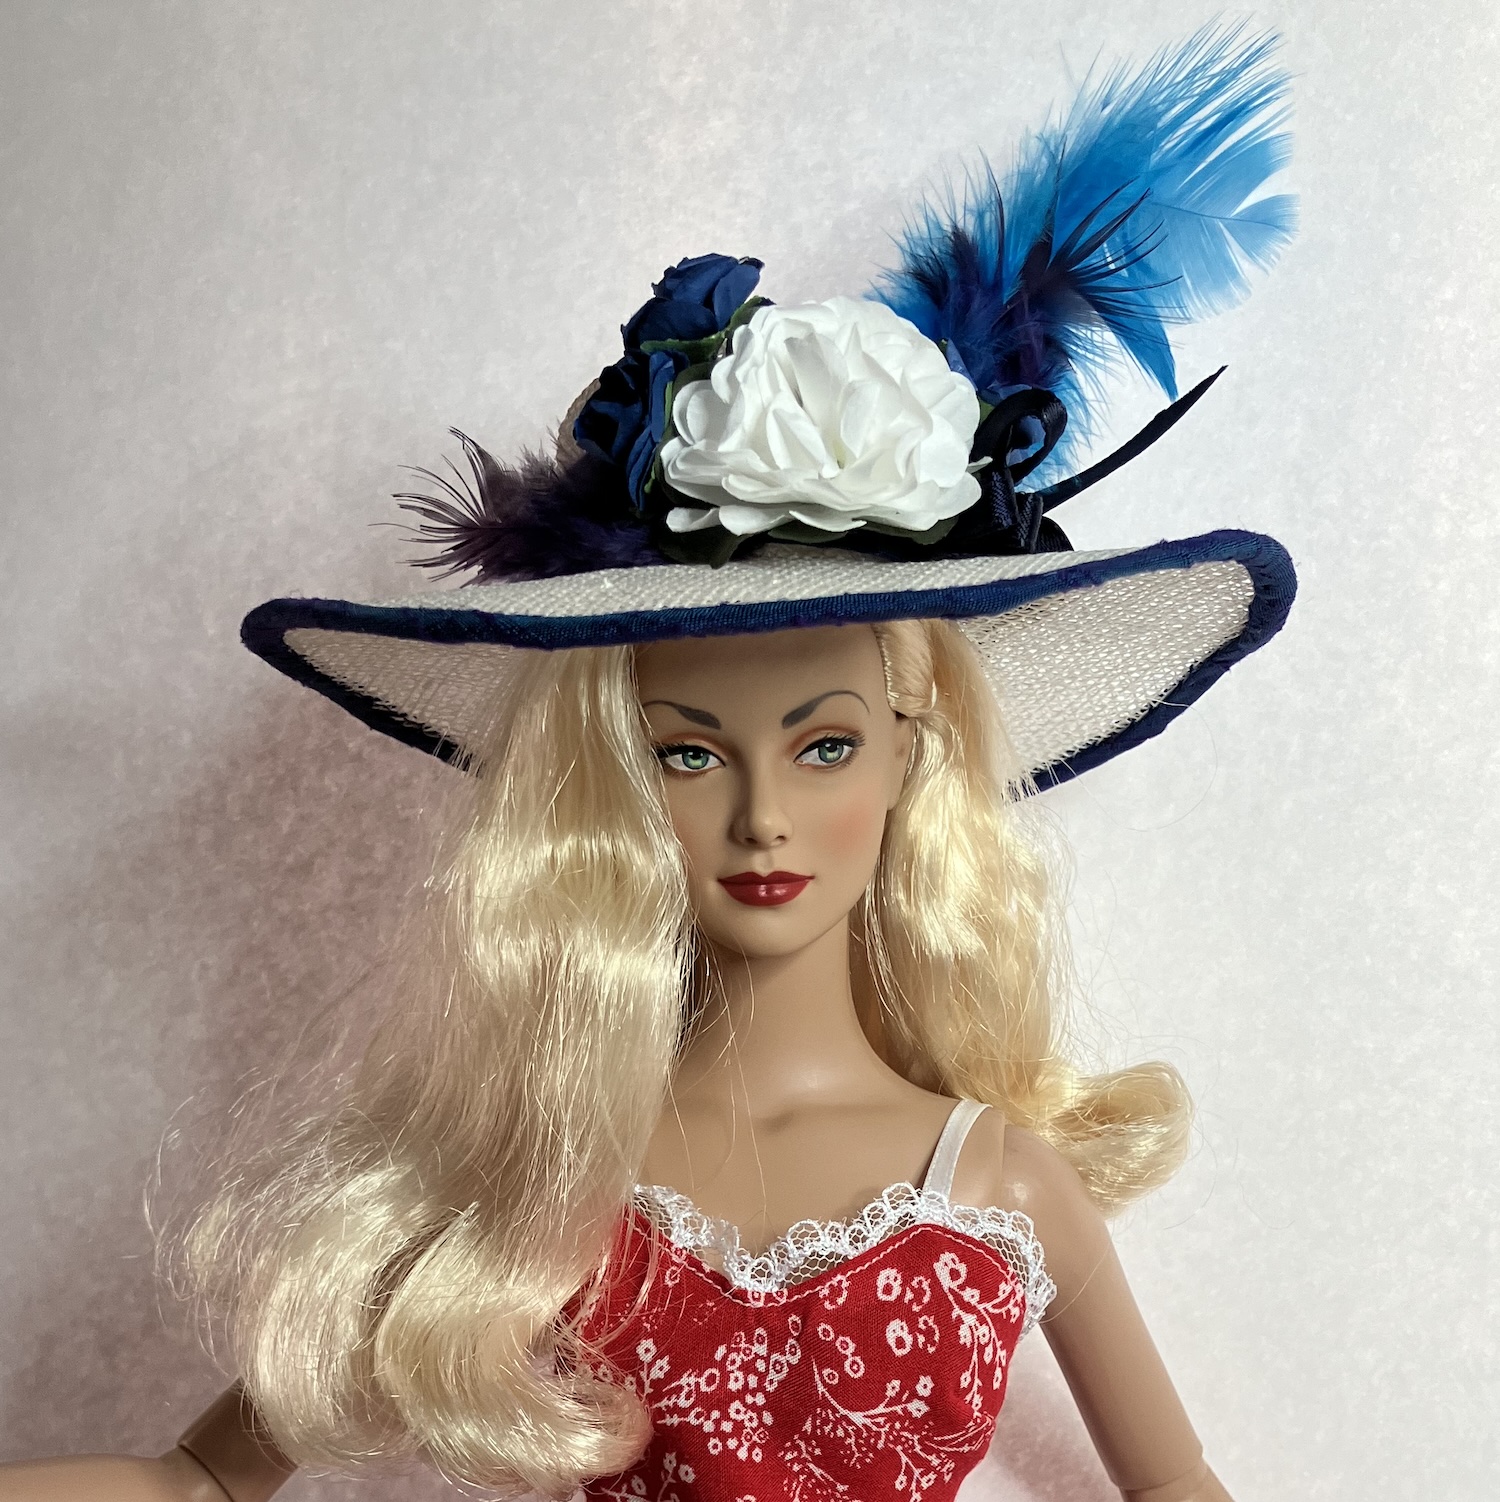
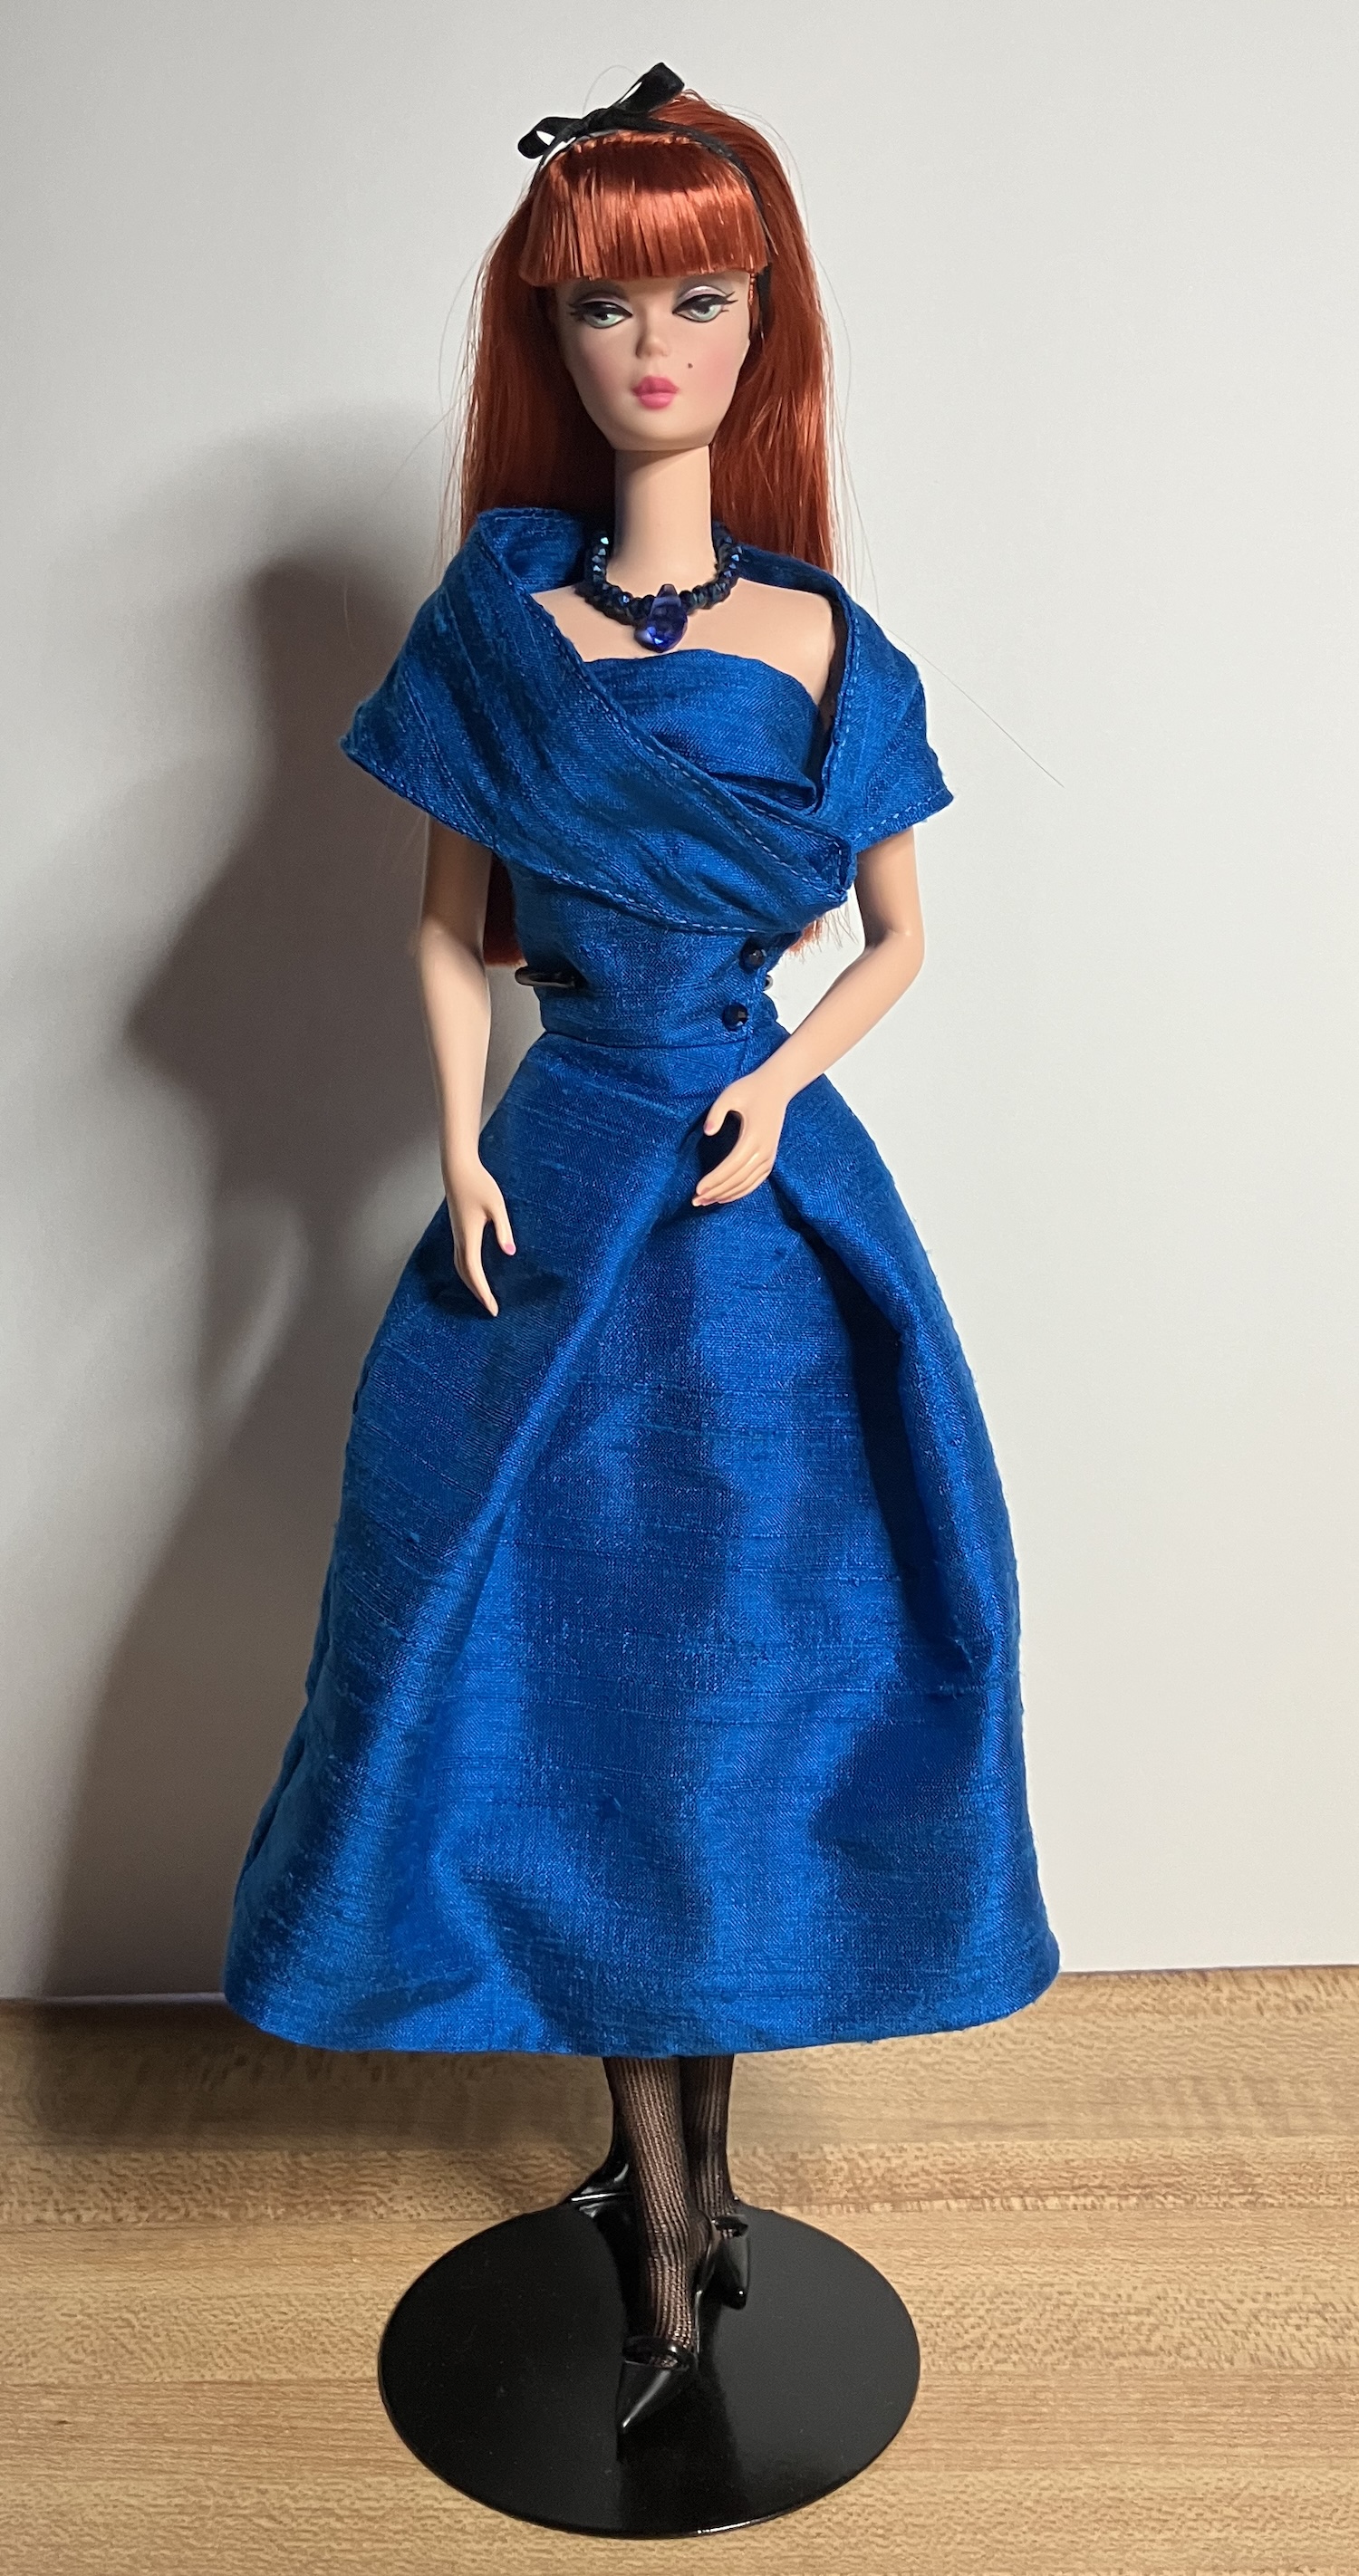
Tyler is in the buff, as well. I’m glad I discovered my stash of feathers.
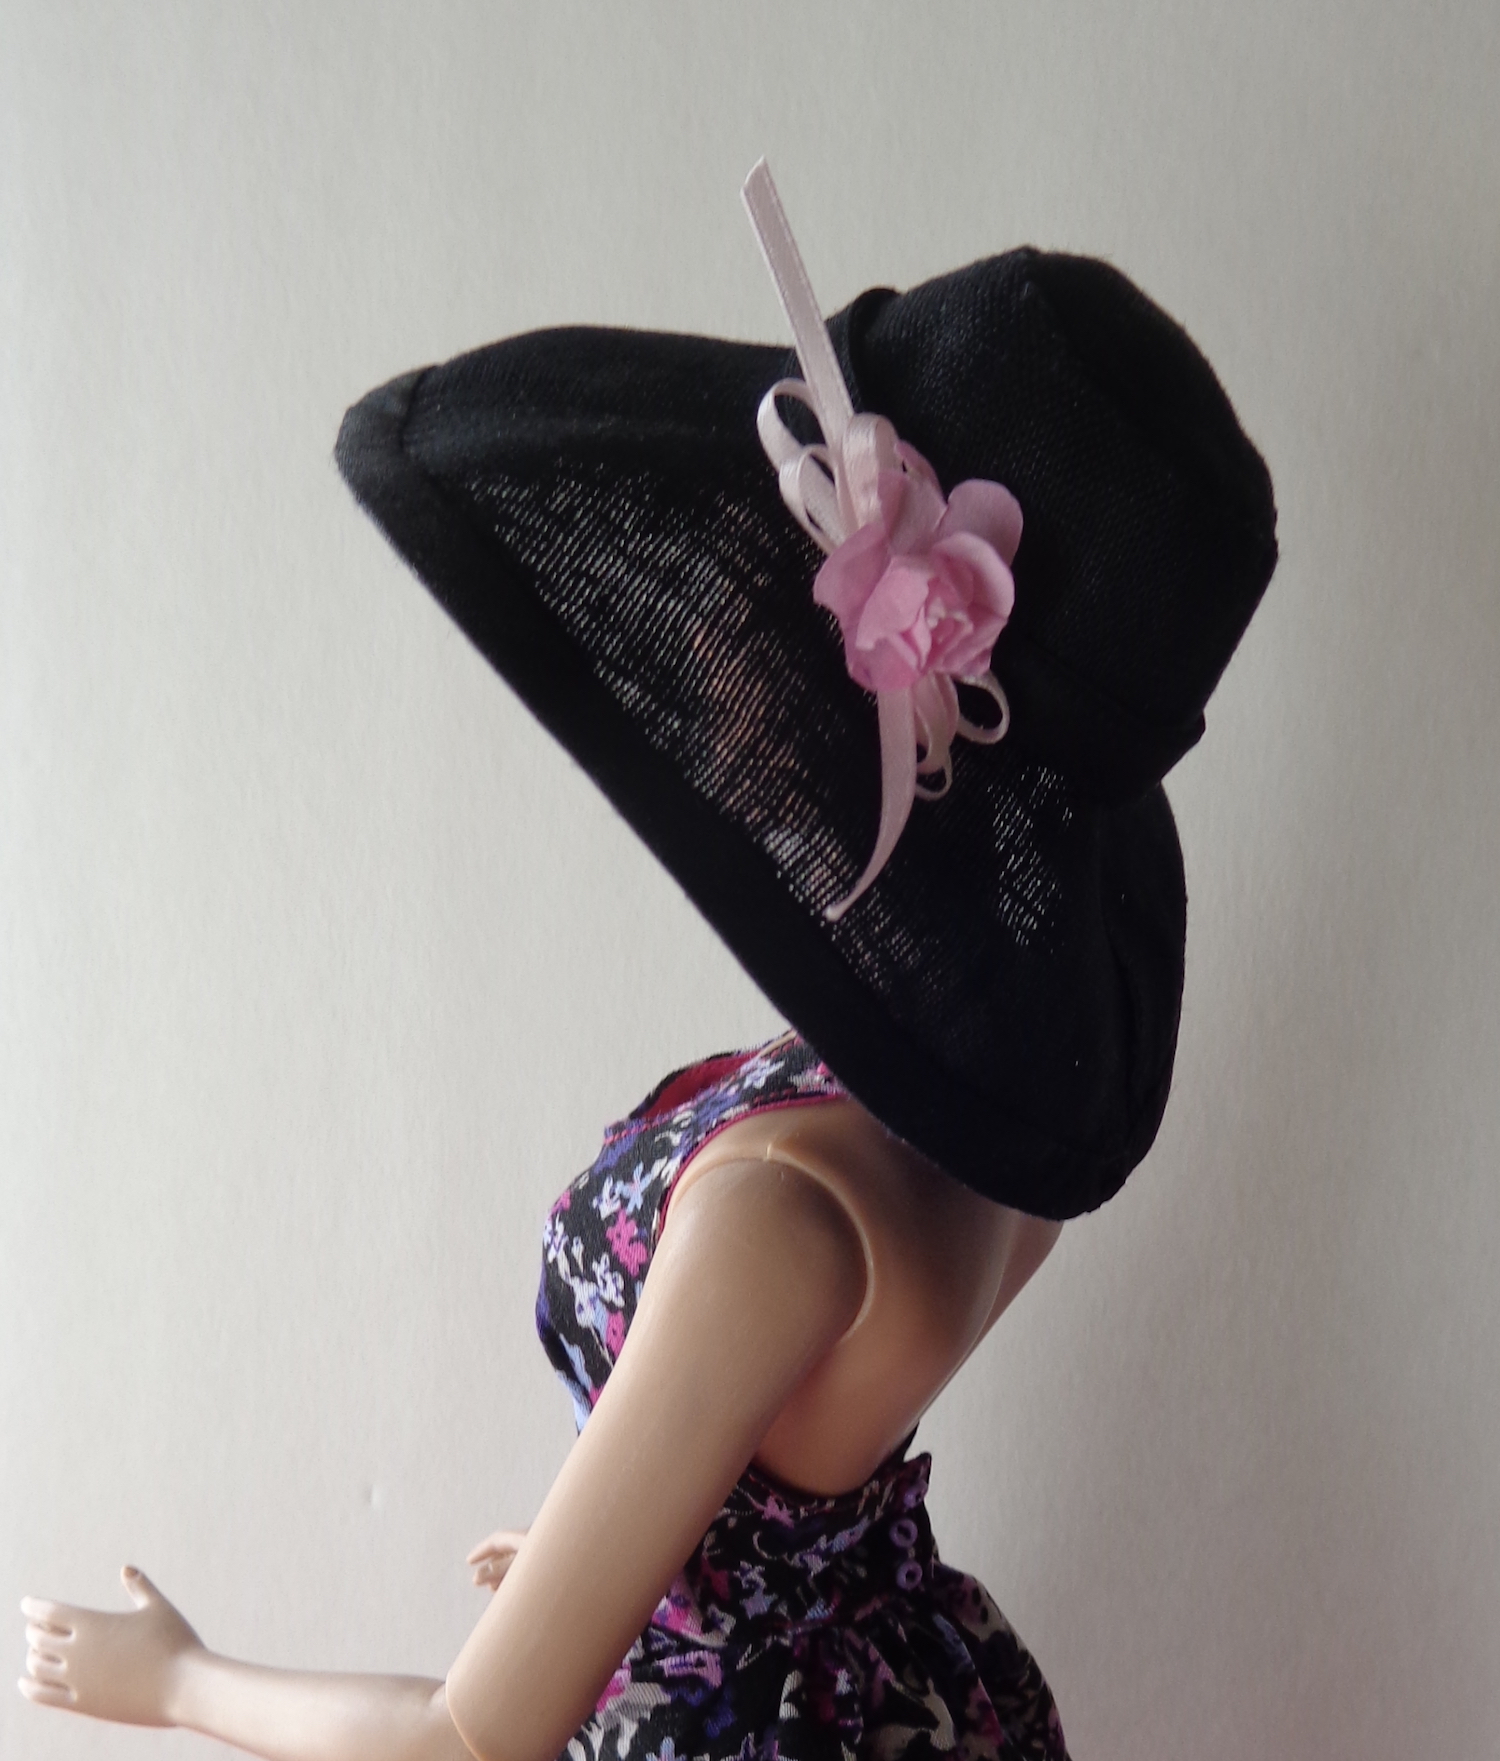
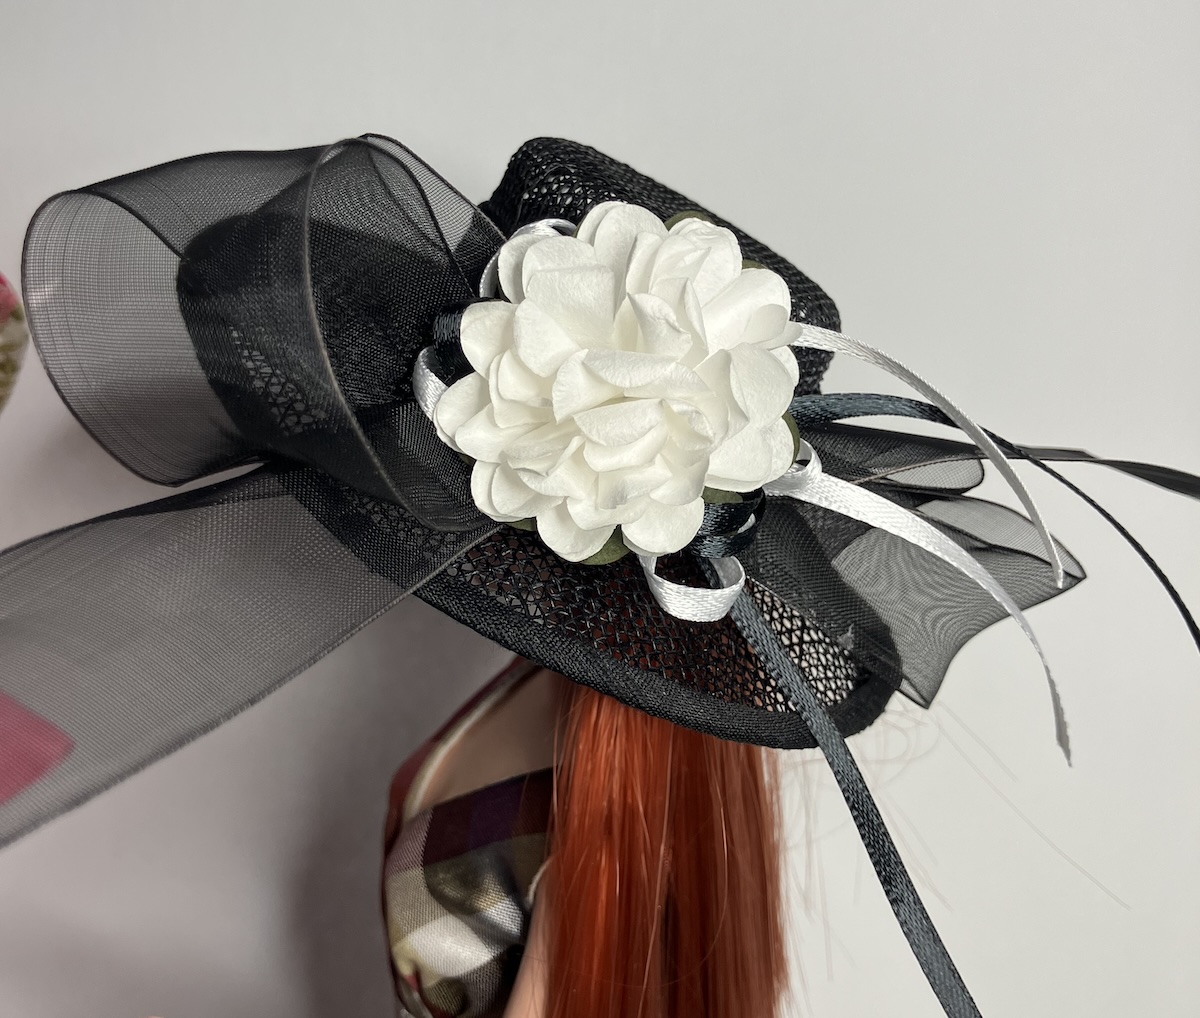
Finally, I made a hat for the 11.5″ girls with a curved crown. This was supposed to be a pillbox hat, inspired by the book, but I watched Four Weddings & a Funeral again and had to add the big brim instead.
These last two are my favourites of the seven (7!) doll hats I’ve made in the past week or so. I’m going to take a break from sinamay now. Soon, the coloured sinamay will arrive from the UK and it will start me all over again. Not today, though.
I finished the knitting on my Quintessential Cardigan in Judy Long Alba in Kilt (which is a plum heather). This is the second kit I bought of this cardigan – I finished the green one in June 2024. So, I’ll be sewing that one together next and knitting the neckband etc. I decided against buttons on this one, so it’s pretty much a case of just sewing it together. (Ew. I hate seaming, but I will Just Do It!) This has to be a record for me to knit two sweaters in two years and right after getting the kits, too.