Undine Shawl

Here’s another of my knitting patterns, now available for free download.Undine by Deborah Cooke knit in Noro Kureyon Sock by Deborah CookeIt’s a triangular shawl, knit in garter stitch, with a ruffled edge. That edge has a picot border. it’s also knitted sideways, which makes for fun stripes in self-striping yarn. You can make this shawl in any size – basically, you follow the directions to increase the width of the shawl until half your yarn is gone. Then you use the directions to decrease down to the other point.

Undine by Deborah Cooke knit in Noro Kureyon Sock by Deborah CookeI used Noro Kureyon Sock for mine. This is two balls-worth and it’s a pretty good sized shawl. Something about the colours and that ruffley picot edge made me think of mermaids and seaweed, thus the name.

The pattern is on Ravelry right HERE.

Kidsilk Haze Gloves

Last week, I cast on a pair of gloves in Kidsilk Haze. Although I am making steady progress on moving my many knitting projects toward completion, sometimes a quicker project needs to sneak into the list to keep me motivated. That’s what these were. And they’re done! Johnstone Gloves by Kim Hargreaves knit in Rowan Kidsilk Haze by Deborah CookeThese are knit using two strands of Kidsilk Haze held together. I used one ball of each colour, and used both ends from each ball when knitting. I was a bit concerned that this might make tangles, but the yarn was very cooperative. (I love KSH.) The pattern called for either 2 row alternating stripes or 4 row alternating stripes – since I wanted to mix it up with a 2 row stripe followed by a 4 row stripe, I thought I might run out of yarn. That’s why I made them opposite in colour. But there’s at least a quarter of a ball of each left – I probably could have made them match.

OTOH, I think it’s fun that they aren’t exactly the same. They’re warm and fuzzy and soft, and just about the perfect gloves for the chilly weather we’re having.

Now, back to all those big projects on the go!

Have you finished any projects lately? Done anything that made you want to cheer?

Damask Bag in SWS – 3

So, I’m still knitting on this ginormous bag, and still loving it to bits. Let’s see – I started to tell you about it HERE, then continued the story HERE. This is the third installment of the story!

I’ve finished one side of the bag, in the same checkerboard pattern as the base. Here’s what it looks like now:Kauni Damask Understated Bag by Karen Stelzer knit in Patons SWS by Deborah CookeSo, the bottom of the bag is at the bottom of the photo here, folded behind the front and back. The top that will remain open is at the top, and the flap off to the top right. To knit the side, I picked up the stitches across the bottom, then picked up stitches all along the edge of the front and the back. Those I left on spare needles. As I knit the side, I joined it to the front and back by working two stitches together at the end of every row. Once I got up to the top, I worked applied I-cord all the way down the join, across the bottom and up the other side – that makes that nice thick black line. Right now, the live stitches at the top of the side are on that green piece of sock wool.

I’ve flipped it over since taking this picture and am repeating this exercise on the other side of the bag. Once that’s done, I’ll just need to knit the handle. I think I’m going to try double knitting on that, so the checkerboard pattern will be on both sides. I’ll knit from one end, make the strap, then graft it to the other side of the bag once I guess that it’s long enough.

After that, there’s just the felting to be done! I can’t wait to see this bag felted and finished.

What do you think of it so far?

My Bright Socks

Here’s one of a pair of socks I’m just finishing.Arch-Shaped Socks by Jen Showalter knit of hand-dyed Knitpicks sock blank by Deborah CookeFirst, let’s talk about the yarn. It’s a sock blank from Knit Picks that I dyed myself. A sock blank is a machine-knit rectangle, which is knit of two strands of sock yarn together. The idea is that you paint or dye it, then knit your socks two at a time with the magic loop method. I gave this a valiant effort but I didn’t enjoy it – instead I unwound the sock blank, separated the strands, balled the yarn and knit them one at a time, the way I always do.

I painted my sock blank in a rainbow gradient. The plan was to start with yellow, then proceed through orange, red, purple, blue and end with green. I had three primary colours of acid dye – yellow, red and blue – but found that they didn’t make such great secondary colours. The orange isn’t bad, but the purple isn’t at all what I wanted. I knit the sock so that the green didn’t even end up being used. That’s how much I disliked it. I put black dots on the sock blank in a regular pattern with an eyedropper – they spread into great blotches instead of remaining nice neat dots. I like how they knit up, though, making ziggles all over the socks.

In hindsight, I kind of like the purpley bits. They aren’t the intense deep purple I envisioned here, but their silvery tone is nice. I may try to find that dye blend again, with another skein of yarn.

The pattern is called Arch Shaped Socks, and you can download the pdf of the pattern HERE. (I’m hoping this is a page that can be viewed by the world at large, but if not, you can always create a free Ravelry account to see it. The pattern is actually resident on another server.) The original pattern has only a ribbed cuff, and the rest of the sock is worked in stockinette. I ribbed mine all the way down to the toe, inspired by the projects of several other Ravellers. The original knitter who ribbed the foot goes by the Ravelry name of Wireless. I think the sock looks really cool with this extra ribbing. My leg length is a bit random – I chose to turn the heel just after the red began. My hope was that there would be enough red of pretty much the same colour that I wouldn’t end up with a line when I started to work in the round again. It worked!

I’m really happy with these socks and can’t wait to finish the second toe.

Have you knit anything lately that made you really happy? Or done something that you thought was huge fun?

Damask Bag in SWS – 2

I told you a few weeks ago about a fair isle bag I had started to knit and intended to felt.

Well, here’s an update. (I’m going on about this bag because I really really really like it, so you get to hear about it!)

I’ve finished the knitting of the bag itself and here’s a picture of it flat:Kauni Damask Understated Bag by Karen Stelzer knit in Patons SWS by Deborah Cooke

The edges really want to curl, and it’s not entirely straight, but you get the idea. I had to hold the camera over my head to get the shot – it’s that big – so the end of the button loop didn’t make it into the image. Oh well! It is about 66 inches long and roughly 22 inches wide – of course, it will shrink a lot when I felt it.

I changed direction twice with my knitting to get the flowers to all be knitted the same way. The first part I knit actually ended up in the middle – it’s the section with the black flowers with the coloured background: I knit from the black line which is just below the checkerboard in this picture down to the pink line. This will be the back of the bag.

When that was done, I picked up stitches at the bottom (a provisional cast on would have been an excellent plan) and knit in the other direction: I knit the checkerboard for the bottom of the bag, then the panel with the coloured flowers on the black background, casting off at the end. This will be the front of the bag.

I used the same technique as in my Stripey Noro Messenger bag and knit two rows in reverse stockinette where the bag will fold.

Then I knit the flap, starting at the point. I tried to replicate the curve of the original, even though my gauge was completely different and I was knitting in the other direction. It’s not too far off. I knit one flower motif, then 40 more rows of plain black. When that was done, I knit that pink line and left the stitches on the needle. I knit pinky-purple I-cord around the flap, then grafted the flap to the top of the first panel I’d knit. The bag will open at the top and the flap will hang over the front of the bag.

And presto – all the flowers are knit in the same direction AND they will all be right side up when the sides are done. I really like how the shading worked out for the single flower on the flap – the brown at the bottom looks like roots in the soil, then yellow- greeny bits for the leaves and pink/purple for the flowers. A happy accident there.

Since this photo was taken, I’ve continued with the sides. I’m knitting them the same way as my Stripey Noro Messenger bag too – first I picked up stitches across the bottom of the bag (on either side of the checkerboard), and now I’m knitting up the sides of the bag, joining to the front and the back as I go. When I get to the opening and flap at the top of the bag, I’ll knit the handle.

Getting there!

What do you think?

Another Citron

Here’s a shawl I just finished last week. There was an idea that it might be a Christmas gift, but it was running so late that the planned recipient got something else. Now, I guess it’s mine!

It’s a free pattern from Knitty, called Citron.

I made a Citron last year in Noro Kureyon Sock yarn, but it came out much smaller than this one. There’s a post about it, back here. Here’s the new one:Citron by Hilary Smith Callis knit in Waterloo Wools Kirkland and Malabrigo Lace by Deborah CookeThe yarn is a handpaint that I bought at the Kitchener Knitters’ Fair last fall, and (incredibly) it didn’t need to age in the stash before I cast on. It’s from Waterloo Wools and is called Kirkland. The colour is a bit more burgundy than it appears in the pictures – the flash seems to have made it look pinker. The base yarn is very similar to Malabrigo Lace. I used smaller needles than the pattern says, because I like the look of Malabrigo Lace on 3.5mm needles.

This time, I wanted the shawl to be bigger, so I did seven rounds of the pattern before the ruffle. (Yup, I had to figure out the increases myself, but it wasn’t that hard.) The skein had 840 yards and I used most of it – if the hem had been in the same red, I would have used it all up. It’s a good size, though – it comes down to my elbows.

I also added beads to the last four repeats, putting them in the flat part with greater density each round. I wanted them to get more dense toward the hem.

Citron by Hilary Smith Callis knit in Waterloo Wools Kirkland and Malabrigo Lace by Deborah CookeSince the beads were dark (black with red linings) and the yarn is very much like Malabrigo Lace, I dug into the stash of leftover bits and pulled out some Malabrigo Lace in black. I worked two rows of stockinette in black at the hem of the ruffle, but then it curled when casting off – so I added a row of purl on the RS, then cast off on the WS. There are some beads in the black as well. It still curls a bit, but I have mixed feelings about blocking it – the ruffles flattened out when I blocked that last Citron and didn’t really ever come back. Maybe I’ll live with the curl.

It makes me think of flamenco dancers. Fortunately, I don’t have any castenettes!

Thick Winter Socks

These are the socks I finished most recently. My husband put them on as soon as they came off the needles!Ribbed Sport Socks by Patons knit in Briggs and Little Tuffy by Deborah Cooke

The yarn is my favourite for hard-wearing warm socks. It’s called Tuffy and is from Briggs & Little, a mill in the Maritimes. This marl – one ply off-white and one ply grey – is called Granite. I had some Tuffy in Red Mix left from another pair of socks, so put it on the cuffs and toes. Although there are a few yarn stores local to me that carry B&L yarn, they don’t tend to have all of the colours – or the colours I want. What is nice is that you can order B&L yarns directly from the mill, even if you aren’t a wholesale customer. They just charge you the postage and pop it into the mail.

The pattern is from an old Patons book, although it’s been included in many other Patons books since. It’s called Ribbed Sports Socks. I followed the pattern, except I changed to 3×1 ribbing after my striped cuff. The pattern has most of the sock knit in 1×1 ribbing.

I like them. He loved them! What do you think?

Sock Yarn Hexagon Afghan Blocks

This is the project I mentioned yesterday, the one that will probably never be finished.

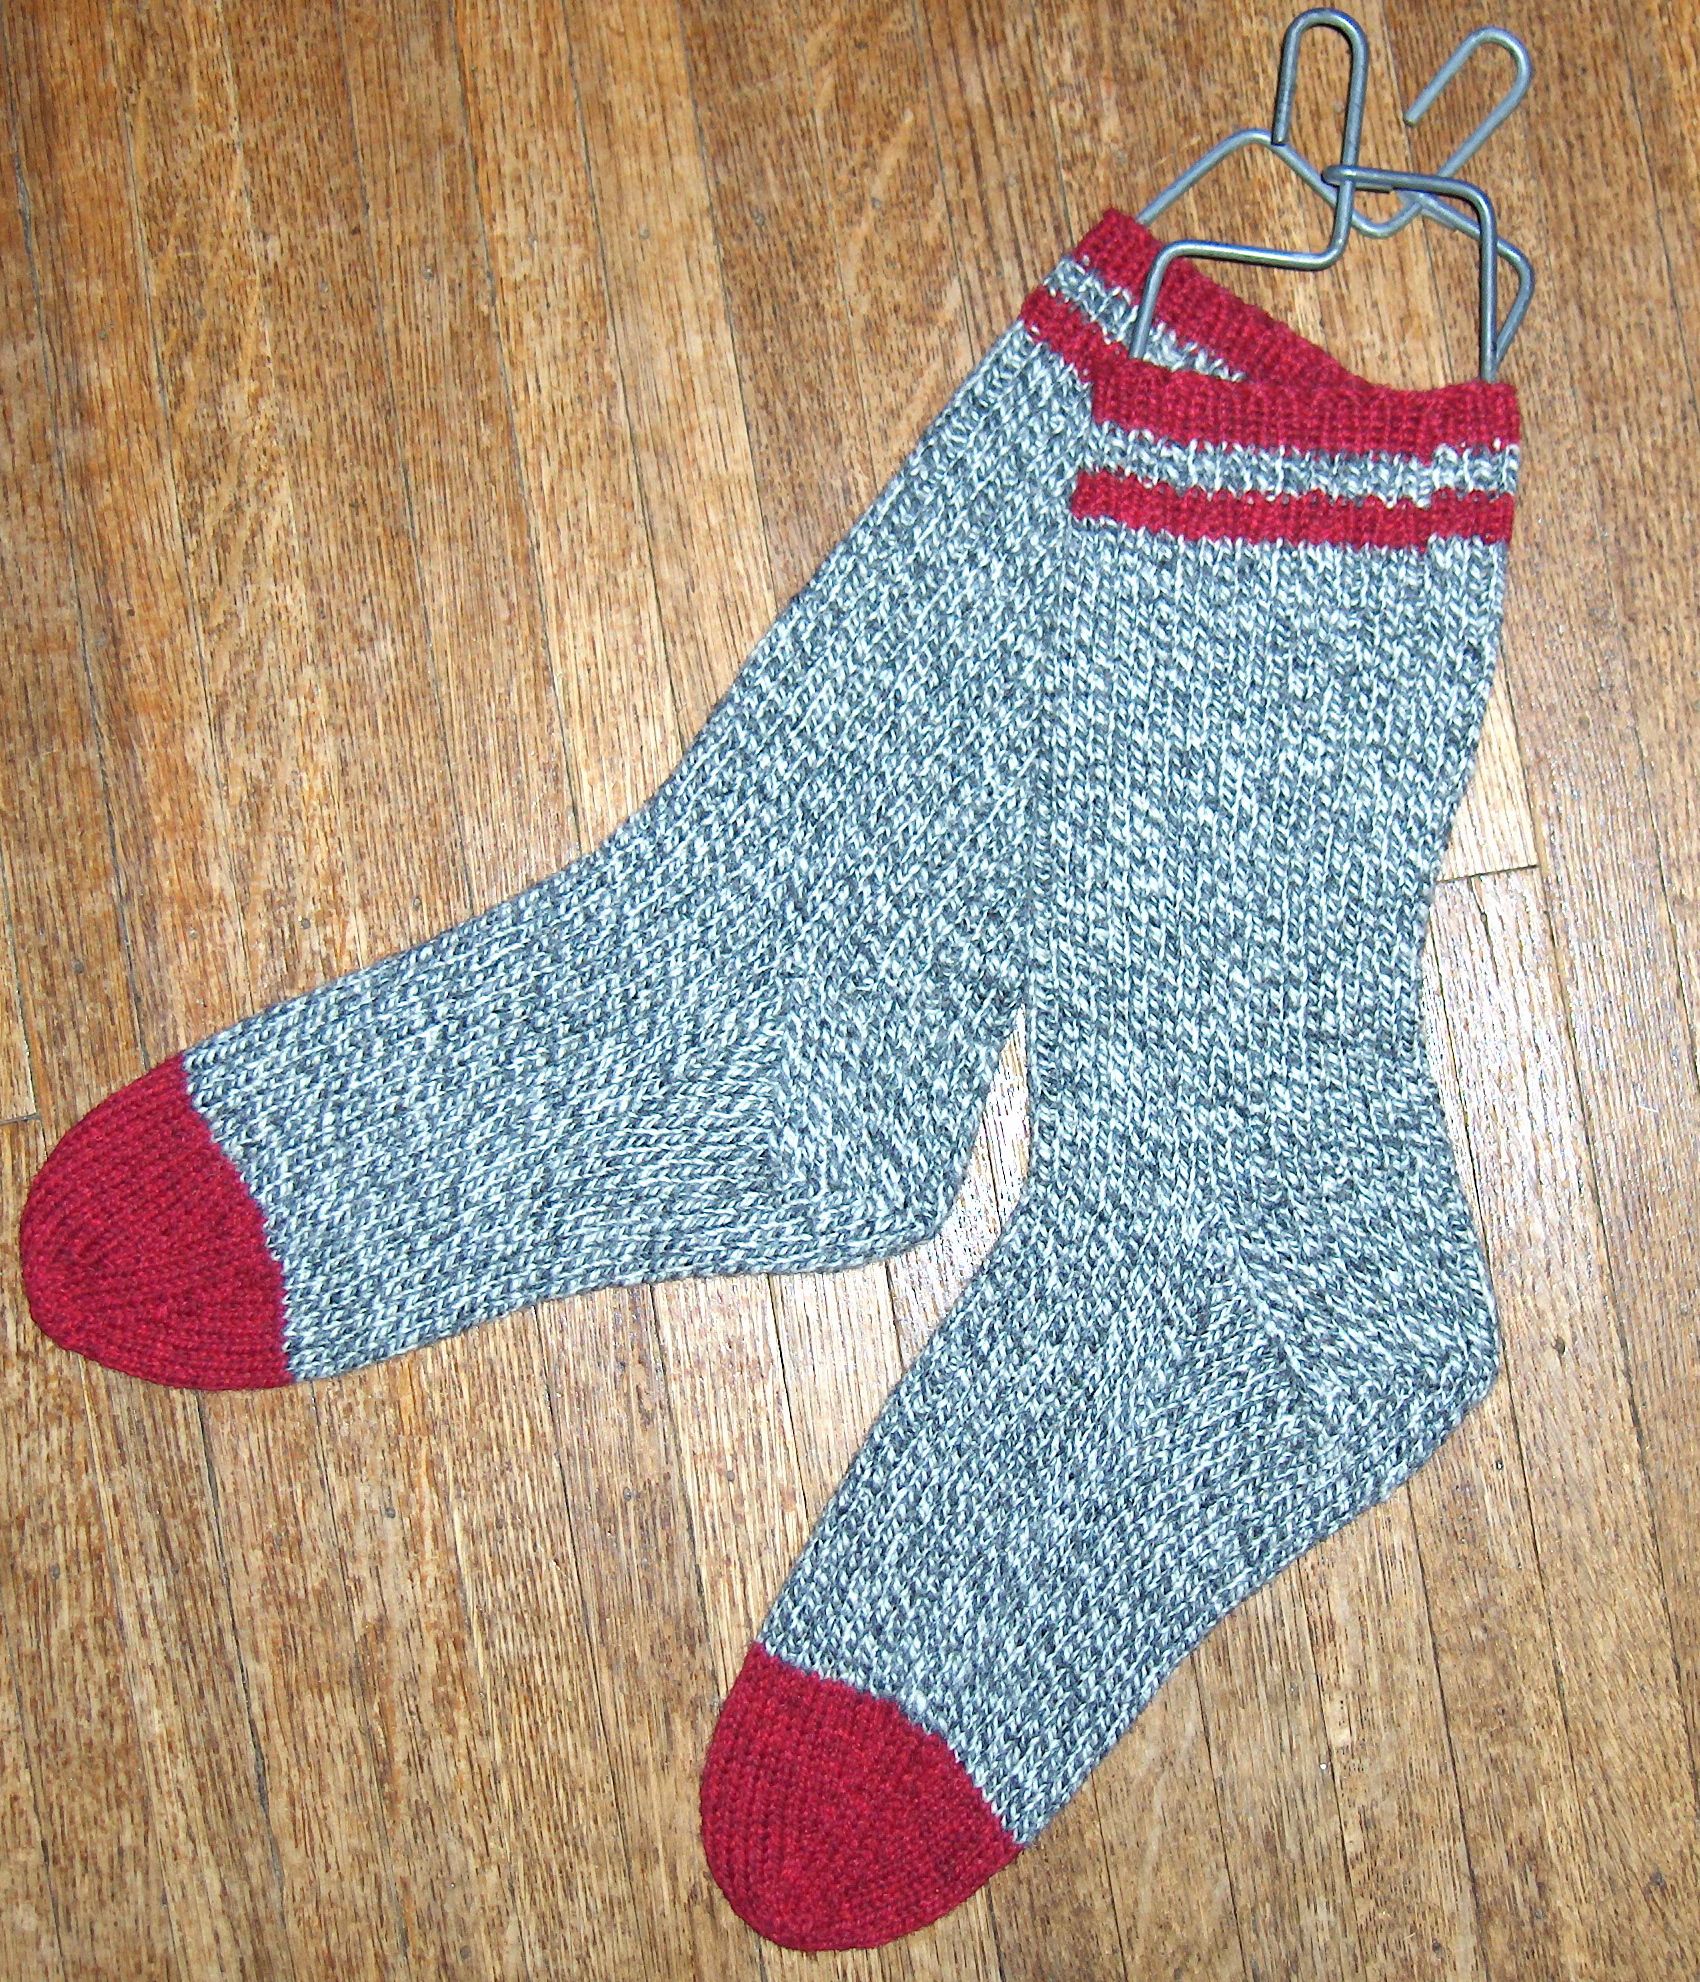
When you knit socks, you have leftover bits and ends of sock yarn. This isn’t a new problem – in fact, there are lots of ideas on Ravelry of what to do with those bits. (And it’s better than the alternative, of running out of yarn and needing to finish the toes in a different colour.) I make lots of socks, thus have lots of bits.

Many people make medallions or squares from these scraps, then create an afghan. My mom knit argyle socks like crazy in the 1950’s and 1960’s, and when I was a kid, she made a lap afghan out of little hexagons. I always loved that afghan and remember helping her knit more hexagons to make it a bit bigger. Scrap quilts and knitted afghans are fun, because you often remember the origin of each little bit. I like that nostalgia. I’m not sure where my mom found the original pattern (she doesn’t remember) but it was a good way to use up those leftover bits.

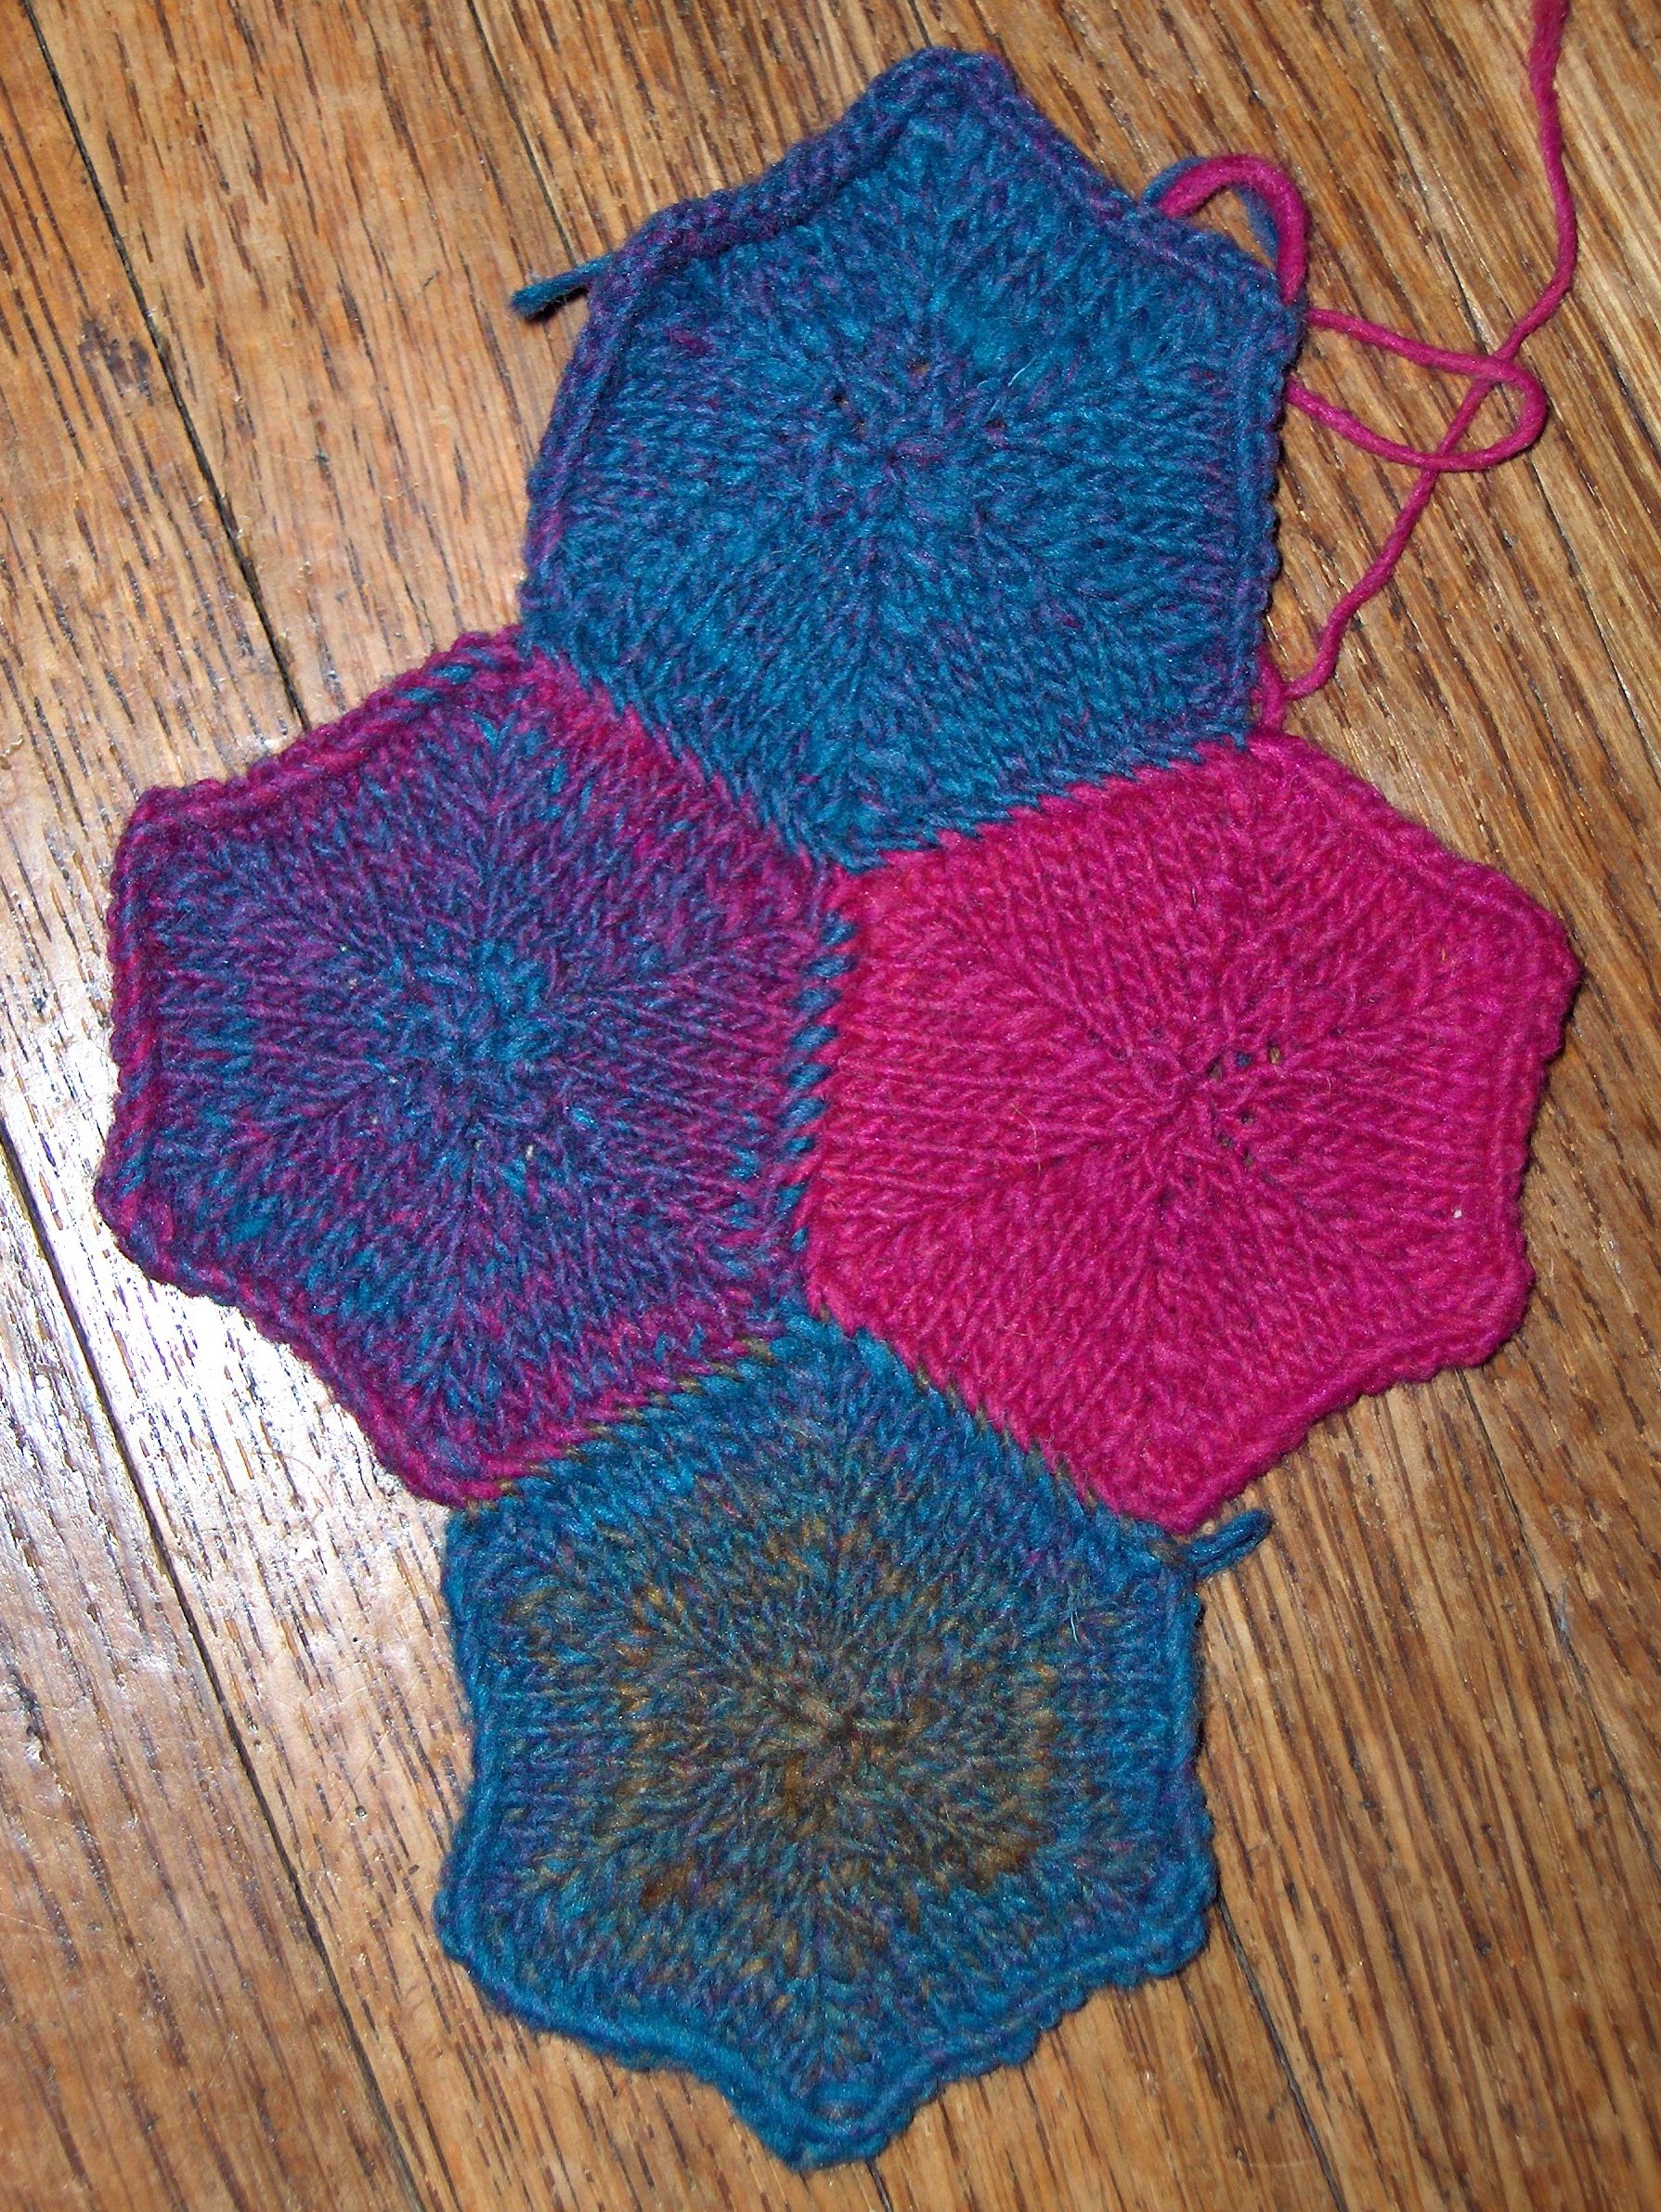
It only made sense that when my own stash of leftover sock yarn started to grow, I thought of that afghan of hexagons again. I couldn’t find her pattern, so I reverse engineered one myself. I knit these on 2.75mm needles, and each is about 2.75″ across.

These four are knit in Fleece Artist Trail Socks:

Sock yarn hexagons knit by Deborah CookeHere are four in Noro Kureyon Sock:Sock yarn hexagons knit by Deborah CookeHere are four in another self-striping sock yarn:Sock yarn hexagons knit by Deborah CookeMy Hexagon Block

Cast on 73 stitches. (I use the long tail cast on.)
Row 1 and all odd-number rows: Purl.
Row 2: *K2tog, K8, Slip 1, K1, PSSO. Repeat from * to last stitch. K1.
Row 4: *K2tog, K6, Slip 1, K1, PSSO. Repeat from * to last stitch. K1.
Row 6: *K2tog, K4, Slip 1, K1, PSSO. Repeat from * to last stitch. K1.
Row 8: *K2tog, K2, Slip 1, K1, PSSO. Repeat from * to last stitch. K1.
Row 10: *K2tog, Slip 1, K1, PSSO. Repeat from * to last stitch. K1.
Row 12: *Slip 1, K1, PSSO. Repeat from * to last stitch. K1.
Cut end, draw wool through remaining stitches and sew up seam.
Block the hexagons – individually or once they’re sewn in groups – on the ironing board. Put them flat, put a damp pressing cloth over them, and steam with a hot iron.

These are pretty quick to make and can be addictive – like so many projects – when knit in self-striping yarn. You can knit the centre in a different colour, if you run out, or could even stripe them if you’re more compulsive than me.

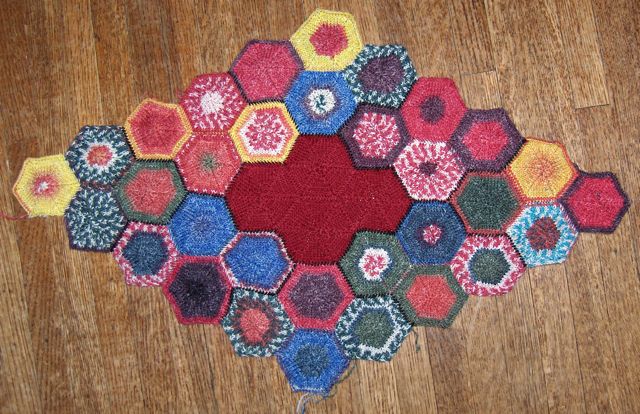
Then there’s the fun of arranging them. You can use a random arrangement, or assemble the hexagons into diamonds the way I have. You can assemble them into bigger diamonds, or into six-petalled daisies. You can make zigzag lines, or straight lines, alternate light and dark in a sunshine-and-shadow pattern. The possibilities are almost endless. I assembled mine into small diamonds of hexagons made of the same yarn (or yarn that looks the same), as you see in the samples above. Then I’m arranging the diamonds into bigger diamonds, like this:Sock Yarn Hexagons knit by Deborah CookeThe red is Lang Jawoll sock yarn. It’s surrounded by hexagons in various colourways of Regia Colori Fortissima. I’m stitching the small diamonds into big diamonds using black sock yarn as contrast. I can’t decide whether it looks funky or Frankenstein.

The only thing was that my hexagons looked a bit smaller to me than my mom’s had been. I finally found her pattern, which is slightly different, buried in my yarn stash. I think she may have used 3.0mm needles which would account for the size difference. Naturally my mom, who is so much more organized than I will ever be, has noted that each hexagon takes 12 yards of yarn.

Original Hexagon Block

Cast on 79 stitches.
First row and every odd row – Purl.
Row 2 – K2tog, K10, *Slip 1, K2tog, PSSO, K10. Repeat from *4 times. Slip 1, K1, PSSO.
Row 4 – K2tog, K8, *Slip 1, K2tog, PSSO, K8. Repeat from *4 times. Slip 1, K1, PSSO.
Row 6 – K2tog, K6, *Slip 1, K2tog, PSSO, K6. Repeat from *4 times. Slip 1, K1, PSSO.
Row 8 – K2tog, K4, *Slip 1, K2tog, PSSO, K4. Repeat from *4 times. Slip 1, K1, PSSO.
Row 10 – K2tog, K2, *Slip 1, K2tog, PSSO, K2. Repeat from *4 times. Slip 1, K1, PSSO.
Row 12 – K2tog, *Slip 1, K2tog, PSSO. Repeat from *4 times. Slip 1, K1, PSSO.
Row 14 – Slip 1, K2tog, PSSO, Slip 1, K2tog, PSSO, K1.
Break wool, leaving a 12″ end. Run end through remaining 3 stitches. Draw closed and seam two edges together. Leave end for joining to next hexagon.
Make 238 hexagons for afghan.
To make up – Sew 17 hexagons together in one long strip. Make 14 strips. Join strips and blog flat.

There’s a note here about making half-hexagons to square up the edges. It says to cast on 40 stitches, purl the odd rows, then work as above. Obviously there will be fewer repeats – I’ll guess that you repeat from the * only once on each even row.

The blocks aren’t that different, but are probably different enough that you should choose one and go with it.

What do you do with leftover sock yarn?
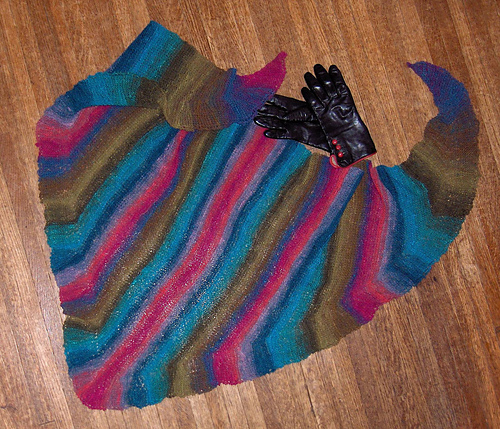
Two Tea Cosies

Have you been knitting gifts for the holidays? I wasn’t doing so well with that this year. I’ve had years when I knit mitts, and years when I knit scarves, but this year, I’ve been a bit stumped and a bit crushed for time.

But a few weeks ago, I needed a new tea cozy myself and found this old Patons’ pattern in my pattern stash. I thought it would be a perfect quick knit and stashbuster:Tea cozies knit in Bernat Felting by Deborah CookeIt calls for a yarn called Beehive Craft Yarn, which I think is gone from this world. (I remember using it a long time ago for doll hair. It was a very thick acrylic yarn, at least three ply.) Instead, I used some Bernat Felting for these two, which I had in my stash. I had the idea that I’d felt it once it was done, but I like the look of it just as it is, and the size is perfect. I was a bit worried about the yarn being a single ply and not spun, but it worked out just fine. This is a quick and easy project – I can knit one in an evening, even when I’m worn out from battling Mages and fighting Slayers. (!)

The idea was that the green one would be a gift, but as you can see, I have two teapots and it wasn’t long before it was put to work right here. (You might also notice that the cables are done differently on the two cozies. The green one has cables the way they’re supposed to be. It doesn’t make a huge amount of difference, but the top is slightly easier to work when the cables twist the right way.)

It also wasn’t long before I was back in my stash, inspired for the holidays. I’ve made more of these tea cozies with Bernat Roving and with Patons Classic Wool Roving. The Bernat Roving is for people who might be inclined to chuck the tea cozy into the washing machine – it’s 80% acrylic. One ball does it in most cases.

Some of these tea cozies are heading to their destinations with a box of the recipient’s favourite tea or a box of shortbread – or both! Those being hand-delivered will arrive with fresh baking. (Yup, my mom will get one with her scones.) I’m quite happy with my army of tea cozies – they’re both useful and attractive. Besides, doesn’t everyone need a nice hot cup of tea?

Have you made any gifts this year? If so, what?

Damask Bag in SWS – 1

I have a tendency, it seems, to make things more complicated than they need to be.

In fact, I really enjoy when a project of any kind evolves into a much more complicated project than I’d originally anticipated. This is true of books and it’s true of knitting projects. In a way, a project that becomes a complicated beast is a good thing – it means, to me, that the project has taken on a life of its own, and demands its own shape. And when it does that independent of how such a move impacts my own scheduling and other demands, I know it’s not just got a life of its own – it’s got a bit of attitude. I like that a lot.

So, this month, I have been wrestling with a book manuscript that ran off and did that, as well as a knitting project that has run off and done that. We’ll talk about the knitting project today. This was supposed to be straightforward.

Uh huh. Nothing worth doing is ever straightforward, and this bag has proven to be very much worth the doing.

Here’s the basic idea. There is a fair isle pattern which is extremely popular in the land o’ knitters, and is particularly gorgeous in our old fave Kauni Effektgarn. It’s become known as Damask.

Here’s the sweater and quite possibly the first reference to it. (The stripey bits in the middle are for steeks – she would later cut open the front to make a cardigan.)

As much as I like this sweater, I didn’t want to make a cardi like this. I have other plans for my Kauni.

But then, I saw this pattern, for a tote bag, using the same fair isle pattern. It’s called Kauni Damask Understated Bag. (Not sure if you can see this without being on Ravelry, but it’s free to create an account. Go for it.) Since I noticed in the notes that some people were unhappy with the resolution of the design once the bag was felted, I decided to use thicker yarn. Venturing into the almost-endless wealth of the stash, I discovered a hoard of Patons SWS, which is excellent for felting. I decided to use one variegated colourway with black.

Of course, I didn’t actually have enough of either colourway in my stash, so had to hunt down more. This was my first complication. Both are discontinued, but I found the yarn with some online searching. Getting it only required a trek through the snow on a Friday to a LYS which isn’t particularly local. No worries. I had the materials.

Time for the second complication. This bag is worked in the round. You knit the rectangle for the bottom of the bag, then pick up stitches on all four sides and knit up. This works because the Kauni has very long colour gradations. SWS does not. Sooooo, I decided to knit the front of the bag, then knit the back. This would allow the SWS to do better stripey things.

I cast on. As I knit the front, the third complication came to me. I realized that the flower would have to be right side up on both sides of the bag. I hadn’t started at one edge – I’d started at the bottom and I would have to start the other side from the bottom as well.

Okay. After I knit the front, I put all my stitches on waste yarn because I’m not sure yet about the flap. I then picked up stitches for the bottom of the bag on the cast-on edge. (At this point, I realized that a provisional cast-on would have been an excellent idea, but no, I hadn’t done that. This counts as a consideration, not a complication. It’s not that hard to pick up from a cast on edge and since the bag is going to be felted, any extra tension there isn’t an issue.) I knit the bottom, then started up the other side, reversing the colour usage. Just because.

It’s a good thing I really like how it’s coming out. Here’s how it looks, on the needles and unfelted.Kauni Damask Understated Bag by Karen Stelzer knit in Patons SWS by Deborah Cooke

Time for another complication? It is! I had been thinking of putting a flower on the bag flap, instead of leaving it plain as in the pattern. That’s why I left those stitches on waste yarn – I was pretty sure I wanted the first colour combo on the back, and I figured I’d just grab those stitches and knit the flap. As I knit the other side, though, I realized that the flower on the flap would also have to be knit right side up. There’s our complication. Instead of carrying on from the back to knit down the flap to the point, I’ll have to cast on the point of the flap and knit UP, then graft the flap to the back of the bag.

I haven’t even thought about the handles yet. There’s got to be another complication there, just lurking…

Do you ever start projects that morph into more than you expected? Do you like that challenge or not?