I’ve had a disappointing run of making this fall, with more failures than would be ideal, but here’s something that came out well. It’s a silk suit for the girls.
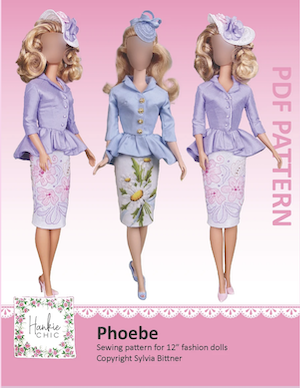
The pattern is Phoebe from Hankie Chic. You can buy the pattern right here. The pattern is for a two-piece suit, with a straight skirt and a fitted jacket with a peplum that opens at the front. The jacket has a small collar and 3/4 sleeves and is lined.
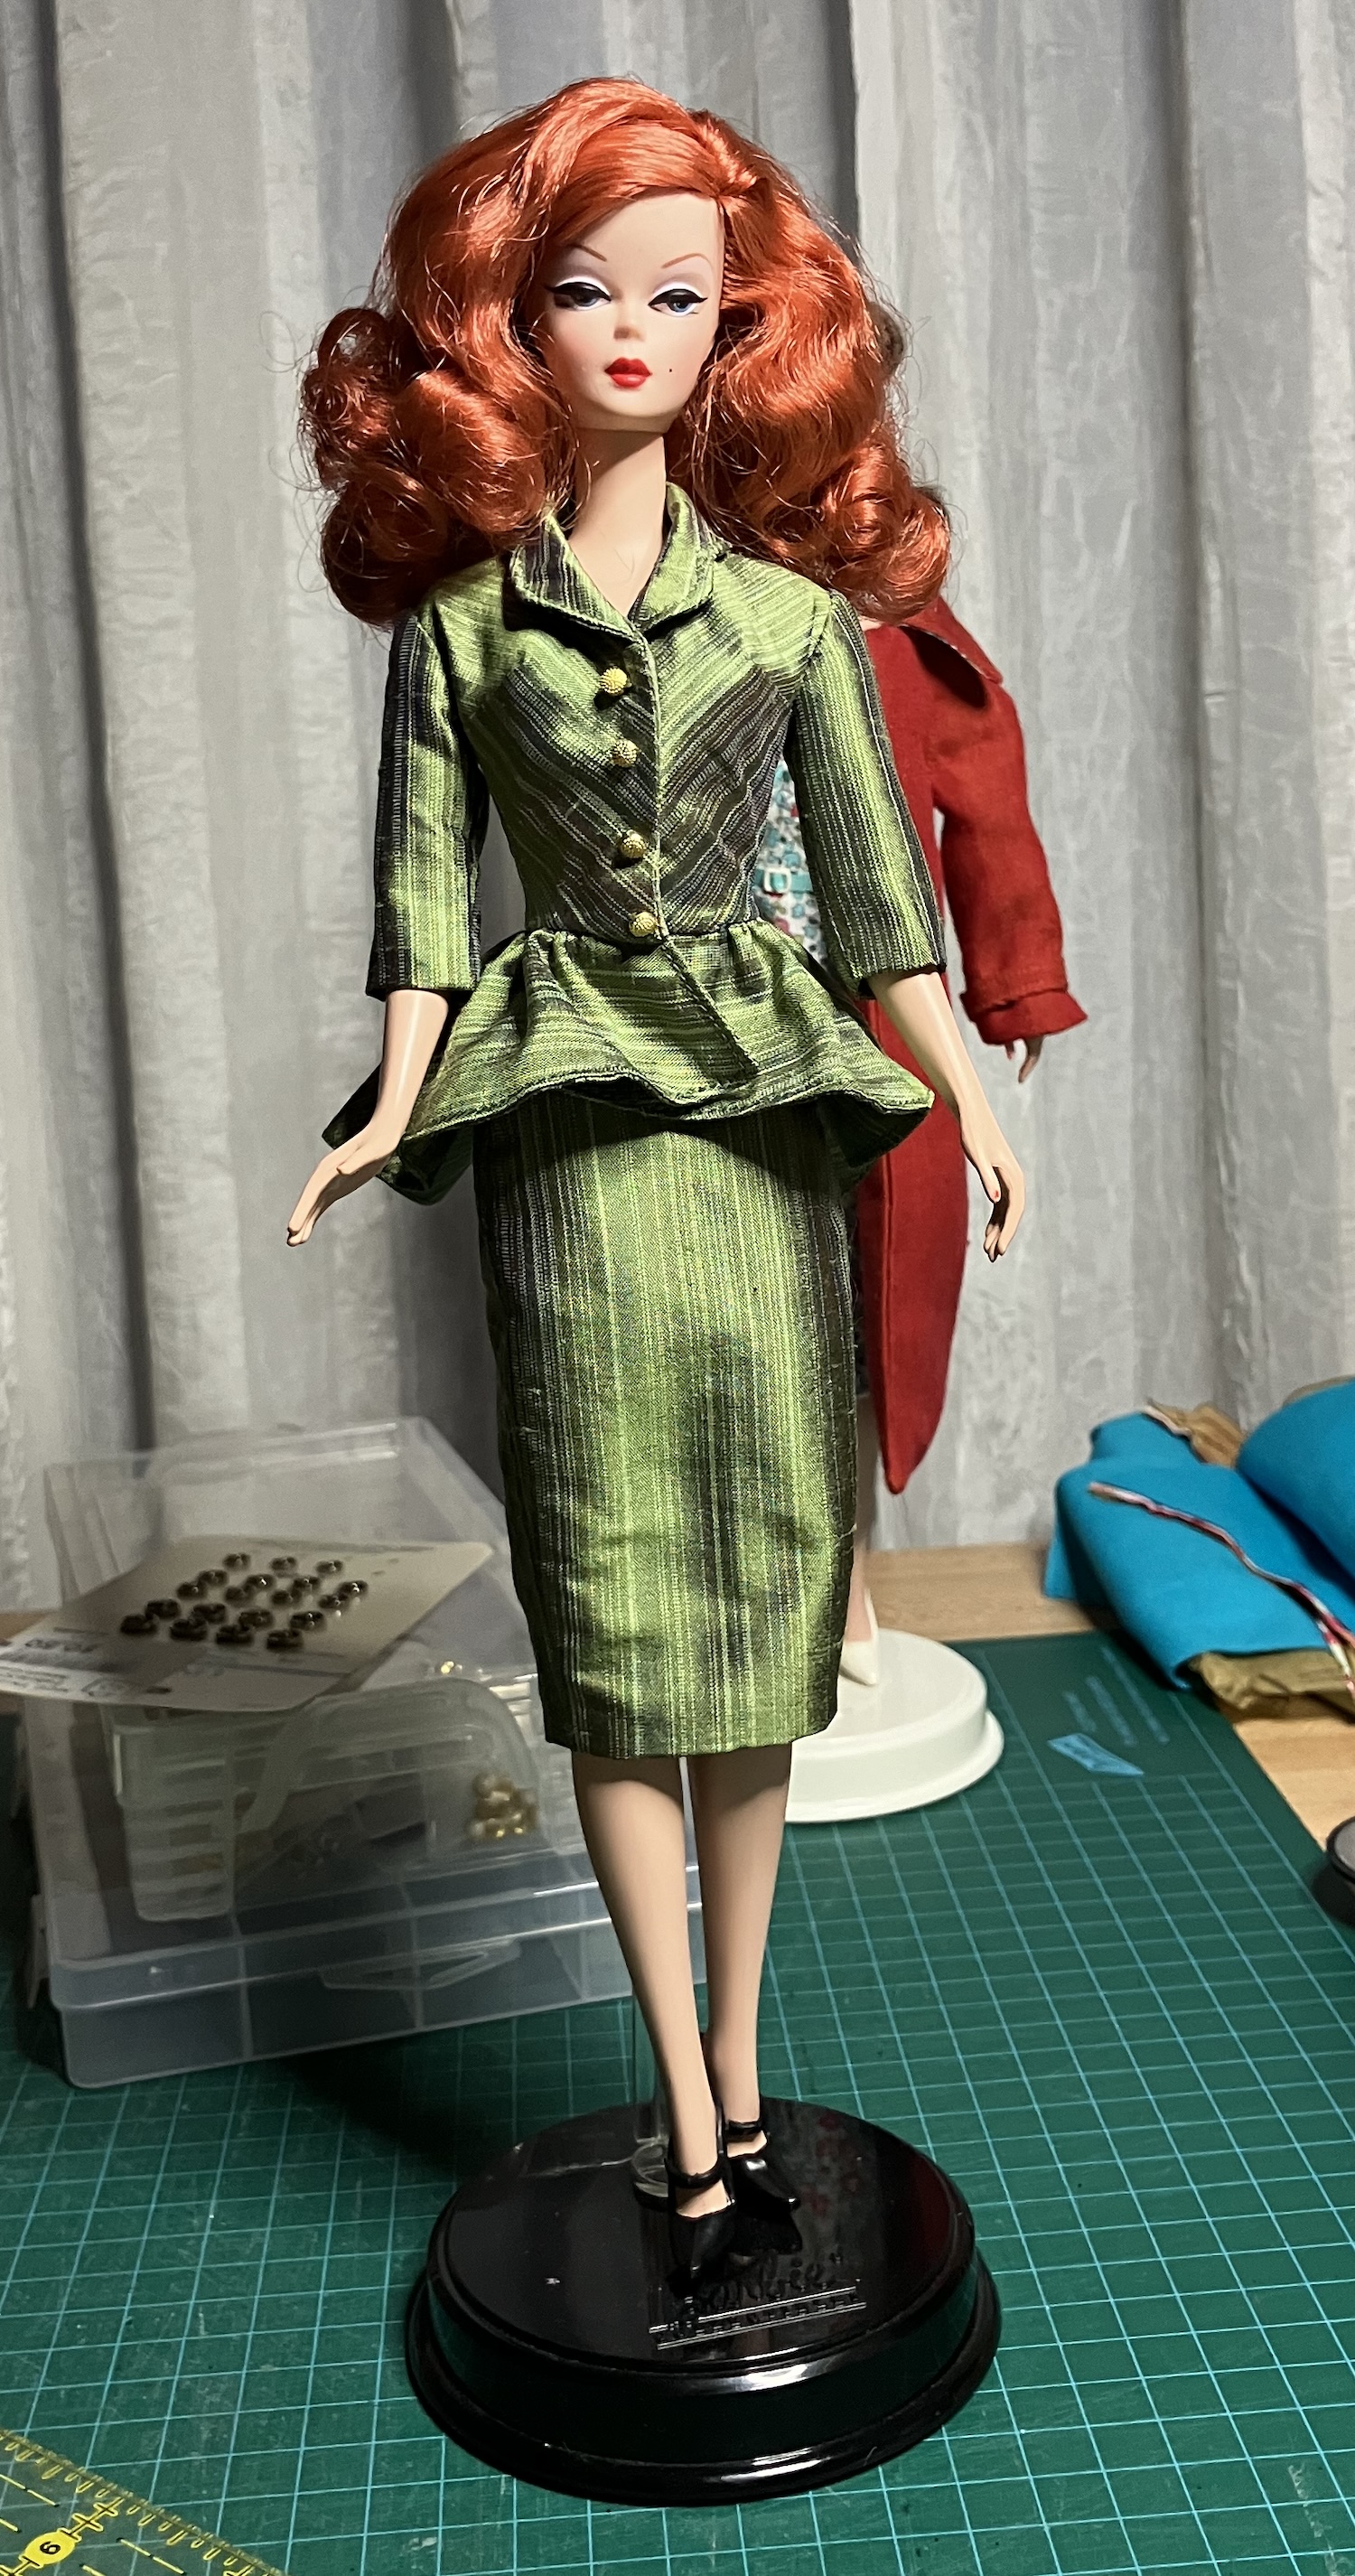
I cut mine of that striped silk in green. I thought the back was too wide – the instructions say to put the back edge of the pattern on a fold, but I subsequently seamed it. This made the back 1/2″ narrower. The jacket is a very precise fit for the Silkie girls (and will be looser on the articulated Silkies) but I’d need at least half of that seam allowance back for it to fit the vintage B girls better. Right now, it goes around the doll and the front edges match, but they don’t overlap.
Here’s the suit on Dusk to Dawn:
Those are little gold shank buttons from I Sew For Doll. I love this shade of green on her!
Because it’s a lengthwise stripe, the direction of the stripe changes in the garment. The bodice top is cut in one piece, without a shoulder seam, so ended up on the bias at the front. I like this construction a lot, as it’s less bulky. I cut the peplum lengthwise and crosswise, planning to use the one for the facing that I liked least. The grain on the center back ends up perpendicular to the front edges – I liked it best when that was lengthwise at the back (even though it means the peplum is crosswise at the front.)
The peplum is much longer in the back than I’d expected. It’s almost like a frock coat. It’s also a lot more full – it was tight to jam in all of those gathers and I’m not sure they’re all needed.
I topstitched the collar and the hem of the peplum. I also understitched the sleeve lining and the skirt lining, all at the hems, but that’s not visible. It stabilizes the hem, though.
There are no grainlines on the patterns from this company, so you have to guess how to lay out the pieces. I put the center back seam on the straight of the grain, which is why the fronts ended up on the bias. It might be interesting to try a variation with the center front on the straight of the grain, which would put the CB seam on the bias. I’ll also likely try one with a shorter peplum, perhaps one that is less full than this one.
I have ideas for many variations and experiments, but the suit came out well as it is and I’m very glad to have a small triumph!
This fall, Mattel introduced another Silkstone Barbie BFMC. She’s the second in the series of new dolls that launched with the Sapphire girl, who moved in here in the summer.
I had mixed feelings about her, even though she’s pretty. I don’t love the articulated body, I wasn’t sure I liked the pink velvet scrunchie bit and I wasn’t loving the price. (She was $175CAD plus shipping and now is $190CAD plus shipping.) Someone in a forum noted that they could buy a vintage Silkstone for the same price, and I had an AHA! moment.
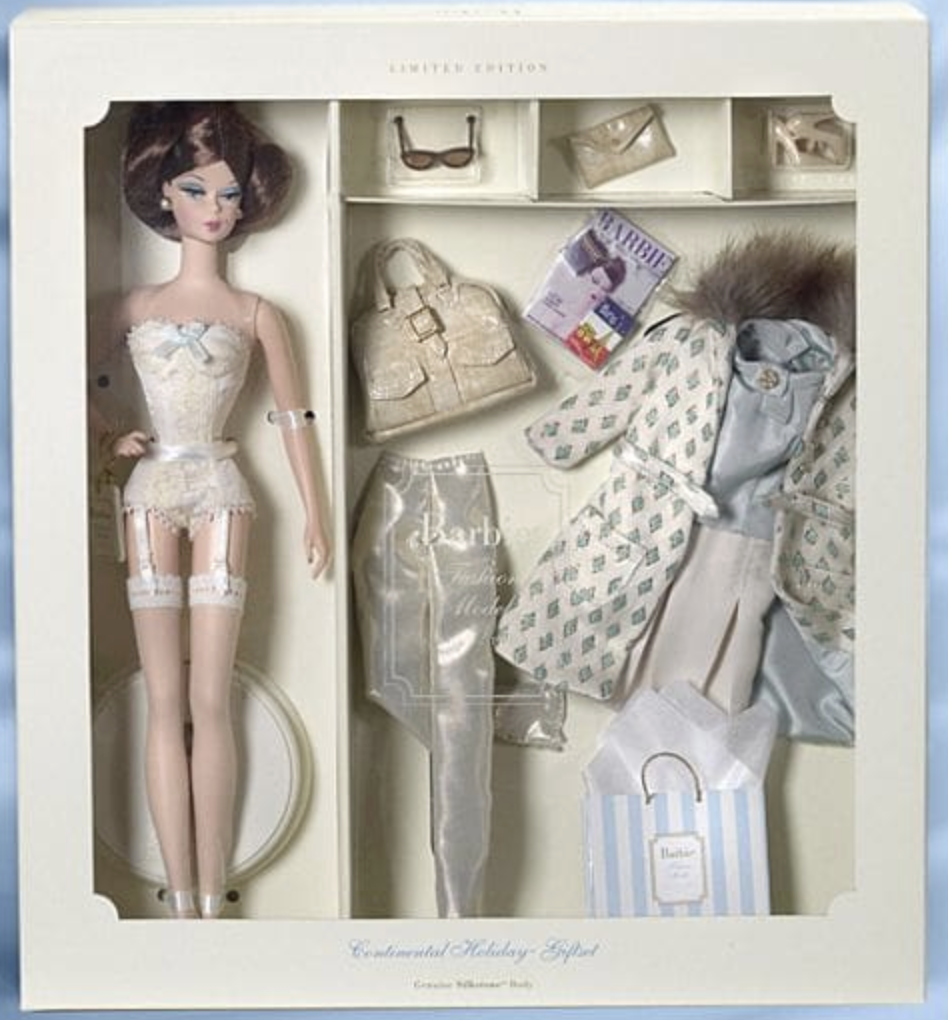
Silkstone Barbie Continental Holiday Gift Set from 2002 joined my collection. Here’s one of the promo shots of her from the original launch.
I like the gift sets because they come with more accessories and garments. Here’s how this one was packed:
She has lingerie and stockings, a second pair of shoes, the outfit in the first picture plus a pair of pants, the overnight bag and the clutch purse, plus sunglasses and other goodies. (A passport! How cute is that?!) Mine was NIB and I think she was glad to get out of the box after 22 years in there. We tried on her clothes, but it was hard to get her coat over that blouse with the wide collar.
Here she is, chez moi. She’s wearing the Trench Setting coat in shot linen and the dress that matches the lining in Tana Lawn.
I’m not sure what to make of her hair arrangement. It’s kind of a double ponytail. The two sides at the front are pulled back into a low ponytail, then there’s a higher ponytail and a bunch of loose hair in between. Here’s the back.
At least it isn’t stiff with glue or spray. I’ll leave it as is for now, but the elastics on her ponytails are over 20 years old and will degenerate soon. Then I’ll have to decide about her ‘do.
Behind her in these pix is my latest DIY carrier for the girls. This one has all of the girls’ original garments, accessories and shoes, sorted and labelled. Instead of putting braces for the dolls on the door, I covered the inside of the door with hooks (each made from a head pin with a bead) to hand and organize all the goodies. It’s lined with the same Italian paper as the first one. Putting this together and hanging everything up gave me enormous satisfaction. (There’s another clothing bar behind the front two for longer gowns, too.)
I also have been fiddling with that Advance pattern again, In Paris 4750. (You might remember that I made the Balenciaga ballgown with lace overlay.) I printed out the pieces for the Bar Suit (Christian Dior’s iconic New Look) but it ended up too big. I’ve reprinted it at 90% and the fit is better. Still fiddling with this one, but should be able to show a result to you soon. I made it of cotton this first time and will remake it in silk once I have the details right. It’s also made me realize that all of the girls have their hair down, and I need one with an updo to model the Dior suit.
That also meant I had a good look at this new girl’s clothes and bags, with a mind to copying them. I never like the fabrics chosen, and there are shortcuts that I might not emulate – the skirt, for example, isn’t lined – but there are other potential take-aways. At the very least, I may remake some of the original garments in fabrics that I like better. There’s always something with the girls!
Sorry to have been quiet lately. I’ve had some projects that didn’t come out as well as I’d hoped which – like books that need a tweak – are in the midst of revisions. I’ll show you them when I’ve fixed them up the way I like. I also was finishing up a book and publishing it.
I have finished the knitting on the black KSH cardigan of doom. (Phew!) I need a sunny day to seam the sleeves and set them in. My Ravelry project page says that one’s been on the needles for eight years – I hope that isn’t true, that I created the project before I cast on, but even so. I have projects that have been on the needles longer than that. Gah. I have a belated case of finish-itis now. I’ll show you that when it’s finally done.
Today let’s talk about purses for 12″ fashion dolls. This is a silly little project that keeps going on and on. The thing with making for the girls is that I always see more variations. I could get stuck exploring the possibilities of one pattern for a very VERY long time, which is kind of what has happened here. I’ve made a lot (a LOT) of these little purses. They’re quick and easy, and they come out really well. It’s almost instant gratification, and I’ve needed a bit of that lately.
I found this image on PInterest when I was ogling gorgeous suits for Silkstone Barbies. (There is some fabulous stuff there and many very talented makers in the world.) It’s in Japanese and from a book for dolls called My Favorite Dolls. That’s pretty much all I know from that one page. You can see that there’s a purse and a pair of jackets illustrated. I’ve no idea where the jacket patterns are – maybe on the facing page? – but there’s the purse pattern right there. I grabbed a screen shot and printed it out. There’s also no scale, so I just guessed it was from a page roughly 8.5″ by 11″ and printed it to fit the page. My purse pattern came out about 4.25″ long and the scale is great for the girls.
And then the fun began.
The directions are in Japanese, but like so many Japanese patterns, it’s pretty easy to figure out what to do. Japanese patterns always include such lovely illustrations in the instructions.
Here are the first ones.
I used my go-to fake leathers first – the shiny black I use for almost everything and a matte burgundy. They’re the two in the top row. The burgundy one has a brass-like button with a butterfly on it. 🙂
For each purse, I folded the handle and glued it – nothing fancy here. I used a gluestick, then put a weight on it until it dried. I did learn over the first couple that it’s easier to do as much as you can while the purse is flat. So, I sew on the half of the snap under the flap and the decorative button over it, then put on the handle. I use a seed bead as a decorative accent on the handle, one that matches the accent button on the front. Then I fold up the purse and press the snap into the body of the purse to make an indent where the other side of the snap needs to be, and sew it on in place.
When seaming the sides, I do a few overcast stitches at the top. When turning the bag right side out, there’s a bit of stress on those two seams at the top, so a little extra reinforcement can’t hurt. When I get to the base, I just tack in the top of the flap from the base of the purse. Turn the purse, ease out the sideseams and fiddle that flap until it looks right. Presto, purse.
The next pair are made from the very cheapest fake leather. I bought a set of 12 squares of craft vinyl, each 5×5″ or so, two each of six colours, at the dollar store. Each purse takes less than half a square. These next two, in red and the caramel, are from that vinyl. The vinyl is stiff enough that the purse holds its shape well.
I even cut an extra strap for the caramel one and added a buckle to that one. The strap is the width to pass easily through the buckle. I cut it an inch too long then trimmed it once the bag was assembled. I glued it in place while working on it, but the glue didn’t hold. Good thing the snap halves are sewn through the beginning and the end of that strap, and will hold it in place forever.
The red one has a fleur-de-lis accent button and I thought it needed even more zing. I used a black Sharpie to outline the edge of the flap and I think it looks great.
Next up, some sample vinyl pieces found at the thrift store. The individual pieces in thiis bundle of different fake leathers is about 5 x 8″. Again, that’s more than enough for a purse. There’s even a piece of cork in there but it seemed too thick for this purse. (Will the girls have cork purses before I do? I’m thinking they will.) I used a dark brown from that bundle and a metallic gold, which got extra beads on the flap for embellishment. (It looks silvery here but is more golden IRL.)
The raw edge does show along the front flap, the top of the bag and at those bottom corners. If the fake leather has a light backing – the dark brown one, for example, has a white backing – I colour the edges with a Sharpie marker in a matching colour.
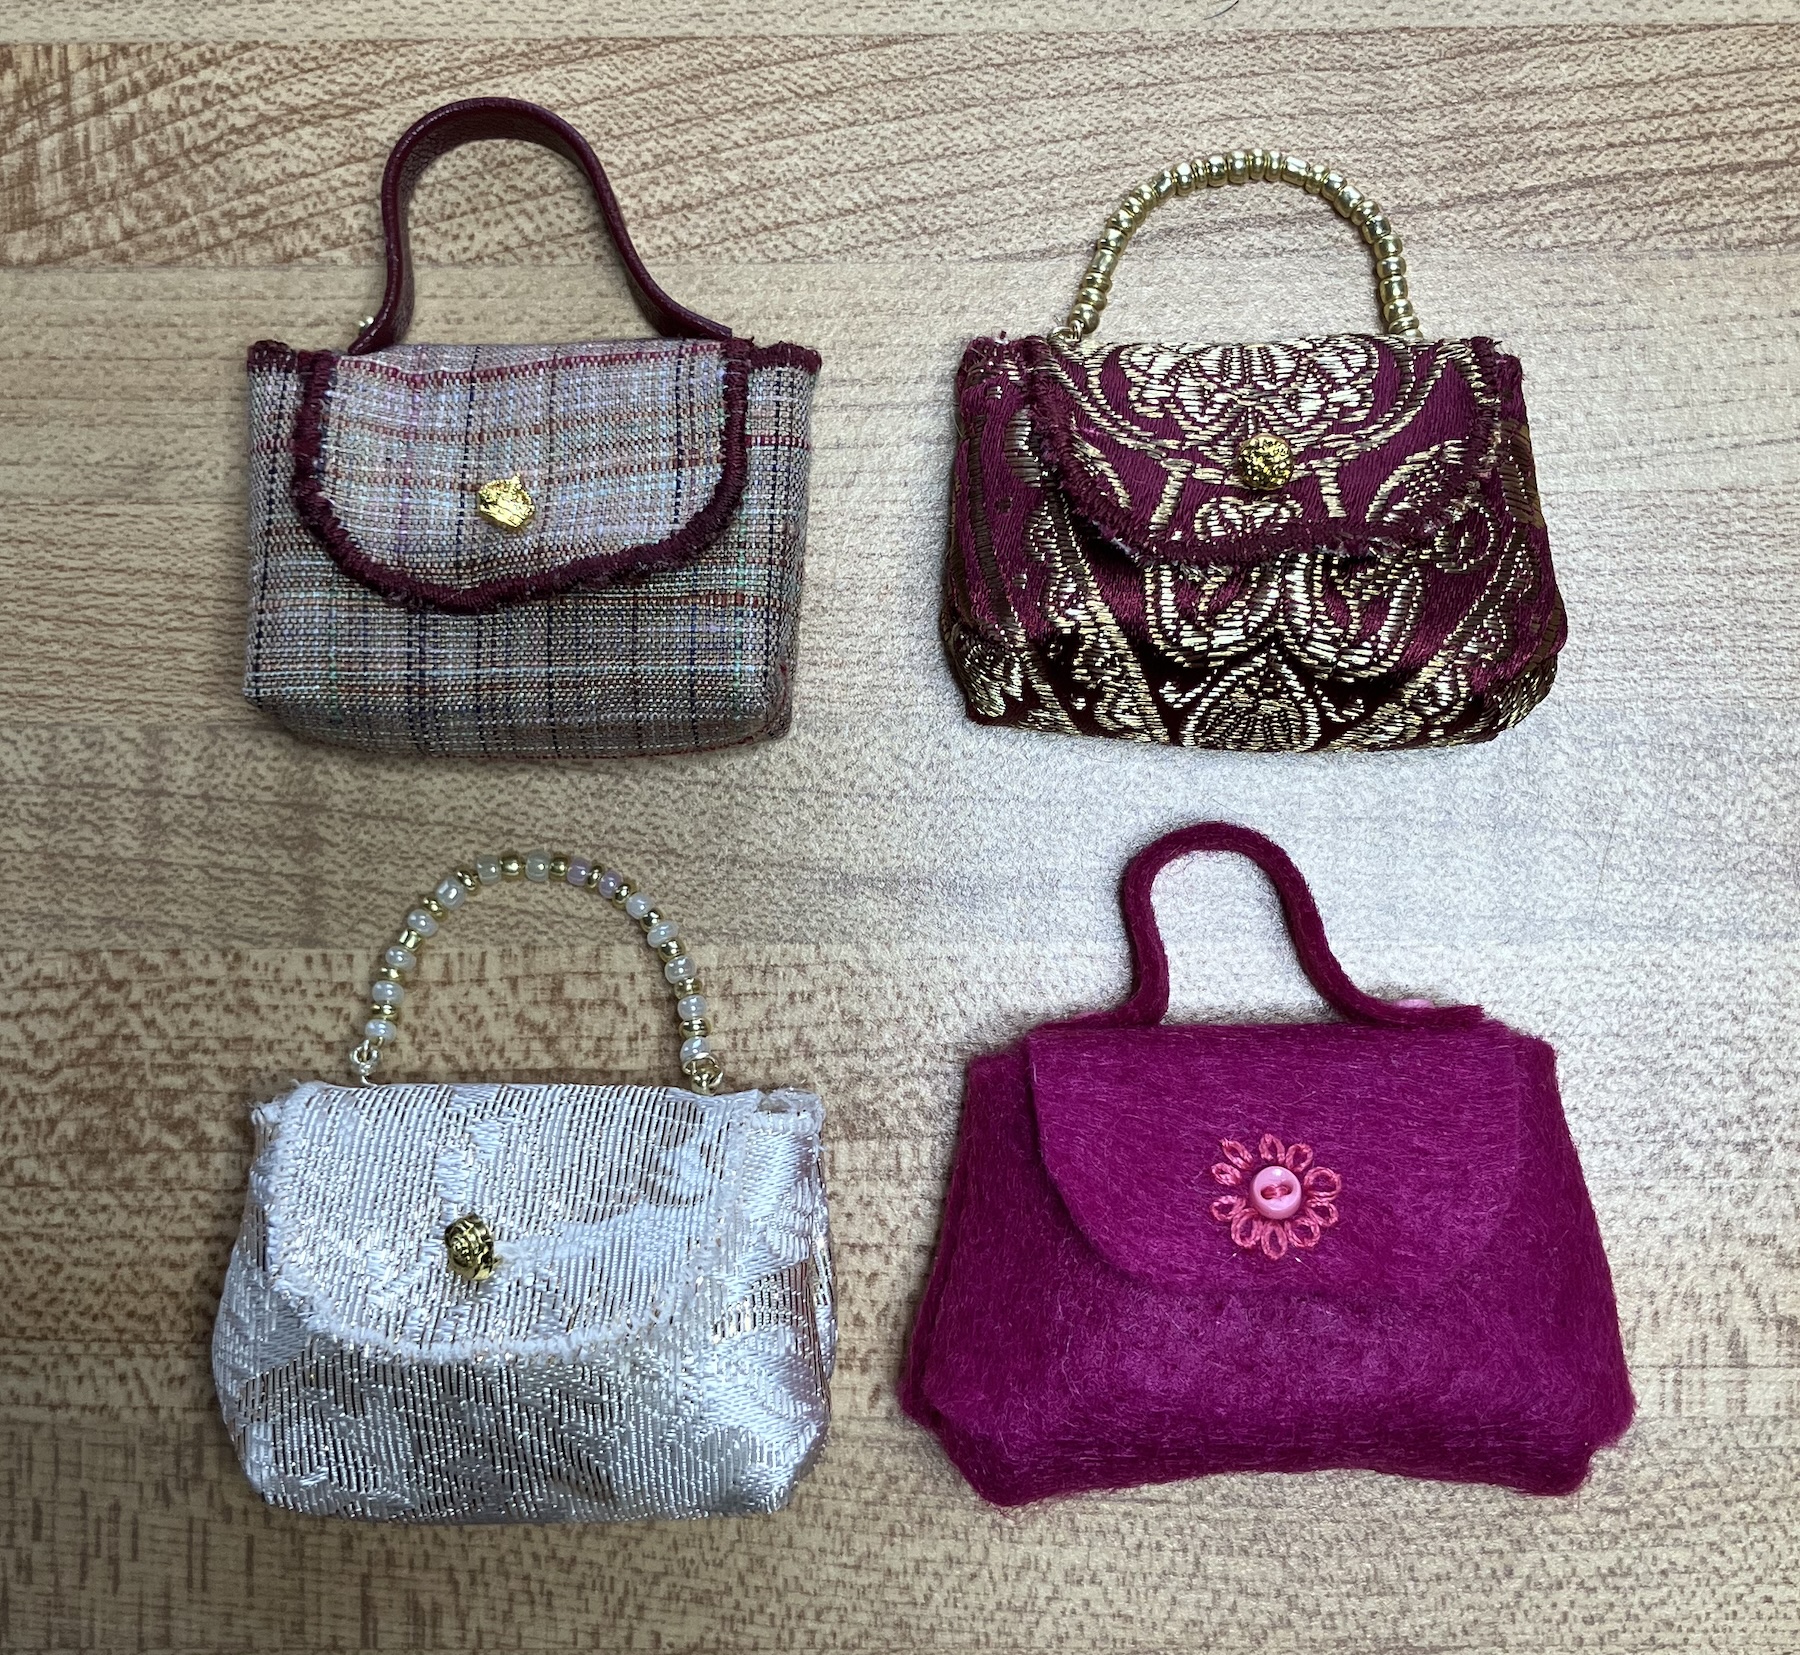
Then I looked at the fabric ones with the bead handles. I chose two brocades, one firmer than the other, and a bit of silk. (The silk is at the top left.) I interfaced all of them with fusible interfacing before cutting out the pattern, then finished the edges of the top and flap of the bag with a zigzag stitch in a coordinating colour of thread. I also used Fraycheck on the other edges to keep them from unravelling. I don’t love this stuff, since it’s essentially glue. It often marks the fabric and leaves it crunchy – that bit is less of an issue for a purse than for a garment, but still. It didn’t mark the white, but it did mark the other two, so I sewed that little base triangle on all three purses to keep the stain and/or edges from showing.
The silk one has a fake leather handle and a little crown button, which is adorable. Sharpies are your friend here, too – where the fabric showed through the thread on the edge of the flap, I just coloured it in with a matching marker.
It looks as though the pattern recommends the beads be on thread, but I wanted a stiffer handle than that. I fed them onto beading wire, then poked the ends of the wire through the fabric and twisted it on the inside so it won’t pull back through.
Finally, I was wishing I had some more fun colours of fake leather and wondered about felt. Why not? It doesn’t unravel. This is synthetic felt and I used three doll buttons in a contrasting colour. The “embroidery” was done with sewing thread held double – I did it after sewing on the button and snap. I think this one is really cute and I do have a lot of fun felt colours. There may be more of these.
You can see these purses are like potato chips. It’s impossible to stop with just one, or three…or ten.
Of course, I also drafted the pattern a bit bigger so I can make similar purses for the 16″ girls. Purses abound!
Next time, I’ll show you my new girl and get her to model one of the purses so you can see it in scale.
If you haven’t yet discovered the stop-motion videos by India Rose Crawford of her knitted frog and toad, then you’re in for a treat. In addition to her knitted frog and toad, she creates miniature rooms and accessories for them, and scripts lovely videos. You can find her on Instagram, right here.
You can also find the pattern to make a frog of your own on Ravelry, right here.
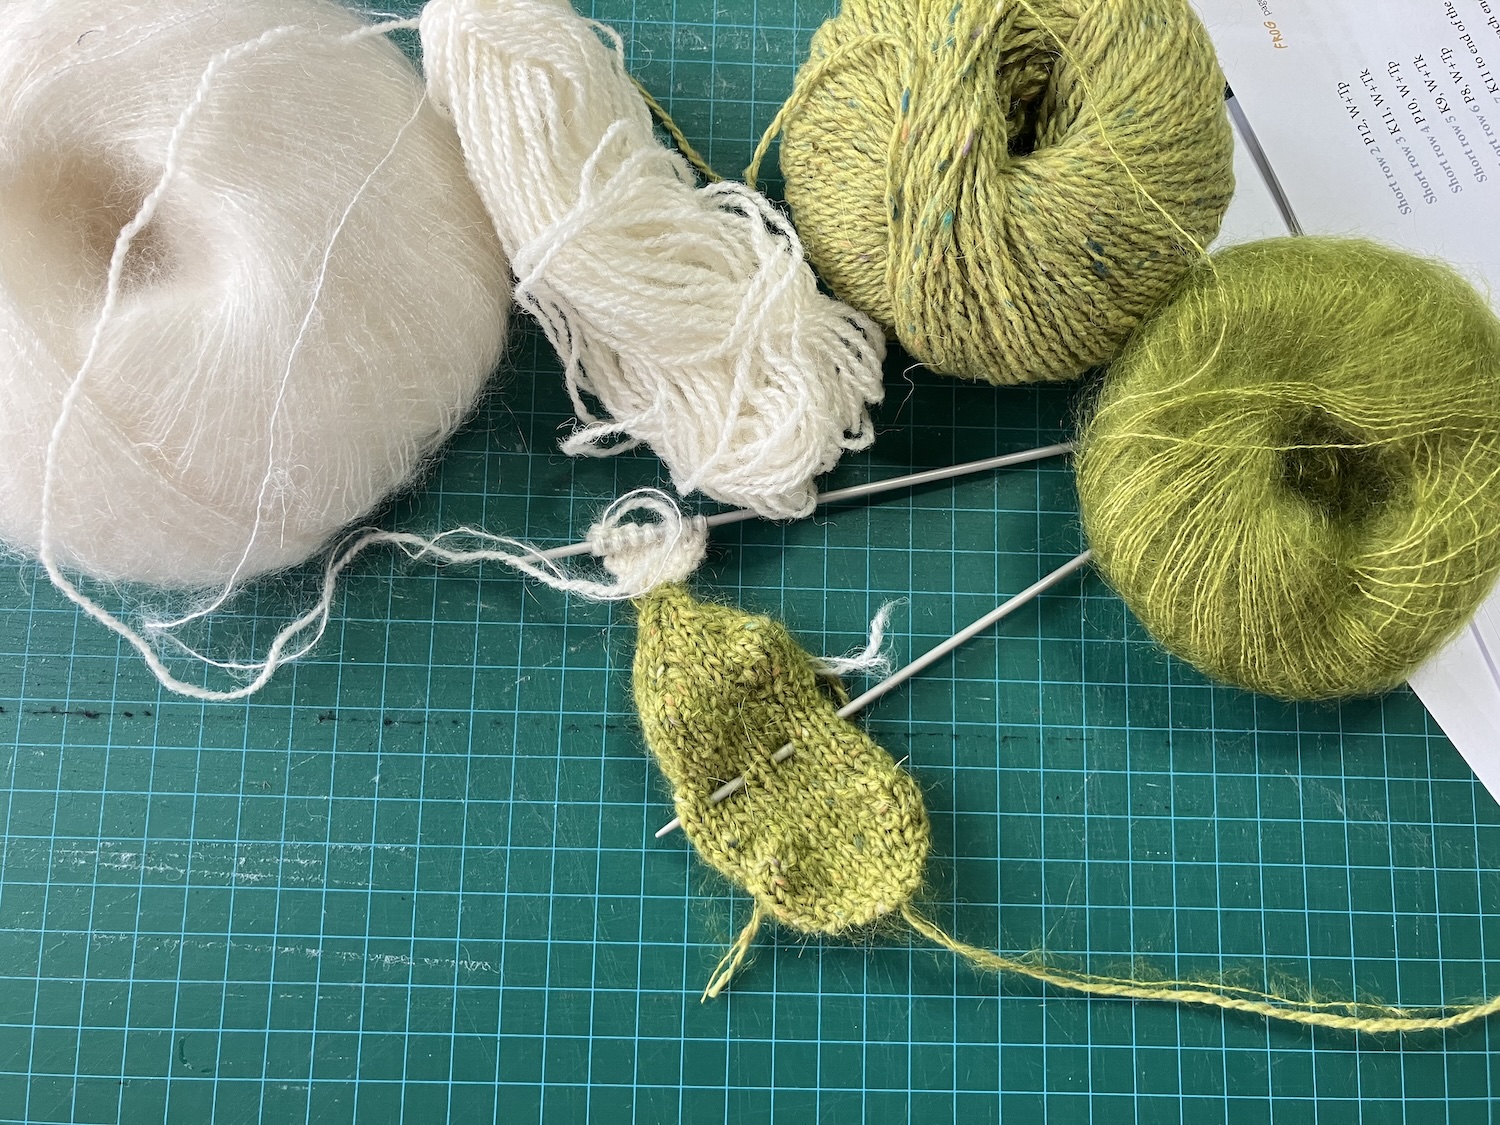
I’ve had this pattern in my favorites for ages, but at the end of September, I finally bought it and cast on. My frog – probably the first of several – is knit from stash leftovers. The green is Jody Long Alba in Moss (left over from my Quintessential Cardigan) held with Kidsilk Haze in Jelly. The white is Jamieson & Smith 2ply (left over from Harriet’s Hat) held with Sugar Bush Drizzle in Icicle.
Here’s the back and all four yarns:
I used 2.5mm needles for this, even though the pattern recommends larger ones. That’s the size I used for Tarragon the dragon, which was knit of a DK yarn and KSH held together as well, and I liked the firm fabric that resulted. Maybe my frog is a little smaller as a result.
The pattern is pretty easy to follow, especially if you’ve knit toys before. She must have knit on straight needles as there’s a lot of intructions for moving stitches from one needle to the other for the i-cord bits – with dpns, you just have to move the needle to your other hand.
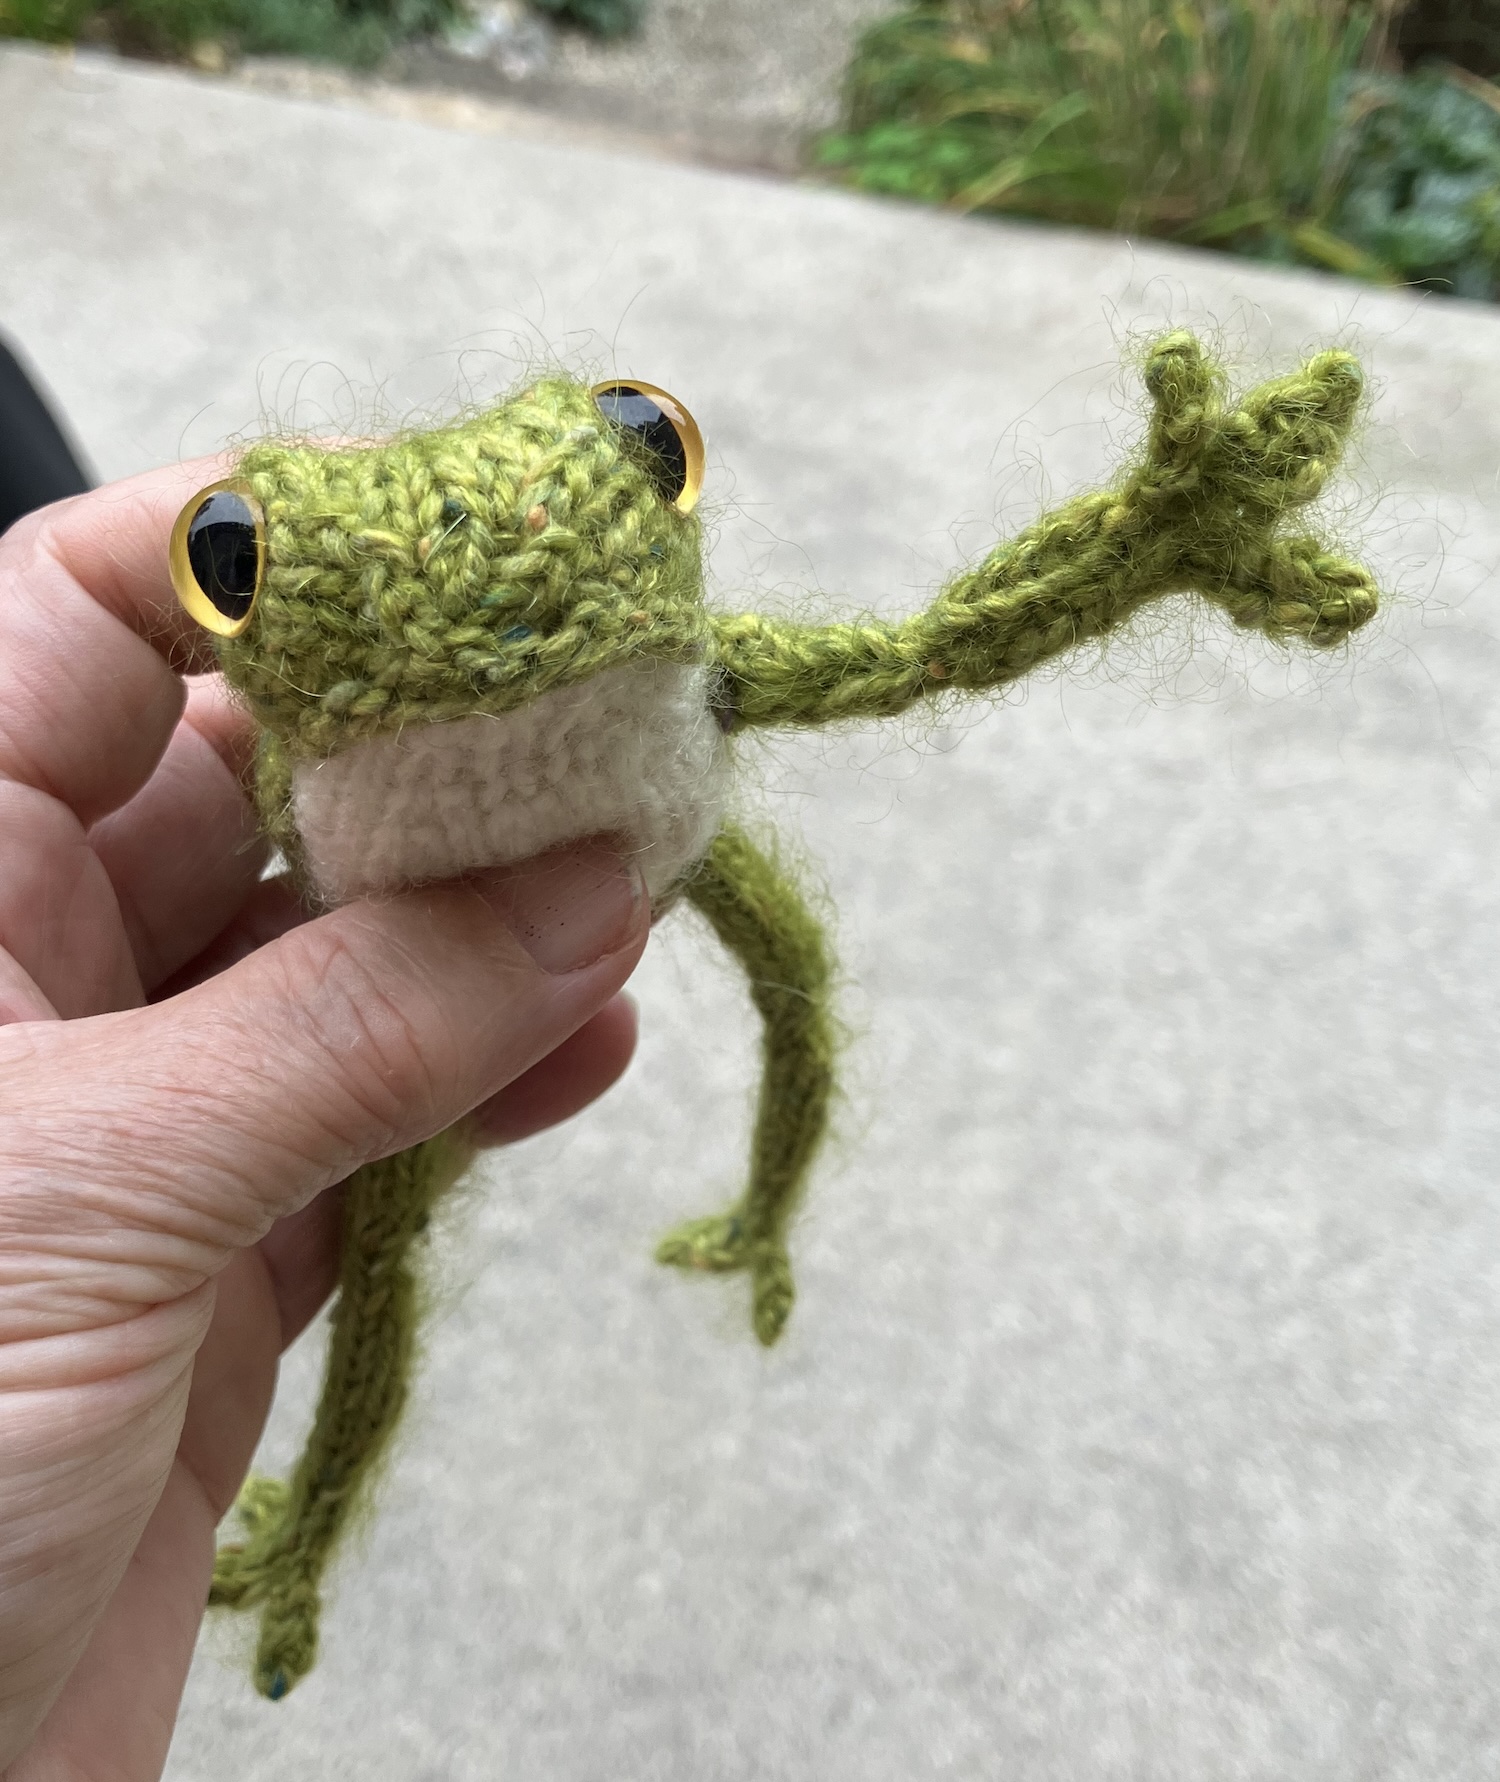
Here it is, mostly done. He needs another leg here:
I found cat eyes at the fabric store, which have an elongated pupil but not a pointy one like the dragon eyes. They are 12mm.
I think I did something wrong, as he has two feet that seem to be the wrong way around. I can twist them into place, though, so will just pay more attention next time.
I knit the sweater on 3mm needles, using KnitPicks Palette in two colours from the stash. The cast-on edge at the neck is a tiny bit tight, but it looks tight in her pix, too. I used a long tail cast-on, so will try a stretchier one next time.
The chair is in 1:6 scale and worked out perfectly for him.
Oops. I think there’s a fly on that plant…
I see that there’s an addendum with wire included in the legs, and also another pattern for both frog and toad, along with some garments. I’ll make Froggie a friend first.
We’ve looked a few times at my DIY doll wardrobes – here and here – but this time, I made a carrying case for my dolls alone.
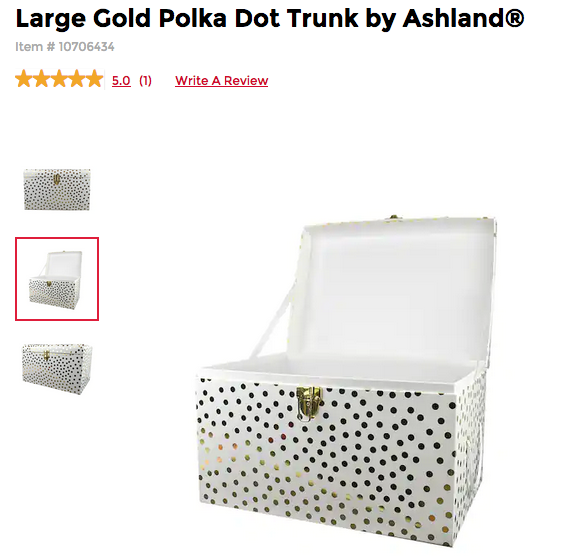
As usual, I used a trunk made by Ashland that I found at Michaels. I have four of this style, two large ones – like the one at right – which are wardrobes for Tyler and friends, then two smaller ones. To date, those had sweaters and coats for Tyler.
One of them has been liberated and become a carrying case for the Silkstone girls. I have some storage bins for the girls, but I’m an unboxer and when they’re on their backs, their hair gets messed up. I wanted them to be standing.
As usual, I removed one handle from the trunk. This time, that was easy as the handles are knotted cord. I pushed that second cord through the eyelets for the top one, to double up the handle. I also added felt feet to the bottom.
This time, I used foamboard for my siding pieces instead of the heavy bookbinder’s board I used for the first wardrobe. I cut them to fit, then papered them over. I put the “floor” in first – which covers the eyelets in the bottom from the removed handle – then the three “walls”. In each wall, I cut paired slits and pushed ribbon through them so that the dolls can be secured in place. The ribbon is taped on the back side so it won’t move.
Here’s a peek inside:
It’s kind of cozy for the girls, but that keeps them from falling over. This case holds 8 dolls – which means I have room to buy 3 more. (mwahaha) The extra ribbons are tied in place.
I feel like I should add a bar table in the middle with cocktails so they have something to do in there in the dark. Maybe a mirror ball or chandelier overhead…
I put the articulated girls on the door since they’re lighter.
Best to a Tea still needs to have her hair done. (No wonder she’s slumped against the wall. Bad hair days are depressing.) The little white wedge of foamboard needs to be covered to match the floor – I forgot that the girls needed to be elevated a bit to ensure that the door can be easily closed. I also ran out of the ribbon I used in the main case, so these girls get a coordinating one. They don’t seem to mind.
I’m kind of amazed that three of them are wearing dresses made from the same pattern – Trench Setting from Hankie Chic – which means I need to sew them some new things. At least they’ll be tidy and safe from dust while I do that.
Next up, the big girls get storage boxes…and the duplicate box of the very first carrying case I made is becoming a wardrobe, too. Instead of space for three girls on the inside of the lid/door, it’ll have lots of hooks for purses and hats. The girls will be organized!
This doll was an experiment and one I’m still thinking about. I ordered her from AliXpress.
Here’s the product image and here’s a link to the product landing page. These dolls are available from many vendors on the site. I paid about $50CAD for mine.
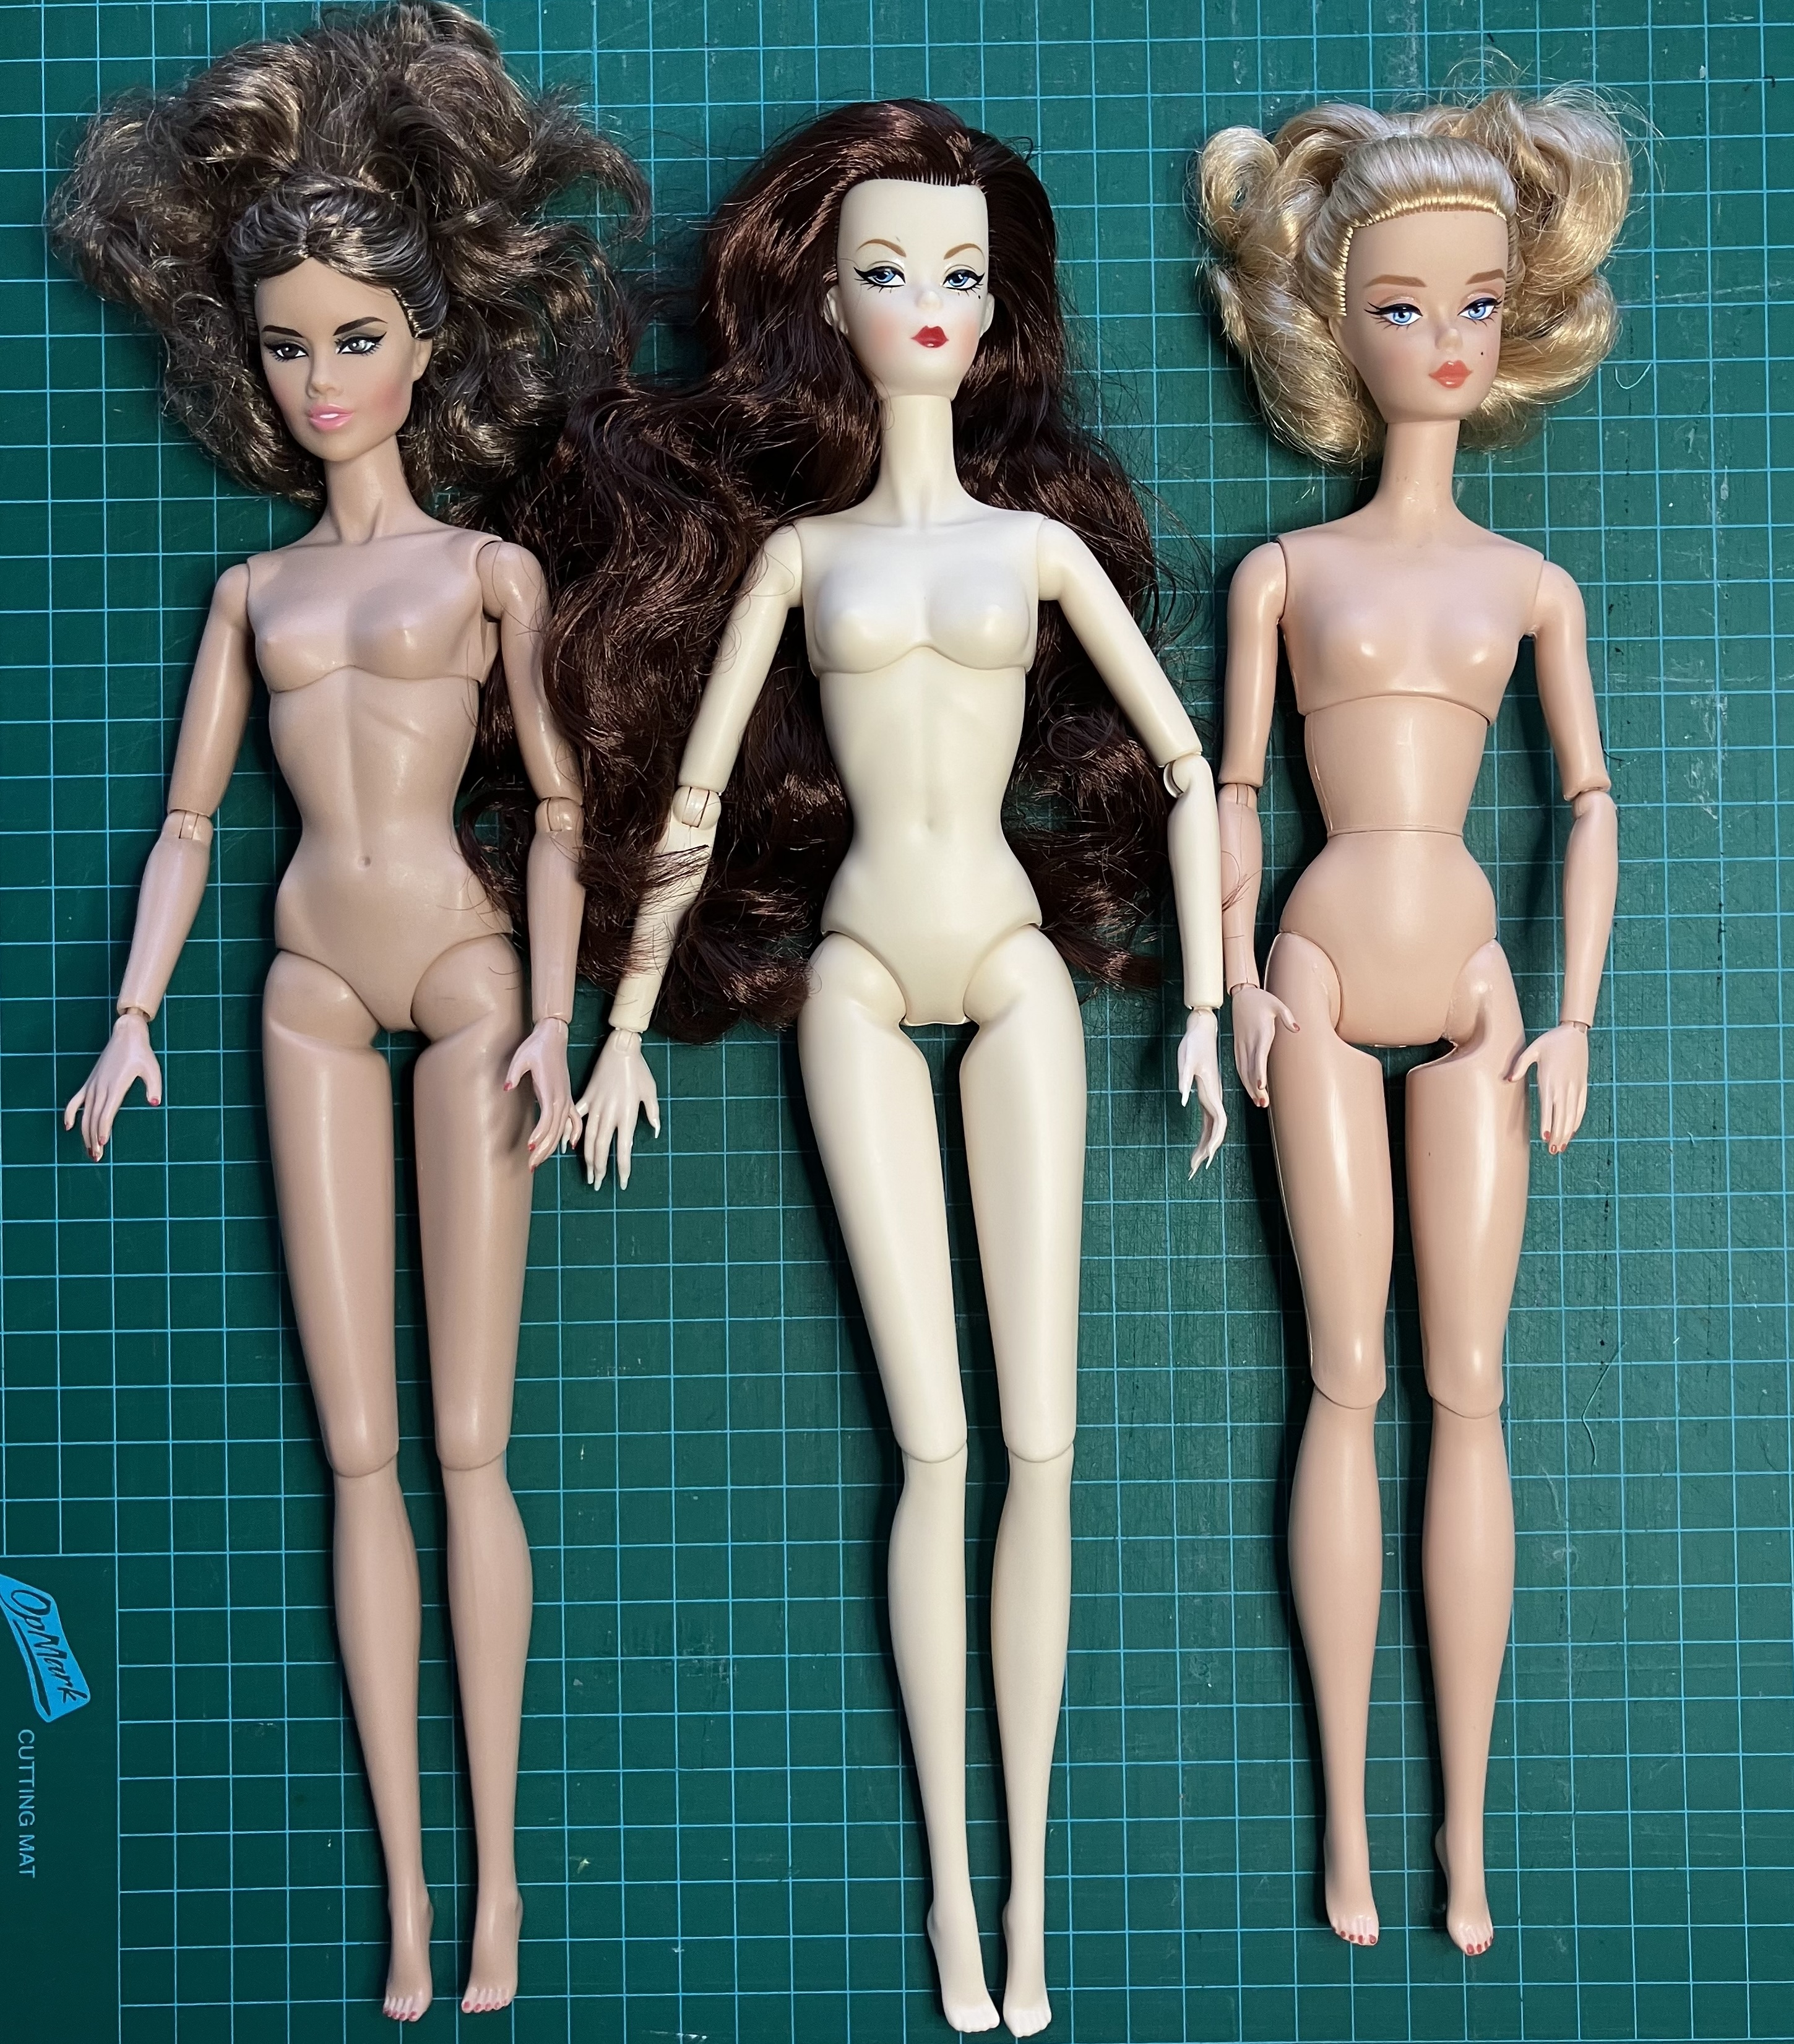
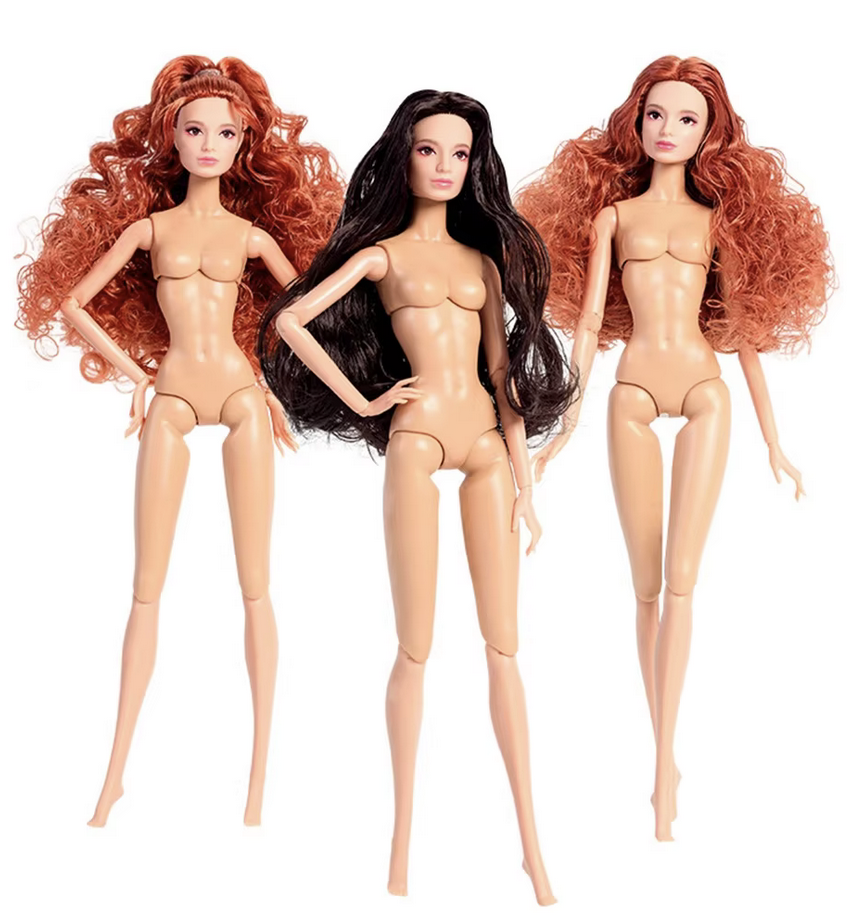
The dolls have a facial sculpt similar to the Silkstone Barbies but a taller articulated body. I thought the body resembled Fashion Royalty dolls. I chose the brunette, which is on the far right. She came in about two weeks, nicely packaged, with a pair of shoes (black slingbacks similar to the ones for Silkstone dolls) but no stand.
When she arrived, I compared her with two of my other dolls. On the left is Jade from Integrity Toys/Fashion Royalty. The body of the new one (in the middle) is most similar to this body type, although she’s a bit taller and has a longer neck, too. She’s also much lighter, so a different plastic has been used for the body. On the right is a Silkstone Barbie, Best in Black, who is a good bit shorter but also an articulated doll.
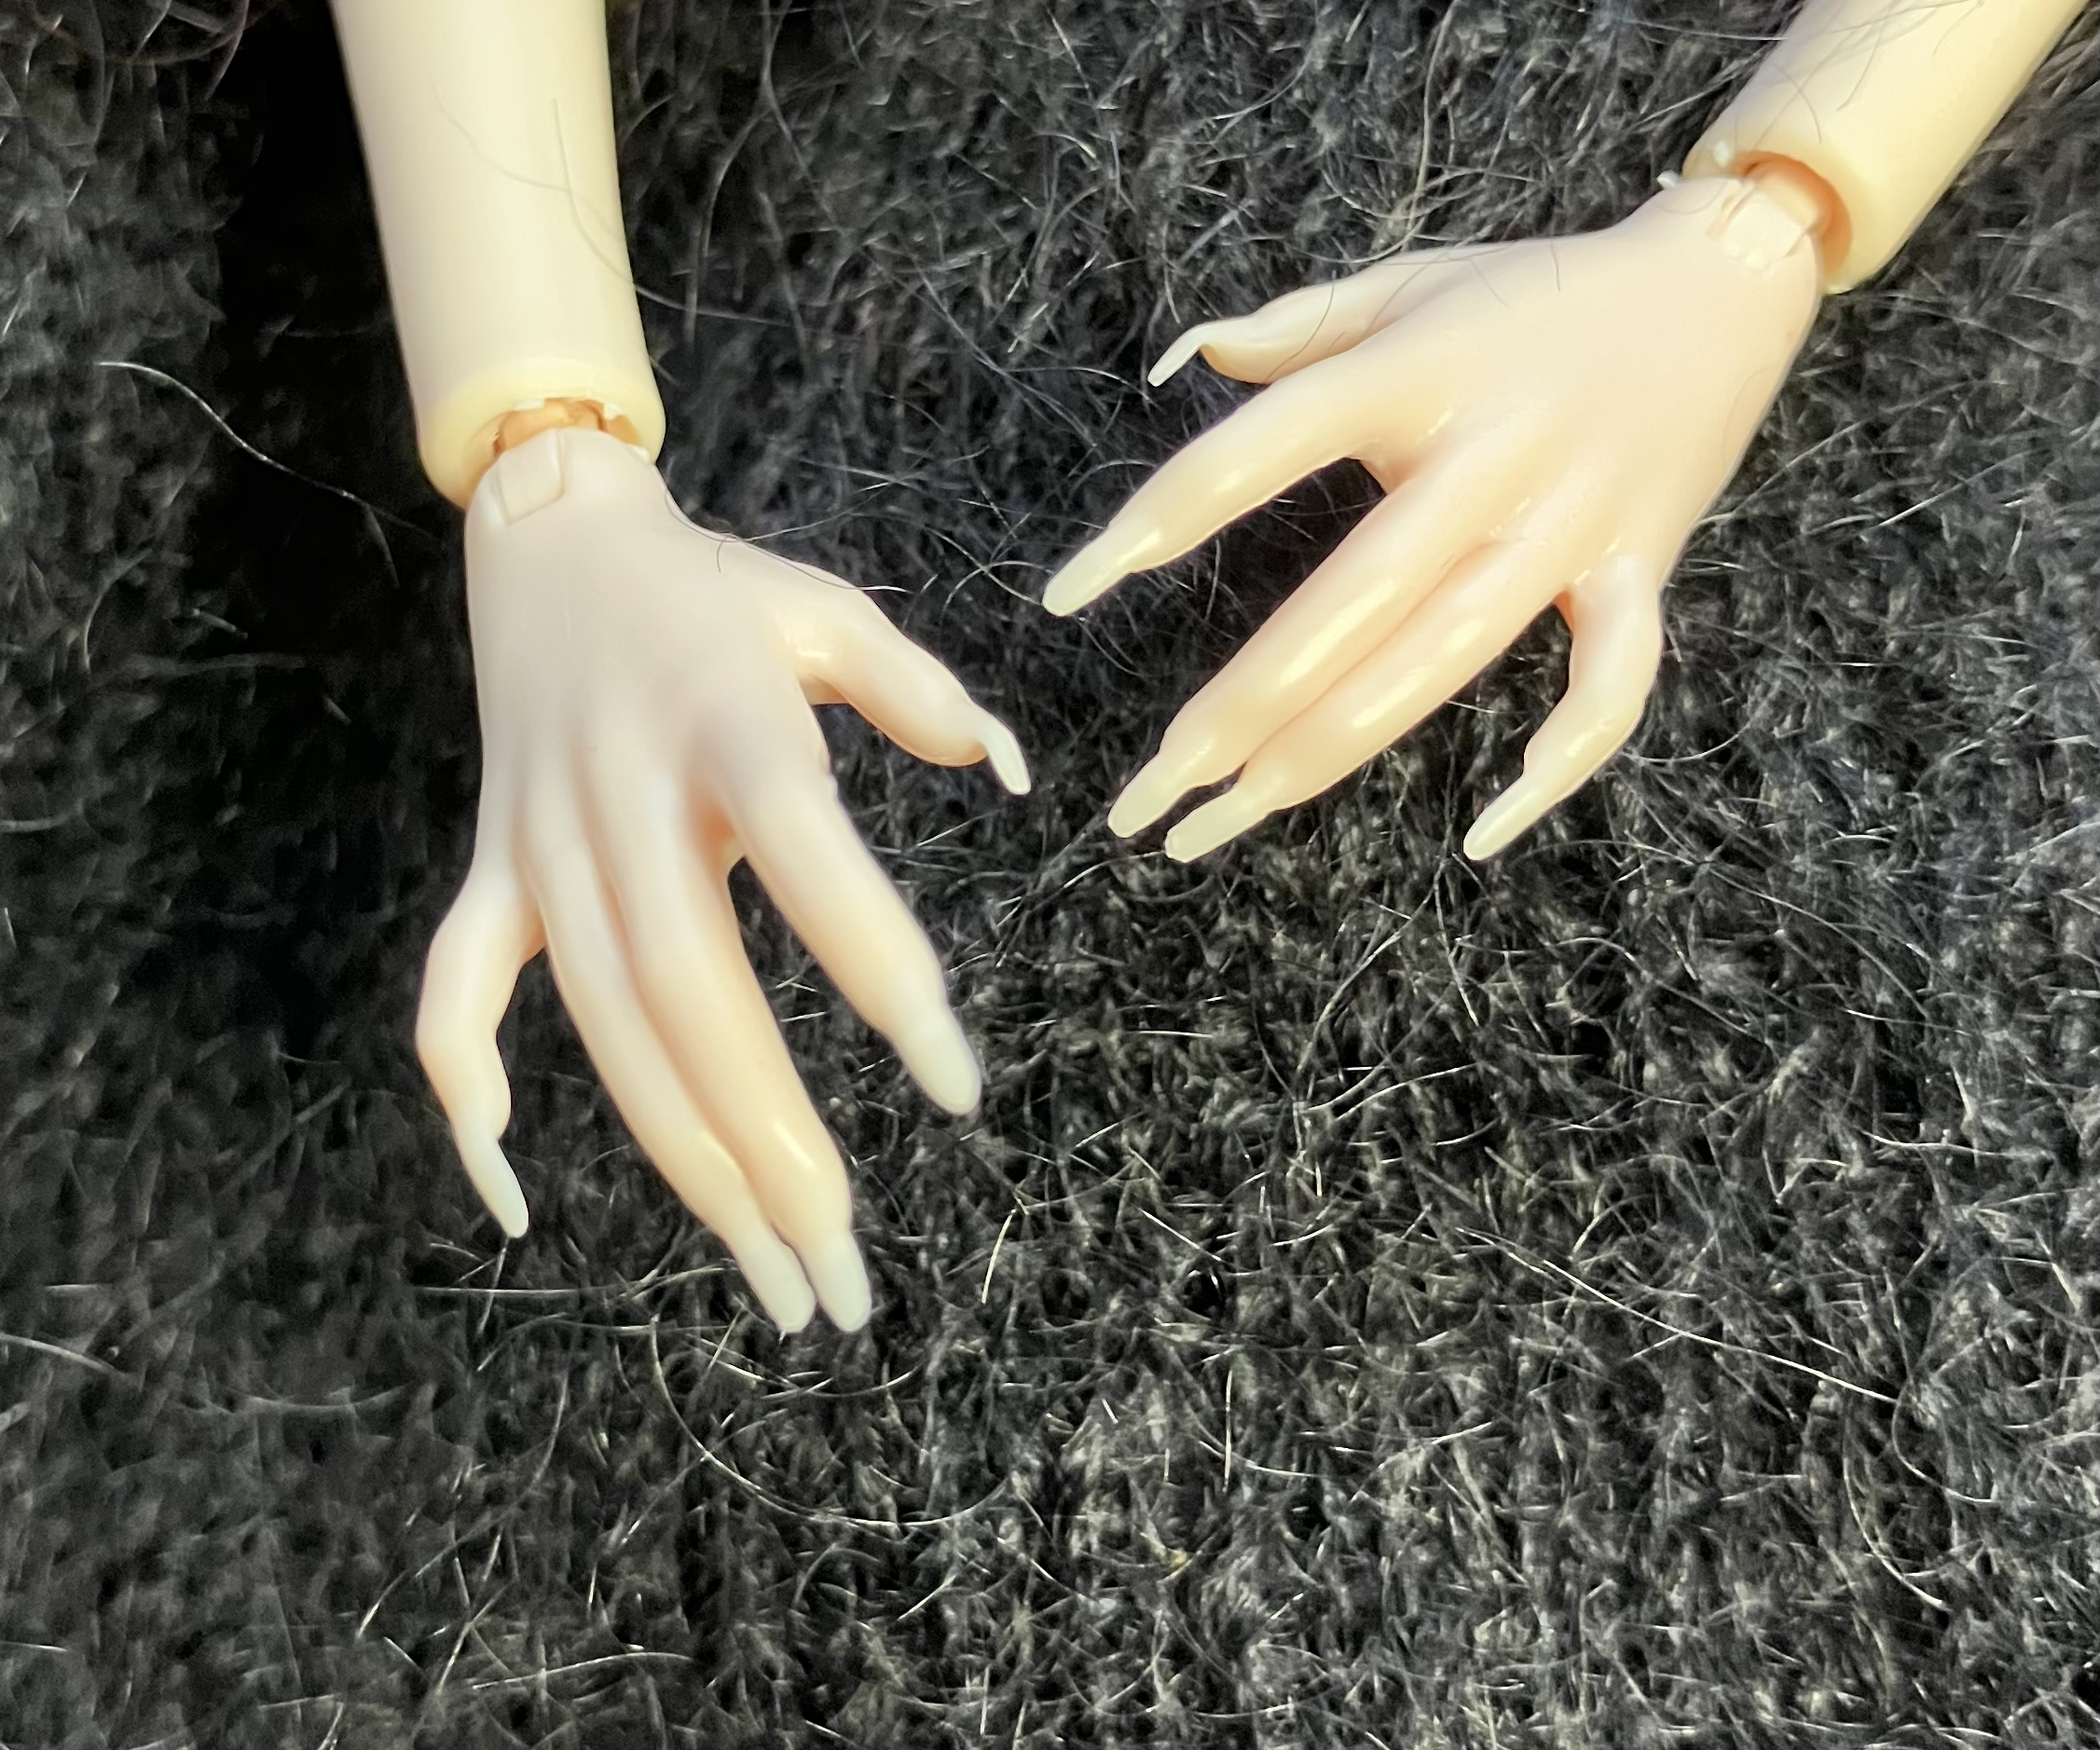
The new one’s hair is nice and long. It feels good, though it could be rooted a little more thickly. She’s too tall for the Silkstone stands, but Jade’s, from Fashion Royalty, works well. She’s very very pale and she has these incredible finger nails.
There’s definitely something “Queen of the Night” about her! If I’d bought the one with the black hair, I probably would have made her a Morticia outfit.
I debated the option of ordering her a different pair of hands – they pop on and off – but doubt I’d manage to get a perfect match on the skin colour. She’ll get a manicure instead.
Overall, I’m not sure she was worth the price. It also looks as if you could build one of your own – buying the head separately from the articulated body on AliXpress – for maybe $10CAD less. I don’t build dolls (yet! LOL ) so I won’t be buying this one a friend.
There’s another doll that people are talking about – actually, there are three variations of another articulated 12″ fashion doll. I don’t mind the faces of these dolls, but apparently their lower limbs are made of a different softer plastic. That’s an ewwwwww for me, which is why I ended up trying this one. That one is less than half the price of this one, though.
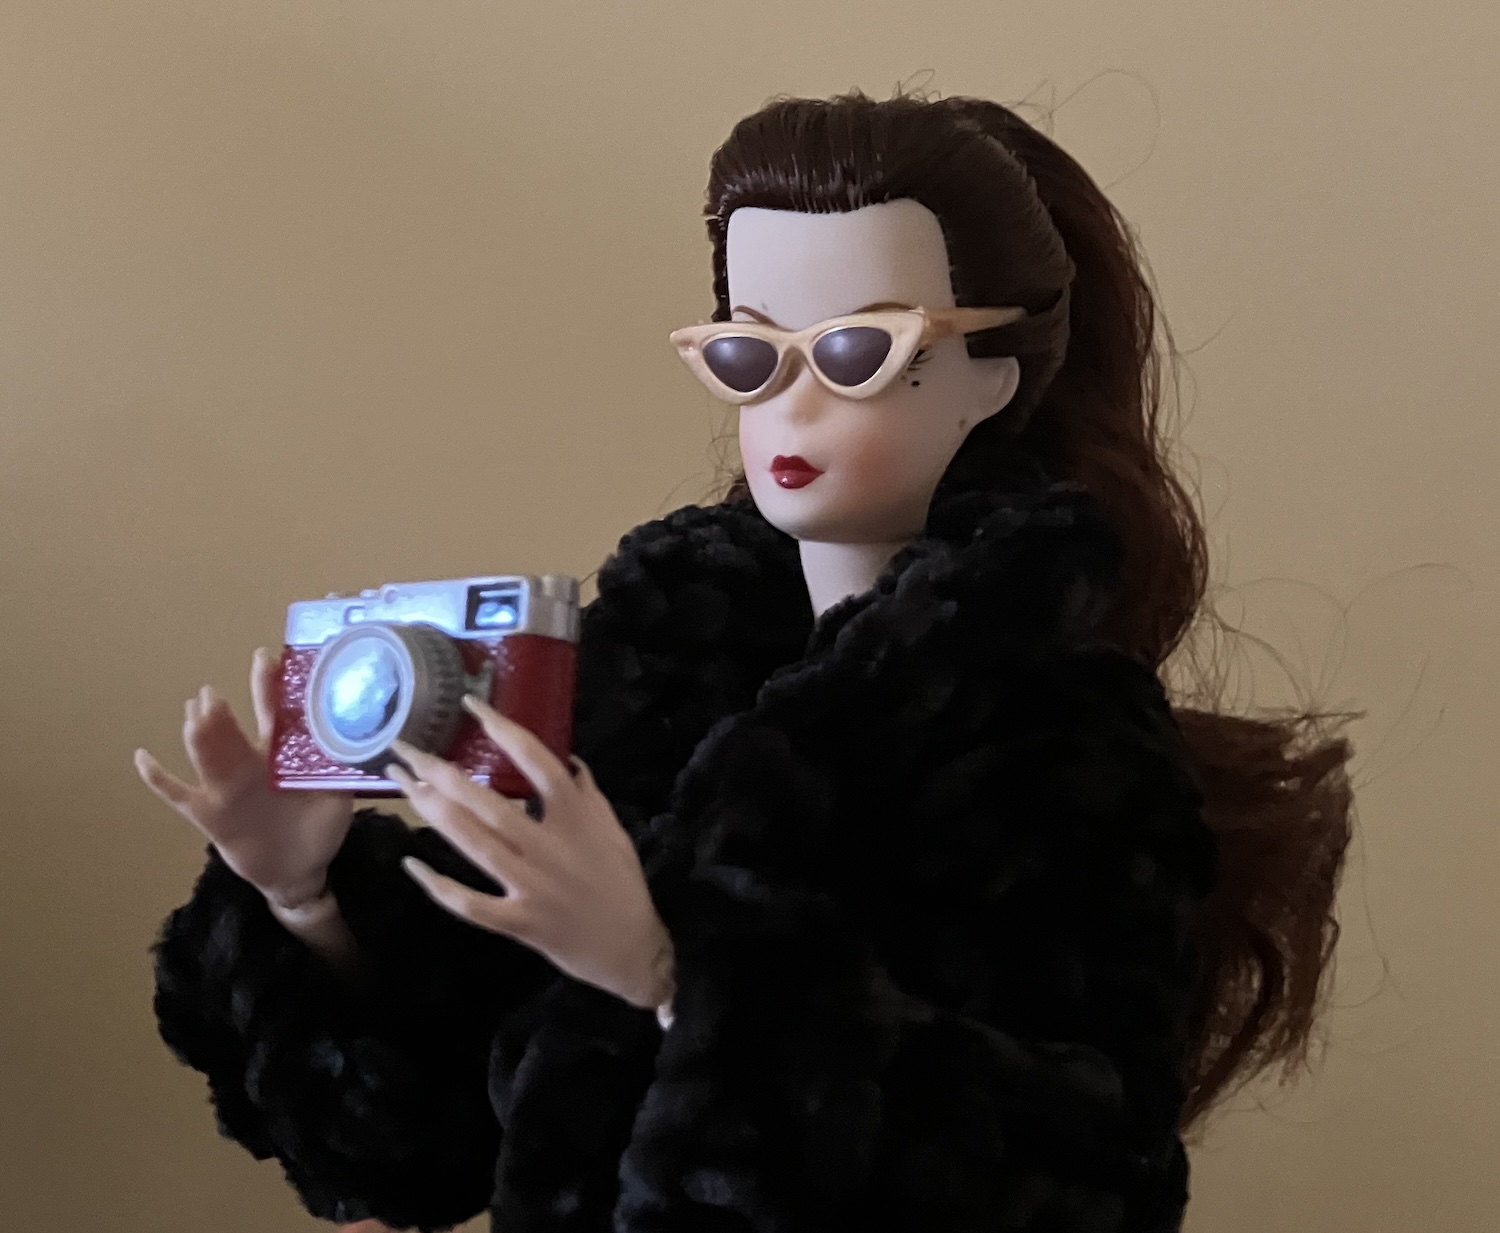
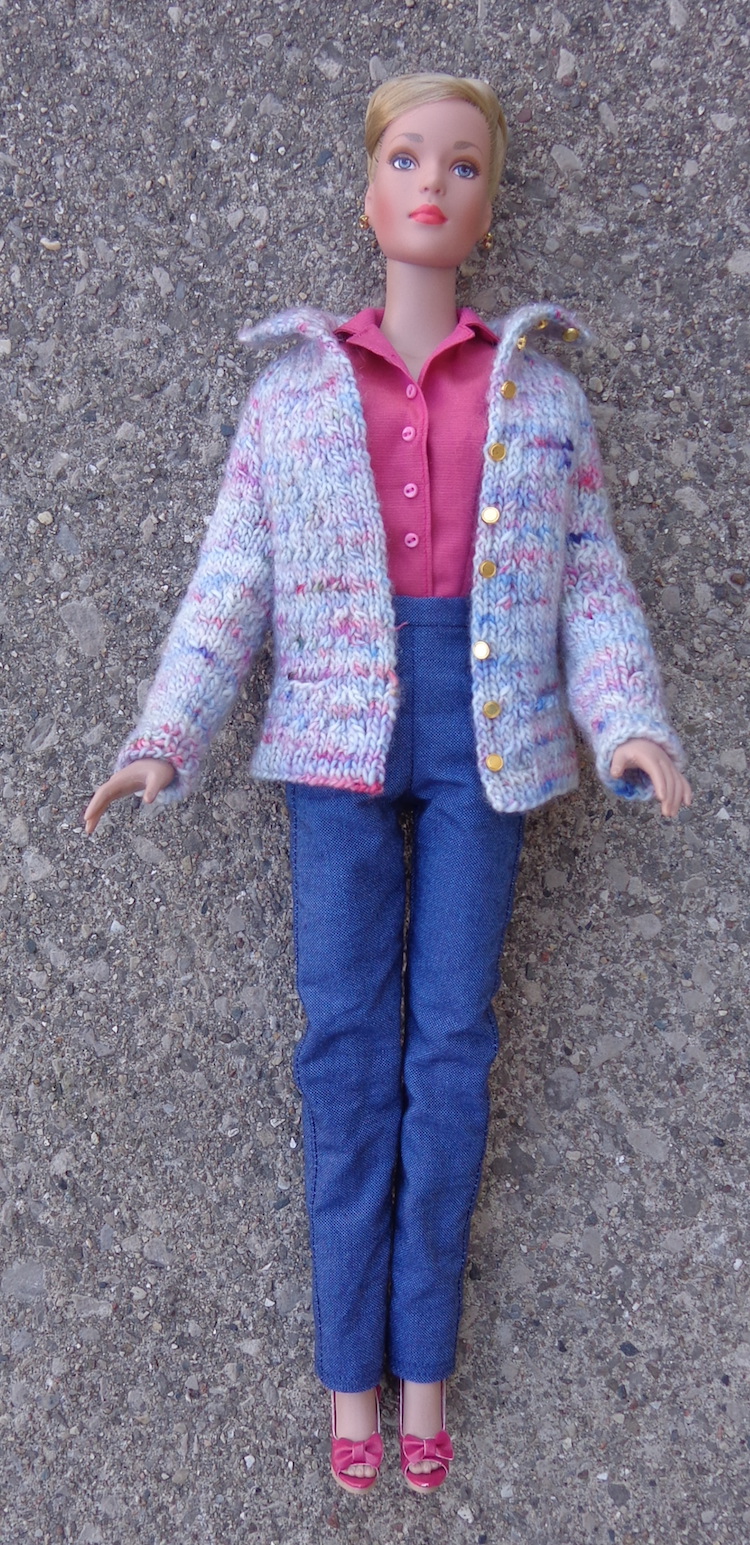
I realized that my new girl reminds me of Natasha from The Rocky and Bullwinkle Show – did you know the character’s name is Natasha Fatale? I didn’t. That’s a Wiki link – so I put her hair in a ponytail and dressed her in a chenille coat.
Doesn’t she look like a spy now? Her sunglasses could have been straighter, but the whole endeavor is such a balancing act – it’s inevitable I’d miss some detail.
I apologize for the quiet here. A month has slipped away from me, and I’m not entirely sure where it went. Of course, there were things to do in the garden this time of year and some canning to finish up. I also treated myself to a lot of reading on the porch, which was just wonderful. (I might not give up on that anytime soon. I’ll be out there in my fuzzies when the first snowflakes fall! LOL!)
I have been sorting and organizing, too, which seems to be a fall impulse for me. The girls are getting some new accommodations, so they won’t be standing on the bookshelves all the time (getting dusty). I’m doing some sewing for myself again (yay for fun clothes that fit) while I continue to knit on the endless black sweater in Kidsilk Haze. I may never take this one off once it’s done.
I’ve been thinking, also, about my Noro Mitred Jacket. (le sigh) The colour is pooling, each square taking repeatable increments of the colour gradation. I’ve reached the end of the I-cord, which is a bit tighter than would be ideal, and am debating the merit of taking it all back, then reknitting it, planning the placement of the squares.
And yes, the pattern does display an order of working the squares, but I never read that bit until now. I’ll guess the designer noticed the same thing, so my result is entirely user error. Those two leftish ones that start with fuschia and end with green, in the second row from the bottom, really irk me, as do the four mirroring each other on the other sleeve opening. (Pink through purple to pink, with pink through green to blue immediately below.) Still thinking on that. On the upside, it looks as if it will fit which wasn’t at all a sure thing.
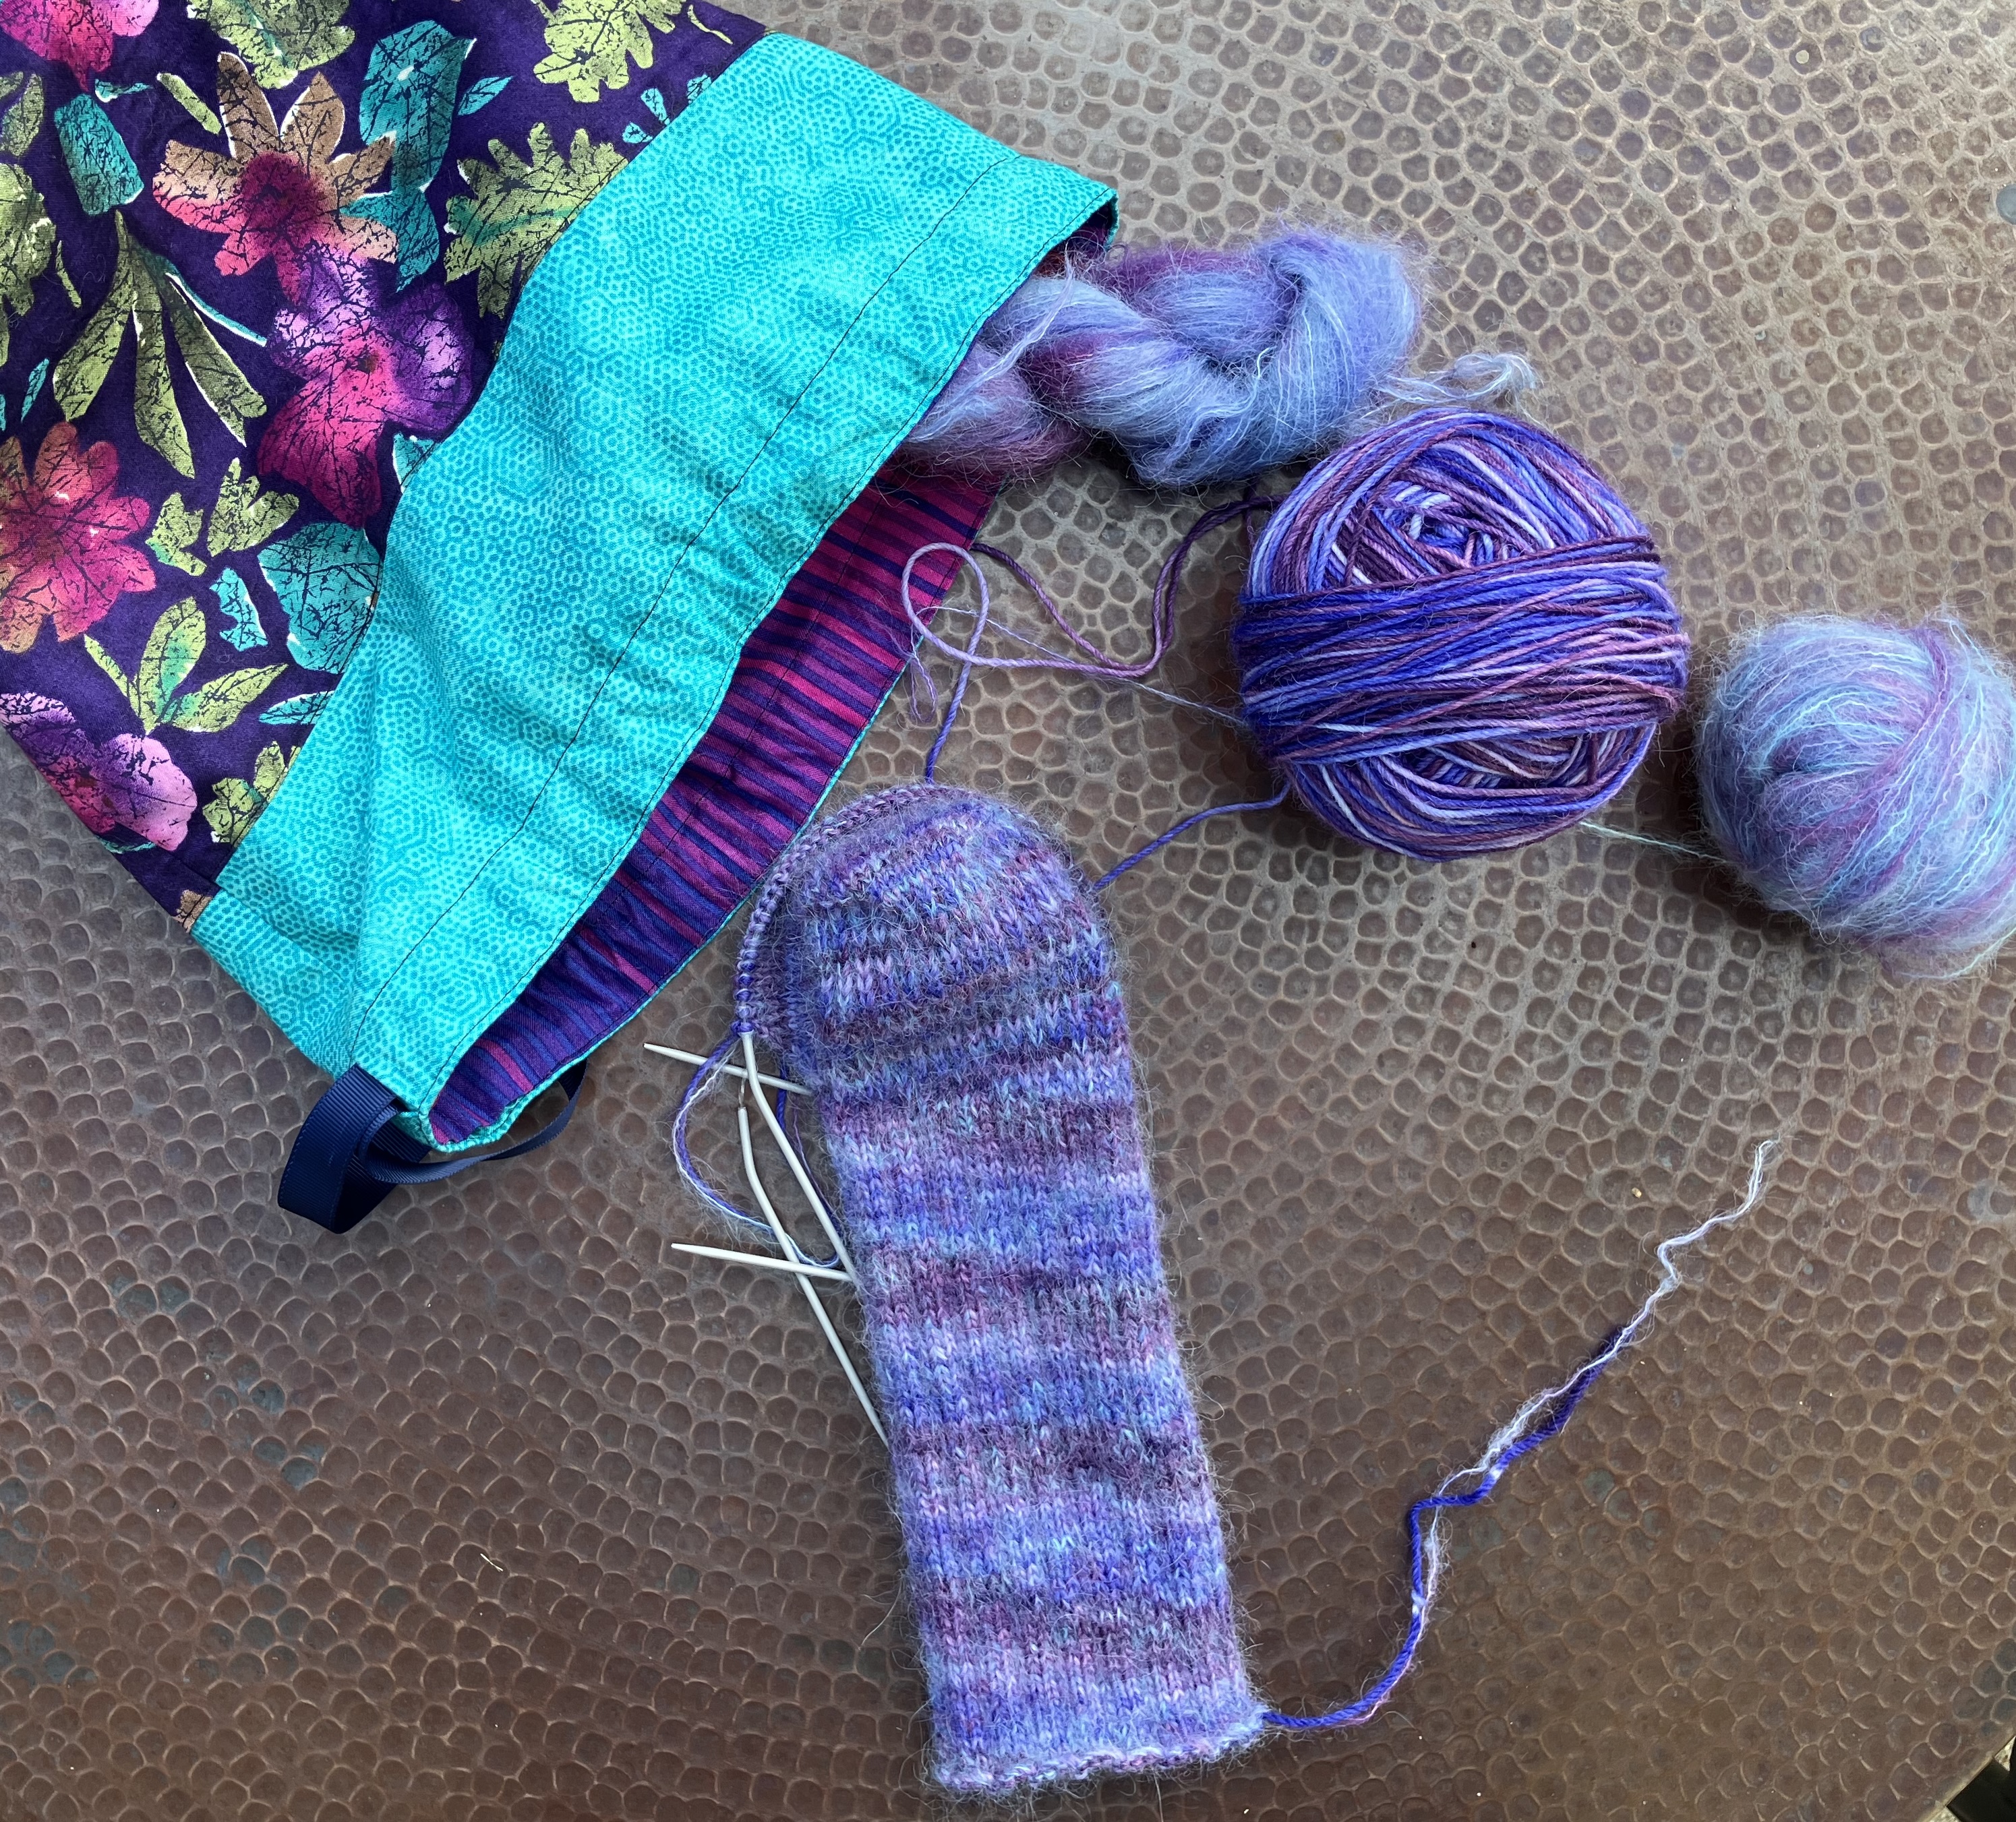
Finally I’ve been knitting myself a pair of fuzzy socks. (Hmm. I cast them on before I even realized the reading-on-the-porch plan.) This may be my fave way to make socks right now, so let’s talk about that today.
A few years ago, I made a number of pairs of the Snowshoe Socks from Knits about Winter. (The first link goes to Ravelry and the pattern. The second is a link to the publisher’s website and wow, the book is really on sale right now.) Essentially, you carry two strands of Kidsilk Haze or a similar yarn along with your sock yarn. The three strands held together make for a thick fuzzy and warm sock. Here are those pair – I made three for myself and one pair for the mister. I think there was a fourth ladies’ pair in teal that went to my SIL.
You can see that the orange and the purple pair for me are quite generous through the ankle. I find them a bit sloppy to wear. The first pair, OTOH, which I knit from a smaller size, are a bit snug. The mister finds his too hot so doesn’t wear them much.
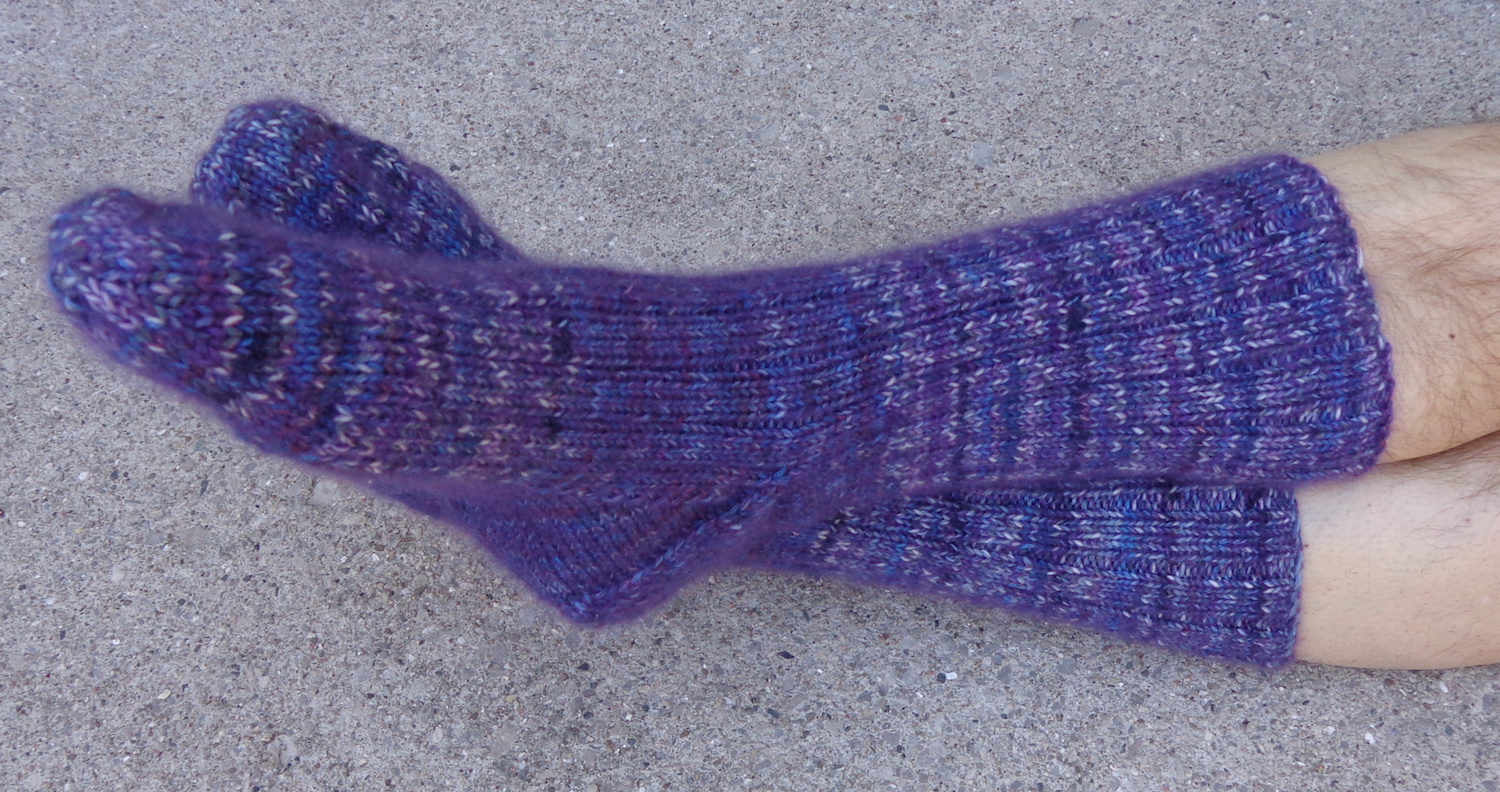
While two strands of silky mohair make for a cushy sock, my current experiment is a pair with just one strand of the fuzzy stuff. That makes two strands overall. I’m also using my regular sock pattern, but I dropped the stitch count to 64 stitches instead of 72. Still knitting on 2.5mm needles but the socks come out a little bigger with the two strands and so, they’re going to fit me perfectly. Ha. No baggy ankles this time. Having just the one strand doesn’t influence the final gauge as much, but you still get a fuzzy sock.
Here’s where I’m at, just after turning the heel on the first sock.
These yarns include alpaca fibre, so the socks are going to be really soft. Both are from The Alpaca Yarn Co. – the sock yarn is Paca-Peds in Purple Rain and the fuzzy one is Halo Watercolors in Picasso. Those are Ravelry links but The Alpaca Yarn Co has an online store right here. Here is Paca-Peds on their site, and here is Halo Watercolors.
I love how the colours become muted when the two yarns are held together. The sock yarn is space-dyed so I knew it would want to pool, probably in a swirl, so the fuzzy yarn softens that a bit, too.
The project bag is one I made from quilting cotton in my stqash. This is the free pattern. It’s a very easy sew, and you can subsequently play with the size of the bag. I’ve added a zipper into the seam between the two colours, too.
If you’ve never knit socks with two strands – and your feet get cold – then give this a try. Your usual sock pattern should work out just fine, but use two strands of yarn instead of just one. Like me, you may want to go down a few stitches in circumference. It depends how tight you like your socks.
Although I’ve been busily knitting, I’m currently trekking through the (endless) wasteland of stockinette stitch on two different projects. It’ll be a while before I have a finished project to show you. I’m alternating between my Hebrides cardigan in black KidSilk Haze (this may be my last black project ever) and the Water shawl. (Those are Ravelry links.)
I’ve finished the fronts, backs and bands of the cardigan and am making progress on the sleeves. (I knit sleeves both at once.) It’s possible that I’ll have it finished in the right season to wear it, which would be great. The Water shawl is finished as far as the directions are concerned, but because I changed the yarn and needle size, it’s too small. I’m adding more repeats – I’ll probably extend it to nine pattern inserts, as I like the idea of the ninth wave.
As I knit along, I’m thinking. 🙂 Today, I’ll share what I’m thinking about knitting stash.
It is the middle of August, and each year, Koigu has a tent sale around this time. (It’s this weekend.) I’ve gone for a number of years, but decided not to go this year. I had the (incredible) thought “I’ve got enough yarn stash.” That’s new, and interesting, so I had to think about it a bit more.
I didn’t attend many yarn events during the pandemic – we went to Koigu last year, and it was lovely to be at a knitting festival again – but I still have most of the yarn I bought at those events. The last time I went to the KW Guild’s Knitters’ Fair, I was on the hunt for a gradient dyed yarn to knit Nim Teasdale’s Don’t Panic, a shawl pattern published in 2017. (That one’s a Rav link, too.) I found it, caked it up, and haven’t cast it on yet. It’s sitting in the stash with the pattern, waiting on me. My Ravelry project page shows 23 projects on my needles, incomplete, but I think there are more than that. Then there are the lots of yarn in project bags with patterns, like Don’t Panic, waiting to be cast on. I have a lot of string.
I generally don’t buy for a specific project, which explains both the size of my stash and the fact that when I choose a project, inevitably, I don’t have the right yarn – in gauge, colour or quantity. So, I’m going to switch things around, and think of my stash in a different way. I’m going to look at what I have, and find a project or pattern to suit that yarn. No more buying a ball of this because it’s pretty, or a sweater-quantity of that because the price is right. It’s time to use it or get rid of it.
And that means that if/when I go to knitting events, it will be to browse and get ideas, not to augment the stash.
I like the plan. We’ll see how it goes. I’ll also start sharing some reliable stash-buster patterns here. I’m thinking of one right now, a pattern of my own for fingerless gloves that is a perfect use of half a ball of sock yarn. It’s scribbled on a torn sheet of notepaper. I can envision it – now all I have to do is find it – and once I share it here, I’ll know where it is.
What’s your stash like? Is it extensive or under control? Do you buy for specific projects or do you add to your stash because you like the yarn? Do you think (gasp) that you have enough stash, too much or not enough?
Two new dolls joined my collection last week, so we’ll meet one of them today.
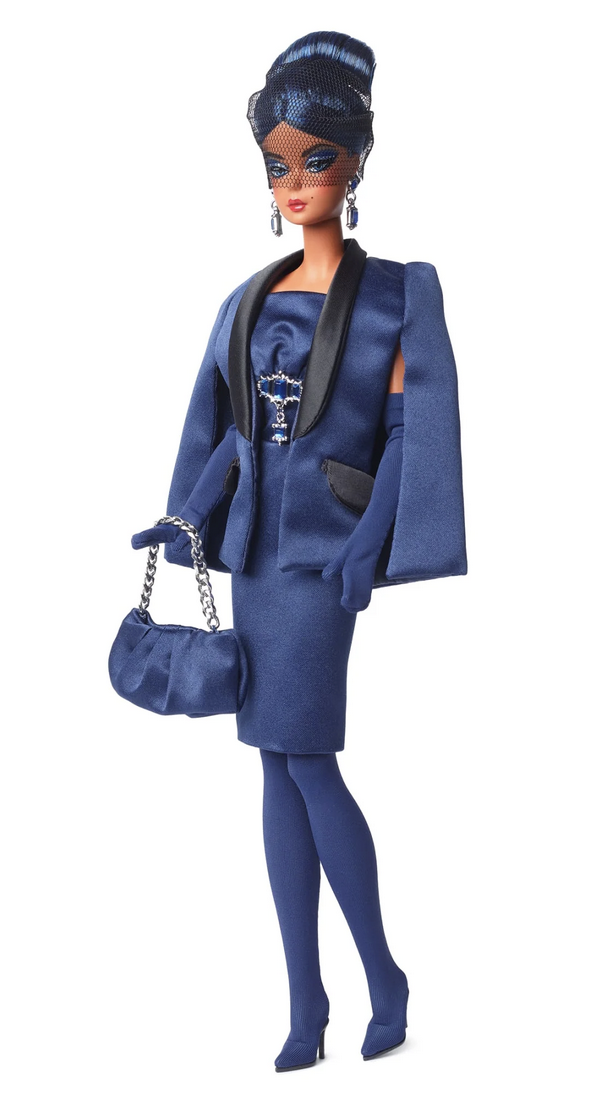
She’s the Sapphire Anniversary Silkstone Barbie. She’s still available on the Mattel website for members, right here. At right is one of the official pix of her and it’s linked back to their landing page.
I had mixed feelings about this doll. I prefer the older Silkstone bodies over the articulated dolls, but was attracted to the idea of getting a new doll. (That explains my other two articulated Silkstones, too!) In the end, though, I ordered her.
The finishing of the doll itself is disappointing but that was true of the other articulated girls, too. I suspected I wouldn’t like the jacket and I didn’t. 🙂
But I love her blue hair and sparkly eye make-up. The dress is darling, although it has a crunchy lining in the skirt. I may try to copy it in another fabric. This time, they put clear plastic disks between the earrings and the doll, presumably to keep her face from being scratched. (It’s the metal pin in the head that gives dolls green ear, so it won’t prevent that.)
Her stocking-boots are interesting – there are shoes secured in the bottoms. I saw a photo of her with the 60th anniversary pink Barbie which appears to have the same stocking-boots. (That’s an Amazon link.)
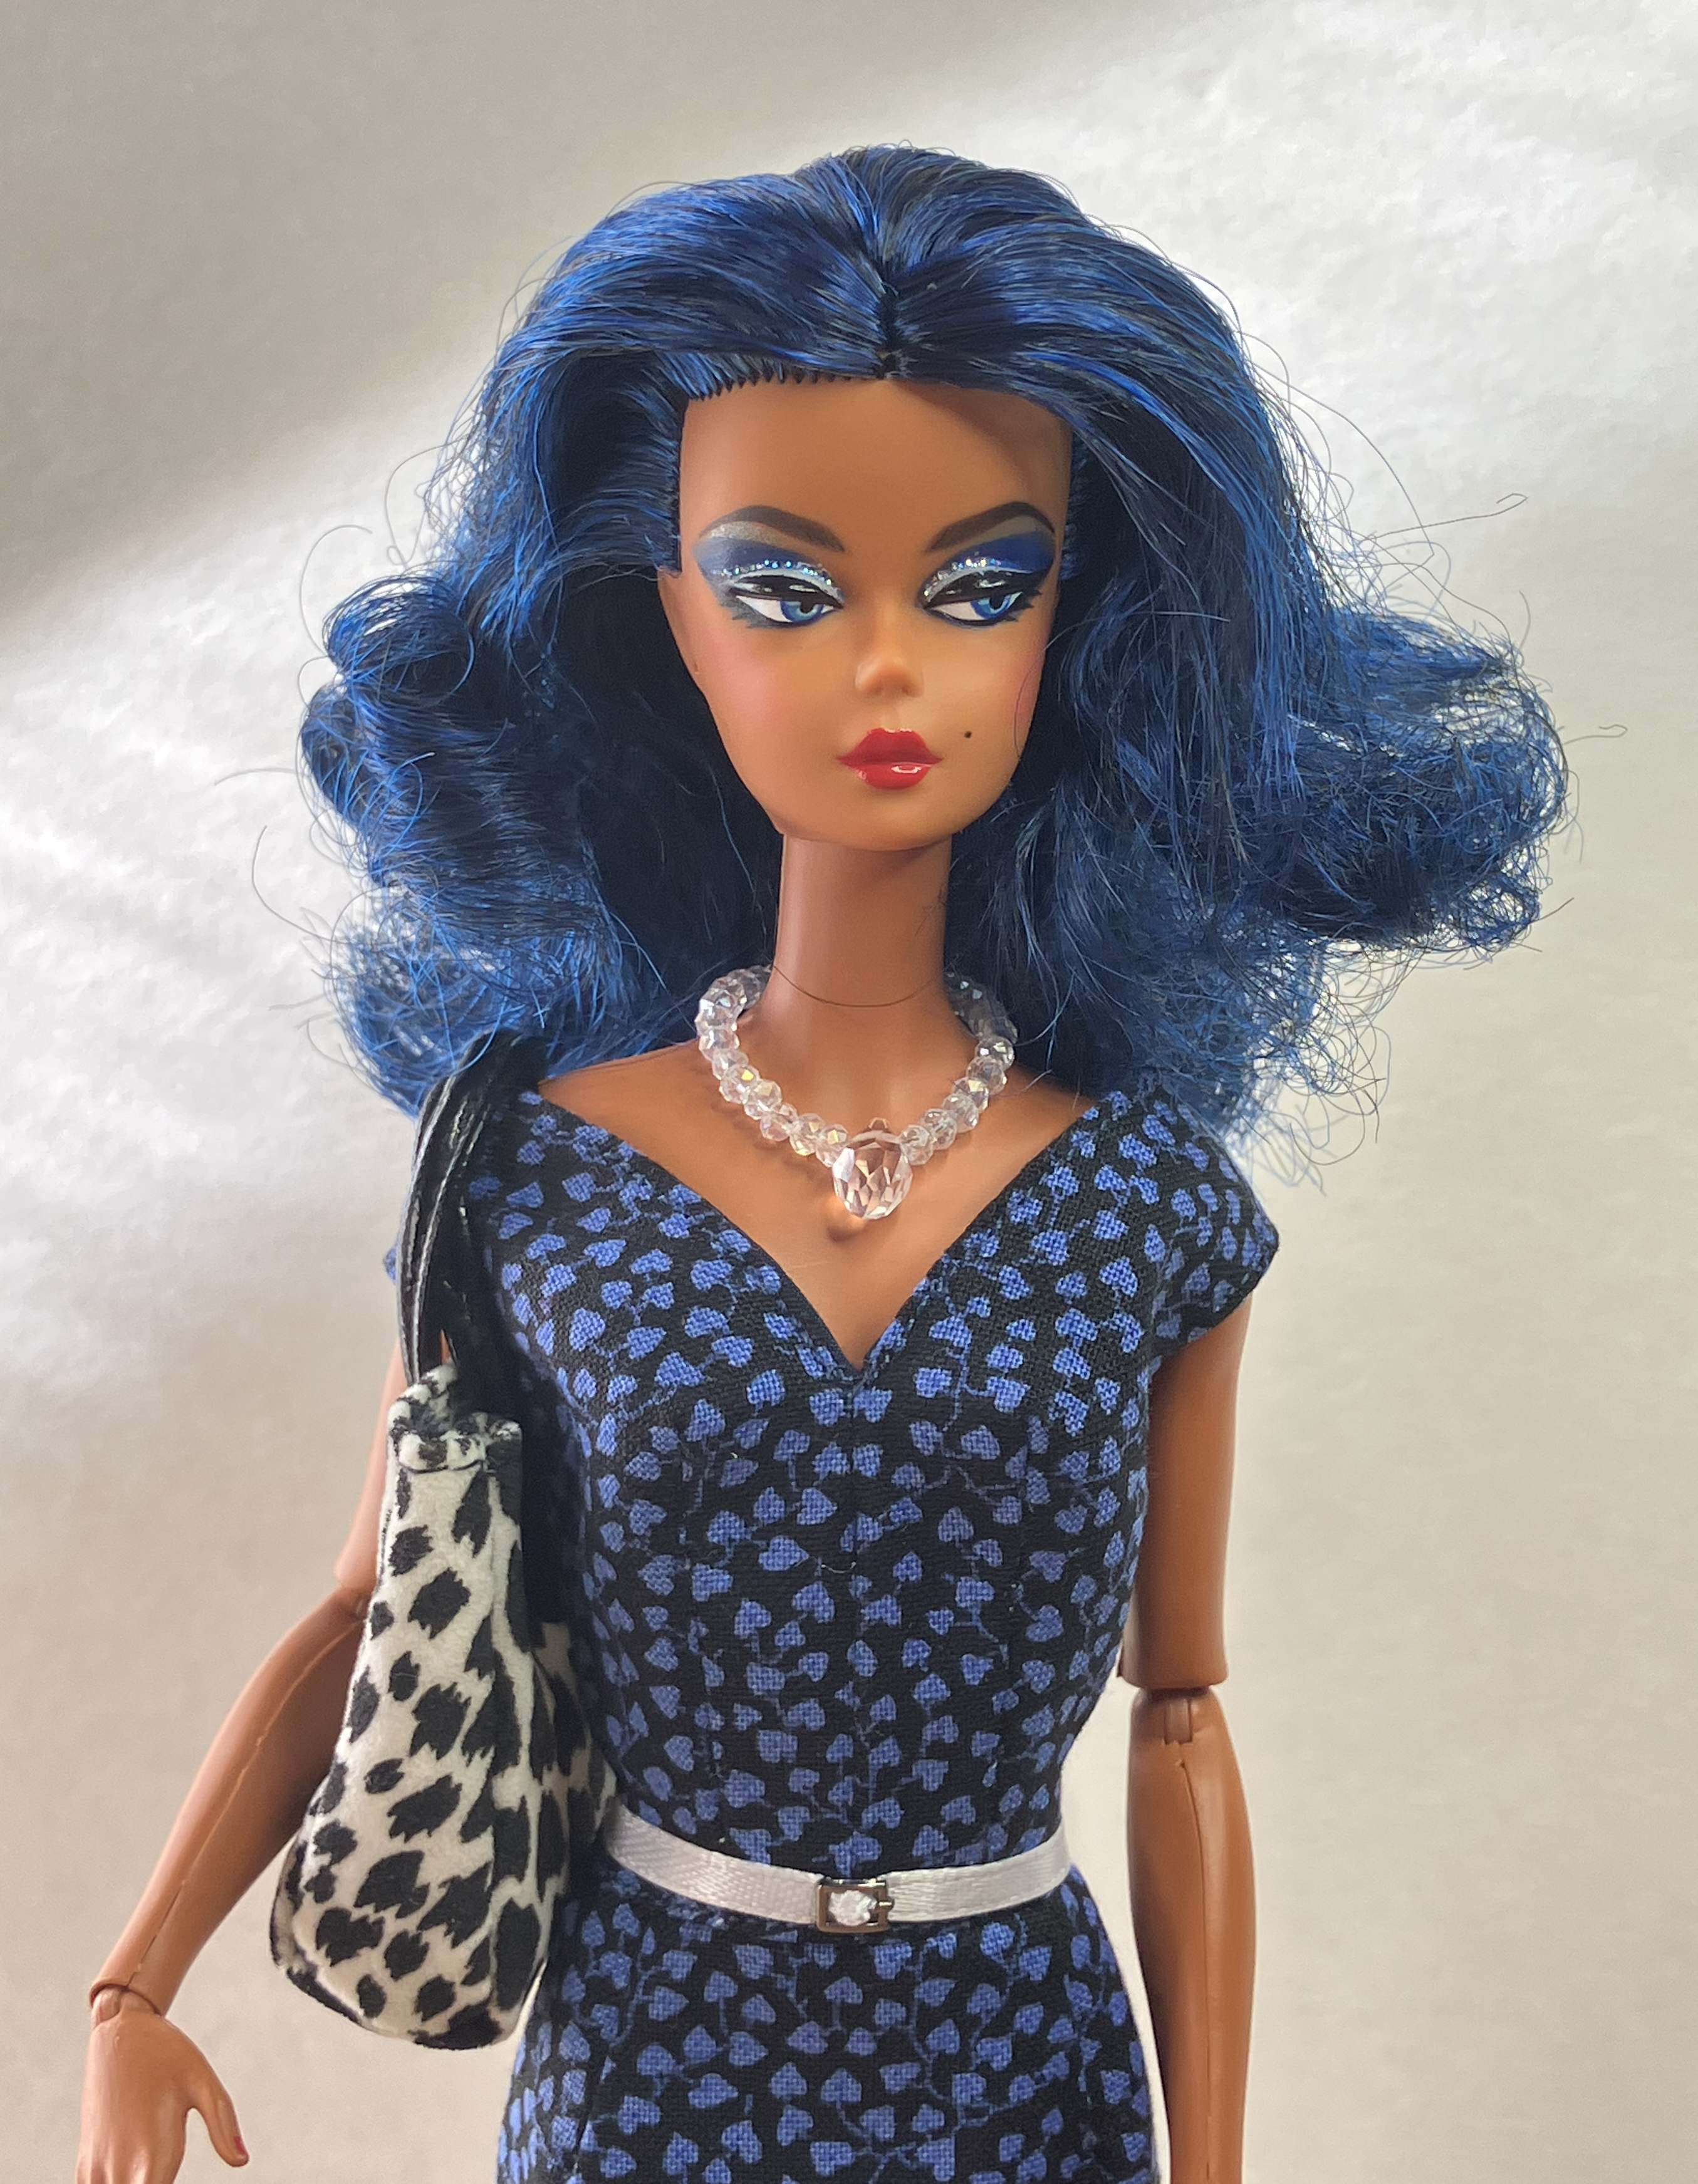
She came out of the box and waited just a day before I surrendered to temptation and took her hair down. I don’t know what they use to keep the hair in place, but it leaves the hair stiff and crunchy. (Maybe it’s just glue.) We had a good wash and comb, then another couple of washes. I didn’t boil-wash because I was hoping to just tame the curl not lose it completely.
And here we are:
Her lipstick is evenly applied – it’s just the angle of the morning sunlight that makes it look otherwise. I trimmed a few scaggy ends from her hair, but otherwise, it’s how it came down. She borrowed the purse from Dusk-to-Dawn and it’s possible she won’t give it back. The dress is the one from Trench Setting. I definitely need to make her some black and blue separates.
Another post about the girls this week. I’m knitting for myself, too, but it takes a lot longer to finish up a project. Right now, I’m knitting the sleeves for a cardigan in black Kidsilk Haze, using the Hebrides pattern. I’ve knit it twice before, and it’s a gem. These little jewel-necked cardis aren’t terribly exciting, but I do get a lot of wear out of them. I’ve wanted a black one for a while, though this may be the last time for black Kidsilk Haze to jump onto my needles. I have the fronts and backs done, and will pick up the buttonbands in daylight on those 2.75mm needles.
I also finished the Storm at Sea quilt, which feels like a huge accomplishment. It’s been a finished top and unfinished quilt for so long. I’m working on the hand quilting for the Pineapple Star – just two corners to go, then I can bind it. It’s time to get all these unfinished tops done.
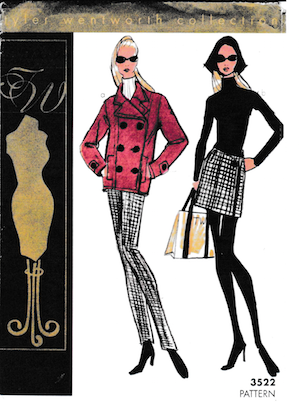
In the meantime, I finished a little top-down cabled cardigan for the girls and that’s what we’ll look at today. Here’s Tyler modelling it, along with the top from McCalls 3701 and pants from Tyler Wentworth 3522.
I didn’t have a pattern for this, just cast on with sock yarn and made it up as I went. I kept notes so I can do it again. I also kept the cables simple on this one – it’s a two-stitch cable with a purl stitch in between each one – so I could keep track of the counts better. Now that I’ve figured them out, the plan is to make another with more elaborate cables. Those are working buttons with buttonholes, though the small holes are tricky to find.
My favorite detail is the pockets in the fronts. You can just see the one on the left side (the doll’s right). I put the stitches on a holder where the pocket should go, then cast on the same number in the next row. That gave me a slit. I continued to the hem and finished the body of the sweater, then went back to those held stitches. I knit down to make a square, then sewed its edges to the inside of the sweater. Pockets!
You can see the cables better on the back of the sweater, as well as the single stitch on the raglan lines. I worked purl-knit-purl on each raglan line, and increased before and after it. As soon as I had two stitches for a new cable, I started one. The cables are turned in opposite directions on the left and right, then the center back cable is four stitches on each side of the central purl stitch.
The wool is some leftover sock yarn and I worked on 2mm needles. The only change I’ll make when I knit it again is to add a few rows to the collar – it wants to curl up – and I’ll play with the cable patterns, too.
These are the patterns for the sewn garments.
McCalls 3701 for 16″ dolls
Tyler Wentworth 3522
The pink shirt is made of French shirting cotton, which is really lovely and fine. The weft is a slightly different colour, so it changes in the light. (Yes, I made a shirt for myself of this fabric once upon a time.) It’s actually a bodysuit but made of woven instead of knit. It was a little tricky to turn those collar points but a nice little project. Those buttons don’t work – there are snaps behind them to close the fronts.
The pants from 3522 are the ones I’ve made multiple times in pleather for the girls. This pair look a bit like jeans thanks to the fabric choice, but I’ll need to add pockets to the back of the next pair to complete that illusion. They are quick basic pants to sew.