
A while ago, I bought several of these metal purse frames when they were discounted at my local fabric store. I liked the curved antique gold ones with the detail on the frames. I finally got around to thinking about them, and making a purse with one of them.
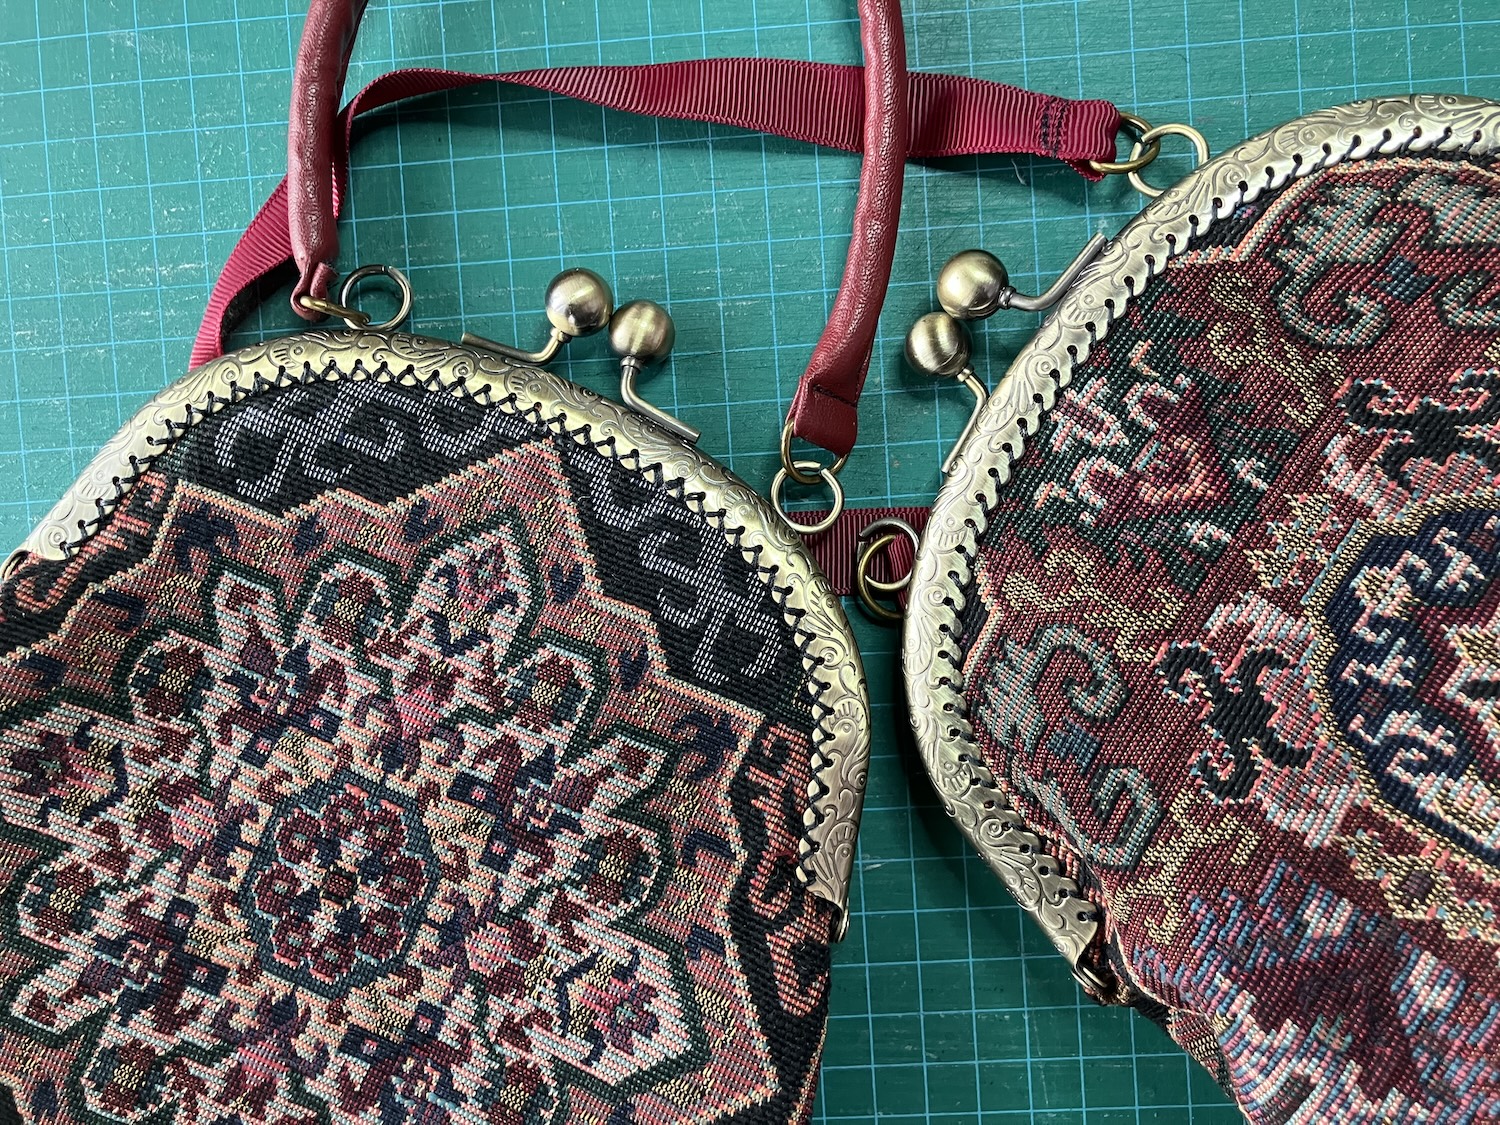
It turns out there are two kind of frames – as well as many styles. One kind has holes like this own, so the bag is sewn into the frame. The other is smooth, and the bag has to be glued into the frame. I’m not fussed about the glue option, so am glad that I inadvertently bought the kind I prefer. Here are my two bags, as a preview, then we’ll look at each one and the differences between them.

The one on the left is the purse I made first.
The package for the handle contains a template but is pretty minimalist in terms of instructions. I traced the curve of the handle and created a pattern, then cut it from a tapestry fabric that I love (there are pieces in the stash from some pillows) and a coordinated lining.
Featuring a motif from this tapestry fabric on each side of the bag determined the size of my bag. Since it’s a very heavy upholstery fabric, I didn’t use any interfacing or padding. I could have used some interfacing on the lining, but didn’t. I did add a small pocket to each interior, since I like having a little pocket inside my purse. (Perfect for a hotel key card that I don’t want to lose.)
I sewed the lining first, only sewing an inch at either end of the seam at the bottom. I then pressed that seam as if it was sewn, giving me a nice crisp edge for closing that up once the bag was done. When I sewed the outside of the bag, I top-stitched all three seams so that the seam allowances would stay put. The bag is boxed out by sewing across the bottom corners.
Once the bag was constructed, turned and the space in the bottom seam of the lining was sewed up, I gave it a good press, then top-stitched around the top curve that goes into the frame. This made it a little easier to jam that edge into the gap in the purse handle – when I could see the top-stitching on the inside, I knew it wasn’t pushed in far enough. I basted the handle in place, then stitched it all together with a topstitching thread.
Here’s that first purse:

The result is fine, but the finished bag doesn’t have much wiggle room at the top. The purse is very flat – I can just slide my hand inside. Hmm.
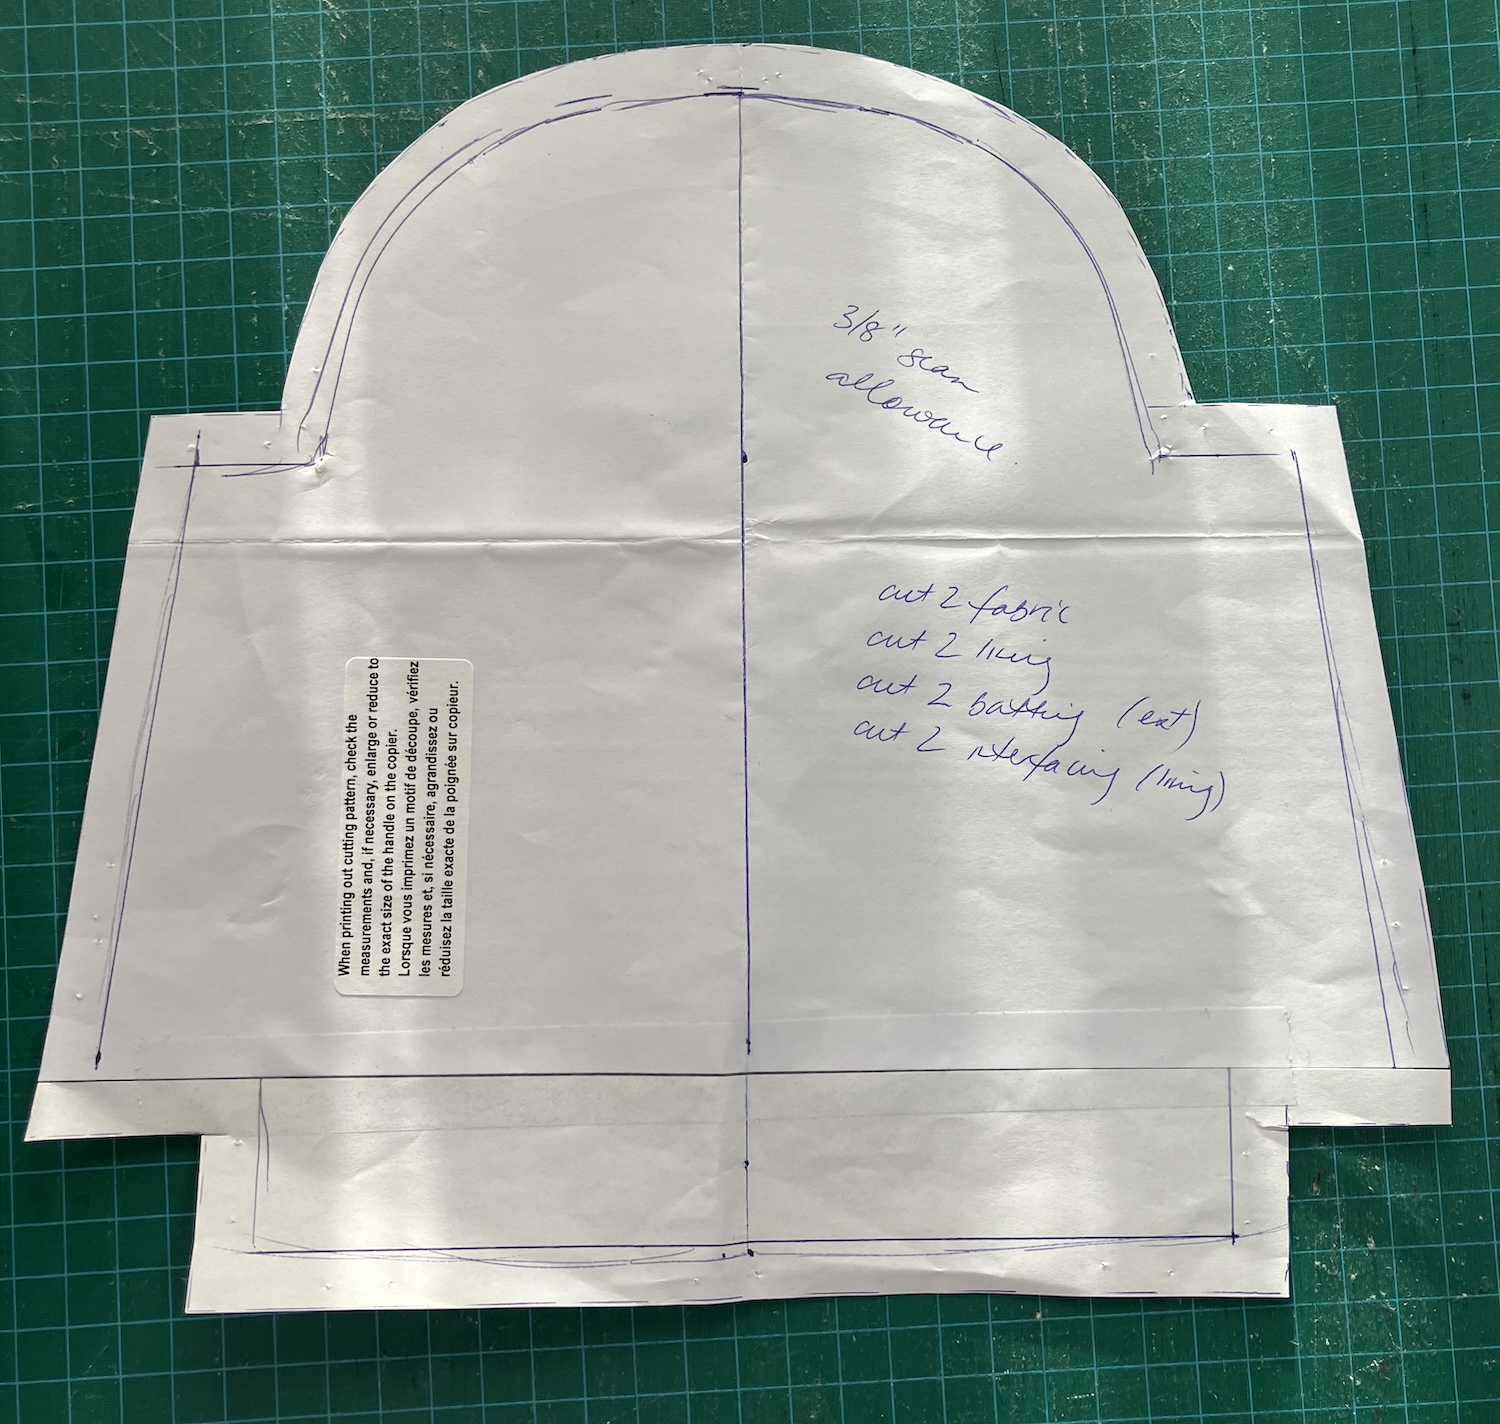
I did some searching online and came up with this tutorial at So Sew Easy. It’s for a different frame – there are so many styles available – but you can follow it to make a pattern to fit your frame. This tutorial shows how to adapt the tracing of the handle to create more fullness in the bag. Ha. Look at the difference between my two pattern templates:

The one on the right has been folded and didn’t want to lie flat for the picture. The bottom edge is straight.
Here’s the bag made from the second pattern:

It’s much fuller. I’d even call it puffy. I would have loved to have included the top of that octagon shape beneath the handle – the yellow-ish outline – but there just wasn’t enough of the fabric for that.
When sewing the handle to the first purse, I used two stitches per loop, making a zigzag, but really, it doesn’t need this much reinforcement. And this sewing is hard on the hands – less is better! (You can see that I missed one zig on the left of the handle.) For the second (on the right) I just did one stitch per hole.
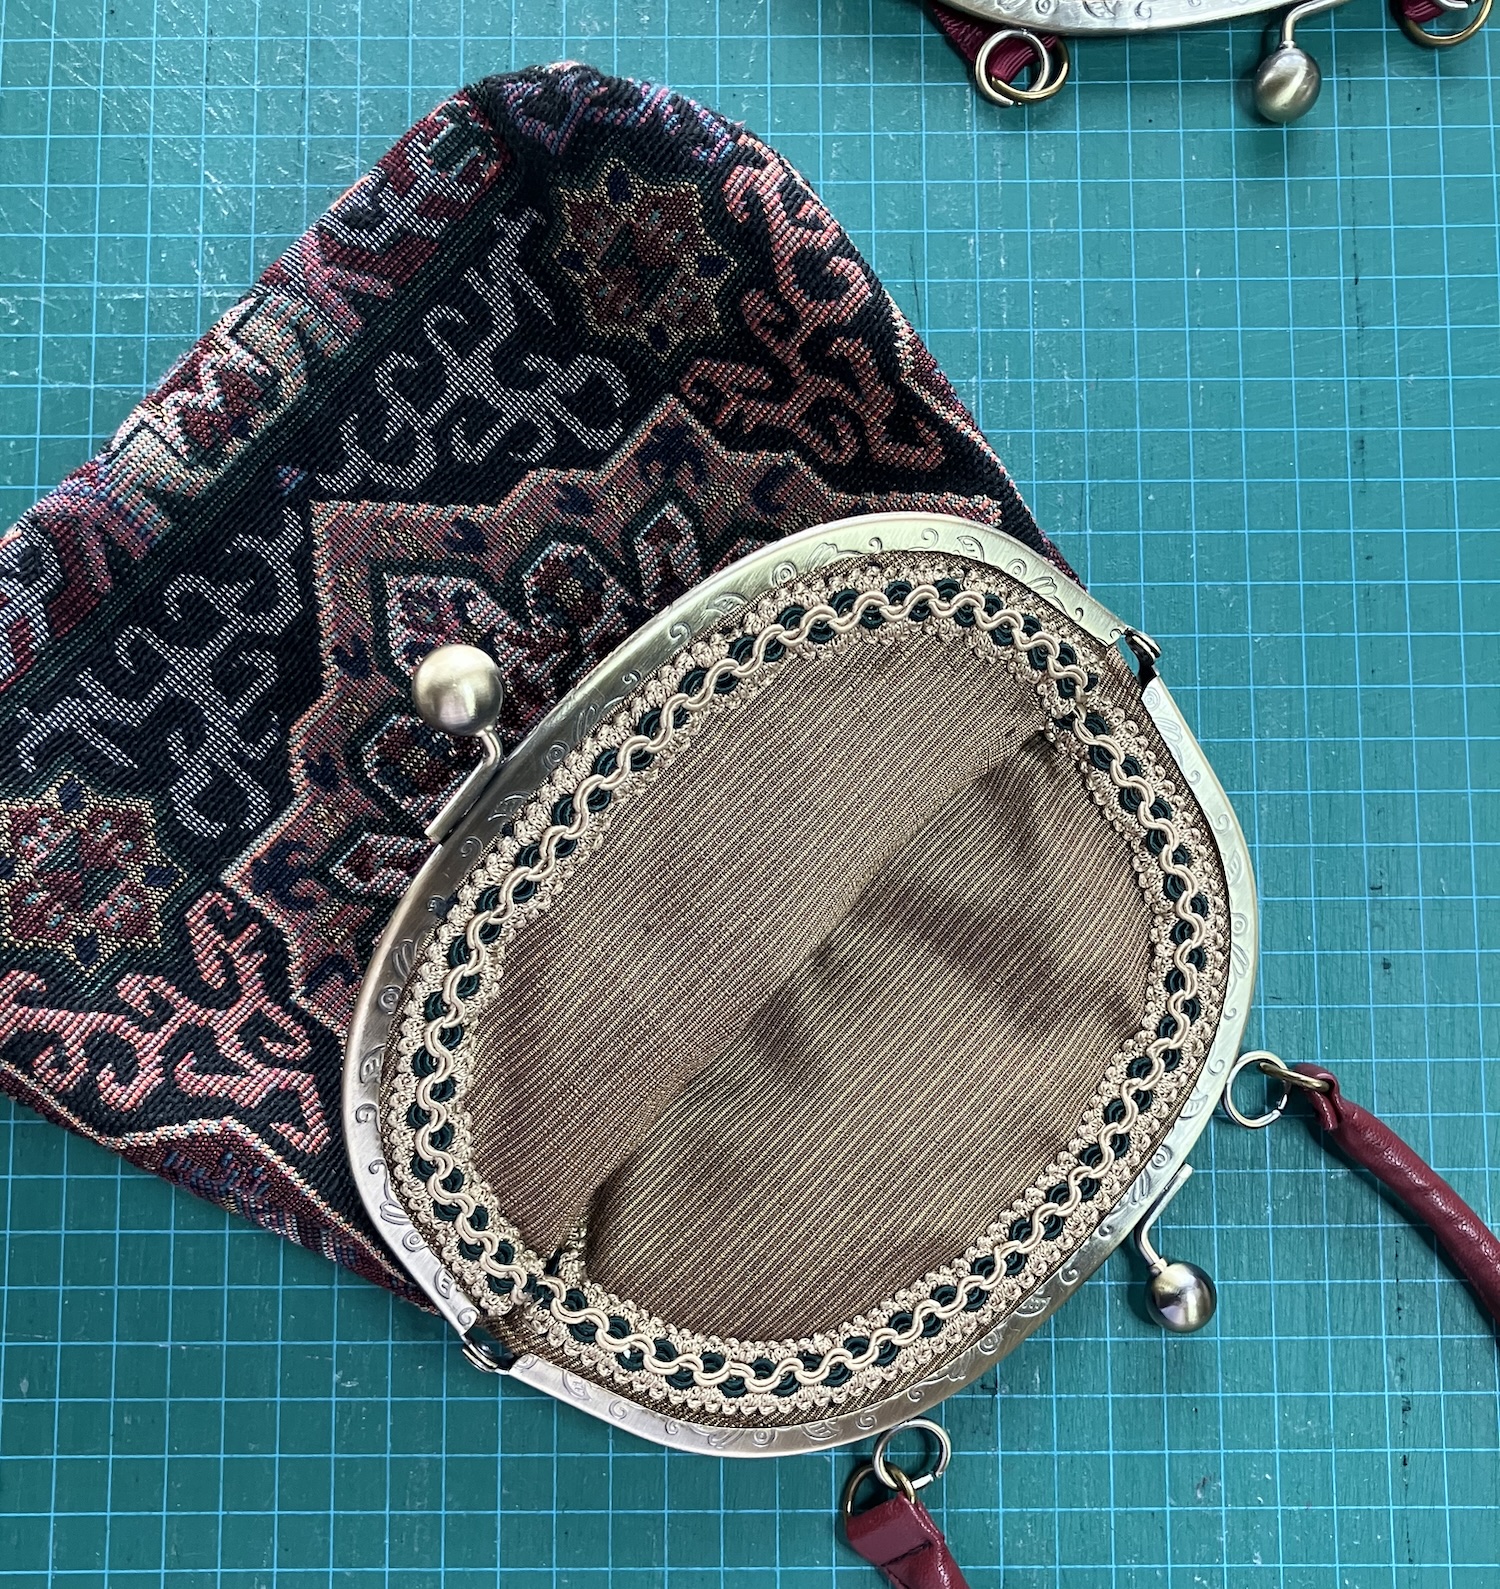
The stitches showed on the inside – I just couldn’t make them small enough to avoid that, as I was using a black buttonhole twist to sew in the clasp. I sewed in a bit of trim to cover that up. Here’s the second bag with the trim pinned in place.

Here’s the first purse with the trim sewn in. It looks much neater. (You can also see how much flatter this one is.)
The frame didn’t come with a handle – I think there were matching chain handles, but they were sold out by the time I wanted them. I cut a length of pleather, sewed the outside edges in place then folded the ends over a d-ring. I then fed a length of cording though it. For the second handle, I just hemmed a piece of grossgrain ribbon. The loops on the bag handle had to be coaxed open a little with a pair of plyers to join the handle, but it all worked out just fine.
Here are those two finished bags, side by side.
I may change the ribbon handle at some point, but for now, it’s just fine.
